How to Make Drain Cleaner at Home: Safe DIY Recipes and When to Call a Pro
You can safely clean home drains using mechanical methods, hot water, or simple DIY mixtures. A popular recipe involves using 1/2 cup of baking soda followed by 1/2 cup of vinegar, then flushing with hot water. For organic buildup, a mix of salt and baking soda or enzyme-based cleaners can be effective. Always wear gloves and goggles, ensure good ventilation, and avoid mixing strong chemicals. For persistent clogs, try a plunger or a snake. If multiple fixtures back up or if odors and surges continue, it’s best to contact a plumber. Follow the practical steps and safety precautions detailed below.
Can You Make Drain Cleaner at Home Safely?
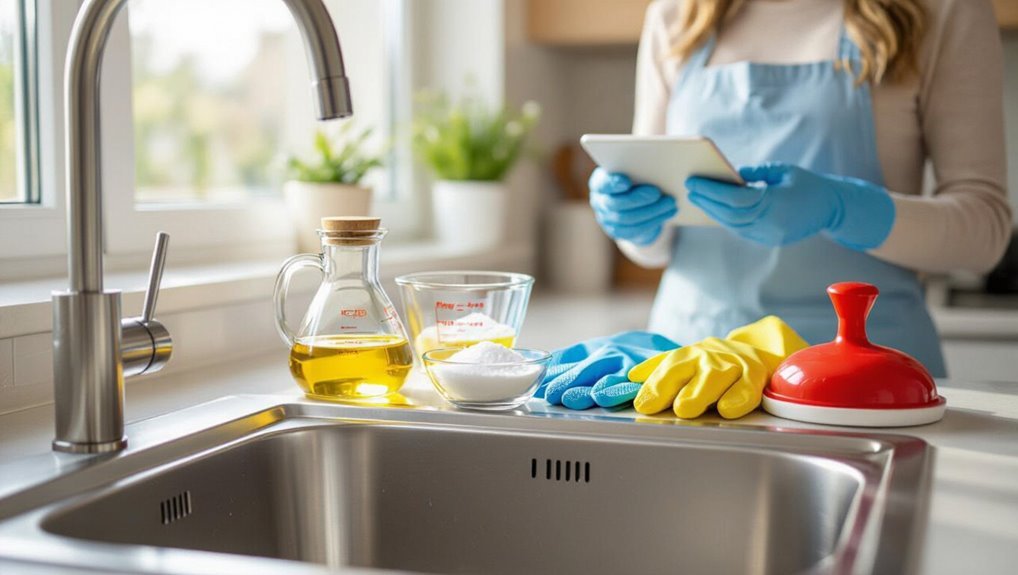
The article outlines a few safe DIY options—mechanical plunging, boiling water for minor grease clogs, and baking soda with vinegar for light buildup.
It also notes hazards of mixing chemicals or using strong acids and bases, which are best avoided at home.
For persistent, recurring, or complex blockages, a licensed plumber should be called.
Short summary of safe DIY options and when to call a professional
Although simple mixtures can clear minor clogs, only a few safe DIY methods are appropriate for household drains: boiling water for grease, a plunger or plumber’s snake for localized blockages, and a baking soda–vinegar flush for mild residue.
The guide on how to make drain cleaner emphasizes limits: attempt DIY for small, accessible clogs; call a professional for recurring, deep, or chemically resistant blockages to avoid damage and hazards.
Basic Understanding How Drains Clog and What Cleaner Needs to Do
Drains commonly block from hair, grease, soap scum, and stray objects that accumulate and restrict flow.
Effective cleaners must either dissolve or break down organic buildup (chemically or enzymatically) or enable physical removal.
Both homemade and commercial products carry safety risks—chemical burns, harmful fumes, and potential pipe damage—so protective measures and correct use are essential.
Common causes of clogs (hair, grease, soap scum, foreign objects)
Many clogs form from a predictable mix of hair, grease, soap scum, and foreign objects that together restrict water flow and trap other debris.
Hair mats with soap scum, forming fibrous nets; grease coats pipes, catching particulates; soap residue builds slippery layers that narrow passages; and foreign objects—cotton swabs, wipes, small toys—create blockages or snag material, compounding backup and slowing drainage.
Chemical and mechanical actions that clear clogs (dissolving, enzymatic, physical removal)
Because clogs typically combine hair, grease, soap scum, and foreign matter, effective cleaning must address both the materials and how they interact inside pipes.
Chemical dissolvers break fats and break down organic binders; enzymatic agents target proteins and oils over time.
Mechanical removal—snakes, augers, plungers—physically extracts debris and restores flow.
Combining approaches often yields the fastest, most complete clearance.
Safety risks of homemade and store-bought cleaners (chemical burns, fumes, pipe damage)
While effective at removing blockages, both homemade and commercial drain cleaners carry significant hazards: chemical burns from caustic agents, toxic fumes causing respiratory irritation, and corrosive damage to metal or PVC pipes and seals.
Mixing chemicals can produce deadly gases. Skin or eye contact risks increase without protection. Improper use may worsen clogs or necessitate costly plumbing repairs, so proceed with caution.
Safe DIY Drain Cleaner Recipes
The section presents four practical, low-risk approaches for clearing and maintaining household drains.
It outlines a baking soda + vinegar followed by hot water method for light clogs, a salt + baking soda flush with boiling water for routine prevention, and an enzyme-based recipe with timing and application details for biological breakdown.
It also covers manual options and common household aids, including proper plunger technique, using a straightened coat hanger, and a handheld drain snake.
Recipe 1 Baking Soda + Vinegar + Hot Water (best for light clogs)
For light clogs, a simple combination of baking soda, vinegar, and hot water can loosen and flush away mild buildups without harsh chemicals.
Pour half a cup baking soda, then half a cup distilled white vinegar; allow fizzing for 10–15 minutes.
Follow with several liters of hot (not boiling) water to rinse.
Repeat weekly as maintenance; avoid use on PVC joints that are already compromised.
Recipe 2 Salt + Baking Soda + Boiling Water (safe preventive flush)
Several common households can use a simple mix of salt, baking soda, and boiling water as a preventive flush to keep drains running smoothly.
Combine 1/2 cup salt and 1/2 cup baking soda, pour into the drain, then follow with boiling water slowly.
Repeat monthly or after heavy use. This noncaustic method reduces grease buildup and odors without harsh chemicals.
Recipe 3 Enzyme-based DIY approach (using biological cleaners; instructions and timing)
When biological cleaners are employed, naturally occurring enzymes and beneficial bacteria break down organic matter—hair, grease, food residue—rather than merely dissolving it chemically.
Use a commercial enzyme powder or liquid per label, pour into cool water then into the drain, allow 6–12 hours or overnight for best results, repeat weekly for maintenance, and avoid mixing with bleach or strong acids.
Recipe 4 Manual tools and household aids (plunger technique, coat hanger, handheld drain snake)
Use simple manual tools and everyday household items to dislodge common clogs without harsh chemicals.
A firm plunger creates pressure differentials to free blockages; maintain a tight seal and steady strokes.
Bend a coat hanger into a hook to extract hair near the drain opening.
A handheld drain snake reaches deeper obstructions; rotate and withdraw debris slowly.
Wear gloves and clean tools after use.
Materials, Tools, and Safety Precautions
This section lists essential and optional materials, plus the basic tools needed to prepare and apply homemade drain cleaners.
It also outlines required personal protective equipment, ventilation practices, and clear warnings about never mixing bleach, ammonia, or strong acids because of dangerous gas or thermal reactions.
Finally, it explains proper disposal of residues and contaminated materials to avoid environmental harm or plumbing damage.
Required materials and optional additions
Though simple recipes exist, preparing drain cleaner requires selecting appropriate materials, basic tools, and clear safety measures to minimize risk and guarantee effectiveness.
Essential components include safe household chemicals and biodegradable alternatives. Useful tools and containment items aid application. Optional additions can boost performance but increase hazard.
- Core ingredients and substitutes
- Basic tools and containment
- Performance enhancers and cautions
Personal protective equipment and ventilation requirements
After selecting ingredients and tools, attention must turn to protective gear and room airflow to reduce exposure risks.
Wear chemical-resistant gloves, splash-proof goggles, and long sleeves; consider a respirator with appropriate cartridges if fumes are present.
Make certain windows and doors are open, use a fan to exhaust air away from occupants, and keep bystanders, pets, and children out of the work area.
What NOT to mix (bleach, ammonia, acids) and why
Many common household chemicals must never be combined because their reactions can produce toxic gases, violent heat, or explosive compounds; for example, mixing bleach with ammonia releases chloramine and hydrazine derivatives, while bleach with acids yields chlorine gas, and strong acids with certain bases or metals can generate heat and corrosive splashes.
| Chemical A | Dangerous reaction |
|---|---|
| Bleach + Ammonia | Chloramine, hydrazine |
| Bleach + Acid | Chlorine gas |
| Acid + Base/Metal | Heat, splashes |
| Solvent + Oxidizer | Fire, explosion |
Safe disposal of residues and used materials
Dispose residues and used materials responsibly to prevent harm to people, plumbing, and the environment.
Contain solids in sealed, labeled bags; never pour concentrated mixtures down drains.
Neutralize mild solutions with plenty of water per manufacturer guidance before disposal.
Store contaminated tools separately for decontamination or disposal.
Follow local hazardous-waste regulations for strong chemicals and consult municipal services for proper collection and recycling.
Step-by-Step Troubleshooting Guide
The guide begins by identifying the clog’s type and location to focus efforts efficiently.
It then recommends trying the least-invasive remedies before moving to stronger, safety-conscious DIY methods.
Finally, it outlines clear signs to stop and seek professional help to prevent damage or injury.
Step 1 Diagnose the type and location of the clog
Before attempting any remedy, assess whether the blockage is localized to a single fixture or affects multiple drains, since that distinction determines whether the problem is a simple trap clog or a main-line issue.
Inspect fixture behavior (slow drain, gurgling, backups), test nearby drains, check clean-out access, note odors and recent debris use.
Record findings before choosing tools or escalation.
Step 2 Start with least-invasive methods
Begin with the least-invasive options to preserve pipes and avoid unnecessary repairs: try a plunger, manual removal with a gloved hand or a simple drain snake, and flushing with hot water.
Observe drainage speed and listen for gurgles. Repeat attempts if progress occurs.
Stop if resistance persists, water backs up, or odors worsen; then consider further assessment or professional help.
Step 3 Escalate to stronger (but safe) DIY methods
If those least-invasive efforts fail to clear the clog, it is appropriate to escalate to stronger but still safe DIY methods.
Try hot water flushes, a handheld drain snake, or a non-corrosive enzymatic cleaner.
Use diluted baking soda plus vinegar only sparingly.
Wear gloves and eye protection, work gradually to avoid pipe damage, and test results after each attempt before proceeding further.
Step 4 When to stop and avoid further DIY attempts
When should DIY efforts stop and a professional be called?
Homeowners should cease DIY after repeated failures, slow drainage worsening, foul odors persisting, backups in multiple fixtures, sewage smells, visible pipe damage, or chemical reactions (fizzing, fumes).
Also stop if tools or products cause leaks, corrosion, or personal injury risk.
Contact a licensed plumber for inspection, safe repair, and potential snake or camera diagnostics.
Comparison DIY Methods vs. Commercial Chemical Cleaners vs. Professional Service
A concise comparison contrasts how DIY methods, commercial chemical cleaners, and professional services perform against different clog types and what each costs in money and time.
It also considers potential risks to plumbing and home infrastructure alongside environmental and health impacts.
This sets the stage for evaluating trade-offs and choosing the most appropriate approach.
Effectiveness on different clog types
Clog type determines which cleaning approach will work best: hair and soap scum respond differently than grease, mineral buildup, or solid obstructions. DIY enzymatic cleaners and plungers often clear organic tangles; caustic chemicals dissolve grease; professional service handles stubborn mineral scale or physical blockages.
| Clog type | Best approach |
|---|---|
| Hair/soap scum | Plunger, enzymatic DIY |
| Grease | Strong chemical cleaners |
| Mineral/solids | Professional service |
Cost comparison and time investment
Comparing DIY methods, commercial chemical cleaners, and professional service reveals clear trade-offs in upfront cost, ongoing expenses, and time required for both application and follow-up.
DIY supplies are cheapest per use but demand time and repeat attempts.
Chemical cleaners cost more per use, act faster but may require ventilation and precautions.
Professional service has highest fee yet saves homeowner time and delivers guaranteed results.
Risks to plumbing and home infrastructure
Having weighed cost and time, attention must turn to how each option affects pipes, fixtures, and surrounding building materials.
DIY enzymatic or baking-soda methods are gentler but may be ineffective on severe clogs.
Commercial caustic cleaners can corrode metal, damage seals, and harm finishes with repeated use.
Professional mechanical or hydro-jetting services reduce chemical damage but risk pressure-related joint or pipe failure if misapplied.
Environmental and health impacts
All three approaches carry distinct environmental and health trade-offs:
DIY enzymatic or baking-soda methods generally pose low toxicity and minimal aquatic impact but may require repeated use.
Commercial chemical cleaners contain strong oxidizers or bases that can release corrosive fumes and pollute wastewater.
Professional mechanical or hydro-jetting services limit chemical discharge but introduce risks from high-pressure sprays and potential release of trapped contaminants.
Users should weigh acute exposure, long-term ecosystem effects, disposal practices, and local regulations when choosing a method.
Signs You Must Call a Professional Plumber Immediately
If clogs recur after safe DIY efforts or spread to multiple fixtures, a homeowner should seek professional help promptly.
Sewage backup, persistent foul odors, visible leaks, corrosion, or damaged pipes also indicate issues beyond routine remedies.
These signs warrant immediate inspection and repair by a licensed plumber.
Persistent or recurring clogs after safe DIY attempts
When clogs continue to return after standard home remedies like plunging or enzymatic cleaners, it signals a deeper issue that typically requires professional assessment.
Recurring blockages often indicate buildup beyond accessible traps, partial pipe collapse, tree-root intrusion, or improper venting.
A licensed plumber can perform camera inspection, hydro-jetting, or targeted repairs to identify and resolve underlying causes safely and prevent repeated failures.
Multiple fixtures blocked or sewage backup
Persistent localized clogs can foreshadow more severe system-wide failures, and one of the clearest red flags is simultaneous backups across multiple fixtures or sewage surfacing in drains or floor drains.
Such symptoms indicate main line obstruction, collapsed pipes, or sewer line damage.
Immediate professional assessment is required to prevent health hazards, structural damage, and costly emergency repairs; avoid DIY attempts beyond shutting off water.
Foul odors indicating deeper issues
Several unmistakable foul odors emerging from plumbing can signal underlying sewer or drainage failures that require immediate professional attention.
Persistent rotten-egg, sewage, or methane-like smells that fluctuate with appliance use suggest sewer-line breaches, venting failures, or biofilm buildup beyond DIY fixes.
When odors return after cleaning or spread throughout the home, a licensed plumber should inspect and diagnose to prevent health risks and structural damage.
Visible leaks, corrosion, or damaged pipes
Visible leaks, visible rust, or cracked pipes are clear indicators that the plumbing system requires professional assessment rather than a DIY patch.
Such damage risks water loss, mold, structural harm, and sudden failure. A licensed plumber can assess corrosion extent, replace compromised sections, and restore pressure and sealing.
Immediate service prevents escalating repair costs and health hazards that household drain cleaners and temporary fixes cannot address.
Prevention and Best Practices to Keep Drains Clear
Routine daily and weekly habits—such as running hot water after use and using strainers—significantly reduce buildup in sinks and tubs.
A recommended maintenance schedule combines periodic use of mild cleaners or enzymatic products with monthly mechanical checks to catch developing clogs.
Storage of homemade or commercial drain cleaners should be secured out of reach of children and pets, with clear labeling and locked cabinets where possible.
Daily and weekly habits to prevent clogs
Because small habits compound quickly, consistent daily and weekly practices are the most effective way to keep household drains flowing and avoid emergency clogs.
- Rinse food scraps into a bin, flush with hot water after dishwashing.
- Wipe hair and soap scum from shower drains after use.
- Run hot water and vinegar weekly to dissolve light buildup and keep odors down.
Recommended products and maintenance schedule
A few targeted products used on a consistent schedule can prevent most household drain problems.
Recommended items include enzyme-based monthly treatments, a gentle biodegradable liquid degreaser every two weeks for kitchen sinks, and a citrus or vinegar rinse after heavy use.
Combine with regular mechanical cleaning (strainer clearing, occasional plunger use).
Record schedule and inspect drains quarterly for slow flow or odors.
How to childproof and pet-proof drain-cleaning storage
Several simple safeguards can considerably reduce the risk of accidental exposure to drain-cleaning chemicals:
Store all cleaners in high, locked cabinets out of sight and reach; use childproof latches and labeled, tamper-evident containers; keep products in original packaging with clear instructions; avoid transferring to food containers; secure storage areas against pets; maintain an emergency contact list and a spill kit nearby.
Common Mistakes and How to Avoid Them
Common mistakes include mixing incompatible chemicals, relying solely on boiling water or strong acids, overlooking underlying plumbing issues, and using mechanical tools improperly.
Each error can worsen clogs, damage pipes, or create safety hazards.
Clear guidance on safe combinations, appropriate methods, diagnosing plumbing problems, and correct tool use helps prevent these outcomes.
Mixing incompatible chemicals
Mixing household chemicals without understanding their reactions can produce toxic gases, violent heat, or corrosive mixtures that pose immediate danger.
The guide warns against combining bleach with acids or ammonia, and against fusing oxidizers with organic cleaners.
It advises using single-ingredient methods, ventilating spaces, wearing protection, and disposing of leftovers safely.
When unsure, contact professionals rather than risking unpredictable chemical interactions.
Over-reliance on boiling water or harsh acids
After warning about dangerous chemical combinations, the guide shifts focus to another frequent error: depending too heavily on boiling water or strong acids to clear drains.
Such practices can damage PVC, soften seals, and warp fittings. They often fail against grease and persistent clogs.
Instead, recommend gentler enzymatic cleaners, mechanical methods, and gradual temperature changes; reserve aggressive treatments for professionals.
Ignoring underlying plumbing issues
Overlooking signs of damaged pipes, sagging drains, or persistent slow flow can turn a fixable clog into a chronic plumbing problem.
Temporary DIY cleaners mask structural faults: leaks, root intrusion, misaligned traps, or corroded piping require inspection and repair.
Ignoring these issues risks repeated blockages, water damage, and higher costs.
Recommend professional diagnosis when problems recur or symptoms extend beyond a single fixture.
Improper use of mechanical tools
Handle mechanical tools with care: incorrect use of plungers, augers, or power snakes can damage fixtures, tear seals, and worsen clogs.
Users should select appropriate tools, follow manufacturer instructions, and avoid excessive force.
Inspect fixtures first, protect finishes, and keep hands clear of rotating parts.
When resistance feels abnormal or leaks appear, stop and consult a professional to prevent costly repairs and safety hazards.
Useful Resources and When to Seek Further Help
When problems persist or become complex, homeowners should document the issue with clear photos, timestamps, and notes on prior attempts to unclog the drain.
Useful resources include reputable links on enzyme cleaners, summaries of local plumbing codes, and emergency contact lists for licensed plumbers.
Before hiring help, it is advisable to ask professionals for their diagnosis, scope of work, timeline, and a written estimate with breakdowns of parts and labor.
How to document problems for a plumber (photos, timing, attempts)
Why did the clog recur at that hour and not earlier?
Photographs showing water levels, residue, and pipe fittings help. Note dates, times, odors, sounds, and preceding activities (cooking, laundry).
Record DIY attempts, products used, volumes, and results. Preserve videos of slow drains or backups.
Compile concise chronological notes and share digital files with the plumber for faster diagnosis and accurate estimates.
Reference links for enzyme cleaners, local codes, and emergency contacts
After documenting symptoms and DIY attempts, homeowners should gather reliable resources to guide next steps: links to enzyme-based drain cleaners, summaries of local plumbing codes, and emergency contact information.
Useful references include verified manufacturer pages, municipal code summaries, and licensed plumber hotlines.
Maintain a concise, accessible folder with:
- Enzyme cleaner product pages
- Local plumbing code summaries
- Emergency and licensed-contact numbers
Recommended professional questions to ask and estimates to request
Who should be asked what and for how much are key details homeowners should know before hiring professional help for stubborn drains.
Ask for license, insurance, scope of work, diagnostic fees, parts and labor estimates, warranty terms, and expected timeline.
Request written itemized estimates and compare two to three bids.
Clarify emergency call-out charges and post-service cleanup responsibilities.
Visual Guides and Quick Reference Aids
Photographic step-by-step sequences illustrate DIY recipes and proper plunger technique, making procedures easier to follow.
A concise checklist highlights safe actions to take before, during, and after home drain cleaning.
Together, these visual aids reduce errors and speed up confident, cautious work.
Step-by-step photos for DIY recipes and plunger technique
When paired with brief captions and clear framing, step-by-step photos make each DIY drain-cleaning recipe and plunger technique easy to follow.
These images show key actions, tool placement, and safety details in sequence.
Images should progress logically: ingredients measured, mixing steps, application, and plunger positioning with seals and motion.
Include close-ups of problem areas and safety gear; avoid ambiguous angles or cluttered backgrounds.
Quick checklist for safe DIY drain-cleaning actions
Provide a compact, room-by-room checklist that highlights safety steps and key actions for DIY drain cleaning so users can reference it quickly during the job.
The checklist summarizes PPE, tools, and escalation criteria. Use short items per location and clear timing. Follow emergency steps if chemical exposure occurs.
- Wear gloves, goggles; ventilate area.
- Try mechanical clearing first; limit chemicals.
- Call a professional if recurring clogs or slow drains persist.
Conclusion
The article concludes that safely making and using mild, noncaustic drain cleaners at home can be effective for minor clogs, yet persistent or hazardous blockages require professional help. Like a small brush sweeping away crumbs before they become a loaf, routine maintenance and cautious DIY methods prevent larger problems. Adhering to safety precautions, knowing limits, and calling a plumber when necessary keeps plumbing functional and avoids costly or dangerous mistakes.