How to Install a Shower Floor Drain: Step-by-Step Guide for DIYers
Installing a shower floor drain is a manageable DIY project that requires careful planning and the right materials. To get started, confirm local plumbing codes and ensure proper slope for drainage. Gather your tools and materials, including a compatible drain assembly, waterproof membrane, mortar or prefab pan, and basic plumbing tools. Begin by isolating the water supply and inspecting the subfloor. Dry-fit the drain to the waste line, integrate the waterproof membrane with the flange, create a sloped mortar bed, and secure the drain body and grates. Finally, test for leaks to ensure everything is sealed properly. Follow the detailed step-by-step guidance for a successful installation.
Can You Install a Shower Floor Drain Yourself?
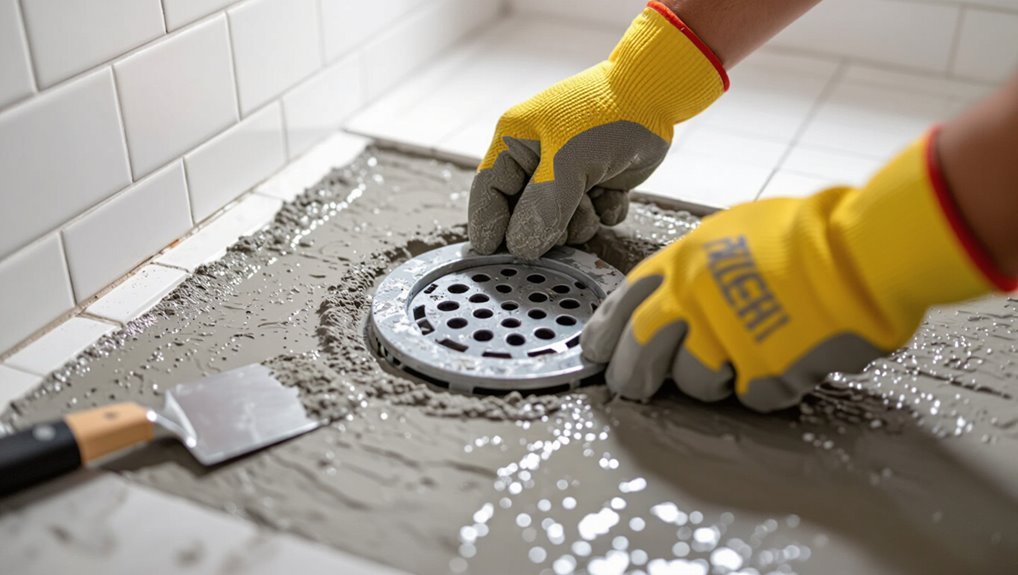
A homeowner can complete many shower floor drain installations, but feasibility depends on the existing plumbing layout and local code requirements.
Typical projects require several hours, basic plumbing skills, and common tools such as a wrench, plumber’s putty or sealant, and a drain assembly.
More complex repairs may need a saw, soldering equipment, or pipe fittings.
Professional help is advisable if the job involves cast-iron pipes, major re-piping, or unfamiliar code and inspection issues.
Short summary of feasibility, time, skill level, and tools required
Installing a shower floor drain is feasible for a competent DIYer with basic plumbing experience and the right tools; it typically takes 3–6 hours for a straightforward replacement but longer for subfloor or tile work.
A DIYer should understand how to install a shower floor drain, possess moderate skill, and have tools: wrench, plumber’s putty, screwdriver, level, saw, and safety gear; call a pro for complex repairs.
Basic Understanding What Is a Shower Floor Drain and Why It Matters
A shower floor drain is an assembly of parts—strainer, grate, trap, flange and coupling—that together manage surface water and prevent sewer gases from entering the space.
Variations include center, linear and tile-in drains, each suited to different tile layouts and slope strategies.
Proper function depends on correct connection to the waste plumbing and integration with the shower’s waterproofing membrane to avoid leaks and clogs.
Components of a typical shower drain assembly
Understanding the components of a typical shower drain assembly clarifies how water is collected, directed, and sealed from the shower floor to the plumbing system.
Key parts include the grate or cover, strainer body, drain flange, clamping ring, rubber or neoprene gasket, weep holes, trap adapter, and threaded tailpiece connecting to the P-trap.
Each element guarantees proper flow, sealing, and access for maintenance.
Common drain types (center, linear, tile-in)
After outlining the parts that make up a shower drain assembly, attention shifts to the different drain layouts that determine water flow and aesthetic outcome.
- Center drains: classic, centralized slope, compact grate.
- Linear drains: single-side or wall placement, long slot, accessible.
- Tile-in drains: customizable cover, seamless look, requires precise tiling.
- Point drains: small footprint, easy retrofit.
- Channel drains: decorative, high flow capacity.
How drains connect to plumbing and waterproofing
Several key connections determine how a shower drain integrates with the surrounding plumbing and waterproofing: the drain body links to the waste line, the flange mates with the shower pan or mortar bed, and the clamping ring or bonding flange secures the waterproof membrane.
Proper sealing, correct slope to the outlet, compatible materials, and tight mechanical connections prevent leaks, odor, and structural damage over time.
Materials, Tools, and Safety Preparations
Before beginning, the installer gathers required materials—drain assembly and flange, appropriate sealant and membrane, and any piping needed for the connection.
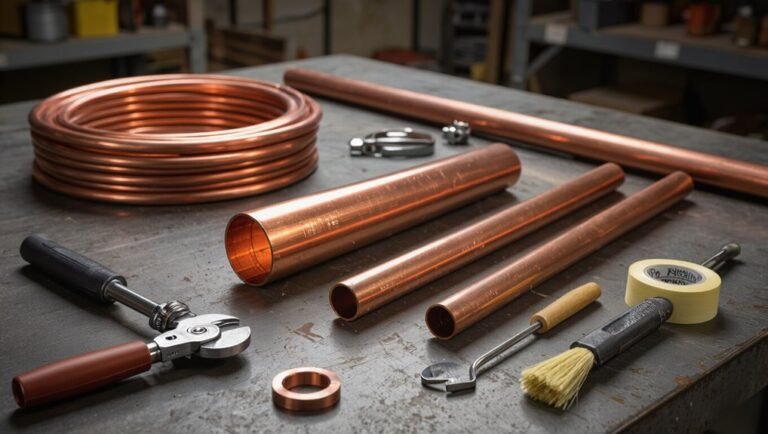
Necessary tools are prepared and checked, including saws, wrenches, a torch, trowel, level, and measuring tools.
Proper safety gear is worn and precautions taken, such as PPE and shutting off water and power as appropriate.
Required materials (drain assembly, flange, sealant, membrane, piping)
A clear inventory of required materials guarantees the drain installation proceeds without delays.
The installer reviews components for compatibility, selects quality parts, and verifies proper quantities.
Essential items include the drain assembly and flange, suitable sealant, waterproof membrane, and matching piping for the waste line.
Inspect for damage and confirm manufacturer specifications before beginning.
- Drain assembly and grate
- Flange fitting
- Waterproof sealant
- Shower membrane
- Waste piping
Required tools (saws, wrenches, torch, trowel, level, measuring tools)
Gather the correct tools to confirm the drain installation is safe, efficient, and accurate. Essential hand and power tools enable cutting, fitting, soldering, and finishing work; measuring and leveling confirm proper slope and alignment.
Precision saves time and prevents leaks.
- Hacksaw or reciprocating saw
- Pipe wrenches and adjustable wrench
- Propane torch (for copper)
- Notched trowel
- Spirit level and tape measure
Safety gear and precautions (PPE, shutoff procedures)
Wear appropriate personal protective equipment and follow shutoff procedures to minimize injury and water damage during drain work.
Use gloves, eye protection, knee pads, and a dust mask when cutting or mixing mortar.
Turn off water at the fixture shutoff and, if necessary, the main valve.
Verify power is isolated for nearby electrical fixtures.
Keep a bucket and towels ready for leaks.
Quick Checklist Before You Start
Before beginning work, the installer should inspect the existing drain, subfloor, and joists for damage or rot.
They must confirm local plumbing codes and any permit requirements that apply.
Finally, measure and plan the drain location and slope to guarantee proper drainage and fit.
Inspect existing drain, subfloor, and joists
Begin by removing the drain cover and inspecting the visible drain assembly for corrosion, improper fittings, or signs of previous repairs; note any gaps, loose connections, or nonstandard parts that could indicate underlying issues.
- Check for water stains or rot on subfloor around drain opening.
- Probe subfloor firmness with a screwdriver.
- Inspect joists for sagging, cracks, or moisture.
- Confirm drain flange is seated and level.
- Document any repairs needed.
Confirm local codes and permit requirements
Because shower drains interact with plumbing, structural, and waterproofing standards, the installer should verify local building codes and permit requirements before work begins to guarantee compliance and avoid costly rework or fines.
Check jurisdictional rules for trap size, venting, backflow prevention, slope limits, and approved materials.
Confirm permit thresholds, inspection steps, and documentation needed to avoid delays or mandatory corrections.
Measure and plan for drain location and slope
With codes and permit details confirmed, the installer should map the drain location and establish slope parameters on the subfloor.
Measure distance to walls, curb, and plumbing stub; center or offset drain per design.
Mark a target elevation ensuring 1/4″ per foot slope (minimum) toward the drain.
Verify slope consistency across the shower area and note adjustments for pan liner and finished tile thickness.
Step-by-Step Installation Guide
The installation proceeds in a logical sequence beginning with removal of old fixtures and exposure of the subfloor.
Next, the condition of the subfloor and joists is assessed and repaired as necessary before rough plumbing is cut and fitted to the waste line.
Finally, the drain flange is dry-fit, waterproofing membrane is applied and integrated with the flange, and the assembly is tested for proper fit.
Step 1 Remove old fixtures and expose subfloor
Begin by shutting off water supply lines and removing any trim, fixtures, and old drain components that obstruct access to the shower pan.
Detach the drain flange, trim plate, and surrounding tile or flooring as needed.
Clear debris, label removed parts, and keep fasteners organized.
Expose the subfloor sufficiently to access the drain opening and verify the work area is clean and well-lit.
Step 2 Assess and repair subfloor/joists if needed
After exposing the subfloor and removing fixtures, the installer inspects the substrate and supporting joists for rot, water damage, sagging, or inadequate fastening.
Damaged sections are marked, cut back to sound material, and replaced with properly sized plywood or blocking. Joists are sistered or reinforced, fasteners upgraded, and surfaces leveled.
All repairs guarantee a stable, square base for the finished shower assembly.
Step 3 Rough plumbing: cut and fit drainpipe to waste line
Measure and mark the drain location on the subfloor, then verify alignment with the existing waste line and trap beneath.
Cut the subfloor hole and expose the waste pipe. Trim and deburr drainpipe sections, dry-fit adapters and couplings, maintain proper slope, and guarantee correct depth for the flange.
Adjust pipe length, secure connections with appropriate solvent or mechanical fittings, and recheck alignment before final assembly.
Step 4 Install drain flange and test dry fit
Set the drain flange into the prepared hole, seating it flush against the subfloor and aligning the outlet with the waste pipe; check that the flange’s depth will allow the finished shower pan or liner to sit level and that the gasket or sealant surface is clean and free of debris.
Temporarily tighten screws or clamp, guarantee straight alignment, confirm proper outlet engagement, and verify no rock or tilt before permanent fastening.
Step 5 Apply waterproofing membrane and integrate flange
Begin by laying the waterproofing membrane over the shower subfloor, working from the drain outward so the membrane can be neatly integrated with the flange.
Cut a snug, circular opening in the membrane and slide it over the flange, ensuring the gasket or bead seating area is fully exposed and free of wrinkles.
Seal per manufacturer instructions, fasten or bond membrane to flange, and smooth edges for a watertight fit.
Step 6 Set mortar bed or shower pan (pre-slope) and ensure correct slope
With the waterproofing membrane secured around the flange, the installer prepares the mortar bed or prefabricated pan that will form the shower’s pre-slope.
The mortar is mixed to a stiff, workable consistency and screeded from perimeter to drain flange, creating a uniform slope—typically 1/4 inch per foot—ensuring water flows to the drain without low spots.
Compact and check slope with a level.
Step 7 Final drain assembly and connection to trap
The installer now assembles the drain body, clamping ring, and strainer.
They verify the flange sits flush with the finished mortar slope and secure the waterproofing flange per manufacturer instructions.
Next, they connect the drain outlet to the trap using the appropriate solvent-weld, compression, or threaded fitting.
All connections are tightened to proper torque, joints are checked for alignment and fall, and the assembly is tested for leaks and proper drainage.
Connections are trimmed, sealed, and rechecked.
Step 8 Tile or finish floor around drain and grout/seal
After confirming the drain assembly is level, watertight, and secured, attention turns to installing the finish surface around the drain.
Tile or flooring is cut to fit the drain flange, maintaining appropriate gap for a grout line.
Apply thinset or adhesive, set tiles flush with the flange, allow curing, then grout joints.
Seal grout and the perimeter to prevent moisture intrusion.
Step 9 Water test for leaks and proper drainage
Begin a controlled water test to confirm the drain and surrounding installation are leak-free and that water clears toward the trap without pooling.
Fill the shower to a few inches, observe seams, joints, and beneath access panels for leaks.
Check that water flows smoothly into the drain, then remove standing water and inspect the trap for proper suction and seal integrity before proceeding.
Step 10 Final cleanup and maintenance tips
Complete final cleanup and a routine maintenance plan guarantee the shower drain remains functional and leak-free for years.
Remove debris, wipe surfaces, and reinstall the grate securely. Inspect seals and accessible connections, tighten or reseal as needed.
Schedule monthly checks: clear hair, test flow, and look for slow drainage or odors. Address issues promptly to prevent clogs and water damage.
Variations and Special Cases
The installation process changes when using a linear drain versus a center drain, affecting slope direction and waterproofing details.
Choices between prefabricated shower pans and traditional mortar or liner systems determine substrate prep and membrane techniques.
Tile-in drains and clamping rings require precise flange integration and bedding to guarantee a watertight, flush finish.
Installing a linear drain vs center drain
Many showers require a choice between a linear drain and a center drain, a decision that affects slope layout, waterproofing details, and tile selection. A linear drain permits single-slope floors and long tiles; a center drain needs a four-way pitch and often smaller tiles. Consider flow capacity, aesthetic lines, and installation complexity before cutting into subfloor.
| Linear drain | Center drain |
|---|---|
| Single slope | Four-way slope |
| Long tiles | Small tiles |
| Sleek look | Traditional layout |
Shower pans: prefabricated vs mortar/liner systems
Although both prefabricated pans and mortar/liner systems serve the same function—containing water and directing it to the drain—they differ markedly in materials, installation methods, and suitability for various shower designs.
Prefab pans are molded, quick to install, and limited in size/finish options.
Mortar beds with waterproof liners allow custom slopes, tile choices, and repairs but require more skill, time, and substrate preparation.
Installing a tile-in drain and clamping ring details
Installers approach tile-in drains with precision, balancing waterproofing, alignment, and aesthetic integration while accommodating variations such as different clamping-ring designs, adjustability, and retrofit vs. new-construction scenarios.
They verify flange height, secure clamping rings to compress the liner evenly, test for watertight seals, set mortar bed depth to match tile, and choose strainers that align with grout joint patterns and slope requirements.
Common Problems, How to Diagnose Them, and Fixes
Common shower drain problems include slow drainage, leaks at the flange or pipe joints, improper slope causing standing water, and odors from trap issues.
Diagnosis should focus on identifying clogs, testing joints with water or dye, measuring the floor pitch, and checking trap seals for water levels and venting.
Fixes range from snaking or cleaning the line, resealing or replacing leaking fittings, regrading the mortar bed or adjusting the drain height, to repairing or priming the trap and vent.
Slow drainage causes and solutions
Slow drainage in a shower typically results from restricted flow within the drain assembly or the connected plumbing, and pinpointing the exact cause requires a systematic inspection of accessible components and basic troubleshooting steps.
Common causes and practical fixes include:
- Hair and soap scum removal with a snake or manual extraction
- Clogged strainer or removable grate cleaning
- Trap debris clearing
- Slow venting diagnosed by gurgling
- Professional sewer line inspection if persistent
Leaks at flange or joints diagnosis and repair steps
After addressing drainage rate issues, attention should turn to leaks at the shower flange and joint connections, which often produce water damage unseen until staining, soft subfloor, or mold appears.
Inspect visible caulk, flange screws, and pipe joints; perform dye or tissue tests while running water.
Tighten or replace corroded hardware, reseal with appropriate sealant or new gasket, and replace damaged flange or plumbing sections.
Improper slope or standing water how to correct
Diagnose standing water by observing puddle locations and timing—note whether water pools immediately after use or accumulates slowly between uses—and measure the floor pitch with a level; a proper shower slope is typically 1/4 inch per foot toward the drain.
Correct shallow or reverse slopes by removing tile, re-screeding or replacing the mortar bed to reestablish proper pitch, then retile and reseal connections.
Odor issues and trap problems
Fixing floor pitch and removing standing water reduces one common source of unpleasant smells, but persistent odors often point to problems with the trap or venting rather than the screed.
Check for dry P-traps, cracked seals, or clogged trap weirs.
Diagnose by running water and smelling at the drain and vent stack.
Repair by replacing seals, restoring trap water, clearing clogs, or adding proper venting.
Mistakes to Avoid and Best Practices
Common DIY mistakes—insufficient waterproofing, incorrect shower slope, and improper drain connections—often cause leaks and poor drainage.
The section outlines practical best practices to guarantee a durable, watertight installation.
It also identifies situations, such as complex pipe rerouting or persistent leaks, when a professional plumber should be called.
Top DIY mistakes (waterproofing, slope, improper connections)
Start by recognizing the most frequent DIY errors that compromise a shower drain installation: inadequate waterproofing, incorrect slope, and poor pipe connections.
Common consequences include leaks, pooling, and clogs.
Typical mistakes to note:
- Skipping membrane overlaps
- Setting floor flat instead of pitched
- Loose or misaligned fittings
- Incorrect trap height
- Using improper sealants or adhesives
Best practices for long-lasting installations
After outlining frequent errors like inadequate membrane overlaps, flat floors, and loose fittings, the guide moves on to best practices that prevent those failures and extend the life of a shower installation.
Use correct slope (1/4″ per foot), secure and test membranes, choose corrosion-resistant drains, apply proper sealants, tighten fittings to spec, and inspect joints regularly.
Document work and allow cure times.
When to call a professional plumber
Occasionally homeowners encounter problems that exceed routine DIY skills—recognizing those moments and calling a professional plumber saves time, prevents costly damage, and guarantees code-compliant repairs.
Seek professional help for complex pipe relocations, persistent leaks, inadequate drainage after correct installation, damaged structural components, or unfamiliar local code requirements.
Avoid delaying repairs; licensed plumbers provide proper diagnostics, permits, and durable solutions, reducing long-term expenses and liability.
Tools, Materials, and Cost Comparison
A clear cost breakdown helps readers weigh DIY versus professional installation by listing material, tool, and potential labor expenses.
Recommended drain brands and compatible replacement parts are noted for long-term reliability and easier maintenance.
Together, the budget figures and brand guidance allow informed decisions on quality and cost trade-offs.
Estimated cost breakdown (materials, tools, labor if hired)
One clear way to plan a shower drain project is to break costs into materials, tools, and labor, then compare options within each category. Estimated ranges help set a budget: basic materials $20–$100, tools $0–$200 (buy vs. borrow), and labor $150–$600 if hired. Compare quality and complexity to refine totals.
| Category | Low | High |
|---|---|---|
| Materials | $20 | $100 |
| Tools | $0 | $200 |
| Labor | $150 | $600 |
Recommended drain brands and parts for reliability
After estimating costs for materials, tools, and labor, focus next on specific drain brands and parts that offer long-term reliability and value.
Recommended options balance durability, warranty, and ease of maintenance. Select corrosion-resistant finishes, trustworthy gaskets, and tested clamping rings.
Consider replacement grate availability and universal fit options.
- Schluter Kerdi‑Line drains
- Oatey PVD finishes
- Sioux Chief clamping rings
- Zurn push‑in traps
- Mueller brass grates
Troubleshooting Quick Reference
A concise troubleshooting table lists common symptoms, the most likely cause, and the immediate action to take.
It helps identify clogged drains, leaks, odors, and poor drainage by matching what is observed to probable faults in installation or parts.
Quick, appropriate responses—such as clearing debris, tightening connections, or replacing a gasket—minimize damage and guide whether professional help is needed.
Symptoms, likely cause, and immediate action
When water pools, drains slowly, or emits persistent odors, these symptoms point to common problems with the shower floor drain; likely causes include debris buildup, a clogged trap, or a failing seal, and immediate action should focus on removing visible obstructions, running a plunger or drain snake if safe, and isolating the bathroom from other fixtures to prevent cross-contamination.
| Symptom | Likely Cause | Immediate Action |
|---|---|---|
| Pooling water | Hair/debris | Remove grate, clear debris |
| Slow drain | Partial clog | Use plunger/snake |
| Odor | Dry/failing trap | Add water, inspect seal |
| Leak | Damaged seal | Shut off water, inspect |
Maintenance and Longevity Tips
Routine cleaning and preventive maintenance keep the drain flowing and reduce buildup that can cause odors or backups.
Components such as gaskets, strainers, and trap seals should be inspected periodically for wear and replaced when signs of deterioration appear.
A simple schedule—monthly cleaning and annual inspections with component replacement every few years as needed—helps extend the drain’s service life.
Routine cleaning and preventive maintenance
Maintain consistent cleaning and simple preventive steps to keep a shower floor drain functioning and to extend its service life.
Regular inspections catch wear early; avoid harsh chemicals; remove hair and debris; flush with hot water weekly; and guarantee a secure, undamaged grate.
Suggested routine actions:
- Remove cover and clear visible debris
- Use a soft brush for the trap
- Flush with hot water
- Check for slow drainage
- Replace worn gaskets promptly
When to replace components and how often
After regular cleaning and inspections, attention should turn to the lifespan and replacement schedule for shower drain components to prevent failures.
Rubber gaskets and seals typically need replacement every 3–5 years. Strainers and grates may last a decade but should be swapped if corroded.
PVC traps and drain bodies often endure 10–30 years; replace when cracked, leaking, or showing persistent odor or slow drainage.
Resources, Codes, and Further Reading
The article points readers to helpful how-to videos and manufacturer guides for step-by-step visuals and product-specific instructions.
It also summarizes relevant plumbing code references and highlights common permit requirements to guarantee compliance.
These resources together support safe, code-compliant installation and informed maintenance decisions.
Helpful how-to videos and manufacturer guides
Consulting concise how-to videos and manufacturer guides helps installers match recommended techniques and parts to specific shower drain models. Reputable sources include official product manuals, factory-produced installation videos, and short, focused tutorials from certified plumbers that demonstrate critical steps such as membrane integration, clamping ring placement, and proper slope.
- Official product manuals
- Factory installation videos
- Certified plumber tutorials
- Parts compatibility charts
- Troubleshooting clips
Relevant plumbing code references and permit tips
When guaranteeing a shower drain installation meets local requirements, installers should reference applicable plumbing codes and understand permit obligations before work begins.
Consult the local plumbing code (often based on IPC or UPC), local amendments, and fixture standards.
Verify venting, trap seal, slope, and materials.
Check permit necessity, inspection scheduling, required documentation, and contractor licensing to avoid violations and guarantee compliance.
Conclusion
With careful preparation and the right tools, a DIYer can install a shower floor drain successfully. The process, though technical, becomes manageable when broken into clear steps—measuring, fitting, sealing, and testing—like assembling a puzzle with each piece guiding the next. Attention to codes, proper slope, and watertight connections prevents leaks and costly repairs. Regular maintenance keeps the system functioning smoothly, extending its life and protecting the home’s structure.