Where Is the Vent Pipe on a Toilet? Easy Guide & Diagram
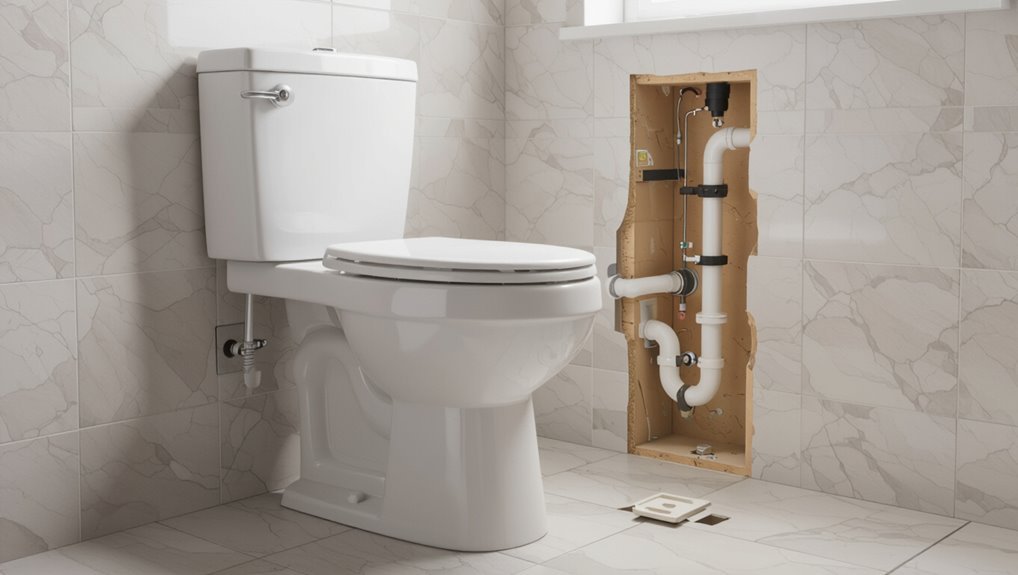
The vent pipe for a toilet is a vertical pipe that connects to the toilet’s waste line, extending through wall cavities, attics, or dedicated chases, and exits above the roof as part of the main soil stack or as a branch vent. It is typically located near the toilet drain and connects with other fixture vents before penetrating the roof. These pipes are commonly made of PVC, ABS, or cast iron and must be sized according to building codes. For further guidance, continue reading for a simple diagram and tips on locating the vent pipe.
Where Is the Vent Pipe on a Toilet?
The vent pipe on a toilet is typically the vertical stack connected to the home’s plumbing system that extends through the roof; it allows sewer gases to escape and equalizes air pressure in the drain line so fixtures flush properly.
It is usually located near the toilet’s drain, rising vertically within walls or joist spaces toward the roof.
In multi-fixture systems the toilet ties into a common vent or branch vent; short horizontal runs slope upward toward the stack.
Access points appear in attics or on roof decks.
Materials are PVC, ABS, or cast iron, sized per local code for proper airflow.
Quick Answer: Where Toilet Vents Run
The toilet vent typically terminates as a roof vent visible on the roofline.
From the fixture it follows the stack pipe upward through walls and floors toward that roof penetration.
In houses with basements or crawlspaces the same stack runs down or across those spaces to connect with the drainage network.
Roof Vent Location
On most homes, a toilet’s vent stack runs vertically from the soil or waste line up through the roof. The roof vent location typically appears as a single or grouped PVC or cast-iron pipe protruding several inches above the roof surface, often near the ridge to improve draft and reduce snow blockage.
Placement follows plumbing and local code requirements, preserving minimum clearances from roof penetrations and skylights. Flashing and a vent boot seal the pipe to prevent leaks.
From exterior, vents are visible as small cylinders; their position reflects internal pipe routing and venting needs without exposing the stack path.
Stack Pipe Path
A vent stack typically runs straight up from the toilet’s soil or waste line through floor and roof framing, joining other fixtures’ vent branches before exiting above the roof. It provides airflow to prevent siphoning and equalize pressure.
Routing follows shortest practical vertical path, avoiding unnecessary offsets; it often aligns with bathroom walls or chase spaces. Materials are commonly PVC, ABS, or cast iron, sized per code (usually 2–3 inches). Penetrations are sealed and flashings installed at the roof. Maintenance access should be considered when planning runs.
- Runs vertically through walls or chases
- Joins branch vents from sinks and tubs
- Exits above roof with cap/flashing
Basement and Crawlspaces
Typically located along inside foundation walls or within dedicated utility chases, toilet vent pipes in basements and crawlspaces run vertically or with minimal offsets up to the main stack or through the floor to reach branch vents.
Installation prioritizes straight runs and accessible cleanouts to prevent blockages and enable inspection.
Materials commonly include PVC, ABS, or cast iron, joined with approved fittings and proper slope where horizontal runs occur.
Clearance from insulation and heat sources is maintained to avoid condensation.
Vent terminations must tie into the building’s venting system per code, keeping trap seals intact and preventing sewer gas entry into occupied spaces.
Why Toilet Venting Matters for Smell and Flushing
Proper venting keeps sewer gases out of living spaces and guarantees the toilet flushes with full force. It maintains trap seals, prevents siphoning, and balances pressure so wastewater moves smoothly.
Without adequate venting, odors can enter rooms and flushes may be weak or incomplete.
- Preserves water seal in the trap to block sewer smell.
- Equalizes air pressure to enable rapid, complete bowl evacuation.
- Reduces gurgling, slow drains, and occasional backflow that indicate vent issues.
Regular inspection and prompt repair of vent components protect indoor air quality and make certain consistent toilet performance.
How a Toilet Vent Connects to the Drain System
Having established why venting prevents odors and maintains flush performance, the discussion now turns to how the vent physically ties into the toilet’s waste line. A vent connects downstream of the toilet trap, joining the soil or waste stack via a vent branch. This branch links to the vertical vent stack through fittings that maintain smooth flow and prevent siphoning.
The connection sits above the trap weir to allow air entry without permitting sewer gases into the bowl. In typical layouts the vent rises vertically within a wall cavity or in the attic before exiting through the roof to atmosphere.
Trap Vents vs. Main Vent Stack: What to Know
The distinction between trap vents and the main vent stack centers on their purposes: trap vents protect individual fixtures by preventing trap siphonage, while the main stack balances pressure for the whole system.
They differ in size, connection point, and the extent of airflow they handle. Trap vents are typically installed close to fixtures or within branch lines, whereas the main vent stack runs vertically through the building to the roof.
Purpose Of Trap Vents
Distinguishing trap vents from the main vent stack clarifies their distinct roles in a plumbing system: trap vents protect individual traps from siphoning and back-pressure by allowing air into the immediate drainage line, while the main vent stack provides overall pressure equalization and a pathway for sewer gases to exit.
Trap vents specifically preserve the water seal in each fixture, prevent odors, and stabilize localized pressure during discharge. They are typically short runs tied into the venting system near fixtures.
Key functions include:
- Preventing siphonage of trap water seals
- Allowing air to break vacuum during flow
- Reducing localized pressure surges
Differences In Venting
Compare trap vents and the main vent stack by their scale, function, and placement within a plumbing system. Trap vents serve individual fixtures, preventing siphonage at the trap and equalizing local pressure. The main vent stack operates at building scale, connecting multiple branch vents to discharge sewer gases above the roof and maintain overall system airflow.
Trap vents are smaller, shorter, and often concealed near fixtures; the main stack is larger, continuous, and vertically prominent. Both must meet code for diameter, slope, and connection height. Proper interaction guarantees trap seal protection, odor control, and uninterrupted drainage performance.
Common Installation Locations
Having contrasted trap vents and the main vent stack by scale and role, attention shifts to where each is typically installed within a building.
Trap vents are placed close to fixtures—often within a few feet—running horizontally to join a soil or branch vent.
Main vent stacks rise vertically through the structure to the roof, collecting branch vents and preventing pressure imbalances.
Placement considers layout, code setbacks, and roof penetration limits.
Common locations include:
- Near toilets and sinks, concealed in stud bays or chase walls for trap vents.
- Centralized stacks in bathrooms or utility rooms.
- Exterior wall runs where roof routing is straightforward.
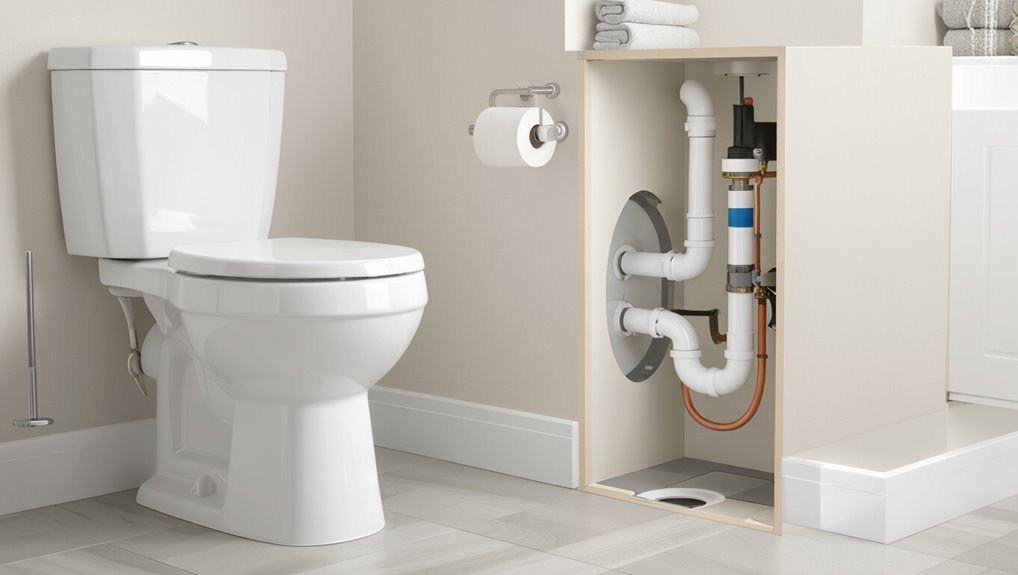
Typical Vent Locations Behind or Near the Toilet Wall
Often located within a short distance behind or beside the toilet, vent pipes typically rise vertically through the wall or run horizontally toward a nearby stack.
In typical layouts the vent is concealed inside a stud cavity or placed in an adjacent chase, accessible via an attic or service panel.
Plastic (PVC/ABS) and older cast-iron vents are common; connections occur above the sanitary tee or near the toilet flange for short runs.
Placement considers trap distance limits and slope for horizontal sections.
Inspection access points or cleanouts may be nearby.
Visible roof terminations remain far above; interior runs stay out of sight.
How to Trace the Vent From the Soil Stack
After locating the vent within a wall or chase near the toilet, the next step is to trace that vent back to the soil stack to confirm continuity and identify any obstructions or changes in material.
The inspector follows accessible pipe runs in basements, crawlspaces, or utility rooms, noting fittings, offsets, and conversions between PVC, cast iron, or clay. Any cleanouts or tee fittings are checked for blockages. When visibility is limited, a camera or inspection mirror can be used.
Key actions include:
- Inspect accessible joints and cleanouts for signs of leakage or blockage
- Map pipe route and material conversions
- Use camera for inaccessible sections
Finding the Vent Where It Exits the Roof
The roof vent exit is located where the vertical vent pipe pierces the roofline, often near the main soil stack run.
Observers should note the pipe’s diameter and whether it is round or rectangular to confirm it matches the building’s venting size and shape.
Careful inspection of nearby roof penetrations helps distinguish the toilet vent from plumbing, HVAC, and electrical openings.
Roof Vent Location
On most residential roofs the plumbing vent pipe can be located by scanning for a vertical pipe protrusion near the ridge line or over bathroom and kitchen areas. The vent’s roof exit often aligns with interior fixture groupings and follows framing clearances.
Visual checks from a safe vantage show single or grouped pipes; seasonal debris and flashing details help confirm the exact spot. When identifying the vent, note roof intersections and valleys where leaks may occur, and observe nearby roof vents to distinguish plumbing vents from mechanical exhausts.
- Look near ridges and interior walls
- Check flashing and seals
- Compare with attic pipe locations
Pipe Size And Shape
Inspect the vent pipe’s size and shape at its roof exit to quickly distinguish plumbing vents from other roof penetrations and to guarantee proper airflow and code compliance.
Typically, toilet vent pipes are round, PVC or ABS, and range from 1¼ to 4 inches in diameter; most residential toilet vents are 2 or 3 inches.
The pipe should rise vertically with a smooth internal bore and minimal joints near the roof to reduce blockage risk.
Flashing and a simple mushroom or vent cap often accompany the pipe.
Note any unusual flattening, tapering, or small-diameter runs that could indicate improper venting.
Identifying Nearby Roof Penetrations
Near roof level, a quick visual sweep reveals clusters of penetrations—vent pipes, plumbing stacks, exhaust vents, and roof-mounted equipment—that must be distinguished to locate the toilet vent. The observer notes pipe diameter, cap style, and proximity to the toilet stack path.
Roof vents often align along the plumbing run; mechanical exhausts have screened or louvered outlets and larger bases. Weather collars and flashing shapes help separate similar fittings. Use these quick checks to identify the toilet vent exit point.
- Look for straight vertical pipes with simple open tops.
- Exclude ducts with louvers or fan housings.
- Follow pipe size toward interior stack locations.
Spotting Vents in Multi-Story Buildings
In multi-story buildings, locating toilet vent pipes requires combining visible cues with knowledge of common routing: vents often run vertically through utility chases, riser closets, or alongside exterior walls and usually terminate above the roofline. Staff or inspectors check ceiling access panels, attic spaces, and mechanical rooms for vertical stacks. Look for grouped pipe bundles and cleanouts at floor transitions. Exterior examinations reveal vent runs against outer walls. Documentation like plumbing riser diagrams speeds identification. Access restrictions may require landlord permission. Safety and code compliance matter when inspecting.
| Location | Visual Cue | Access point |
|---|---|---|
| Chase | clustered pipes | panel |
| Riser closet | metal stack | door |
| Exterior wall | exposed run | ladder |
How Vertical Vents and Horizontal Runs Differ
Several clear differences separate vertical vent stacks from horizontal vent runs, primarily in routing, slope requirements, and access for maintenance.
Vertical vents rise uninterrupted through floors to roof level; they rely on gravity for drainage of condensation and are easier to access from attic or roof openings.
Horizontal runs require constant slope, support, and careful pitch to prevent traps or stagnant water.
Material selection and insulation needs differ with exposure and airflow.
Typical contrasts include:
- Vertical stacks: direct roof termination, simpler backflow prevention, easier inspection access
- Horizontal runs: require pitch, support nearby fixtures, more prone to sagging
- Location: stack-centered vs. branch-oriented
How Offsets and Elbows Affect Vent Placement
With changes in direction, offsets and elbows alter not just the path of a vent but its effective length and airflow characteristics, so their placement must account for added resistance, potential condensation traps, and code limits on horizontal offset distance.
Offsets increase equivalent length, reducing venting efficiency; each elbow adds friction and may change required pipe diameter or slope. Placement should minimize elbows, use long-radius fittings where possible, and avoid low spots that collect moisture. Proper support and accessible cleanouts reduce maintenance issues. Designers balance routing constraints with hydraulic performance to make certain traps remain properly vented without creating siphonage or backpressure.
How Far Can a Toilet Be From Its Vent Legally?
Distances from a toilet to its vent are governed by maximum run limits that vary with pipe diameter and code.
These limits differ by jurisdiction, so local codes and amendments determine allowable fixture runs.
Understanding the longest permissible fixture runs helps guarantee proper venting and code compliance.
Maximum Distance Limits
Regarding how far a toilet may be from its vent, plumbing codes set specific maximum trap-to-vent distances based on pipe diameter and whether the run is horizontal or vertical. Codes typically limit the uninterrupted distance from the toilet’s trap to its vent connection to guarantee proper trap seal and venting performance.
Common limits depend on pipe size and slope; longer runs may require larger diameter or a relief vent. Installers must measure along the developed length of the drain, not just straight-line distance.
- 2″ trap: shorter maximum distance, often cited in codes
- 3″ trap: longer allowable run than 2″
- Horizontal runs: stricter limits than vertical runs
Local Code Variations
After outlining standard trap-to-vent distance limits, attention turns to how those limits are applied locally: plumbing jurisdictions adopt model codes (IPC, UPC) but often modify allowable distances, required pipe sizes, or relief venting rules.
Local amendments reflect climate, building types, and enforcement practices. Inspectors may require shorter runs, larger vents, or auxiliary vents where fixtures cluster or where long horizontal runs exist.
Developers should consult municipal codes, local amendments, and authority having jurisdiction (AHJ) interpretations. Plans permitting often reveal accepted precedents.
Compliance secures proper performance and avoids costly rework; installers must document code citations and obtain approvals for deviations.
Longest Fixture Runs
One key limit for fixture layout is the maximum developed distance a toilet trap can be from its vent, a measurement governed by pipe diameter, trap type, and the plumbing code adopted locally.
Codes set maximum developed lengths to prevent siphoning and guarantee trap seal integrity; common values vary with pipe size and whether the trap is a standard or deep seal type.
Installers must consult the adopted code (IPC, UPC, or local amendments) and measure along the pipe run, including fittings.
- Short runs reduce risk of siphonage and odor.
- Larger-diameter vents allow longer developed distances.
- Local code tables provide exact limits.
How Plumbing Codes Dictate Vent Placement Distance
In many jurisdictions, plumbing codes set specific maximum distances between a fixture trap and its vent to preserve proper trap seal and prevent siphoning. These limits depend on pipe diameter, trap arm slope, and fixture type; larger-diameter drains permit longer trap-to-vent runs.
Codes also specify allowable fittings, minimum slope (typically 1/4 inch per foot), and how multiple fixtures may share a vent or connect to a common soil stack. Exceptions and relief vents apply in some configurations.
Compliance guarantees functioning traps, reduces odor and blockage risk, and avoids failed inspections or required rework during installation or remodeling projects.
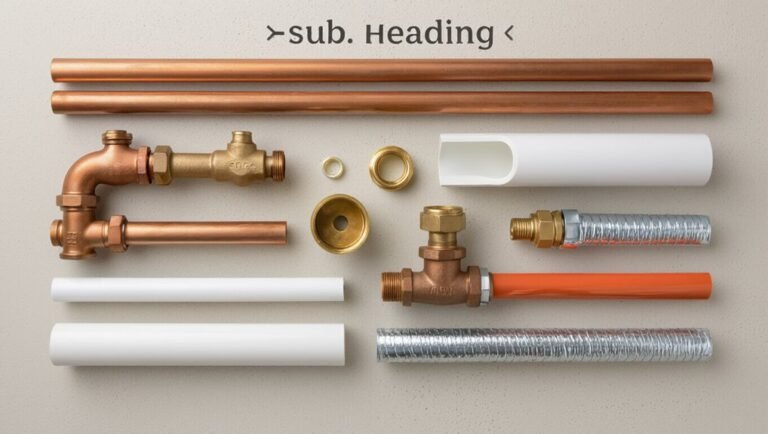
Recognize Vent Pipes: PVC, ABS, Cast Iron, and Sizes
How can a homeowner or installer quickly identify vent piping in a building? Vent pipes commonly appear as vertical runs serving fixtures, differing by material and diameter. PVC is white, smooth, used in modern homes; ABS is black, rigid, seen in some regions; cast iron is heavy, dark, found in older buildings. Typical vent sizes relate to fixture units and distance to stacks.
- PVC: white, solvent-weld fittings, common 1¼–4 in for vents
- ABS: black, similar sizes, regional code acceptance varies
- Cast iron: durable, larger diameter in older mains, often 2–4 in
How to Distinguish a Vent From a Waste Line Visually
A visual inspection can separate vent and waste pipes by noting pipe size and orientation: vents are usually smaller and run vertically or toward the roof, while waste lines are larger and slope toward drains.
Connection location offers additional clues, since vents join the drainage system above the highest fixture outlet and rarely connect directly to traps.
Observing these features together helps confirm whether a pipe is a vent or a waste line.
Pipe Size And Orientation
Several small visual cues help differentiate a vent from a waste line: vent pipes are typically narrower, run vertically without continuous downward slope, and extend upward through the roof, while waste lines are larger in diameter, slope steadily toward drains or sewer connections, and often have horizontal runs with trap fittings.
Pipe size and orientation clarify function. Vents usually use 1¼–3-inch pipes and remain upright; waste lines use 3–4 inches or larger and angle downward. Surface fittings, joint types, and clear slope indicate drainage versus venting.
- Narrow, vertical runs suggest venting.
- Large, sloped pipes indicate waste.
- Horizontal runs with traps point to drainage.
Connection Location Clues
By examining where pipes join fixtures, observers can often tell vent lines from waste lines: vents typically connect near the top or rear of plumbing fixtures or tie into a vent stack above the trap arm, while waste lines attach at the lowest outlet and continue downward toward traps and drains.
Visual cues include upward-angled or horizontal runs rising toward the roof for vents, thinner diameter runs that don’t slope steeply, and connections above the trap weir.
Waste lines are larger, slope visibly toward soil stacks, and join at or below fixture bases.
Seals, cleanouts, and accessible stacks further indicate vent versus waste.
Roof Vent Caps: What They Reveal About Vent Lines
Roof vent caps, the visible fittings crowning plumbing stacks on a roofline, offer clear clues about the size, condition, and routing of underlying vent lines. Observers can note cap diameter relative to stack, material (metal, PVC), and signs of blockage or corrosion; these indicate whether vents match building codes, need cleaning, or have been altered.
Caps also hint at multi-stack connections when several caps cluster.
Practical reading of caps informs screening and planning before interior inspection.
- Size and material reveal pipe diameter and age.
- Damage or debris suggests obstruction or leakage risk.
- Clustered caps suggest shared or branched vent routing.
Using Attic or Ceiling Access to Find the Vent
Accessing the attic or ceiling cavity provides a direct way to trace a toilet vent from its fixture toward the roof, using visual cues and measurements to confirm routing and connections.
Inspectors look for vertical soil stack runs, horizontal offsets, and vent pipe passages through joist bays.
Note pipe material, diameter, and nearby traps or cleanouts that indicate branch intersections.
Measure distances from the toilet’s drain to ceiling penetrations to match plans or locate hidden branches.
Secure areas, avoid insulation disturbance, and mark the vent’s path for roof penetration points.
Photograph findings and record measurements for reference during repairs or routing changes.
How to Use a Flashlight and Mirror to Inspect Vent Entries
After tracing the vent from the attic or ceiling cavity, inspectors often use a flashlight and mirror to inspect tight penetrations and confirm pipe entries where direct sightlines are blocked. They angle the mirror to reveal the pipe collar, look for sealant or flashing, and note pipe orientation. Shadows and reflections help distinguish vent from electrical conduits. Careful illumination prevents misidentification without disturbing insulation.
- Position the mirror beyond the obstruction and sweep with a focused beam.
- Use a small, rigid mirror for narrow gaps; avoid hand-held shaking.
- Record findings and photograph reflections for later reference.
Safe Roof Inspection for Toilet Vent Caps
From a safe distance and with stable footing established, the inspector evaluates toilet vent caps for clear openings, secure attachment, and intact screens or rain guards. The inspector notes corrosion, debris, or bird nests, records measurements, and photographs defects. Safety protocols include using harnesses near edges, non-slip footwear, and avoiding inspections in high wind or wet conditions. If a defect is found, temporary measures are applied and a qualified roofer or plumber is scheduled. Documentation specifies location, issue, and recommended repair priority to guide follow-up.
| Component | Condition | Action |
|---|---|---|
| Cap | Clean | No action |
| Screen | Torn | Replace |
| Fasteners | Loose | Tighten |
How to Test Vent Function With Smoke or a Smoke Pencil
To test a toilet vent’s airflow, the inspector uses smoke—from a handheld smoke pencil or disposable smoke stick—held near the vent opening while the system is under typical use conditions (a nearby drain running or a trap being emptied). The smoke reveals direction and strength of airflow, showing steady draw, weak movement, or escape irregularities.
Observations are noted and compared to expected performance. Safety and wind conditions are considered to avoid false readings.
- Confirm steady, consistent smoke movement into the vent.
- Note intermittent or turbulent smoke behavior.
- Record absence of smoke movement for further investigation.
Gurgling, Trapped Air, and Other Signs of Vent Problems
Frequently, gurgling, trapped air, and related noises signal a compromised venting system rather than a fixture defect. Such sounds often occur when air moves unevenly through drain lines; bubbles, sputters, and slow draining suggest air is being drawn or forced where it shouldn’t. Observers may note intermittent noises after other fixtures run, indicating shared vent stress. Prompt inspection prevents odors and sewer gas buildup. Simple checks—listening during flushing, noting timing with other fixtures, and identifying recurring patterns—help isolate vent-related causes before calling a professional.
| Sign | Likely implication |
|---|---|
| Gurgling during flush | Air displacement issue |
| Sputtering sink | Shared vent stress |
| Intermittent noises | Partial restriction |
| Recurrent timing | Systemic vent problem |
How a Blocked Vent Affects Toilet Performance and Noise
The noises and air movement described earlier often trace back to a vent obstruction that directly alters toilet behavior. A blocked vent prevents proper air intake and exhaust, changing flush strength and trap pressure. Reduced airflow causes slow drains, intermittent gurgles, and siphoning that can pull water from the bowl. Pressure fluctuations also let sewer gas escape, increasing odors and unusual sounds.
- Reduced flush power: incomplete siphoning and sluggish bowl clearance.
- Gurgling and bubbling: trapped air escaping through fixtures.
- Intermittent odors and hissing: pressure-driven sewer gas intrusion and vent whistling.
How to Clear Indoor Vent Clogs Without Dismantling the Toilet
Begin by locating the vent access points inside the home—typically roof-drain cleanouts, attic stacks, or crawlspace fittings—and inspect them for visible blockages using a flashlight.
If accessible, use a plumber’s snake or flexible drain auger inserted into the vent stack to dislodge soft obstructions; rotate slowly and withdraw debris.
Flush the vent with a garden hose from the lowest accessible point, applying moderate pressure to wash away remnants.
For persistent buildup, apply a biological enzyme cleaner per instructions to break organic material over several days.
Afterward, run water through fixtures while listening for normalized airflow and reduced gurgling.
Accessing and Removing Obstructions From the Attic
From an attic access panel, a careful visual inspection will quickly reveal common vent obstructions such as bird nests, leaves, animal carcasses, or accumulated insulation.
The inspector should wear protective gear, use a flashlight, and trace the vent stack to the roof penetration.
Small blockages can be removed by hand or with a long grabber; larger debris may require cutting back insulation or detaching sections of duct for access.
After removal, the vent path should be tested by running water in fixtures to confirm airflow restoration.
Repair or reseal any damaged flashing or pipe joints observed.
- Wear gloves, mask, eye protection
- Use grabber and flashlight
- Test airflow after clearing
Clearing Leaves and Bird Nests From Roof Vents
Before attempting to reach a roof vent, the person evaluates secure footing, ladder placement, and appropriate fall protection to prevent accidents.
They inspect the vent from the roof edge and use long-handled tools or a vacuum to remove leaves and bird nests without forcing entry.
If the obstruction is extensive or access is unsafe, they arrange for a qualified professional to complete the clearing.
Roof Vent Access Safety
Approaching roof vents requires attention to safe access and careful debris removal to prevent damage and injury. The writer notes that planning, proper equipment, and awareness of roof conditions reduce risk.
Before work, assess weather, slope, and footing; use a stable ladder and wear slip-resistant boots and gloves. Consider calling a professional for steep or fragile roofs.
- Use a harness or roof anchor on steep pitches.
- Keep a spotter and secure ladder placement.
- Protect shingles and flashing with a pad or roof ladder.
Maintain clear communication and avoid working alone when accessing vents.
Clearing Debris Properly
When debris accumulates around roof vents, removing leaves and bird nests promptly prevents blockages that can cause sewer odors, slow drainage, and create fire or pest hazards.
Inspect vents from a stable position using gloves, a mask, and a hand tool or soft brush. Gently clear material without forcing it deeper into the pipe. Use a flashlight to confirm openness; a garden hose can flush remaining debris downward.
Dispose of nests humanely and in accordance with local wildlife regulations. Reinstall or replace vent caps and screens that are damaged.
Schedule seasonal checks to prevent recurrence and maintain proper vent function.
How to Seal Small Vent Leaks That Cause Odors
Identify the leak source by inspecting accessible vent pipe joints, roof flashings, and connections near fixtures for gaps, deteriorated sealant, or hairline cracks that allow sewer gases to escape.
Once located, clean the area, remove old sealant, and dry surfaces.
Use appropriate materials and methods to reseal small leaks without replacing piping.
- Apply silicone or polyurethane sealant to small gaps and around flashings for a watertight, gas-resistant seal.
- Use plumber’s tape on threaded joints and replace damaged rubber gaskets.
- For shingle penetrations, add roofing cement and a new flashing boot to restore the roof seal.
How to Identify Sewer Gas Leak Signs Near the Toilet
After sealing visible vent joints and roof penetrations, attention turns to signs of sewer gas near the toilet itself.
The observer checks for persistent rotten-egg or musty odors localized to the bathroom, especially when fixtures are unused.
Look for bubbling in the bowl or trap primer drains when nearby drains run, indicating pressure imbalances.
Corrosion, staining, or dampness at wax ring seams, floor flange, or caulk lines suggests leaks.
Sudden loss of traps’ water seals after flushing neighboring fixtures points to venting issues.
Use a handheld smoke pencil or soapy water to detect escaping gas at seals and connections.
Replacing a Damaged Vent Section: Step-by-Step
Begin by isolating the damaged vent section and ensuring all affected areas are safe and dry before any cutting or removal.
Next, gather appropriate replacement pipe, connectors, primer and solvent or mechanical couplings.
Remove the damaged segment, deburr cut ends, and test-fit new pieces before final joining.
After joining, secure supports and check alignment to existing vent runs.
Finally, perform a smoke or water test to confirm airtight seals and proper flow, then restore any removed roofing or wall finishes.
- Cut and remove damaged pipe cleanly
- Fit and join new section with approved fittings
- Test seals and secure supports
Extending a Vent When Adding a Bathroom or Moving a Toilet
When adding a bathroom or moving a toilet, extending the vent requires planning to maintain proper trap arm length, slope, and connection to the existing stack so the fixture vents correctly without introducing siphon or backpressure issues.
The installer must locate the nearest suitable stack or vent, verify code-mandated distances and pipe diameters, and choose whether to extend vertically through the roof or run a horizontal vent to an existing vent line.
All new vent runs require correct rise, pitch on horizontal sections, approved fittings, and secure support.
Testing the extended vent for leaks and proper airflow before finishing is essential.
How Different Toilet Models Change Vent Routing
Depending on the toilet model, vent routing requirements can vary because trapway shape, outlet height, and flush valve location change the fixture’s trap arm geometry and connection point to the soil stack. Manufacturers’ designs influence required trap arm length, slope, and distance from the vent; wall-hung, floor-mounted, and back-outlet toilets each present distinct routing constraints. Installers must match vent placement to the specific outlet to prevent siphoning and make certain proper air admission.
Typical considerations include:
- Wall-hung vs. floor-mounted: outlet elevation affects vertical riser placement.
- Rear outlet vs. back-outlet: horizontal routing differs.
- Dual-flush mechanisms: larger discharge volume may alter vent sizing.
Choosing Vent Material: PVC vs. ABS vs. Cast Iron
The discussion compares PVC, ABS, and cast iron on durability, highlighting resistance to corrosion, impact, and temperature over time.
It then contrasts installation complexity and typical labor costs for each material.
Practical trade-offs between upfront expense and long-term performance are noted to guide material choice.
Material Durability Comparison
Selecting a vent material requires balancing durability, cost, and installation constraints; PVC, ABS, and cast iron each offer distinct strengths and weaknesses. Longevity depends on environment, mechanical stress, and chemical exposure. PVC resists corrosion and many chemicals but can become brittle with UV exposure and extreme cold. ABS is slightly tougher against impact and lower temperatures but is less common and may face chemical limitations. Cast iron provides exceptional mechanical durability and sound dampening yet can corrode over decades if water intrusion occurs.
- PVC: corrosion-resistant, lightweight, UV-sensitive
- ABS: impact-resistant, good low-temp performance
- Cast iron: highly durable, corrosion-prone over long term
Installation And Cost Differences
When weighing installation and cost differences among PVC, ABS, and cast iron, upfront material price, labor complexity, and long-term maintenance all drive the decision.
PVC is cheapest and lightest, enabling faster DIY or contractor installation with solvent cement; fittings are inexpensive and common.
ABS costs slightly more but offers similar installation ease and chemical resistance.
Cast iron is costly, heavy, and requires skilled labor, hoisting, and special couplings, increasing labor hours and disposal costs.
Long-term, cast iron may outlast plastics but can corrode; PVC and ABS minimize replacement costs.
Local code and project scale often determine the most economical choice.
Local Code Variations: Required Vent Height Above Roof
In many jurisdictions, local plumbing codes set minimum heights for toilet vent pipes where they extend above the roof to guarantee proper draft, prevent sewer gas entry, and reduce wind-induced siphoning. Requirements vary by roof slope, proximity to windows or air intakes, and multi-story stack configuration. Inspectors may mandate higher terminals for rooftop equipment or parapets. Designers reference local code tables and manufacturer guidance to confirm compliance and avoid rework.
- Typical minimums range from 6 inches to several feet above the roof or nearby openings.
- Elevation rules differ for flat versus pitched roofs.
- Exceptions and setbacks depend on local amendments and utility conditions.
Roof Flashing and Vent Collars: Protection at the Penetration
Attention to the roof penetration is essential to prevent leaks where the vent pipe passes through the roof.
The choice of flashing and vent collar material—typically galvanized steel, aluminum, or rubberized silicone—affects durability and compatibility with roofing materials.
Proper sealing and secure attachment at the collar guarantee a weatherproof connection and reduce maintenance issues.
Roof Penetration Sealing
At roof penetrations, flashing and vent collars form the primary defense against water intrusion where a toilet vent pipe breaches the roof plane. Sealing focuses on continuous, weatherproof joints between pipe, collar, flashing and roofing material. Proper sealing prevents leaks, ice dam issues and rot while allowing pipe movement.
- Make certain tight compression or sealant at the pipe-collar interface to block water entry.
- Integrate flashing under upper shingles and over lower ones to shed water away from the penetration.
- Maintain flexible sealants and check for sealant degradation regularly to preserve a watertight barrier.
Inspection and timely resealing extend roof and vent longevity.
Collar Material Choices
Choosing the right collar material influences long-term watertight performance and compatibility with roofing systems.
Metal collars, typically galvanized steel, aluminum, or stainless steel, provide rigidity and durability; they resist UV and temperature cycling but require corrosion-appropriate selection for coastal or acidic environments.
Rubber or EPDM collars offer flexibility, conforming to irregular pipe shapes and accommodating thermal movement; they need UV-resistant grades and periodic inspection.
Plastic collars (PVC) are lightweight and cost-effective but may embrittle in extreme cold.
Integrated flashing systems combine materials for balance.
Proper material choice matches roof type, climate, pipe diameter, and expected maintenance intervals.
How to Read Plumbing Plans for Vent Locations
When examining plumbing plans for vent locations, a reader should first identify the soil stack and branch drain lines, since vents are typically shown as vertical risers or labeled ventilation symbols adjacent to those pipes.
The plan view and riser diagram together clarify horizontal run distances, fixture connection points, and where vents penetrate roofs. Symbols and abbreviations (V, VP, or vent) mark connections; scale and legend verify distances to meet code.
Review offsets, fittings, and cleanouts that affect vent routing.
- Check legend for vent symbols and abbreviations.
- Compare plan view with riser diagrams.
- Verify scale and code clearances.
When to DIY and When to Hire a Plumber for Vent Work
Typically, a homeowner can handle straightforward vent tasks—such as clearing a simple roof vent obstruction, replacing a short accessible vent pipe section, or installing a vent cap—provided they have basic tools, understand local code clearances, and can safely work on a roof.
More complex issues—persistent sewer gas, multiple blocked vents, vents hidden within walls or beneath finished floors, major roof flashing work, or code-required rerouting—warrant a licensed plumber and possibly a roofer.
Professionals diagnose with camera inspection, make certain proper slope and sizing, obtain permits, and guarantee compliance and safety.
When in doubt, consult a plumber before attempting repairs.
Typical Cost Ranges for Vent Repair or Relocation
Typical repairs to a toilet vent pipe often range from minor patching at $100–$300 to more extensive fixes approaching $500–$1,000 depending on materials and access.
Relocating a vent usually costs more, with factors such as roof penetration, length of new piping, required permits, and labor driving prices into the $1,000–$3,000+ range.
Accurate estimates depend on site-specific issues like attic access, roof type, and whether walls must be opened.
Typical Repair Costs
Estimating the cost to repair or relocate a toilet vent pipe depends on factors like access, pipe material, roof type, and local labor rates. Typical repairs range from simple fixes to full section replacements, often quoted as low, mid, and high tiers.
Homeowners receive estimates reflecting scope rather than exact prices.
- Minor repairs (patching, flashing, short section replace): $100–$400
- Moderate work (accessible section replacement, rerouting in attic): $400–$1,200
- Major jobs (roof penetration repair, long relocations, permutation of materials): $1,200–$3,500+
Prices vary by region and contractor; obtain multiple bids.
Relocation Price Factors
After outlining broad repair tiers and sample prices, attention turns to the specific factors that drive costs when a toilet vent pipe must be relocated.
Critical variables include access difficulty—roof, attic, or slab work increases labor and time—plus pipe material (cast iron costs more to cut and join than PVC).
Length and routing complexity affect material and labor.
Code upgrades, permit fees, and required insulation or flashing add expense.
Additional tasks like drywall repair, roof shingle replacement, or replacing other plumbing increase totals.
Regional labor rates and emergency or weekend service surcharges also alter final estimates.
How to Prevent Future Vent Clogs and Roof Blockages
Regularly scheduled inspections and simple preventive steps markedly reduce the risk of vent clogs and roof blockages. A homeowner or maintenance technician should check vent terminals after storms, remove visible debris, and confirm proper flashing and cap integrity to prevent animal entry and water intrusion.
- Trim overhanging branches and clear rooftop debris seasonally.
- Install and maintain mesh screens or protective caps to block leaves and critters.
- Use a plumber’s snake or professional camera inspection for periodic internal clearing.
Consistent attention and timely minor repairs extend vent function, minimize odor/backflow risks, and avoid costly emergency interventions.
Documenting Vent Locations for Future Maintenance
A concise record of each toilet vent pipe location helps streamline future inspections and repairs.
Photographs, a simple sketch on the building plan, and notes on roof access points create a practical location log.
Clearly marked and labeled access points reduce time and risk during maintenance.
Vent Pipe Location Records
When maintaining a home’s plumbing system, keeping precise records of toilet vent pipe locations guarantees future work proceeds efficiently and safely.
A concise Vent Pipe Location Record should note pipe type, exact routing, and connection points, plus inspection dates and any repairs. Include clear references to house plans or room coordinates. Store records digitally and as a printed copy near the main service panel.
- Pipe material and diameter; routing sketches or photos
- Connection heights and distances from fixed landmarks
- Inspection dates, technician name, and repair notes
These records reduce diagnostic time and prevent accidental damage during renovations.
Marking Access Points
For future maintenance, clearly marked access points for toilet vent pipes guarantee quick identification and safe work by technicians. Labels should indicate pipe function, direction, and depth; durable, weatherproof markers are preferred.
Create an access map showing vents relative to fixtures and structural features, store a copy near the main breaker and with plumbing records, and attach a small diagram inside service panels. Photograph exposed vents and note coordinates or distances from fixed points.
When installing access panels, make certain they are unobstructed and sized for service tools. Update records after repairs so future crews find vents without invasive searching.
Conclusion
To summarize, the article clarifies that toilet vents typically run from the fixture’s drain up through the roof as part of the home’s vent stack, essential for proper flushing and odor control. Importantly, studies show that 30% of residential plumbing issues involve venting or vent-related blockages, underscoring how often overlooked vents cause real problems. Homeowners are reminded to document vent locations, inspect roofs, and hire a plumber for complex or risky vent work.