Creative Copper Pipe Uses: DIY Home, Plumbing & Decor Ideas
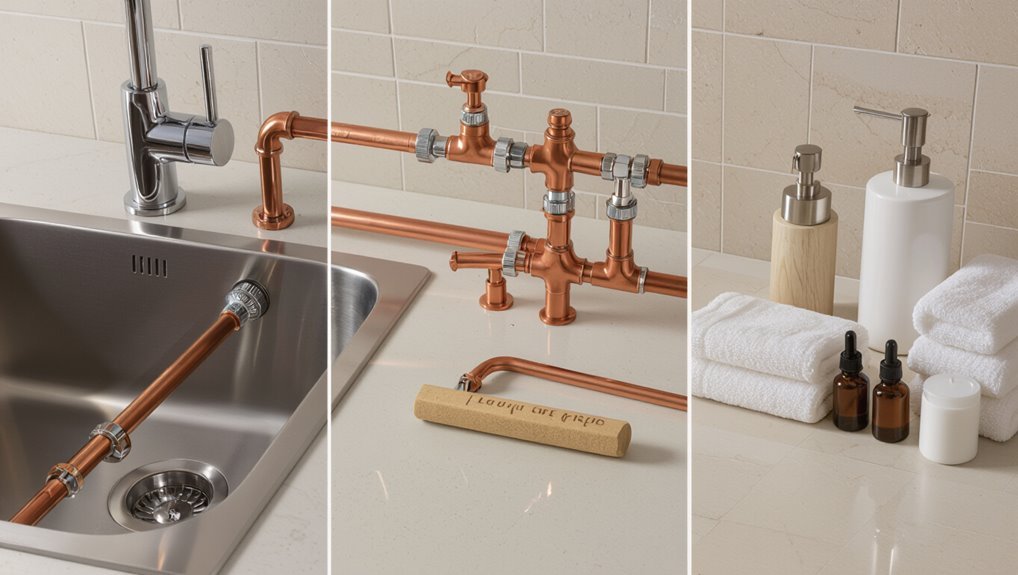
Copper pipe is an excellent choice for both practical plumbing needs and creative DIY projects. It efficiently transports potable water, resists corrosion, and can be used for radiant heating or drainage systems where permitted. Available in various thicknesses (K, L, M) and forms (soft or hard), copper pipes can be bent or used in straight runs. Essential tools for working with copper include cutters, benders, torches, and deburrers, with an emphasis on safety and proper joint connections. Beyond plumbing, copper pipe can be transformed into stylish towel warmers, racks, frames, and shelving, showcasing its durability and recyclability. Explore these versatile uses to inspire your next project!
Common Home Uses for Copper Pipe (Supply, Drainage, Radiant Heat)
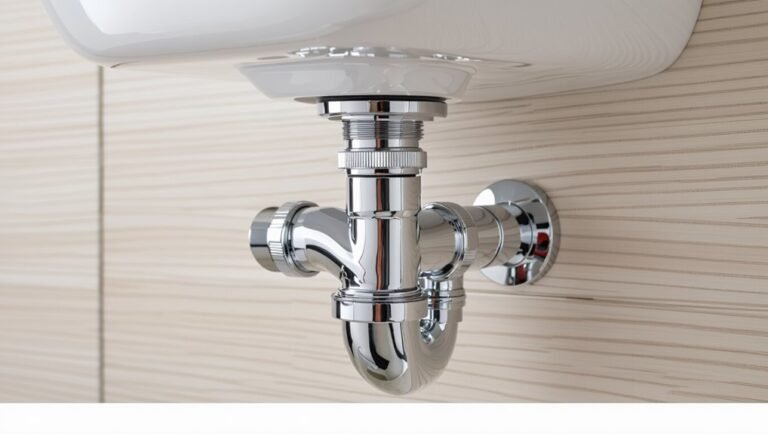
In residential settings, copper pipe serves three primary functions: water supply, drainage, and radiant heating. It conveys potable water with durability and corrosion resistance, forming the backbone of cold and hot lines.
For drainage, larger-diameter copper handles waste and venting where code and preference permit, offering mold- and pest-resistant runs. In radiant heating, copper distributes heated water efficiently through tubing arrays beneath floors or within baseboards, enabling even thermal transfer.
Beyond function, copper’s longevity and recyclability reduce life-cycle costs, and its predictability simplifies maintenance and retrofits compared with less rigid materials.
Why Choose Copper Pipe Over PEX or Plastic
Durability and thermal stability make copper pipe a preferred choice for many homeowners and professionals comparing it to PEX or plastic alternatives. Copper resists UV degradation, holds up to higher temperatures, and maintains structural integrity over decades. Corrosion patterns are predictable and detectable, aiding maintenance and safety assessments.
- Longevity: proven service life reduces replacement frequency and lifecycle costs.
- Heat tolerance: withstands hot-water and boiler systems without deformation.
- Safety: non‑porous, inhibits bacterial growth and doesn’t leach plastics into potable water.
- Recyclability: fully recyclable material supports sustainable building practices and resale value.
Copper Pipe Types & Grades for DIY (K, L, M; Soft vs Hard)
The article outlines the common copper pipe grades (K, L, M) and their typical wall thicknesses and uses so readers can match material to need.
It also contrasts soft (annealed) and hard (drawn) copper to clarify which bends or fittings each accommodates.
Guidance on selecting the right type for plumbing, decorative, or structural DIY projects follows.
Pipe Grades Explained
For DIYers choosing copper piping, understanding the K, L, and M grades—and the distinction between soft and hard temper—is essential to matching pipe to application.
Pipe grades indicate wall thickness, pressure capacity, and typical use: K is thickest for buried or high-pressure lines, L suits most residential systems, and M is thinner for low-pressure or cost-sensitive projects.
Compatibility with fittings and code requirements matters; installers select grade by location and expected stress.
Proper selection minimizes leaks and maintenance.
Consider appearance and flexibility where visible or curved runs are planned.
- K — heaviest, underground/high-pressure.
- L — standard residential.
- M — economical, low-pressure.
- Code and application determine choice.
Soft Versus Hard
Having chosen between K, L, and M based on wall thickness and application, attention turns to temper—soft versus hard—because it affects handling, jointing, and where each pipe performs best.
Soft (annealed) copper bends easily, ideal for curved runs, decorative projects, and field fabrications; it accepts flared and compression fittings and reduces soldering time.
Hard (drawn) copper holds shape, resists kinking, and suits straight runs, exposed framing, and structural elements; it requires mechanical fittings or careful soldering and may need annealing before extensive bending.
Understanding temper guides appropriate techniques, tooling, and expected longevity without conflating grade with flexibility.
Selecting For Projects
When choosing copper pipe for a DIY project, consider both wall-thickness grade (K, L, M) and temper (soft vs. hard) together, since each combination dictates suitability, cost, and required techniques. Selection hinges on pressure requirements, bending needs, joint type, and visibility.
Thicker K suits underground and high-pressure; L balances strength and cost for homes; M is thin, economical for low-pressure or noncritical uses. Soft temper bends for fixtures without fittings; hard requires fittings or annealing.
Match grade and temper to function, budget, and skill to avoid leaks, overbuilding, or unnecessary labor.
- Assess pressure and exposure.
- Choose temper by bending needs.
- Select grade by safety margin.
- Factor cost, tools, and finish.
Essential Tools & Supplies for Copper Projects
Equipped with the right tools and materials, a copper project moves from idea to finished piece efficiently and safely.
Essential handheld tools include pipe cutters, a deburring tool, adjustable wrenches, and needle files for clean edges and precise fits.
A tubing bender and vise simplify shaping and holding workpieces.
For joining and finishing, flux, lead-free solder, chlorinated flux alternatives, and a durable torch or soldering iron are common, alongside emery cloth and brass brushes for surface prep.
Mounting needs include brackets, copper-compatible screws, and thread sealant.
Organized storage, measuring tape, marker, and gloves complete a practical kit for varied copper projects.
Safety Basics for Cutting, Soldering, and Mounting Copper
Because copper work involves sharp edges, hot solder, and torque from tools, strict adherence to basic safety protocols is essential to prevent cuts, burns, and inhalation hazards.
Protective equipment—gloves, eye protection, and flame-resistant clothing—reduces injury risk.
Adequate ventilation or a fume extractor prevents breathing flux and solder fumes.
Secure workpieces and use the correct tool for each task to avoid slips and strain.
Fire safety includes a nearby extinguisher and removing combustibles.
Electrical safety and stable ladders protect against shock and falls.
Awareness and deliberate pacing minimize mistakes and create a safer workspace.
- Personal protective equipment
- Ventilation and fume control
- Workpiece security and correct tools
- Fire and electrical precautions
Cutting & Deburring Copper Pipe Safely
Following basic shop safety, attention shifts to cutting and deburring copper pipe—tasks that create sharp edges, metal shavings, and potential kickback.
Operators wear safety glasses, gloves, and a dust mask; secure the pipe in a vise or clamp to prevent rotation.
Use a proper tubing cutter for clean, square cuts or a hacksaw with steady strokes; avoid excessive force.
After cutting, rotate a deburring tool or reamer inside the end to remove burrs, then file the outside edge smooth.
Clean shavings with a brush, not hands, and inspect ends for roundness and undamaged surfaces before assembly.
Soldering Copper Pipe Joints: Step‑by‑Step
When preparing to solder copper pipe joints, the technician makes certain all fittings and pipe ends are clean, dry, and free of burrs or corrosion.
Flux is applied sparingly to mating surfaces, then parts are assembled firmly.
Heat is applied evenly at the joint, observing the flux to liquefy and draw solder by capillary action.
After soldering, the joint cools naturally and excess flux is wiped away to prevent corrosion.
- Prepare: clean, deburr, and dry.
- Flux: apply thin, even coat.
- Heat & Feed: heat joint, feed solder at bead.
- Cool & Clean: let cool, remove flux.
Soldering Troubleshooting & Common Mistakes
Diagnose soldering problems by systematically checking heat, cleanliness, and technique; most joint failures trace to insufficient heat, contaminated surfaces, or improper flux application. The writer notes common mistakes: weak capillary flow from cool joints, burned flux from overheating, and skipped cleaning. Remedies include reheating evenly, scrubbing to bright copper, and applying correct flux amount. Safety and patience matter; avoid excessive solder that hides poor joints. Testing under pressure reveals leaks early. Practice on scraps builds consistent rhythm.
| Problem | Cause | Fix |
|---|---|---|
| Cold joint | Low heat | Increase heat evenly |
| Pitted solder | Contamination | Clean thoroughly |
| No capillary | Improper fit | Deburr, fit snugly |
| Burned flux | Too hot | Lower flame |
| Excess solder | Poor technique | Use proper amount |
When to Use Compression Fittings vs Solder
The choice between compression fittings and solder depends on project conditions and desired permanence.
Compression fittings suit quick, mechanical joins or situations where heat is unsafe or inconvenient.
Soldered joints are preferred for permanent, leak-proof connections when access and skill allow.
When To Choose Compression
Select compression fittings for copper pipe runs where speed, accessibility, or the absence of a torch makes soldering impractical; compression joints thread together using a ferrule and nut to create a reliable seal without heat, suitable for repairs, temporary connections, or installations near flammable materials.
- Tight spaces: when a torch cannot reach or would risk nearby finishes.
- Temporary setups: for testing, staging, or installations planned for later modification.
- Accessibility: in renovation zones where plumbing must be reversible without cutting.
- Material constraints: when working with pre-coated, soft, or fragile tubing that could be damaged by heat, or where code permits heat-free connections.
When To Solder Copper
Choose soldering for permanent, watertight copper joints where durability, low profile, and long-term reliability are priorities.
Soldered joints suit concealed plumbing, pressurized lines, and connections that should not be disassembled.
They provide superior leak resistance and slimmer profiles than compression fittings, making them ideal for tight spaces and aesthetic fixtures.
Soldering requires proper cleaning, flux, heat, and skill; avoid solder near heat-sensitive materials without protection.
Compression fittings remain preferable for temporary work, quick repairs, or when disassembly is anticipated.
The decision balances permanence, appearance, accessibility, and installer experience.
Quick Fixes for Leaks and Pinholes
How can small leaks in copper pipes be stopped quickly without a full repair? Temporary measures can limit damage until proper work occurs. Simple, effective steps suit DIYers: clean the area, dry it, and apply a chosen stopgap. Consider methods that provide immediate sealing and allow assessment.
- Wrap epoxy putty around the pinhole, sculpting a tight seal; cure time varies.
- Use self-fusing silicone tape stretched and overlapped over the leak for pressure resistance.
- Slide a rubber patch and hose clamp over the spot for a mechanical stopgap.
- Apply a waterproof repair tape designed for metal for a quick cover-up.
When to Call a Plumber: Limits for DIY Copper Work
When a leak, corrosion, or alteration exceeds basic stopgap measures, a licensed plumber should be contacted to avoid further damage or code violations.
Complex leaks, hidden pipe failures, widespread corrosion, or recurrent failures require professional diagnosis and repair.
Tasks involving soldering on pressurized systems, replacing mains, altering water heaters, or working on gas lines are beyond casual DIY.
Permits, pressure testing, proper fittings, and adherence to local codes often mandate licensed work.
For safety, longevity, and liability protection, homeowners should call a plumber when uncertainty exists, when repairs affect system integrity, or when inspections and permits are required.
Re‑Routing Home Plumbing With Copper: Planning Tips
Before altering runs, the homeowner should map the existing pipe layout to identify shutoffs, joints, and potential obstructions.
They must also confirm permit requirements and code compliance for any rerouting work.
Finally, plan access points and staging to minimize demolition and guarantee safe, efficient installation.
Assess Existing Pipe Layout
In evaluating an existing pipe layout, a careful survey of visible runs, access points and connection types establishes the baseline for any re‑routing plan. The inspector notes material changes, fastening methods and signs of stress or corrosion.
Measurements and photographs document current routing relative to walls, joists and fixtures. Mapping flow direction and shutoff locations clarifies isolation options and potential service interruptions.
- Identify visible pipe materials, joints and valve types.
- Record exact routing, clearances and fixture connections.
- Note structural penetrations, supports and ease of future access.
- Highlight compromised sections and probable replacement needs.
Plan Permit And Access
Having mapped existing runs and noted access points, the planner must next confirm permitting requirements and arrange site access for re‑routing copper lines.
Research local codes and utility markings, then submit required plans or applications early to avoid delays.
Coordinate inspections, set realistic timelines, and budget for permit fees.
Secure temporary access agreements if work crosses property lines or requires neighbor cooperation.
Identify areas needing wall or floor openings and plan protective measures for finishes.
Notify occupants of scheduled disruptions and safe routes.
Finally, document approvals and access arrangements in the project file to make certain compliance and smooth execution.
Exposed Copper Shower Frame: Design & Plumbing Notes
Centered around both form and function, an exposed copper shower frame brings industrial warmth and durable plumbing into plain view, turning structural piping into a key design element. It emphasizes visible joints, matching fixtures, and planned routing to conceal valves while celebrating metal lines.
Careful corrosion protection and proper anchor points prevent movement and staining. Consider water pressure, access panels, and thermal expansion in early schematics.
Maintenance-friendly finishes and removable sections simplify future repairs. Coordination with tile, glass, and waterproofing ensures longevity without hiding the frame’s aesthetic.
- Route planning and valve placement
- Corrosion prevention and sealants
- Structural anchoring points
- Access for maintenance
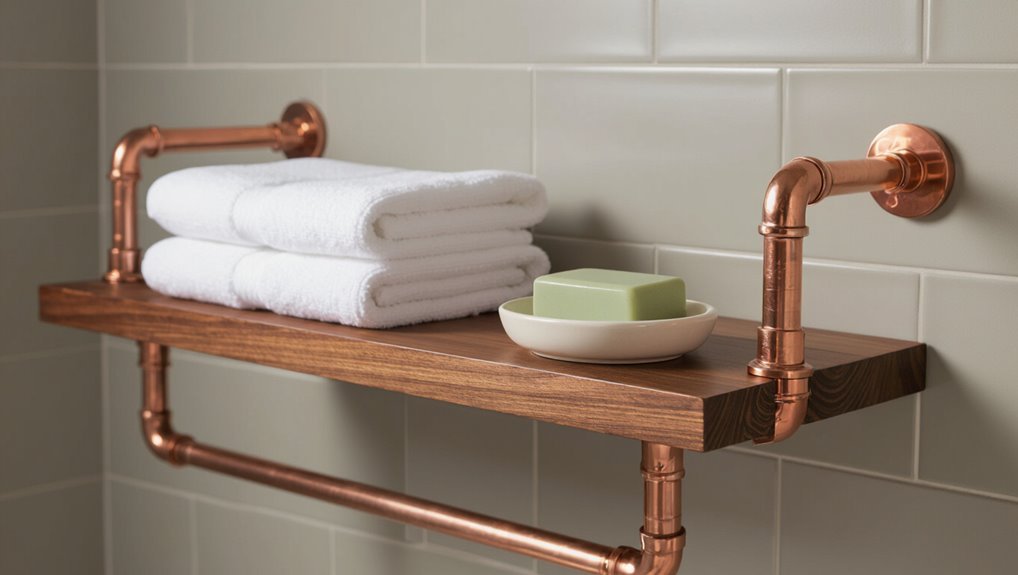
Installing a Copper Pipe Towel Warmer (Options & Safety)
For a copper pipe towel warmer, selection of a heat source—hydronic, electric element, or central-heating tap-in—determines performance and installation complexity.
Proper plumbing connections and rated fittings are essential to prevent leaks and guarantee system pressure integrity.
If converting to electric, considerations include wiring, ground-fault protection, and compliance with electrical and building codes.
Heat Source Options
When choosing a heat source for a copper pipe towel warmer, the decision balances desired temperature, installation complexity, and safety requirements. Options vary by power, control, and integration. Electric elements offer plug-in simplicity and thermostats for consistent warmth.
Hydronic connection leverages existing hot-water systems, supplying gentle, efficient heat when compatible. Low-voltage systems reduce shock risk and often include timers for energy savings.
Radiant panels or nearby space heaters can supplement warmth but require careful placement to prevent overheating or contact. Consider local codes, ventilation, and material ratings when selecting a source to guarantee reliable, code-compliant performance.
- Electric elements with thermostats
- Hydronic connection to boilers
- Low-voltage dedicated systems
- Supplemental radiant or space heaters
Plumbing Connection Safety
Although copper pipe towel warmers are durable and conductive, their safe integration with a home’s plumbing requires strict adherence to pressure, temperature, and backflow controls. Installers must fit pressure relief valves, thermostatic mixing or temperature limiters, and certified backflow preventers. Connections should use compatible fittings and solder or compression methods rated for potable water. Routine inspection for leaks, galvanic corrosion, and secure mounting prevents failures. Local codes dictate isolation valves and testing. Professional review is advised for pressurized systems.
| Component | Purpose | Checkpoint |
|---|---|---|
| Relief valve | Overpressure protection | Size/test |
| Backflow preventer | Contamination prevention | Certification |
| Temperature limiter | Burn risk reduction | Setpoint |
| Valves | Isolation/maintenance | Accessibility |
| Fittings | Leak integrity | Material match |
Electrical Conversion Considerations
Consideration of electrical conversion options is essential before converting a copper pipe towel warmer from hydronic to electric operation or integrating an electric element into a mixed system. The writer emphasizes safety, compatibility, and regulatory compliance. Proper grounding, GFCI protection, and certified heating elements reduce shock and fire risks.
Pipe integrity and corrosion from dissimilar metals must be assessed. Professional inspection is advised for wiring and load calculations; improper installation voids warranties and may breach codes.
Maintenance access and thermostat placement affect performance and longevity.
- Grounding and GFCI
- Certified heating elements
- Corrosion prevention
- Professional inspection
Building a Copper Pipe Towel Rack : Step‑by‑Step
Using basic plumbing fittings and a few common tools, the copper pipe towel rack can be assembled quickly and mounted securely to provide an industrial‑style storage solution. The process begins by measuring wall space, cutting pipe to length, threading or joining with elbows and flanges, then anchoring into studs. Sanding and sealing edges improves safety and finish. Final checks guarantee level alignment and firm mounts. Visualize components and finished form:
| Component | Size | Finish |
|---|---|---|
| Pipe | 24″ | Polished |
| Elbow | 90° | Aged |
| Flange | 2.5″ | Brushed |
| Mounts | 2 | Brass |
Copper Pipe Curtain Rods: Making Industrial Style Rods
The section introduces steps for creating industrial-style curtain rods from copper pipe, beginning with accurate measuring and planning to guarantee proper length and support points.
It then covers cutting and joining techniques, including recommended fittings and secure connections.
Finally, finishing and mounting options are outlined, from patina or lacquer treatments to bracket placement for stable installation.
Measuring And Planning
Before cutting or assembling, measure the window width and account for mounting hardware and desired overhang to determine the finished rod length.
The planner notes mounting height, bracket placement, and curtain stack depth to guarantee proper coverage and clearance.
Consider weight of fabric to choose thicker wall pipe or additional supports.
Visualize finish and spacing relative to trim and furniture; sketch elevations and label dimensions.
Confirm standard fittings will accommodate measured lengths and note any adapters needed.
Verify symmetry by measuring from center to each bracket location.
Record all dimensions and materials before purchasing to streamline the build.
- Measure window and overhang
- Choose mounting height
- Assess fabric weight/supports
- Sketch and record dimensions
Cutting And Joining
Cut pipe to length with a tube cutter or hacksaw, then deburr and file each end to guarantee smooth, square joints that seat fully in fittings.
For slip-fit assemblies, test-fit all pieces and mark alignment.
Use threaded adapters or flared fittings where removable rods are desired; apply PTFE tape on male threads for a snug, vibration-resistant connection.
For permanent joins, solder with flux and a propane torch, heating evenly until solder wicks into the joint. Clean joints before and after soldering. Clamp components to maintain alignment during cooling.
Inspect each joint for gaps or movement, correcting leaks or loose connections before proceeding.
Finishing And Mounting
When ready to finish and mount, attention turns to surface treatment, end fittings, and secure wall attachments that define the rod’s look and function.
The pipe may be polished, brushed, lacquered, or left to develop a natural patina; choice affects longevity and maintenance.
End caps, flanges, or custom finials conceal cuts and reinforce style.
Brackets must align, bear weight, and permit curtain movement; use wall anchors suited to substrate.
Careful measurement, level installation, and concealed fasteners yield a professional result.
Safety includes deburring edges and sealing lacquered surfaces before exposure to humidity.
- Choose finish
- Select end fittings
- Mount brackets
- Seal and test
Copper Pipe Shelving Brackets: Joinery & Mounting
For copper pipe shelving brackets, secure joinery and reliable mounting are essential for both function and appearance; fittings and fasteners must be chosen to match load requirements and wall substrate.
Brackets can be assembled with threaded fittings, soldered joints, or compression couplers; each method affects strength and appearance.
Anchor selection—masonry anchors, toggle bolts, or heavy-duty screws into studs—should reflect shelf weight and contents.
Make certain pipes are cut square and deburred for tight connections.
Consider mounting plate adapters or flanges to distribute load and conceal anchors.
Regularly inspect joints and fasteners for looseness or corrosion to maintain safety and longevity.
Designing a Copper Pipe Wine Rack (Load & Layout Tips)
In planning a copper pipe wine rack, careful attention to load distribution and bottle orientation guarantees both safety and usability. Proper spacing prevents bottle contact and allows gravity-secure storage. Consider pipe diameter, joint strength, and wall anchors to support weight. Account for bottle length variation and access clearance.
- Calculate total weight: multiply average bottle weight by capacity and add safety factor.
- Space holders: allow 3–4 cm between bottles for labels and insulation.
- Anchor method: use studs or heavy-duty toggles; distribute mounts along rack length.
- Joint reinforcement: use brazing or threaded fittings where shear loads concentrate.
Copper Pot Rack for the Kitchen: Build & Ceiling Mounts
Mounted beneath a ceiling beam or centered over an island, a copper pot rack combines durable support with visual warmth, serving as both storage and a focal element.
Constructed from 1/2–1 inch copper pipe, fittings, and sturdy ceiling anchors, it supports pans via S-hooks and integrated railwork.
Designs range from minimalist rectangular frames to circular chandeliers; planning must account for load, ceiling type, and clearances above cooking surfaces.
Patina can be left natural or sealed for shine.
Installation requires locating joists, using appropriate toggle anchors for drywall, and ensuring all connections are tight to prevent sagging or wobble.
Mounting a Copper Garment Rack for Entryways
Mounting a copper garment rack in an entryway begins with precise measuring and planning to guarantee proper height, clearance, and load capacity.
Selection of appropriate mounting hardware — from wall flanges and studs to toggle anchors and brass screws — determines stability and ease of installation.
Final finishing and styling, including sealants, patina choices, and complementary hooks or shelves, complete both the function and the aesthetic.
Measuring And Planning
When planning a copper garment rack for an entryway, precise measurements determine fit, stability, and clearance.
The installer measures wall width, available depth so doors and traffic flow remain unobstructed, and ceiling height to set rod elevation.
Load expectations guide pipe diameter and span support placement.
Marking stud locations and imagining coat bulk ensures balanced spacing.
Final plans note total rack length, drop height, and offset from adjacent trim, plus allowances for shoe storage beneath.
Accurate sketches prevent rework and inform hardware selection later.
- Measure wall width, depth, and ceiling height.
- Calculate rod elevation versus coat length.
- Note stud locations and expected load.
- Sketch final dimensions and clearances.
Mounting Hardware Options
For a copper garment rack in an entryway, choosing appropriate mounting hardware guarantees safety, appearance, and ease of installation.
Wall anchors, toggle bolts, and molly bolts suit drywall; select based on load and stud proximity. Use pipe flanges or specialized copper pipe wall mounts for direct attachment to studs or masonry with lag screws and masonry anchors.
Corner brackets and ceiling-mounted flanges accommodate layout constraints. Make certain hardware finish complements copper or plan for concealed fasteners to avoid visual clash.
Verify weight capacity, predrill accurately, and use level alignment. Periodically inspect fasteners for loosening or corrosion to maintain secure support.
Finishing And Styling
Frequently, finishing and styling transform a functional copper garment rack into a cohesive entryway feature that balances durability with visual appeal.
Careful sealing prevents tarnish while preserving warm tones; matte lacquer gives modern restraint, waxed oil offers a hand-rubbed patina.
Mounting height and spacing determine usability, while end caps and brackets refine silhouette.
Accessories unify the look: wooden hangers, woven baskets, and coordinated hooks complete the composition.
- Seal: choose lacquer, clear coat, or wax to control shine and oxidation.
- Color: contrast or match wall paint and hardware finishes.
- Scale: set rack height for coats, scarves, and children’s items.
- Details: select caps, brackets, and fasteners for a polished finish.
Crafting Copper Pendant Light Fixtures (Electrical Basics)
Starting with a clear plan and respect for electrical safety, crafting a copper pendant light fixture combines metalworking with basic wiring knowledge: the maker selects pipe dimensions and fittings to achieve the desired profile, determines the lamp type and socket rating, and calculates wire length and strain relief points before any cutting or soldering begins.
The process includes cutting and deburring pipe, fitting or brazing joints, installing a lamp holder compatible with bulb wattage, threading appropriate insulated cable, and securing strain relief and mounting hardware.
Final checks involve continuity testing, correct polarity, and ensuring fixtures are cool-touch and well-ventilated during operation.
Copper Handrails & Bannisters: Code & Mounting Tips
Copper pipe handrails must meet local building codes for height, gripping size, and load capacity to guarantee safety and accessibility.
Proper mounting requires selecting compatible brackets, anchors, and spacing to secure the rail to wood, masonry, or metal surfaces.
Attention to corrosion resistance and clearances around fittings prevents premature wear and maintains code compliance.
Code Compliance Basics
For many projects, ensuring code compliance is the first step when planning copper pipe handrails and bannisters; building codes dictate dimensions, strength, mounting, and clearance to protect users and inspectors alike. A concise review covers essential requirements and documentation.
- Height and continuity: handrail top height, uninterrupted runs, and returns to walls per local code.
- Load capacity: specify live and concentrated load resistance for safety and inspection.
- Clearance and graspability: required clearance from wall and diameter limits to allow secure grip.
- Materials and finish: corrosion resistance, non-toxic coatings, and fire-safety considerations for approval.
Mounting And Brackets
Regarding installation, proper mounting and bracket selection determine a copper handrail’s safety, longevity, and code compliance.
Brackets must match rail diameter, support spacing, and load requirements; typically 32–48 inches between supports and secure anchoring into studs or masonry are required.
Use corrosion-resistant fasteners and plate backing when attaching to hollow substrates.
Handrail height, projection, and returns should follow local codes; offset brackets prevent pinching and allow grip clearance.
Soldered or swaged joints need reinforcement or internal sleeves for strength.
Periodic inspection for loosening, corrosion, or movement preserves structural integrity and user safety.
Copper Pipe Plant Stand & Indoor Planters
Using simple lengths of copper pipe and a few fittings, a plant stand and indoor planters can be assembled to combine industrial lines with natural greenery. The approach emphasizes modularity, allowing different heights and pot sizes. Copper’s warm hue complements foliage while fittings create sturdy frames. Careful sealing prevents water contact with joints; felt pads protect floors. Maintenance involves occasional polishing or allowing patina for a softer look. Lightweight assemblies suit balconies and windowsills; heavier designs anchor larger pots. Design variations adapt to mid-century, modern, or rustic interiors without large tools.
- Measure and plan heights.
- Choose pots and drainage.
- Assemble with tees and elbows.
- Seal and finish.
Turning Copper Pipe Into a Rustic Ladder Bookshelf
Built from straight runs of pipe and a few threaded fittings, a rustic ladder bookshelf pairs copper’s warm metallic tone with reclaimed wood shelves to create a sturdy, eye-catching display.
It stands leaning against a wall, vertical pipes forming rails while shorter crossbars support boards at staggered depths.
Assembly requires measuring shelf spacing, cutting pipe to length, threading joints, and securing fittings; shelves rest on flanges or slip over crossbars.
Finishes range from polished to patinated for vintage appeal.
The design is modular, allowing custom heights and shelf widths.
Careful anchoring prevents tipping and guarantees safe, long-lasting use.
Copper Pipe Trellis and Raised Garden Uses (Outdoor Tips)
Copper pipe provides a sturdy framework for climbing plants, offering durable vertical support that resists weathering and flex.
Sections can be configured into modular raised beds, allowing gardeners to expand or rearrange planting areas with simple joints and fittings.
Practical tips cover anchoring, spacing for vine growth, and corrosion considerations to guarantee long-term outdoor performance.
Sturdy Climbing Support
A copper-pipe trellis provides a durable, weather-resistant framework that supports vigorous climbers like peas, beans, and clematis while adding a clean, industrial aesthetic to raised beds and garden borders.
Careful spacing and secure joints guarantee stability under load and wind. Copper’s natural patina reduces maintenance and deters pests.
Properly anchored uprights and crossbars prevent sagging as vines thicken and fruit develops.
- Anchor posts deeply with concrete or ground sleeves for long-term rigidity.
- Space horizontal rungs to match plant tendril reach and growth habit.
- Use slip joints or unions for seasonal disassembly.
- Corrosion-friendly fittings extend service life.
Modular Raised Beds
Following the sturdy climbing support, modular raised beds expand the copper-pipe trellis concept into a versatile planting system that combines structural framing with contained soil.
Sections of copper pipe form durable corner posts and horizontal rails, allowing interchangeable panels—wood, metal mesh, or composite—to create beds of varying depths.
Integrated trellis arches support vining crops while maintaining drainage and airflow.
The modular approach permits seasonal reconfiguration, easy repair, and scalability across small patios or larger plots.
Copper’s weather resistance reduces maintenance; occasional polishing preserves appearance.
Proper anchoring and nonreactive soil liners prevent galvanic issues where copper contacts different metals.
Copper Pipe for Radiators & Home Hydronic Heating (DIY Basics)
In many older and some modern homes, copper pipe remains the preferred choice for radiator and hydronic heating systems due to its durability, thermal conductivity, and ease of installation.
Practical DIY basics emphasize proper sizing, secure fittings, and leak-free joints.
Attention to slope and support prevents air locks and stress.
Corrosion resistance and compatibility with solder or compression fittings simplify repairs.
Appropriate insulation minimizes heat loss in runs to distant radiators.
- Measure pipe lengths and calculate flow requirements.
- Use flux, clean joints, and solder or press fittings correctly.
- Support runs with clamps at recommended intervals.
- Pressure-test before finishing walls.
Copper Towel Warmer Options: Electric vs Hydronic
The section compares electric and hydronic copper towel warmers, highlighting where each performs best. Electric models offer simple installation, fast heat-up, and independent operation.
Hydronic systems provide consistent warmth, integration with existing boiler loops, and lower operating costs in heated-water homes.
Electric Towel Warmer Pros
Why choose an electric towel warmer over a hydronic model? An electric copper towel warmer offers straightforward installation, independent operation, and precise temperature control without connecting to home plumbing. It suits retrofits and small bathrooms, providing consistent warmth and lower upfront disruption.
- Plug-and-play installation simplifies placement and reduces labor.
- Independent scheduling and thermostats deliver predictable, programmable heating.
- No need to tap into existing hot-water systems avoids compatibility issues.
- Lower initial cost and minimal maintenance make it practical for many households.
Electric models prioritize convenience and adaptability while retaining copper’s aesthetic and thermal advantages.
Hydronic Towel Warmer Benefits
Compared with electric models, hydronic copper towel warmers draw heated water from a home’s boiler or hot-water loop to provide steady, energy-efficient warmth across larger racks. They integrate with existing plumbing, reducing operating costs when central heating is active and offering consistent temperatures without individual electrical elements.
Copper’s thermal conductivity speeds warm-up and promotes even heat distribution, while the sealed hydronic circuit minimizes maintenance. These units suit multi-towel storage and longer seasonal use, but require professional installation, potential boiler compatibility checks, and occasional bleeding.
For homeowners prioritizing efficiency and cohesion with central systems, hydronic copper warmers present a durable, low-running-cost option.
Finishing Copper: Polish, Patina, and Lacquers
When exposed to air and handling, copper changes appearance and can be finished to emphasize shine, develop color, or preserve its state. The choice of finish affects look and longevity: buffing yields bright reflectivity, chemical patinas introduce greens or browns, and clear lacquers lock a surface immediately.
Application technique matters; care in preparation, even strokes, and curing produce consistent results. Consider intended purpose—decorative pieces accept aggressive patination; visible plumbing benefits from polished or lacquered clarity.
- Polish: mechanical or paste polishing for mirror sheen.
- Patina: controlled chemical or natural aging for color.
- Lacquer: protective film to freeze appearance.
- Blend: combine methods for depth.
Preventing Corrosion & Verdigris (Coatings & Maintenance)
Coated with the right materials and maintained on a schedule, copper installations resist corrosion and the formation of verdigris while retaining planned appearance and function.
Protective clear lacquers, waxes, or polyurethane sealants create barriers against moisture and pollutants; choose UV-stable products for indoor displays near windows.
Periodic cleaning with mild, nonabrasive cleaners removes contaminants before they etch the surface; avoid acidic or ammonia-based cleaners that accelerate oxidation.
Touch-up coatings after scratches prevent localized corrosion.
For plumbing, use approved internal linings and inspect joints annually for leaks or discoloration.
A documented maintenance routine guarantees longevity and predictable aesthetic outcomes.
Weatherproofing Copper Projects for Outdoor Use
Weatherproofing copper projects for outdoor use requires attention to sealant and coating options that block moisture while preserving the metal’s appearance.
It also involves protecting fasteners and joints with compatible materials or sleeves to prevent crevice corrosion and loosening.
Regular seasonal maintenance—inspecting seals, reapplying coatings, and tightening or replacing compromised hardware—ensures long-term durability.
Sealant And Coating Options
For outdoor copper projects, selecting the right sealant or coating is essential to control patination, prevent corrosion at joints, and extend the piece’s lifespan without compromising its appearance.
Options vary by finish and exposure. Clear lacquers preserve shine; waxes and oils slow patina while allowing natural aging; acrylics and polyurethanes offer durable, UV-resistant films; and specialized copper sealers inhibit verdigris chemically.
Surface preparation—cleaning and degreasing—ensures adhesion. Reapplication schedules depend on environment.
Test a small area first to confirm color and texture. Consider reversibility for decorative pieces and compatibility with any future finishes.
- Clear lacquer
- Wax/oil
- Acrylic/polyurethane
- Copper-specific sealer
Fastener And Joint Protection
After selecting sealants or coatings, attention turns to protecting fasteners and joints where moisture, electrolytic reactions, and movement most commonly cause failure. Stainless steel or brass fasteners reduce galvanic corrosion; isolating washers and anti-seize compounds further prevent contact deterioration. Flexible joint materials accommodate thermal movement; adhesive-lined heat-shrink tubing seals threaded connections. Proper drainage and slight slope at joints discourage standing water. Visual inspection points — crevice, overlap, fastening head — guide placement of barriers and corrosion inhibitors. Example imagery:
| Fastener | Barrier | Condition |
|---|---|---|
| Brass screw | Washer + sealant | Dry seat |
| Copper lap | Tape wrap | Tight overlap |
Seasonal Maintenance Tips
Regularly inspecting exterior copper installations before seasonal shifts helps prevent moisture, freeze-thaw damage, and accelerated corrosion.
Routine checks reveal seal failures, loose mounts, or verdigris early.
Protective coatings, like clear lacquer or wax, reduce patination while allowing inspection.
Drainage and insulation guard against ice expansion in pipes and decorative elements.
Storage or cover during harsh months prolongs life.
- Clean contacts and fittings; replace compromised seals.
- Apply UV-resistant clear coat after surface preparation.
- Add removable insulation or heat tape to vulnerable runs.
- Secure mounts and add drainage paths to avoid standing water.
Combining Wood & Copper for Mixed‑Material Furniture
Blending warm wood tones with copper’s metallic sheen produces furniture that balances rustic comfort and industrial edge, creating pieces that read as both handcrafted and contemporary.
Designers often pair solid hardwood tops with copper pipe legs or braces, using visible fittings as intentional accents rather than hiding joints.
Copper resists corrosion and develops a patina that complements aging wood; sealing choices control contrast.
Lightweight copper tubing enables delicate profiles for shelving, tables, and benches while providing surprising strength when properly braced.
Care considerations include avoiding direct contact with acidic finishes and planning attachment points to prevent stress and movement over time.
Upcycling Old Copper Pipe Into Craft Accents
When repurposed into small-scale accents, old copper pipe lends crafts a warm metallic patina and structural simplicity that suits both modern and rustic aesthetics.
It adapts readily to small projects: trimmed lengths become geometric napkin rings, stub sections form taper holders, and thin slices create textured coasters.
Surface treatments—light sanding, chemical patination, or clear sealing—alter color and sheen without complex tools.
Joints can be soldered or joined with adhesive for clean lines.
Reclaimed pieces emphasize sustainability and tactile contrast in interiors, offering approachable DIY opportunities that transform scrap into refined, functional decorative details.
- Geometric napkin rings
- Taper holders
- Textured coasters
- Mini planters
Cost Guide: Budgeting for Copper Pipe Projects
After outlining small decorative uses for reclaimed copper pipe, attention turns to planning and costs for projects of varying scale.
The guide separates materials, fittings, tools, and finishes into predictable line items. Material quantities and pipe diameter drive base cost; fittings and connectors add fixed expense. Tool purchases (saws, deburring tools, soldering or press kits) represent one-time investments that should be amortized across projects. Labor estimates vary: DIY time should be valued realistically, while contractor rates differ by region. Contingency of 10–20% covers waste and unexpected fittings. A sample budget framework helps compare design choices and keep projects on target.
Where to Source Copper Pipe Affordably and Ethically
Although reclaimed copper offers both cost savings and environmental benefits, sourcing pipe affordably and ethically requires a deliberate mix of suppliers and scrutiny: reputable salvage yards, plumbing supply houses with certified recycled stock, and community reuse networks often provide the best balance of price and provenance. Buyers should verify chain-of-custody, inspect for contaminants, and compare unit pricing against new stock. Local regulations and intended application (potable water vs. décor) affect acceptable sources. Consider warranties, return policies, and cutting fees when calculating value.
- Salvage yards and architectural recyclers
- Certified recycled plumbing suppliers
- Community reuse exchanges
- Local classifieds and tradespeople
Common Mistakes to Avoid With Copper Pipe Projects
Start projects with a clear plan to prevent common pitfalls that waste time and money.
Common mistakes include using the wrong pipe type or wall thickness for the intended load, underestimating fittings and fasteners, and ignoring required codes for pressurized systems.
Cutting and joining without proper tools causes leaks and weak joints.
Overbending pipe weakens structure; inadequate support leads to sagging.
Mixing incompatible metals without isolation invites galvanic corrosion.
Skipping test runs or pressure checks misses defects early.
Poor surface preparation and wrong finishes produce uneven appearance or adhesion failure.
Anticipating these issues improves safety, function, and longevity.
Maintenance Checklist to Keep Copper Pieces Looking New
Proper upkeep prevents many problems that arise during installation and use, so a concise maintenance checklist helps keep copper pieces looking new and functioning well.
Regular cleaning removes grime and prevents patina where undesired; use mild soap and soft cloths.
Inspect joints and fittings monthly for leaks or corrosion and tighten or replace as needed.
Apply a protective wax or lacquer sparingly to decorative pieces to slow oxidation.
Avoid abrasive cleaners and harsh chemicals that damage finishes and solder.
Record dates of major inspections and treatments to track longevity and schedule future maintenance efficiently.
- Clean gently
- Inspect fittings
- Protect finish
- Log maintenance
Tools & Techniques Recap: What to Master First
When learning copper work, focus first on a small set of foundational tools and techniques that deliver the biggest safety and quality gains: a reliable tubing cutter, quality soldering torch, flux, lead-free solder, deburring tool, and a set of appropriate fittings, paired with mastering clean joints, correct heat control, and proper flux application.
Practitioners should prioritize accurate measuring and square cuts, thorough deburring and cleaning, consistent solder flow, and controlled heating to avoid overheating.
Safe ventilation and eye protection are nonnegotiable.
Repetition on simple joints builds competence faster than complex assemblies.
A toolkit kept organized and maintained supports reliable results.
Inspiring Project Gallery & Next Steps to Try
With a handful of mastered techniques and basic tools, a wide range of practical and decorative copper projects becomes attainable; the gallery that follows highlights straightforward builds—simple shelving brackets, exposed-pipe light fixtures, minimalist towel racks, and small planters—that reinforce core skills while offering room for creative variation.
Presented pieces demonstrate joint methods, finishing choices, and mounting strategies, guiding makers from one-off accents to cohesive room treatments. Viewers are encouraged to adapt scale, patina, and mixed materials. Suggested next steps focus on safe soldering practice, fixture wiring basics, surface sealing, and small-scale prototyping before committing to larger installs.
- Practice solder joints and clean finishing
- Try a bedside exposed-pipe lamp
- Build a modular shelving run
- Prototype a sealed countertop planter
Conclusion
Whether used for supply lines, radiant heat, or as sculptural décor, copper pipe proves both practical and poetic, a backbone and a braid in one. Its durability and thermal performance outshine many plastics, while varied types and simple tools invite DIYers into confident practice. By avoiding common mistakes, observing safety, and keeping a steady maintenance rhythm, homeowners can let copper’s warm glow age gracefully—transforming ordinary projects into lasting statements.