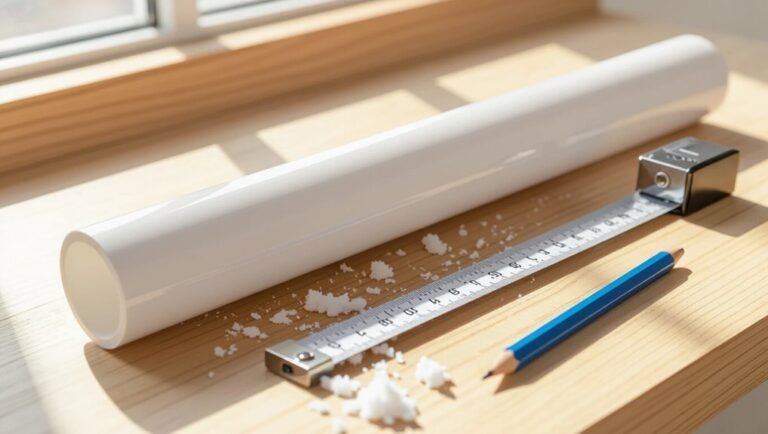
PEX Pipes Explained: Uses, Benefits & Installation Tips for Homeowners
PEX pipes are a versatile solution for both hot and cold water systems, radiant heating, and appliance connections. They are made from flexible, cross-linked polyethylene, offering advantages such as resistance to corrosion and scale, reduced fittings and labor, and better tolerance to freeze cycles compared to rigid pipes. There are three types of PEX (A, B, and C) that vary in flexibility and fitting methods. Proper installation requires adequate support, compatible fittings, and pressure testing to prevent leaks. With a lifespan of several decades under normal conditions, this guide will help you effectively plan, size, and test a dependable PEX plumbing system.
Quick Answer: Should You Use PEX Plumbing?
Deciding whether to use PEX plumbing depends on factors like budget, installation complexity, local code, and the specific application.
The concise answer: PEX is often suitable for residential repiping, new construction, and retrofits due to flexibility, freeze resistance, and lower material and labor costs.
It is less appropriate where codes prohibit it, in exposed UV environments, or where copper’s long-term durability and thermal properties are prioritized.
Consider water chemistry, fixture compatibility, and necessary fittings.
A cost-benefit assessment and consultation with a licensed plumber or local inspector guarantees compliance and determines whether PEX meets performance and longevity requirements for the project.
What Is PEX Plumbing and How It Works
PEX (cross-linked polyethylene) is a flexible plastic piping system created by chemically bonding polyethylene molecules to improve strength and heat resistance.
It transports hot and cold water through continuous runs, using fittings and manifolds to branch lines. Flexibility reduces joints, minimizes leak points, and allows easier routing around obstacles.
Installed with crimp, clamp, or expansion fittings, connections rely on mechanical compression or controlled deformation rather than solvent welding. PEX resists corrosion and scale, maintains thermal stability, and dampens noise.
It works within standard plumbing systems, compatible with common fixtures and water heaters when installed to manufacturer and local code specifications.
PEX Types: PEX‑A, PEX‑B, PEX‑C (Differences and Pros)
After outlining how cross-linked polyethylene functions in plumbing systems, attention turns to the three major manufacturing methods that produce PEX‑A, PEX‑B, and PEX‑C, each yielding different material properties and installation behaviors.
PEX‑A (peroxide method) is the most flexible, resists kinking, and recovers shape when expanded, making it ideal for expansion fittings.
PEX‑B (silane method) is stiffer, more affordable, and commonly used with barb fittings; it offers good chemical resistance.
PEX‑C (electron beam) sits between A and B in flexibility and cost.
Each type meets standards, so selection depends on fitting systems, budget, and installer preference.
Where to Use PEX in Your Home (Supply, Radiant Heat, Appliances)
PEX tubing is commonly used for domestic water supply lines because of its flexibility, corrosion resistance, and ease of installation.
It is also a preferred choice for radiant floor heating systems due to its ability to circulate warm water efficiently and withstand repeated thermal cycles.
Additionally, PEX is suitable for appliance connections—such as dishwashers, refrigerators, and water heaters—where short, flexible runs simplify hookups.
Water Supply Lines
In many homes, PEX is chosen for water supply lines because it combines flexibility, resistance to corrosion, and easier installation compared with rigid piping.
It serves cold and hot potable water runs, trunk-and-branch systems, and manifold-based home distributions.
Fewer fittings reduce leak points; long continuous lengths navigate joists and studs without soldering or threading.
PEX tolerates freezing better than copper, easing winter risk where applicable.
Compatibility with common connectors and codes enables retrofit and new construction use.
Proper support, protection from UV, and adherence to local plumbing codes guarantee reliable service life and maintain potable water safety.
Radiant Floor Heating
Installing radiant floor heating with cross-linked polyethylene offers an efficient, quiet way to distribute low-temperature heat evenly throughout living spaces.
PEX tubing is flexible, resists corrosion, and tolerates repeated thermal cycling, making it ideal for embedded slab or staple-up installations. Its continuous runs minimize joints, lowering leak risk and simplifying manifolds and zoning.
Proper insulation, spacing, and layout guarantee uniform warmth and system efficiency. Contractors favor oxygen-barrier PEX for compatibility with closed-loop hydronic systems.
Routine checks of manifold connections and pressure tests before covering are essential. Thoughtful design balances comfort, response time, and energy consumption.
Appliance Connections
After outlining radiant floor applications, the discussion turns to appliance connections, where PEX serves as a practical option for many domestic fixtures. PEX reliably supplies dishwashers, refrigerators with ice makers, and washing machines, offering flexibility, fewer fittings, and resistance to corrosion. Installers favor PEX for concealed runs and connections that require vibration absorption. Temperature and pressure ratings must match appliance requirements; adapters and shutoff valves remain essential. Local codes may restrict PEX near exposed appliance areas. Properly supported, labeled, and routed PEX delivers durable, low-maintenance service for modern household appliances.
| Appliance | Typical Connection | PEX Advantage |
|---|---|---|
| Dishwasher | Hot/Cold branch | Flexibility |
| Refrigerator | Cold feed | Fewer fittings |
| Washing Machine | Hot/Cold | Vibration damping |
Why Homeowners Choose PEX Over Copper or PVC
Compared with copper or PVC, many homeowners favor PEX for its combination of cost-effectiveness, flexibility, and ease of installation. PEX reduces material and labor costs, requiring fewer fittings and faster runs.
Its flexibility allows long, continuous lengths that minimize joints and leak points, and it navigates obstructions with simple bends. Thermal properties resist freezing damage better than rigid alternatives, while quieter flow and lower heat loss improve comfort and efficiency.
Compatibility with common fittings and retrofitting systems simplifies upgrades. Overall, homeowners often select PEX for practical savings, installation speed, and adaptability in varied plumbing scenarios.
Pros and Cons of PEX for Home Plumbing
PEX offers a balance between durability and flexibility that makes it attractive for many residential plumbing applications.
Its resistance to corrosion and freeze-related damage contrasts with concerns about long-term chemical exposure and maximum service temperatures.
The following discussion compares these strengths and limitations to help homeowners assess suitability.
Durability vs. Flexibility
In balancing the needs of a modern home, homeowners and plumbers weigh durability against flexibility when choosing piping materials. PEX offers resilience to impact and freeze-thaw cycling while its suppleness simplifies routing and reduces fittings. Tradeoffs include potential for abrasion where pipes rub and reduced stiffness that can complicate long unsupported runs. Life-cycle costs often favor PEX due to fewer joints and faster installation, but attention to proper support and protection preserves longevity.
| Advantage | Concern |
|---|---|
| Flexible routing reduces fittings | Needs protection from abrasion |
| Freeze resistance lowers burst risk | May require more supports |
Chemical & Temperature Limits
While flexibility and durability address mechanical performance, chemical resistance and temperature limits determine where and how PEX can be safely used in a home’s plumbing system.
PEX resists many common chemicals but degrades with prolonged exposure to strong solvents, oils, and certain disinfectants. Temperature ratings typically allow continuous use up to about 180°F for short periods and 200°F brief exposure; long-term pressures decrease at elevated temperatures. Installers must follow manufacturer specs for hot water heaters and outdoor exposure.
Considerations include water chemistry, additives, and UV sensitivity.
Key points:
- Maximum continuous temperature limits
- Vulnerability to specific chemicals
- Reduced pressure ratings at high heat
- No UV exposure
How to Tell PEX Pipe From Copper, CPVC, and PVC
Color, texture, and fittings provide the quickest clues when distinguishing flexible cross-linked polyethylene from metal or rigid plastic pipes. PEX is typically red, blue, or white, smooth, and pliable; fittings use push-fit, crimp, or expansion rings.
Copper is metallic, rigid, and shows soldered or compression joints.
CPVC is cream or off-white, rigid, slightly matte, and glued or solvent-welded at joints.
PVC is bright white or gray, rigid, and commonly uses solvent-welded fittings with thicker walls.
Markings printed along pipe indicate material and pressure ratings, offering definitive identification when visible.
Choosing PEX Pipe Size for Fixtures and Runs
For selecting PEX pipe sizes for fixtures and runs, consider flow requirements, pressure loss, and code minimums to match tube diameter with planned use. Homeowners should match fixture unit demand to common PEX sizes: 1/2″ for individual fixtures, 3/4″ for short multiple-fixture branches, 1″ or larger for mains feeding several runs.
Longer runs require upsizing to offset friction loss. Local plumbing codes and manufacturer charts guide acceptable minimums and maximum run lengths. Use conservative sizing where water delivery or future fixtures matter. Consult a licensed plumber for complex layouts or marginal pressure situations.
- 1/2″ for single fixtures
- 3/4″ for short branches
- 1″ for mains
- Upsize for long runs
Calculate PEX Lengths and Fittings for Your Project
Begin by measuring each run from the manifold or supply source to the fixture, following the planned routing and accounting for bends, rises, and drops so that total PEX length reflects the actual installed path.
Add lengths for stub-outs, appliance connectors, and extra for service loops or future adjustments.
Count fittings per run—tees, elbows, couplers—and include appropriate allowance for adaptor to existing plumbing.
Convert measurements to linear feet (or meters) and round up to avoid shortages.
Create a materials list with total PEX length, number and type of fittings, and spare sections to cover cutting errors or unexpected changes during installation.
Tools and Fittings for PEX Installation
With lengths and fittings tallied, attention shifts to the tools and connectors that turn planning into a secure PEX system. Essential tools include crimpers, expansion kits, cutters and deburring tools; each guarantees reliable joints and clean runs. Quality fittings—crimp rings, barbed fittings, and push-to-connect options—match system type and installer skill. Proper tool selection reduces leaks, speeds installation, and preserves warranty compliance. Safety gear and measuring tools complete the kit.
Common choices:
- PEX crimper or cinch tool
- Expansion tool (for PEX‑A)
- Tubing cutter and reamer
- Push‑to‑connect fittings and spare rings
Manifold vs Trunk‑and‑Branch: Choose the Best Layout
Two common PEX distribution strategies—manifold (home‑run) and trunk‑and‑branch—offer distinct tradeoffs in materials, labor, and performance.
The manifold layout runs individual PEX lines from a central manifold to each fixture, maximizing flow control, ease of isolation, and minimal pressure loss; it uses more tubing and requires manifold space.
Trunk‑and‑branch uses a main supply line with lateral branches to fixtures, reducing tubing and initial cost but increasing shared flow paths and potential pressure/temperature variation under demand.
Choice depends on budget, space, fixture count, and desired serviceability; contractors weigh long‑term convenience against upfront material and installation expense.
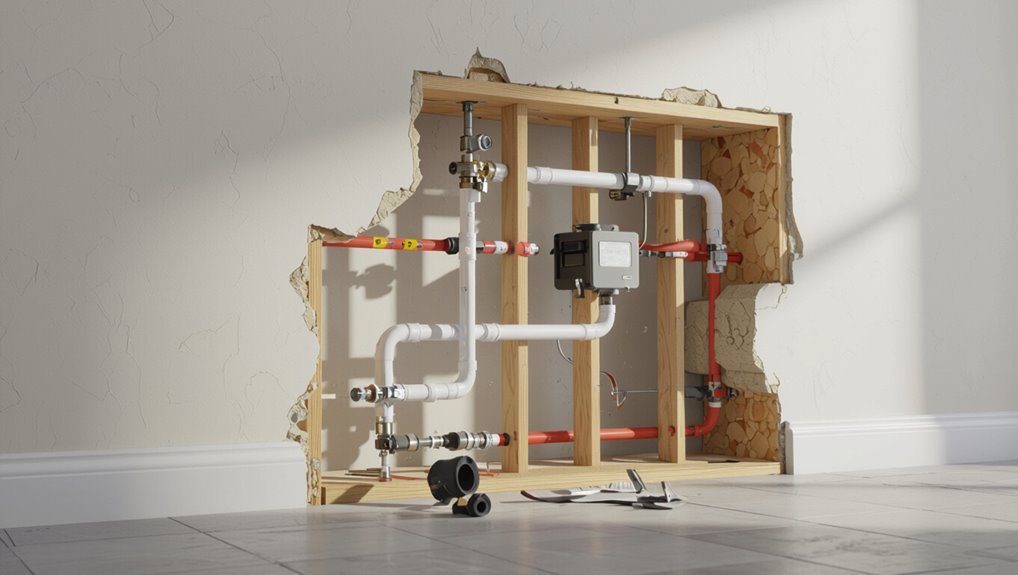
Step‑by‑Step: Install a PEX Supply Run
When preparing a PEX supply run, the installer first verifies the route, measures required lengths, and gathers fittings and tools so the work proceeds efficiently.
The installer cuts PEX squarely, deburrs if needed, and dry-fits runs to avoid twists.
Supports are spaced per code, thermal expansion loops planned, and changes to other materials anticipated.
Pressure-test the assembled run before concealment, correct leaks, then secure and label lines for future access.
- Cut PEX with a proper cutter for clean ends
- Use supports and clamps at specified intervals
- Maintain gentle bends; avoid kinking
- Perform a pressure test prior to concealment
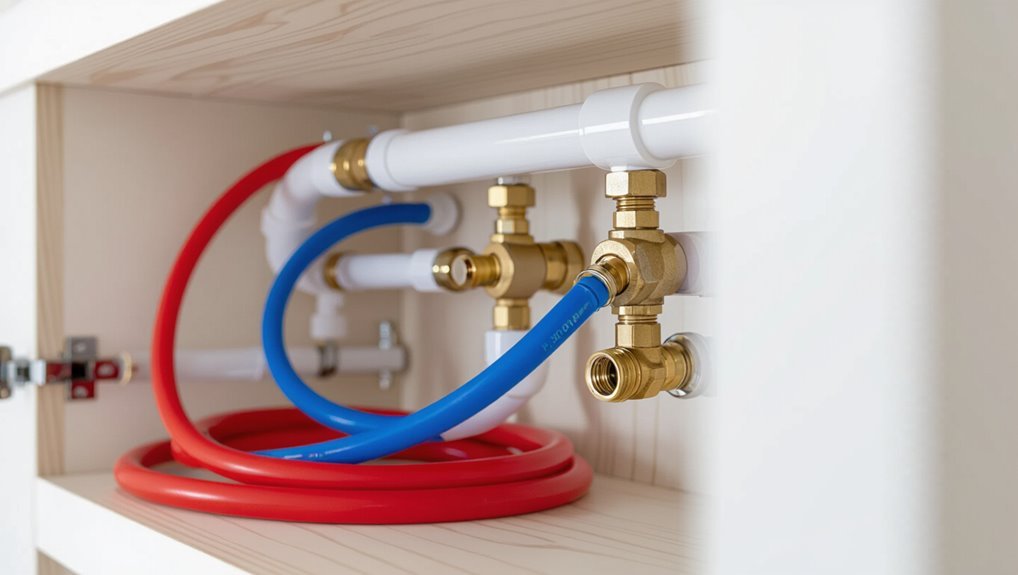
Connecting PEX to Valves, Fixtures, and Appliances
After a successful pressure test and secure routing of the supply run, attention turns to making reliable connections to valves, fixtures, and appliances.
Installers verify fittings match pipe size and system pressure ratings, using appropriate adapters where metal threads or sweat connections are present. PEX ends are cut square, deburred, and inserted fully into fittings to guarantee seals. Shutoff valves are mounted with support and accessible orientation. For appliances, incorporate manufacturer-recommended connectors and strain relief where required.
After connections, a focused leak check at each point confirms integrity before insulation and final trim work, maintaining code compliance throughout.
Crimp vs Clamp vs Expansion Connections : Which to Use
In choosing between crimp, clamp (cinch), and expansion connections for PEX, the installer balances tool availability, local code acceptance, ease of installation, and the specific PEX type being used.
Each method has distinct fittings, failure modes, and installer learning curves; selection depends on project scale and access.
Common considerations include inspection visibility, reworkability, and long-term reliability under expected pressures.
- Crimp: simple tools, visible testable rings.
- Clamp (cinch): faster, adjustable, works well with limited space.
- Expansion: reliable for some PEX-A, needs expansion tool.
- Code: always verify local approvals.
Working With PEX in Cold Climates and Freeze Prevention
Selecting the appropriate connection method for PEX also affects performance in cold climates, since joint types and installation details influence vulnerability to freezing and frost heave. PEX flexibility resists burst risk, but installers should allow slope, insulation, and controlled expansion. Maintain indoor line access, keep lines away from exterior walls, and use heat tape where code permits. Drain and isolate outdoor fixtures before winter. Monitor water pressure and avoid trapped pockets that freeze. Visualize placements and protections:
| Location | Insulation | Freeze Risk |
|---|---|---|
| Crawlspace | Foam wrap | Moderate |
| Exterior wall | Cavity fill | High |
| Garage | Pipe sleeve | Low |
Common Installation Mistakes and How to Avoid Them
When installed correctly, PEX delivers durable, flexible plumbing; however, common mistakes—improper fittings, incorrect pipe support, inadequate expansion allowance, and poor insulation—regularly undermine system reliability. Installers should select compatible fittings, tighten to specified torque, and avoid over‑crimping.
Support spacing must follow code to prevent sag and stress at connections. Allow for thermal expansion with loops or expansion fittings to prevent buckling.
Insulate lines in unconditioned spaces and near fixtures to reduce freezing risk and heat loss. Regularly check tubing for kinks and replace damaged sections.
Clear labeling and thoughtful routing simplify future maintenance and reduce accidental damage.
- Use correct, compatible fittings
- Maintain proper support spacing
- Provide expansion allowance
- Insulate and protect tubing
Inspecting and Pressure‑Testing a PEX System
Before pressurizing the system, a thorough visual inspection should confirm proper fittings, secure supports, correct routing, and absence of kinks, cuts, or contaminants in the tubing; any issues must be corrected to prevent leaks or premature failure.
A calibrated pressure gauge and pump are used to raise the system to test pressure per code, typically 50–150 psi, then isolate and monitor.
Maintain the test pressure for the required duration, often 15–30 minutes, watching for drops.
Check all joints and connections for visible leaks and listen for hissing.
Document results and repair any failures; retest after repairs.
PEX Maintenance Checklist and Expected Lifespan
A concise maintenance checklist helps preserve PEX performance and extends service life by guiding routine inspections and minor repairs.
Typical tasks include checking for visible leaks, ensuring fittings remain secure, and verifying insulation and UV protection where applicable.
Manufacturers and industry sources generally estimate PEX lifespan at 25–50 years under normal conditions, with variations depending on installation quality and water chemistry.
Expected Lifespan Estimates
Estimates for PEX pipe lifespan typically range from 25 to 50 years under normal residential conditions, though actual longevity depends on water chemistry, installation quality, and exposure to UV or high heat.
Expected service life varies by material type (PEX-A, -B, -C), system pressure cycles, and whether fittings were properly installed. Manufacturers often provide warranties reflecting controlled conditions rather than real-world variables. Owners should track factors that affect durability and plan replacements accordingly.
- PEX-A: higher flexibility, often longer service expectancy
- PEX-B/C: durable but less forgiving of stress
- Aggressive water: shortens lifespan
- UV or heat exposure: accelerates degradation
Routine Inspection Tasks
Regularly scheduled inspections help make certain PEX systems meet expected lifespans by catching wear, leaks, and installation faults early.
Inspectors should check visible piping for soft spots, kinks, discoloration, frost damage, and secure fittings.
Pressure-test accessible runs and monitor for pressure drops.
Review manifolds, clamps, and expansion loops for corrosion or movement.
Verify insulation integrity in unconditioned spaces and confirm ambient temperatures remain within manufacturer limits.
Flush and sample water where chemical exposure is suspected.
Document findings, corrective actions, and dates.
Routine records support warranty claims and inform replacement timing, helping predict whether pipes approach their expected service life.
Health, Taste, and Chemical Concerns With PEX
Often scrutinized by homeowners and health agencies, PEX pipe has prompted questions about taste, odor, and potential chemical leaching into drinking water.
Studies show most PEX formulations meet safety standards, but initial odors or slight plastic taste can occur after installation. Water quality can be influenced by pipe brand, water chemistry, and stagnation time.
Recommended practices reduce risks and sensory issues:
- Flush new PEX lines thoroughly before use
- Choose certified PEX (NSF/ANSI 61) to limit contaminants
- Monitor for changes in odor or taste over time
- Use filtration if specific contaminants are a concern
Local Permits, Codes, and When to Call a Pro
Local building permit requirements and specific plumbing codes determine when PEX installation must be permitted and inspected.
These regulations vary by jurisdiction and affect allowable materials, fittings, and installation methods.
For complex projects or unclear code interpretations, hiring a licensed plumbing professional guarantees compliance and reduces risk of costly rework.
Building Permit Requirements
When installing PEX piping, homeowners and contractors must account for building permits, applicable plumbing codes, and situations that require licensed professionals; requirements vary by municipality and can affect inspection schedules, material approvals, and allowable installation methods.
Permit applications typically demand scope, plans, and fee payment.
Inspections confirm support, connections, and protection against freezing or chemical exposure.
Some jurisdictions permit homeowner work; others mandate licensed plumbers for mains or complex alterations.
Failure to obtain permits risks fines and insurance denial.
- Confirm permit type before starting
- Prepare clear plans and specs
- Schedule inspections proactively
- Hire a licensed pro when required
Local Plumbing Codes
Permit requirements naturally lead to the next consideration: municipal plumbing codes and when a licensed professional must be involved.
Local codes dictate accepted materials, permitted PEX types, connection methods, support spacing, and maximum runs. Compliance guarantees safety, water quality, and insurance validity.
Homeowners should consult jurisdictional codebooks or building department resources before planning work. Inspections may be required at rough-in and final stages.
When code language is ambiguous, or when alterations affect firestops, backflow prevention, or pressure systems, engagement of a licensed tradesperson guarantees correct interpretation and documented compliance, avoiding fines or failed inspections.
Hiring A Licensed Pro
Engage a licensed plumbing professional whenever a project triggers permit requirements, complex code interpretations, or work that affects safety systems. A qualified pro guarantees compliance with local permits, deciphers code changes, and verifies materials and methods for PEX installations. Homeowners benefit from documented inspections, warranty protections, and reduced liability when permits are properly obtained.
Call a licensed plumber for whole-house repipes, changes to gas or main water lines, or when required by municipality rules. Obtain written estimates, check license and insurance, and confirm jurisdictional approval before work begins.
- Permit filing and inspection
- Code interpretation
- Complex system changes
- Warranty and liability protection
Conclusion
In the end, PEX quietly bends through walls and floors as if it always belonged, while skeptics clutch copper pipes like relics. Homeowners find flexible tubing doing the heavy lifting — resisting corrosion, easing installs, and even warming cold toes via radiant heat — all without fanfare. Ironically, the future of plumbing looks less like rigid metal and more like supple tubing, proving that reliability can arrive in soft, plastic curves rather than triumphant, clanging pipes.