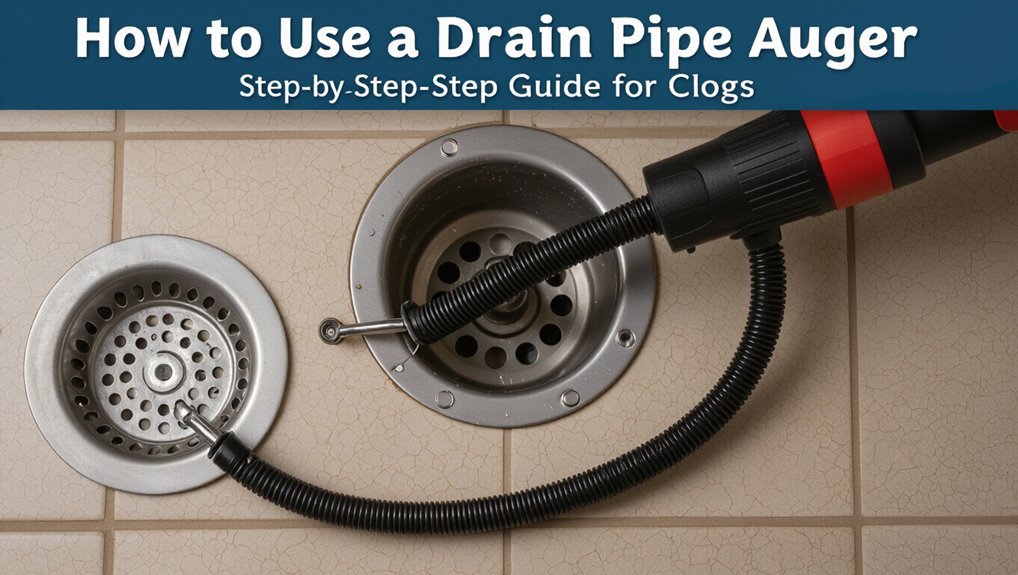
How to Use a Drain Pipe Auger: Step-by-Step Guide for Clogs
To effectively use a drain pipe auger for clearing clogs, follow these steps: Wear gloves and eye protection, remove the stopper or clean-out, and select the appropriate auger type. Insert the flexible cable slowly into the fixture, turning it clockwise when you encounter resistance. If you feel a blockage, back off slightly and then advance again to break up or snag the obstruction. Once you’ve engaged the debris, crank the auger counterclockwise while gently pulling to retrieve the material. Afterward, flush the drain with hot water and clean your auger tool. For detailed tips and safety precautions, continue reading.
How to Snake a Drain: Quick Step‑by‑Step

Begin by preparing the work area and gathering a drum or hand auger, gloves, and safety glasses; once ready, remove the sink stopper or clean‑out plug to expose the drain opening.
Feed the auger cable slowly into the drain while turning the handle clockwise.
When resistance is felt, rotate and push gently to engage the obstruction. Retract slightly, then advance again to break or snag debris.
Once movement eases, crank the cable counterclockwise while pulling to retrieve buildup.
Flush the drain with hot water to confirm flow.
Clean and dry the auger, dispose of waste properly, and store tools safely.
Who This Guide Is For and What It Covers
Typically aimed at homeowners and DIYers with basic tool experience, this guide also suits renters, maintenance staff, and anyone facing common sink or shower clogs who prefers a manual solution over chemical cleaners or calling a plumber.
It outlines safe, practical use of a hand auger, necessary precautions, basic troubleshooting, and cleanup steps.
The tone is concise and instructive, avoiding jargon while assuming familiarity with simple hand tools.
It does not cover advanced drain work or specialized powered equipment.
Readers will gain confidence to handle routine clogs reliably and efficiently.
- Relief at restored flow
- Pride in self-reliance
- Frustration turned solve
- Calm control
When a Drain Auger Is the Right Tool
Recognize a drain auger as the right choice when a clog resists a plunger, smells persistent, or when slow drainage suggests a localized obstruction within a few feet of the fixture.
A hand or drum auger reaches sinks, tubs, and shower traps; a closet auger addresses toilet blockages.
Choose an auger when water pools despite chemical treatments or when visible debris or hair likely causes the stoppage.
It suits DIYers comfortable feeding cable and retrieving material, and professionals needing a focused mechanical solution.
Proper size and tip type improve effectiveness.
Use caution to avoid pipe damage and follow manufacturer instructions.
When Not to Use a Drain Auger
When is a drain auger inappropriate? A drain auger should be avoided when risks outweigh benefits: fragile or corroded pipes, sewage backups indicating main-line failure, fixtures with delicate finishes, or when chemical drain cleaners were recently used. Attempting auger use in these situations can worsen damage, cause injury, or void warranties.
- Fear of causing pipe collapse or cracks
- Anxiety about contaminating living spaces with sewage
- Frustration over ruining fixtures’ finishes
- Uncertainty after chemical treatments made conditions unpredictable
In such cases, consulting a professional plumber or alternative methods is the prudent course.
Drain Auger Types and Which to Choose
Having established situations where an auger should be avoided, the next consideration is selecting the right type for the job.
The common choices include hand-held drum augers for short sink or tub clogs, closet augers tailored for toilets, and long-reach cable augers for deep line blockages.
Specialty options like accordion-style sink snakes and sectional sewer machines address tight traps or mainline issues.
Materials, cable thickness, and tip design influence durability and effectiveness.
Selection depends on pipe length, diameter, access constraints, and clog nature.
Renting heavy-duty machines suits infrequent, severe obstructions while basic augers fit routine household clogs.
Manual vs. Powered Augers: Pros and Cons
Choose between manual and powered augers by weighing control, effort, and scope: manual augers offer tactile feedback, low cost, and simple maintenance but require more physical exertion and are best for short, accessible clogs; powered augers deliver greater torque and reach for deep or stubborn blockages yet cost more, demand cautious handling, and risk pipe damage if misused.
A clear choice aligns with clog severity, budget, and confidence.
- Relief when a manual twist clears a kitchen sink.
- Frustration eased by a motor conquering a tough clog.
- Anxiety over potential pipe harm with power.
- Satisfaction from saving money and time.
Drum, Sectional, and Toilet Augers Explained
The section compares three common auger types and their appropriate uses. A drum auger is described for clearing long stretches of pipe with a stored coiled cable, while sectional snakes are noted for extending into deeper lines using joined rods. A toilet auger is presented as a compact, protected tool designed specifically to clear traps without damaging porcelain.
Drum Auger Uses
Drum augers, sectional augers, and toilet augers each serve specific roles in clearing clogs: drum augers are compact, spring-fed reels best for medium-length household drains; sectional augers extend through interlocking rods for deeper municipal or sewer lines; and toilet augers feature a protective sheath and angled shaft designed to navigate the trap without damaging porcelain.
Drum auger uses focus on sinks, bathtubs, and floor drains where access is limited and flexibility is needed. They retrieve hair, soap buildup, and small debris, reducing chemical reliance. Benefits include portability, quick deployment, and controlled reach.
- Relief when a sink clears
- Confidence in DIY fixes
- Satisfaction from restored flow
- Calm after mess averted
Sectional Snake Details
Moving from compact, spring-fed reels to longer-reach equipment, sectional snakes are described by their modular rods that interlock to reach deep blockages in main lines and sewer pipes.
Designed for professional or heavy-duty residential use, they assemble to precise lengths, allowing technicians to adapt reach and stiffness to pipe diameter and obstacle type.
Powered versions mount on carts with reels and motors; manual sets rely on hand-crank rotation.
Interchangeable heads—cutters, flails, or augers—address roots, grease, and debris.
Proper lubrication, steady advancement, and periodic retrieval prevent rod binding.
Storage and rod care extend service life and guarantee safe operation.
Toilet Auger Features
Although smaller in size than sectional snakes, toilet augers bring specialized features tailored to bowls and traps, balancing reach, flexibility, and protection for porcelain surfaces.
The tool’s curved shaft, rubber bumper, and grabber tip reduce scratches while reaching U-bends; a hand-crank mechanism offers controlled torque to break or retrieve obstructions.
Drum augers focus on compact storage and smooth feed, sectional snakes extend for deeper lines, and toilet augers prioritize bowl-safe contact. Selection depends on clog location and user confidence; proper technique minimizes damage and maximizes clearing success.
- Relief when water drains again
- Confidence using the right tool
- Frustration turned into control
- Satisfaction of a clean bowl
Parts of a Drain Auger and What They Do
Composed of a few simple components, a drain auger translates hand or motor input into the torque and flexible reach needed to clear clogs. The cable or coil is a long, flexible shaft that extends into pipes and transmits rotation. The head or tip is shaped for grabbing, cutting, or drilling through obstructions. A drum or reel stores the cable and controls feed and retrieval. The handle, crank, or motor provides rotational force. A clutch or brake prevents overfeed and protects plumbing. Frame or housing supports the assembly. Optional protective boot seals the entry point and reduces mess.
Tools and Supplies to Gather First
Before beginning, gather the basic tools and supplies so the job proceeds efficiently and without interruption. A concise kit prevents delays and frustration while snaking a drain. Essential items include the drain auger itself, replacement cables or heads for different clogs, a bucket to catch debris and water, and plumber’s tape for resealing fittings afterward.
Additional small items—rags, gloves, and a flashlight—help manage mess and visibility. Emotional reassurance comes from preparedness:
- Confidence from a reliable auger
- Relief with spare cables
- Calm knowing a bucket is ready
- Satisfaction in having simple fixes on hand
Safety Gear to Wear When Snaking a Drain
Always wear appropriate protective gear when snaking a drain to reduce the risk of injury and exposure to contaminants.
The person should don chemical-resistant gloves to prevent skin contact with sewage and cleaners, and safety goggles to shield eyes from splashes and debris.
A long-sleeved shirt and waterproof apron protect clothing and skin, while closed-toe, non-slip footwear prevents falls on wet surfaces.
If working in confined or poorly ventilated spaces, a respirator or mask reduces inhalation of fumes and aerosols.
Hearing protection may be warranted with powered augers.
Make certain gear fits properly and is cleaned after use.
How to Locate Cleanouts and Access Points
When preparing to snake a drain, locating cleanouts and access points is essential for efficient, safe entry to the drain line; these are typically found where the building’s waste stack exits the foundation, along exterior walls, in basements, utility rooms, or near the property line, and they may be capped with screw-on or threaded plugs, rectangular access panels, or floor-level covers.
Inspect visible piping runs, check plumbing diagrams, and probe obvious low points. Use a flashlight and feel for removable caps. If unsure, consult building plans or a professional to avoid damage.
- Relief at finding the right spot
- Frustration when blocked
- Confidence once exposed
- Urgency to act
How to Shut Off Nearby Water and Protect the Area
Before beginning work with a drain pipe auger, the operator locates and turns off the nearest shutoff valves to prevent unintended flow.
Nearby fixtures and floors are covered with waterproof sheeting or towels to protect surfaces from spills and splashes.
Clear signage or a temporary barrier is placed to keep others from using affected fixtures during the procedure.
Locate And Turn Off Valves
With the water supply secured, attention shifts to locating and shutting off the nearest valves to prevent unintended flow and limit water damage.
One-person assessment identifies supply lines, gate or ball valves, and accessible shutoffs; a quiet check confirms no residual flow.
Turn valves slowly, noting resistance, and close main fixtures if in doubt.
If a valve leaks or won’t move, stop and call a professional.
- A sudden drip can provoke anxiety.
- A stubborn valve may create frustration.
- Quick, decisive action brings relief.
- Knowing locations restores confidence.
Document valve positions for future emergencies.
Protect Surrounding Surfaces
Around the work area, the operator isolates nearby water sources and shields surfaces to prevent spills and splashes from causing stains or damage.
They close supply valves, shut off adjacent fixtures, and open a nearby tap to relieve residual pressure.
A waterproof drop cloth covers counters and floors; towels absorb drips around the drain.
Tools and the auger are placed on a tray to contain lubricants or debris.
Protective pads guard porcelain and wood edges.
If sewage risk exists, a bucket and disposable gloves are ready.
After clearing the clog, surfaces are wiped, contaminated materials disposed of, and valves restored.
How to Prepare a Sink, Tub, or Floor Drain
When preparing a sink, tub, or floor drain for an auger, the operator first clears visible debris and removes any pop-up stoppers or strainers to allow unobstructed access to the drain opening.
They then place protective coverings on nearby surfaces, position a bucket under the P-trap if accessible, and guarantee adequate lighting. Gloves and eye protection are donned. The work area is kept ventilated and entry points for pets or children are blocked.
- Relief at seeing a clear workspace
- Confidence from proper preparation
- Frustration eased by protective steps
- Anticipation of a successful clear-out
Measure Pipe Length and Pick Cable Size
After clearing the drain area and removing obstructions, the operator assesses how far the auger cable must reach and which cable diameter is appropriate for the pipe.
Measurement uses visible pipe length plus estimated bends to the trap or main line; a tape measure or measuring wheel records straight runs, and allowances are added for elbows.
Cable diameter is chosen by drain size: 1/4–3/8 inch for sinks and lavatories, 3/8–1/2 inch for tubs and showers, larger or sectional cables for main lines.
The operator notes pipe material and access points to make certain chosen cable navigates bends without damaging the line.
How to Feed a Drain Auger Cable Correctly
The operator should set the auger housing squarely at the drain entrance to assure the cable feeds straight and avoids binding.
With a firm grip on the cable, they should advance it steadily, maintaining gentle tension and controlling rotation speed.
If resistance is met, the operator eases back, repositions the cable, and resumes gradual feeding to prevent kinks or damage.
Positioning The Auger Properly
With the auger crouched over the drain, the operator aligns the cable so it feeds straight into the pipe’s centerline rather than at an angle that can bind or kink.
The base sits level, handle accessible, and casing clear of edges. Visual checks confirm unobstructed entry; hands remain steady to prevent sudden torque. Small adjustments correct misalignment before any cable advances. Proper positioning reduces wear, prevents jams, and improves feel during operation. The operator notes posture and tool balance to sustain control and avoid fatigue.
- Relief at smooth insertion
- Confidence in steady alignment
- Frustration avoided by correct setup
- Pride in careful preparation
Feeding Cable With Control
Once alignment is confirmed, the operator advances the cable slowly and deliberately, keeping a firm but flexible grip to sense resistance and prevent sudden torque.
The other hand feeds and guides the cable, maintaining gentle pressure while rotating the drum as needed.
Small, controlled pushes reduce kinking and allow the auger head to navigate bends.
If resistance increases, the operator reverses slightly, twists gently, then resumes forward motion.
Periodic retraction clears debris and prevents binding.
Throughout, visual checks at the entry point confirm smooth travel and prevent damage to the pipe or cable.
Safety gloves and eye protection remain mandatory.
Proper Stance and Grip While Operating
Operators should generally position their feet shoulder-width apart, one foot slightly forward, to maintain balance and absorb torque when feeding and retracting the auger. The torso stays upright, knees slightly bent; arms align with the cable to reduce strain. One hand steadies the drum, the other guides the cable near the drain entrance. Grip remains firm but not rigid to sense movement. Breathing steadying helps control sudden pulls. Proper stance minimizes fatigue and risk.
- Relief when the clog yields
- Confidence handling stubborn lines
- Calm despite sudden twists
- Satisfaction finishing efficiently
How to Tell Resistance From Friction in the Cable
The operator should pay attention to subtle cable movement at the hand to distinguish a free-running line from one encountering obstruction. Noting whether the cable advances smoothly or meets steady rotation resistance helps determine if the issue is simple friction against the pipe or a true blockage.
Controlled feeding and brief reverse rotations provide confirmation before applying more force.
Feeling For Cable Movement
With hands on the auger, a technician should pay close attention to subtle changes in cable movement to distinguish true blockages from normal friction. Hands feel for a sudden firm stop, a brief snag, or smooth glide; each conveys different conditions. Slow, controlled feeding and retraction sharpen these sensations. Attention to rhythm and small vibrations helps identify where a clog grips the cable versus when pipe bends or residue cause drag.
- Relief when the cable slips free
- Frustration at a persistent, unyielding tug
- Confidence from consistent, expected feedback
- Caution when unfamiliar jolts occur
Noting Cable Rotation Resistance
Feel for changes in cable twist to distinguish true resistance from ordinary friction: steady, evenly increasing torque usually signals drag from bends or buildup, whereas a sudden spike in rotation resistance that holds under push or pull indicates the cable encountering a compact obstruction or snagged fitting.
The operator notes baseline resistance while advancing and retracting; friction rises slowly with length or turns, releasing when reversed. A persistent catch that does not ease with shorter strokes, slight rotation reversal, or added feed suggests a lodged clog, coupling lip, or broken pipe piece.
Respond by gently working, avoiding force that kinks or breaks the cable.
Break up Soft Clogs With Slow Turning
Ease the auger into the drain and turn the handle slowly to let the cable work through soft obstructions rather than forcefully tearing or compacting them.
The operator should feel gradual give as hair, grease, or organic residue loosens.
Gentle rotation minimizes pipe damage and prevents pushing the clog deeper.
Pause periodically to retract a few inches, clear debris, and reassess resistance.
If progress stalls, advance a bit then reverse to coax material free.
Maintain steady control and patience; slow work often resolves blockages without escalation.
- Relief as flow returns
- Confidence in careful technique
- Frustration eased by small gains
- Satisfaction in avoided repairs
Pull Back Snagged Solids Safely
Once the auger catches a mass, the operator should retract it slowly and steadily to draw the snagged solids out without shredding or dislodging them further.
Hands maintain a firm, controlled grip on the drum; any jerking risks breaking the bundle apart and pushing fragments deeper.
Pause if resistance spikes, then ease back with micro-adjustments until movement resumes.
Keep a catch basin and gloves ready for hygienic removal once the material clears the trap.
Inspect the cable tip visually before further retraction to confirm a clean pull.
Dispose of debris and sanitize tools and work area promptly.
Use Forward and Reverse Motion Effectively
The operator should recognize when to push the auger forward to break through soft blockages and when to pull back to engage and extract solid obstructions.
Changing direction requires steady, controlled motion and brief pauses to prevent pipe damage or kinking of the cable. Proper switching technique—slow reversal with tension maintained—helps free snags without worsening the clog.
When To Push
When a clog resists rotation, apply short, controlled forward pushes alternating with brief reverses to break it apart without overfeeding the cable; this rhythmic push-and-pull lets the head bite into buildup, then retract slightly to prevent kinking and reduce stress on the auger and the pipe.
The operator gauges resistance: firm pushes when the cable moves smoothly, gentler when tension spikes. Pause when sudden give or stubborn stop occurs, then resume pulsed pressure. Maintain steady body alignment to avoid jerks. Stop if unusual noise or pipe strain appears and reassess.
- Frustration melts with steady progress
- Confidence grows with each inch advanced
- Relief at loosening resistance
- Caution preserves equipment and plumbing
When To Pull
Pull with purpose: operators should use measured forward pushes followed by deliberate reverse motion when tension increases or the head seems to snag, alternating to work the clog free without overfeeding the cable.
When resistance shifts from soft to firm, a controlled pull helps break material loose or draw it toward the auger head.
Short, steady reversals prevent kinking and reduce stress on fittings.
If debris begins to back out, pause and retract slightly to clear the path.
Maintain steady assessment of cable tension and audible feedback; resume gentle advancement only after loosened fragments move freely and the auger operates smoothly.
Switching Directions Properly
Before switching directions, an operator pauses to assess cable tension and listen for changes in resistance. They advance the auger forward to engage the obstruction, then reverse briefly to break compacted material, alternating measured pushes and pulls. Smooth, controlled motion reduces kinking and protects fixtures. Awareness of sound and feel guides timing; abrupt twists signal a need to retract and reorient. After clearing, slow forward feeds confirm flow restoration.
Emotional cues—relief, caution, frustration, triumph—underscore the process:
- Relief when water resumes movement
- Caution during stubborn resistance
- Frustration at repeated snags
- Triumph on final clearance
How to Avoid Damaging PVC and Old Metal Pipes
Taking care with speed and force, a user should treat PVC and aged metal pipes more gently than modern cast-iron systems to prevent cracking, splitting, or loosening joints when using a drain auger.
The operator should retract and advance the cable slowly, avoiding sudden twists or aggressive pushing. Use the smallest suitable cable diameter and avoid over-rotating at bends.
Inspect visible fittings for corrosion or soft spots before starting.
Support exposed pipes to reduce stress on joints.
If resistance is unusually firm or grinding noises occur, stop and reassess; consider hand augering or calling a plumber to avoid irreversible damage.
Clear Hair Clogs From Bathroom Drains
Clear hair clogs require a patient, methodical approach: begin by removing the drain cover and visually evaluating how far hair extends into the opening.
The auger’s flexible cable is fed slowly, feeling for resistance; when hair is encountered, rotate the handle to entangle strands, then withdraw steadily to avoid tearing.
Repeat until flow improves.
Inspect and clean the retrieved material; flush with hot water to clear residual debris.
Wear gloves and eye protection.
Dispose of waste responsibly.
- Frustration eases when progress is visible.
- Relief arrives with each pulled strand.
- Pride follows a job well done.
- Confidence grows for future clogs.
Remove Grease and Soap Buildup in Kitchen Drains
Grease and soap tend to accumulate near the trap and the first few feet of the kitchen drain, where flow slows and solids cling to the pipe walls.
A thorough hot water rinse can soften and flush some buildup before mechanical action is applied.
When residue persists, a drain pipe auger is fed into the line to break up and extract hardened deposits.
Identify Grease Buildup Areas
Kitchen sinks and adjacent drain lines commonly accumulate congealed fats and soap scum, so it is important to locate likely buildup zones before using an auger. A technician inspects trap areas, pipe bends, and low-flow segments, noting greasy sheen, slow drainage patterns, and odor sources. Visual and olfactory cues guide targeted auger work; probing without assessment risks pushing residue deeper. Prioritize accessible junctions and areas with recurring blockages.
Emotional cues help motivate careful action:
- frustration at recurring slow drains
- relief when a stubborn smell is traced
- urgency from visible oily film
- satisfaction in pinpointing the clog source
Use Hot Water Rinse
Frequently, a hot water rinse is the simplest first step to dissolve and flush away accumulated fats and soap scum from kitchen drain lines.
Run the hottest tap water available for several minutes while the sink drain is open; sustained heat softens grease and reduces adhesion to pipe walls.
For stubborn residue, pour a kettle of boiling water directly into the drain in stages, allowing intervals for heat to act and flow to carry loosened material.
Follow with dish detergent and another hot rinse to emulsify oils.
Repeat as needed before proceeding to mechanical methods or enzymatic treatments.
Mechanical Cleaning With Auger
Begin by feeding the auger cable into the drain until resistance is met, then rotate the handle to break up and retrieve compacted grease and soap scum. The operator advances carefully, feeling texture changes and backing out debris onto a rag.
Repeated passes loosen layers; occasional flushing with hot water clears emulsified oils. Caution prevents pipe damage and splashback; gloves and eye protection are advised.
After clearing, inspect flow and repeat if needed. Proper technique restores function and reduces odors.
- Relief when water rushes freely again
- Satisfaction from removing stubborn gunk
- Confidence in preventing recurring clogs
- Pride in a clean kitchen drain
Handle Tree‑Root Intrusions With an Auger
Confronting tree roots in sewer lines requires a measured approach, and a drain pipe auger is often the most direct tool for restoration; its rotating cable and cutting head can slice through fibrous intrusions and clear a path for normal flow.
Operators should confirm pipe material and diameter, begin with a flexible root-cutting head, and advance slowly to avoid snagging. Use steady feed, moderate rotation speed, and periodic retraction to remove debris. Inspect extracted material to assess severity.
After clearing, flush the line with water to wash residues. Repeat passes may be necessary; persistent regrowth requires professional evaluation and longer-term remedies.
Extract Stuck Items Without Pushing Them Farther
When an auger encounters a lodged object, the operator must focus on retrieval techniques that seize and extract the obstruction rather than pushing it deeper into the line.
The operator advances the cable slowly, feeling for resistance shifts that indicate a catch. Gentle retraction with slight rotation often allows the head to grip; abrupt force risks lodging the item farther.
If resistance persists, reverse rotation and small forward nudges can free edges. Withdraw steadily once movement is felt, keeping tension to prevent slippage.
- Alarm at sudden give, relief at progress
- Frustration when it won’t budge
- Tension during careful pulls
- Satisfaction on extraction
How to Know When a Clog Is Fully Cleared
How can an operator be certain the line is clear? The operator observes improved drain flow when water moves freely without gurgling, bubbling, or slow drainage.
Resistance on the auger diminishes and the cable feeds and retracts smoothly without sudden stops. Retrieved debris or consistent, cleaner cable returns indicate progress.
Odors and visible buildup at the access point lessen. No waste material adheres to the cable after several rotations.
If multiple access points are available, runs checked downstream show similar free flow. When these objective signs persist during repeated, gentle probing, the clog can be considered cleared.
Flush and Test the Drain After Snaking
Begin by running a robust flow of water through the line to confirm the blockage is gone and to clear remaining debris. Observe water speed, listen for gurgles, and check for slow drainage. If flow is steady, proceed to test nearby fixtures to verify the clog hasn’t shifted. Note any odors or residual backing-up.
- Relief at clear, fast flow
- Confidence in restored function
- Annoyance if sluggish persists
- Urgency if backups reoccur
Document observations and repeat testing after several minutes. If problems continue, re-snaking or professional help may be required.
Clean and Sanitize the Auger After Use
After confirming the line is clear and nearby fixtures operate normally, attention shifts to cleaning and sanitizing the auger to prevent corrosion and cross-contamination.
Wear gloves and eye protection. Retract the cable fully, wiping debris into a disposable bag. Use a stiff brush and mild detergent or a solution of water and household disinfectant to scrub the cable, drum, and tip. Rinse thoroughly with clean water, avoiding excess soaking of any wooden handles.
Dry the entire tool with clean rags and allow air drying in a ventilated area. Dispose of contaminated rags and wash hands after the procedure.
Store Your Auger to Prevent Rust and Tangles
With the cable cleaned and dried, proper storage prevents rust and tangles while extending the auger’s service life. The tool is coiled loosely, secured to avoid kinks, and kept dry away from humidity. The handle and drum are wiped and inspected; any remaining debris is removed. A light coat of corrosion inhibitor is applied to metal surfaces, not the cable core. Store in a ventilated, elevated spot out of direct sunlight and chemicals.
- Relief knowing it’s ready when needed
- Confidence in a maintained tool
- Pride in orderly storage
- Calm from avoiding future frustrations
Troubleshoot a Cable That Won’t Retract
When a drain auger cable refuses to retract, the operator should inspect it for kinks or bends that can catch in the drum.
If the cable appears corroded or fouled with debris, carefully clean it and test retraction again.
Severely damaged or rusted cables should be replaced to restore safe, reliable operation.
Check For Kinks
Inspect the cable visually along its exposed length to locate any sharp bends or folded sections that could trap it. The operator notes stiffness or unusual resistance where kinks occur. Gentle straightening can restore smooth travel; do not force or pry. After easing each bend, test retraction slowly to confirm freedom of movement. If tension persists, mark the spot for later attention.
- Frustration when a stubborn kink halts progress
- Relief as a snag loosens with careful pressure
- Anxiety eased by methodical inspection
- Confidence regained when the cable retracts smoothly
Clean Or Replace Cable
Remove the cable from the auger housing to examine it closely for grime, corrosion, or frayed strands that can prevent smooth retraction.
Wipe the cable with a clean cloth and apply a light, manufacturer-recommended lubricant along its length, avoiding excess that attracts debris.
Inspect the casing and guide for rust or burrs; file or replace damaged guides.
If kinks or broken strands exist, cut back to solid wire if feasible, or replace the cable entirely to avoid failure inside pipes.
Test retraction after maintenance; if stiffness persists, install a new cable to restore reliable operation.
Deal With a Bent or Kinked Auger Cable
A bent or kinked auger cable reduces cleaning effectiveness and can damage the tool if not addressed promptly.
The operator inspects the run, notes tight bends, and gently straightens accessible kinks by feeding and retracting the cable while supporting it.
Stubborn folds warrant slow, controlled tension to avoid sudden snaps.
If the cable binds, stop and reassess alignment before proceeding.
After correcting shape, test the cable rotation in a safe area to confirm smooth operation and cable integrity.
- Frustration at stalled progress
- Relief when tension eases
- Caution at every movement
- Confidence in restored function
Repair Minor Damage to an Auger Head
The auger head should be inspected for worn edges, missing teeth, and surface corrosion before use.
Any rust and debris can be removed with a wire brush and solvent to restore cutting efficiency.
Bent flanges are carefully straightened with pliers or a small vise to guarantee smooth rotation and proper engagement.
Inspect The Auger Head
Inspecting the auger head begins with a careful visual and tactile examination to identify bent flights, chipped edges, or cracks that could worsen during use.
The inspector notes deformities, checks for loose components, and lightly runs a gloved finger along the metal to detect sharp burrs.
Small bends may be straightened with pliers; minor chips can be smoothed with a fine file.
Any fracture suggesting imminent failure prompts replacement rather than repair.
- relief at finding only minor flaws
- frustration when damage interrupts a job
- confidence after successful smoothing
- caution if cracks are discovered
Remove Rust And Debris
Before beginning repairs, the auger head should be cleaned of surface rust and lodged debris to reveal the true extent of any damage.
Wearing gloves and eye protection, loosen accumulated grime with a stiff wire brush, removing scale from coils and crevices.
Apply a rust remover or a vinegar soak for stubborn corrosion, then scrub and rinse thoroughly.
Dry completely to prevent flash rusting.
Use a small file to smooth pits and remove raised burs, avoiding alteration of cutting edges.
Re-lubricate moving joints and the core shaft with light oil to restore function and slow future corrosion.
Straighten Bent Flanges
Straighten bent flanges by gently coaxing each lip back into alignment to restore cutting performance and prevent wobble. A small set of pliers or a soft-faced hammer can reshape slightly deformed edges; work incrementally, checking concentricity frequently. Avoid overcorrection that enlarges gaps or thins metal. After reshaping, spin the head to confirm balance and inspect for cracks. If damage is extensive, replace the head to prevent further pipe harm.
- Relief: a smooth turn restores confidence.
- Frustration: minor damage feels maddening.
- Pride: repair saves money and time.
- Caution: know when to replace.
Decide: Rent or Buy an Auger
When deciding whether to rent or buy a drain pipe auger, consider frequency of use, cost, and storage; occasional clogs usually justify renting, while homeowners who face recurring blockages or perform plumbing tasks regularly may find purchasing more economical over time.
Renting minimizes upfront expense and provides access to heavy-duty models for stubborn obstructions, plus maintenance and replacement are handled by the rental service.
Buying offers convenience, immediate availability, and long-term savings if used often, though it requires storage and care.
Evaluate typical clog severity, project timelines, and budget; compare rental daily rates versus purchase price and expected lifespan before deciding.
Choose the Right Auger for Apartment vs. House
For apartment dwellers and homeowners alike, choosing the right drain auger depends on pipe diameter, access constraints, and the expected frequency and severity of clogs.
Apartments often need compact, short cable augers for narrow, shallow lines and limited storage; houses may require longer, heavier cables or drum augers for main drains and deeper blockages.
Consider portability, noise, and tenant rules versus serviceability and durability for long-term ownership.
Match auger tip types to common debris.
Safety and ease of use matter equally.
- Relief when a compact tool fits tight spaces
- Confidence in a durable, long-reach option
- Frustration avoided with the right tip
- Peace knowing the choice suits the setting
Typical Costs to Rent or Buy Augers
Several factors determine the typical cost to rent or buy a drain auger: tool type (handheld, drum, or electric), cable length and diameter, build quality, and rental duration.
Handheld consumer models commonly retail for $15–$60; they suit minor clogs and short cables.
Drum augers for residential use range $100–$400, offering longer cables and sturdier construction.
Electric or professional sewer machines exceed $500, often reaching $1,500+ for heavy-duty units.
Rental rates vary: small hand units may be free with purchase or $5–$15/day, drum units $20–$60/day, and electric machines $75–$200/day, depending on market and location.
Read and Apply Manufacturer Instructions
The user should read and follow the auger’s manufacturer instructions before use.
These guidelines specify proper operation and maintenance steps.
They also list the safety gear required and emphasize wearing recommended protection during operation.
Follow Manufacturer Guidelines
Always consult the manufacturer’s instructions before using a drain pipe auger, as they provide model-specific operating steps, safety warnings, and maintenance requirements. The user should follow torque limits, cable extension lengths, and recommended speeds exactly to prevent damage or injury. Warranty validity often depends on adhering to these directions; deviations can void coverage. Routine maintenance intervals, cleaning methods, and approved lubricants are usually specified and extend tool life. If unclear, contact customer support for clarification rather than guessing. Emotional cues emphasize respect for guidance.
- Relief from uncertainty
- Confidence in safe operation
- Trust in preserved warranty
- Satisfaction of proper care
Wear Recommended Safety Gear
Because a drain pipe auger can fling debris, spray water, or snag clothing, users must wear the safety gear specified by the manufacturer before energizing or extending the cable. The manual lists required items, fitment, and maintenance; adherence reduces injury risk. Protective eyewear, gloves, and close-fitting clothing prevent punctures and entanglement. Hearing protection and non-slip shoes may be advised for motorized models. Inspect gear for damage and replace per instructions. If uncertainty exists, consult customer support. Follow disposal and cleaning procedures for contaminated PPE to avoid cross-contamination.
| Gear | Purpose |
|---|---|
| Safety glasses | Eye protection |
| Gloves | Grip and cut resistance |
| Close-fit clothing | Entanglement prevention |
| Non-slip shoes | Stable footing |
Common Mistakes That Worsen Clogs (and How to Avoid Them)
When attempting to clear a blocked drain, several common mistakes often make clogs worse rather than better; improper tool choice, excessive force, and chemical overuse rank among the chief culprits and can push obstructions deeper, damage pipes, or create hazardous reactions.
A detached observer notes typical errors and simple avoids: selecting the wrong auger size, forcing the cable, mixing drain cleaners, and ignoring pipe condition.
Each error amplifies risk and cost.
Clear steps—match auger type to drain, feed gently, flush cleaners thoroughly before mechanical work, inspect for corrosion—prevent escalation and preserve system integrity.
- Panic-driven haste
- Overconfidence in tools
- Chemical reliance
- Neglected inspection
Protect Finishes and Fixtures While Snaking
Before snaking, the work area and fixtures should be guarded to prevent scratches and dents.
Soft materials—rags, foam, or a rubber mat—are recommended to cushion the sink rim and surrounding surfaces.
The auger should never contact finishes directly; use protective barriers and steady handling to avoid damage.
Protect Sink And Surroundings
To prevent scratches, dents, and stains while snaking a drain, cover surfaces and fixtures with protective materials—towels, rubber mats, or painter’s tape over chrome—to buffer tools and catch debris.
The area around the sink should be cleared of fragile items; drape cloths beyond the basin to protect counters and flooring from splashes.
Position a bucket to catch runoff and keep the auger’s cable guided to avoid striking faucet bases.
After work, wipe surfaces with mild cleaner to remove residue and inspect for unnoticed nicks.
- Anxiety eased by visible protection
- Relief when finishes remain intact
- Confidence in a clean workspace
- Satisfaction after damage-free repair
Use Soft Protective Materials
After protecting surrounding surfaces and clearing the workspace, attention turns to soft materials that shield finishes and fixtures while snaking a drain. A cloth or silicone mat is placed around the drain opening to prevent scratches and dents from the auger’s housing.
Foam pads cushion faucet bases and porcelain edges where the cable might rub. Microfiber towels absorb drips and catch debris for easy disposal.
Nonabrasive tape can secure pads without leaving residue. Materials are positioned to allow clear access to the drain and removed immediately after use to prevent moisture damage.
Clean materials extend fixture life and simplify cleanup.
Avoid Direct Tool Contact
When snaking a drain, direct contact between the auger and finished surfaces should be avoided to prevent scratches, chips, and tarnishing. The operator wraps exposed metal with tape or cloth, guides the cable gently, and keeps tools clear of porcelain, chrome, and wood trim. Protective collars or rubber sleeves reduce impact; slow, controlled feed prevents sudden jerks. If resistance threatens a fixture, withdraw and reassess rather than force. Emotional stakes—pride in a pristine bathroom—motivate care.
- Protect cherished finishes
- Prevent costly repairs
- Preserve aesthetic pride
- Maintain homeowner confidence
Using Chemicals Safely With Snaking
Mindful of corrosive risks and reactions, a homeowner should treat chemical drain cleaners as a last resort when snaking a pipe, using only products compatible with the pipe material and following label instructions precisely.
They should wait adequate time after any chemical use before inserting an auger to avoid splash or fume exposure, flush the line thoroughly with water, and wear eye and skin protection.
Avoid mixing different chemicals.
If chemical residue remains, neutralize per manufacturer guidance or run water until clear.
When in doubt about compatibility or persistent odor, professional assessment is safer than continued chemical or mechanical attempts.
Recognize Signs of Deeper Sewer Problems
Persistent foul odors coming from drains may indicate a sewer breach rather than a simple clog.
Recurrent multiple clogs and slow drains throughout the home also suggest a systemic sewer line problem. These signs warrant inspection beyond routine snaking to identify underlying damage or blockages.
Persistent Foul Odors
Often a lingering sewage odor signals more than a temporary trap drying or a minor blockage; it can indicate deeper sewer-system failures that require prompt attention.
The smell persisting after trap checks and careful auger use suggests leaks, mainline breaks, or pipe collapse.
Immediate evaluation prevents health risks and property damage.
Homeowners should note odor intensity, locations, and timing, and consider professional inspection, smoke testing, or camera evaluation.
Emotional responses—concern, urgency, frustration, relief—are common when confronting hidden sewer issues.
- Concern at unexplained, pervasive smells
- Urgency to protect family health
- Frustration over recurring detection
- Relief after definitive diagnosis
Recurrent Multiple Clogs
Frequent backups in multiple fixtures can indicate more than routine blockages; they often signal a compromised main sewer line or tree-root intrusion.
Homeowners should note simultaneous slow drainage, gurgling toilets, and sewage odors near cleanouts or yard areas.
Temporary auger clears may recur quickly when underlying collapse, offset joints, or invasive roots exist.
Recommended steps include inspecting the cleanout for visible discharge, documenting frequency and affected fixtures, and avoiding repeated chemical treatments that mask damage.
Professional sewer camera inspection and contractor evaluation are advised to confirm location and cause before attempting further mechanical snaking or repairs.
Slow Drains Throughout
Regularly slow drains across multiple fixtures often signal problems beyond isolated clogs and warrant prompt attention. A homeowner observing persistent sluggish flow should suspect mainline obstruction, tree root intrusion, collapsed pipe sections, or sewer line silt buildup.
These conditions often worsen, causing backups, odors, and property damage. Inspection with a camera or professional assessment is advised rather than repeated auger attempts alone. Early action can prevent costly repairs and health risks.
- Anxiety as water pools where it shouldn’t
- Frustration with recurring slow drains
- Dread of foul sewer smells
- Urgency to avoid structural damage
When to Call a Professional Plumber
When is a DIY auger no longer sufficient? Persistent clogs after several proper auger attempts, recurring blockages, or multiple affected fixtures indicate deeper or widespread issues beyond homeowner scope. Professional assessment is advised for sewer line backups, foul sewage odors, or slow drains throughout the property.
Call a plumber when an auger cannot reach obstructions, when pipe damage, corrosion, or collapsed lines are suspected, or when complex plumbing systems and fixtures require access. Also seek help for awkward or risky locations, repeated need for chemical cleaners, or when local codes, warranties, or safety concerns dictate licensed intervention.
How a Hydro‑Jet Differs From an Auger
If a homeowner reaches the limits of a manual auger or a plumber identifies a more extensive buildup, the next common option is hydro-jetting.
Hydro-jetting uses high-pressure water to scour pipe walls, removing grease, scale, and roots more thoroughly than a rotating cable.
It suits larger clogs and long-term buildup where an auger only breaks through obstructions.
Considerations include pipe condition, access, and required expertise; hydro-jetting can damage fragile lines.
Expectations shift from spot clearing to restoration.
Emotional reactions often accompany the choice:
- relief at full clearing
- anxiety about pipe damage
- confidence in long-term cleanliness
- cost-conscious hesitation
Maintain Regular Drain Health to Prevent Clogs
Homeowners should maintain drains proactively to minimize clogs and extend pipe life.
Regular attention reduces reliance on mechanical clearing and prevents minor buildups from becoming severe blockages.
Encourage the removal of hair, grease, and debris before they enter traps; use strainers and rinse residue with hot water after oily or starchy tasks.
Avoid chemical drain cleaners that can damage pipes and harm seals.
Periodic inspection of visible drain fittings and cleanouts helps catch leaks or slow flow early.
When recurring issues occur, consult a plumber to diagnose underlying problems rather than repeatedly using an auger.
Simple Drain Maintenance Schedule
Regularly scheduled maintenance keeps drains flowing and prevents small buildups from becoming blockages.
A simple, repeatable schedule reduces surprise clogs and limits need for augering. Weekly rinses with hot water, biweekly hair and debris removal, monthly trap checks, and quarterly deep inspections form a baseline. Clear responsibilities, timestamps, and brief notes help track progress and spot trends before intervention is required.
- Relief when water flows freely
- Confidence knowing routines prevent disasters
- Calm from predictable, painless upkeep
- Satisfaction watching small tasks avert big repairs
Stick to the cadence and adjust frequency for household usage.
Remove Mineral Buildup That Resists Augering
Mineral deposits such as calcium and lime can harden inside pipes, forming crusty rings and constrictions that a drain auger simply grinds past without clearing.
When augering fails, chemical descalers formulated for plumbing or diluted vinegar applied with soak time can dissolve scale; always follow product instructions and ventilate the area.
Mechanical removal using a wire brush or rotary pipe-cleaning brush attached to a drill can abrade deposits in accessible sections.
After treatment, flush with hot water to remove residue.
If buildup persists or pipe material might be damaged, consult a professional to assess replacement or specialized hydro-jetting.
Document Recurring Clogs for a Plumber or Landlord
The user records each clog with date and time to establish a clear timeline.
The entry includes a concise problem description and any visible symptoms.
Previous fixes and their outcomes are noted so a plumber or landlord can assess patterns and required repairs.
Date And Time Logged
When a clog recurs, record the exact date and time of occurrence along with any observed symptoms and actions taken; this timeline helps a plumber or landlord identify patterns, assess severity, and prioritize repairs.
The entry should be concise, factual, and consistent, enabling quick comparison across incidents.
Include short notes about frequency and any immediate remedies applied, but save detailed descriptions for the problem section.
Timely logs reduce disputes and speed diagnosis, offering a clear history that supports decisions.
- Frustration eased by clear records
- Urgency highlighted through timestamps
- Confidence gained from consistent entries
- Relief when patterns emerge
Problem Description Details
For recurring clogs, provide a concise but specific problem description that lets a plumber or landlord quickly grasp scope and severity: state which fixture(s) are affected, describe symptoms (slow drain, gurgling, backups, odors), note onset and frequency, and list any temporary fixes attempted.
Specify whether the issue is isolated (single sink, tub, toilet) or multi-fixture, indicate water temperature effects, and report visible debris or sewage.
Include whether neighboring units experience issues, approximate duration of each incident, and any patterns (after laundry, heavy rainfall).
Keep language factual, timestamp observations, and attach photos or videos if available.
Previous Fixes Noted
In documenting previous fixes, list each remedy chronologically with date, who performed it (tenant, building maintenance, or licensed plumber), actions taken (plunging, snaking, chemical treatments, hydro-jetting, trap removal, or pipe replacement), parts used, and immediate outcomes (cleared, partial improvement, or no effect).
The record should note frequency, location, and any patterns suggesting recurring blockage sources.
Photographs, receipts, and technician notes add clarity.
Summarize unresolved trends and recommend next steps for the plumber or landlord, such as camera inspection or permanent repairs.
- Frustration: repeated short-term fixes
- Relief: successful, lasting repair
- Concern: escalating severity
- Urgency: imminent replacement needed
Recycle or Dispose of an Old, Unusable Auger
With wear or irreparable damage rendering a drain pipe auger unusable, proper disposal or recycling prevents environmental harm and recovers valuable materials.
The user assesses condition: remove oil, grease, and attachments.
Separate components by material—steel cable and head, plastic handles, rubber grips, electronic parts if present.
Local recycling centers accept scrap metal; verify guidelines for size and contamination.
Plastics and electronics may require special drop-off.
Consider donating intact but obsolete units to vocational schools or makerspaces.
For hazardous-soiled tools, follow municipal hazardous waste instructions.
Document disposal for warranty or inventory purposes and record recycling receipts when available.
Conclusion
A homeowner stands in a gleaming kitchen while an old, stubborn clog waits like a dark knot. The auger, coiled and quiet, bridges the gap—simple tool, complex problem—unwinding into unseen pipes. Routine patience and occasional professional help alternate like light and shadow: DIY victories beside plumber calls. Maintenance keeps the small victories frequent; when problems persist, documented history hands control to a stranger who knows the pipes’ hidden map.