How to Use a Pipe Wrench: Step-by-Step Guide for Beginners
To effectively use a pipe wrench for gripping and turning round metal pipes, follow these steps: Position the fixed jaw toward the direction of the turn, then adjust the knurled nut until the teeth bite onto the pipe. Apply smooth, controlled pulls while keeping the handle aligned with the pipe axis. Always clean the teeth and the pipe beforehand, and wear gloves and eye protection. Avoid using the wrench on finished or thin-walled tubing. For stubborn joints, use two wrenches or apply penetrating oil to help with corrosion. Reposition the wrench as necessary to prevent rounding the pipe edges. For more detailed setup instructions, safety tips, and alternative tools, continue reading.
When to Use a Pipe Wrench
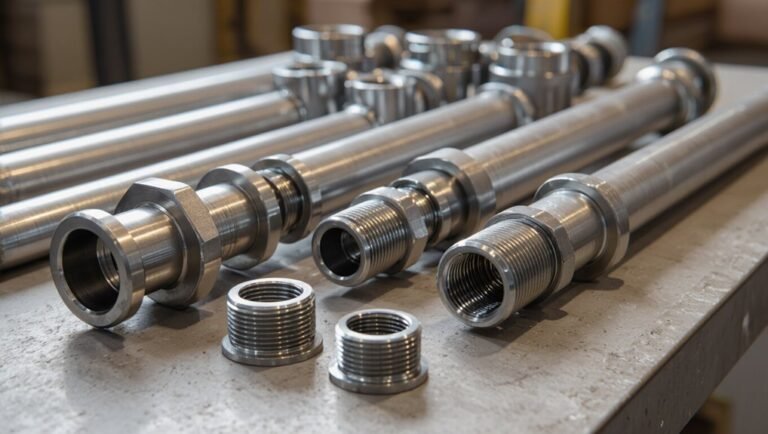
A pipe wrench is appropriate when gripping, turning, or loosening round metal pipes and fittings that require substantial torque; it should not be used on finished surfaces, thin-walled tubing, or nonmetallic materials that can be damaged by its serrated jaws. The tool suits ferrous and some nonferrous piping where a firm bite prevents slippage: galvanized, black iron, and thick-wall copper.
It is chosen for stuck joints, rusted fittings, and large-diameter plumbing connections where adjustable jaw capacity and leverage matter. It is inappropriate for delicate fixtures, chrome-plated components, soft alloys, plastic piping, or precision assemblies needing torque control or protective grips.
Quick How-To: Loosen and Tighten With a Pipe Wrench
The user is introduced to key steps for loosening and tightening pipes with a pipe wrench: place the wrench so the fixed jaw bears on the pipe and the adjustable jaw faces the direction of expected force.
Adjust jaw tension so the teeth bite firmly without over-compressing the pipe.
Apply controlled, steady force with short pulls rather than abrupt jerks to avoid slipping and damage.
Proper Wrench Placement
When seating a pipe wrench, align the jaws so the fixed (heel) jaw bears against the pipe in the direction of the planned turn; this guarantees the adjustable (toe) jaw bites into the pipe as force is applied, preventing slip and damage.
Position the wrench so teeth fully contact the pipe’s circumference, avoiding contact with fittings or damaged sections.
Place the wrench handle so leverage pulls in line with the pipe axis, not at an angle that can twist or mar surrounding components.
For long pipes, support the opposite end to reduce strain.
Verify clear space for the handle swing before applying steady pressure.
Adjusting Jaw Tension
Once the wrench is properly seated, attention shifts to adjusting jaw tension so the tool grips without crushing the pipe. One hand holds the handle; the other turns the knurled nut to close jaws until slight resistance appears. Test by rocking the wrench; if it slips, tighten incrementally. If teeth bite too deeply, back off a quarter turn. Recheck fit frequently, especially on soft or plated pipes. Maintain alignment so jaws contact squarely. Clean debris from teeth before final adjustment.
| Action | Purpose |
|---|---|
| Turn nut clockwise | Increase grip |
| Turn nut counterclockwise | Reduce bite |
| Rock test | Detect slip |
| Inspect teeth | Make certain clean contact |
Applying Controlled Force
Apply steady, controlled force to avoid slipping or damaging the pipe: position the wrench so the handle extends in the direction of desired rotation, pull with smooth, even pressure rather than jerking, and use the pipe wrench’s length for leverage—push only if space or handedness requires it.
The user aligns jaws squarely on the pipe, confirms firm bite, then applies gradual torque until the fitting loosens or tightens.
If resistance is excessive, stop, readjust jaw tension or reposition the wrench, and try again. Use steady cadence and body weight for power; avoid sudden force, which risks slippage, pipe deformation, or injury.
Pick the Right Pipe Wrench Type and Size
For effective gripping and safe operation, selecting the correct pipe wrench type and size is essential. The user evaluates pipe diameter, access space, and required torque, then matches wrench length and jaw capacity. Straight, offset, and chain wrenches suit different situations; choosing appropriately reduces slippage and damage. Weight and handle ergonomics affect control and fatigue. Inspect adjustable jaw range to confirm fit. Use a wrench slightly larger than the pipe for leverage without overreach. A proper match inspires confidence, minimizes effort, and preserves fittings.
- Choose with confidence.
- Avoid unnecessary strain.
- Protect pipe integrity.
How Wrench Teeth Grip Pipes
The pipe wrench secures its hold through a serrated jaw design that bites into the pipe surface for increased traction.
As torque is applied, the wrench’s geometry produces a self-locking action that tightens the grip rather than letting it slip. Understanding both features explains why proper jaw engagement and angle are critical for effective, safe use.
Serrated Jaw Design
Serrated jaws use staggered, sharp teeth to bite into a pipe’s surface, converting sideways force into a secure grip that resists slipping while minimizing the need for excessive clamping pressure.
The tooth geometry concentrates force on small contact points, increasing friction and allowing controlled rotation of round stock. Hardened teeth resist wear, preserving bite over repeated use; spacing balances penetration with material preservation to avoid excessive damage.
Proper alignment guarantees teeth engage evenly, preventing slippage or marring.
Maintenance like cleaning and occasional sharpening restores performance. Emotional response follows practical relief and reassurance in tool trust.
Self-Locking Action
Leveraging the angled teeth and slotted jaw geometry, a pipe wrench converts applied torque into a sideways bite that progressively tightens as load increases. The self-locking action relies on tooth angle, jaw spacing, and handle leverage; these create increasing normal force against the pipe, preventing slippage. Proper engagement depth and perpendicular handle force maximize grip while minimizing damage. Users should align teeth with pipe curvature and avoid excessive force that deforms metal. Routine inspection keeps teeth sharp and free of debris so the self-locking feature remains reliable under repeated use and varying loads.
| Tension | Trust |
|---|---|
| Steady | Calm |
| Firm | Secure |
| Tight | Confident |
| Grip | Relief |
Safety Gear and Precautions Before You Start
Before beginning work, a user should always equip basic protective gear and verify the surrounding area is safe. The user inspects gloves, eye protection, and sturdy footwear; checks for leaks, trip hazards, and electrical risks; and positions lighting for clear visibility. Awareness reduces injury and equipment damage.
Hands-on focus must be deliberate: a secure stance, controlled force, and attention to pinch points. If unsure, stop and consult a professional. Never improvise with inadequate tools or skip PPE. Confidence grows from caution; safety practices protect health and project outcomes.
- Gloves to prevent cuts and improve grip
- Safety glasses to guard against debris
- Firm shoes to stabilize and protect feet
Clean and Mark the Pipe Before Work
With the work area secured, the pipe should be wiped free of oil, dirt, and corrosion so markings are visible and the wrench can bite cleanly. A clean surface prevents slippage and guarantees accurate alignment. Mark cutting or turning points with a permanent marker or scribe. Measure twice, mark once; confirm marks against fittings. Remove loose rust with a wire brush; use solvent for grease. Note thread condition and mark any damaged areas for replacement. Record orientation marks when disassembling assemblies to ease reassembly.
| Item | Tool | Purpose |
|---|---|---|
| Wipe | Rag | Clean surface |
| Brush | Wire brush | Remove rust |
| Mark | Scribe | Precision |
| Solvent | Cleaner | Degrease |
| Inspect | Eyes | Thread check |
Position the Wrench for Maximum Grip
The wrench is set so the jaws contact the pipe at the correct angle and the teeth bite firmly into the surface.
The handle is positioned to allow steady, controlled force without overreaching, while the free hand guides direction.
The pipe should be supported and stabilized to prevent slippage and protect threads during turning.
Jaw Angle And Teeth
Angling the pipe wrench so its jaws engage the pipe at an offset rather than square-on increases biting force and reduces slippage. The teeth should seat cleanly into the surface; worn or damaged teeth cut grip and invite rounding. Lightly clean grime and guarantee teeth align with pipe curvature. Observe resistance; a subtle tilt transfers force through the fixed jaw while the movable jaw bites deeper. Avoid excessive torque that strips metal; reposition and re-seat instead. Confidence grows from controlled, repeatable contact, not brute force.
- Relief — teeth that bite restore control.
- Tension — proper angle instills surety.
- Trust — good maintenance earns reliable grip.
Handle Positioning Technique
After establishing a secure bite with correct jaw angle and sharp teeth, attention shifts to handle placement to translate that bite into torque without losing grip.
The user positions the handle so force aligns with the pipe’s axis, keeping motion smooth and centered. The free hand steadies the lower handle end; the dominant hand applies steady, controlled pressure near the midpoint for leverage while avoiding sudden jerks. The wrist stays straight to prevent slippage. When extra force is needed, the handle is pulled toward the body rather than pushed away. Repositioning occurs incrementally to maintain tooth engagement and avoid rounding.
Pipe Support And Stability
With feet planted and the pipe secured against movement, the wrench is positioned so its jaws bite squarely and the handle aligns with the pipe’s axis to maximize grip and prevent slipping.
The operator makes certain pipe supports or a vise cradle the workpiece, reducing rotation and strain.
Proper cheek contact and jaw adjustment prevent crushing or gaps.
Short, controlled pulls increase leverage without sudden torque.
Inspect seating after each adjustment to maintain alignment.
Stability preserves threads and reduces injury risk.
- Relief — steady support eases tension.
- Confidence — firm seating builds trust.
- Safety — predictable grip prevents accidents.
Hand Placement and Stance With a Pipe Wrench
When preparing to use a pipe wrench, proper hand placement and a stable stance are essential for control and safety. The operator places the dominant hand on the wrench handle near the head for guidance and the other hand farther down for leverage. Feet shoulder-width apart, one slightly ahead, center of gravity low, reduce slip risk. Keep arms slightly bent, avoid overreaching, and align shoulders with the wrench to apply force in line with the pipe. Maintain clear footing and remove obstacles. Adjust position rather than forcing the wrench to preserve control and prevent strain or sudden slips.
| Guideline | Action |
|---|---|
| Hand placement | Dominant near head; other farther down |
| Stance | Shoulder-width, one foot forward |
| Body alignment | Shoulders inline with wrench |
| Safety | Remove obstacles, avoid overreach |
Loosen a Stuck Threaded Pipe Joint: Step-by-Step
Loosen a stuck threaded pipe joint by first evaluating the joint and surrounding area: check for corrosion, thread damage, and nearby fixtures, and guarantee adequate lighting and clear access.
Apply penetrating oil, let it soak, then tap the joint lightly with a hammer to break surface rust.
Fit the pipe wrench with correct jaw engagement, secure one wrench to hold the stationary pipe, and use a second wrench to turn the stuck joint in the loosening direction.
Work slowly, increasing leverage incrementally; stop if threads bind or deform.
- Relief
- Confidence
- Caution
Tighten a Pipe Fitting Without Damaging It: Step-by-Step
Before applying torque, inspect the fitting and mating threads for burrs, debris, or thread tape remnants, and make certain pipe ends are square and properly aligned to prevent cross-threading. The worker hand-tightens, then applies steady, controlled turns with the wrench, small increments only. Use backing tools on fixtures to isolate strain; stop when resistance rises noticeably. Recheck alignment and sealant coverage; wipe excess compound. Test under low pressure, watch for leaks, then tighten slightly if needed. If resistance becomes abrupt, back off and rethread.
| Visualize | Feel | Result |
|---|---|---|
| Clean threads | Smooth turns | Solid seal |
| Proper alignment | Even resistance | No leaks |
Use Two Wrenches Together for Stubborn Fittings
To break free stubborn fittings without damaging the assembly, a worker uses two wrenches—one to hold the fitting or fixture steady and the other to apply turning force—so torque is isolated to the joint being moved while preventing stress on adjoining pipes or connections.
The holding wrench stabilizes the opposing component; the turning wrench delivers controlled, steady force. Hands remain clear of pinch points.
The worker checks grip alignment, adjusts jaw spacing, and applies short, measured pulls rather than sudden jerks. If resistance persists, reposition and reassess rather than increasing force.
- Relief
- Confidence
- Control
Working on Corroded, Painted, or Rounded Pipes
When pipes show rusted seams, paint buildup, or rounded surfaces, different preparatory steps are required before using a pipe wrench.
The writer outlines methods for removing corrosion, scraping or scoring paint to restore bite, and using auxiliary tools or jaw protectors to improve grip on rounded metal.
Safety and gentle force are emphasized to avoid further damage while securing a firm hold.
Removing Rusted Seams
After prolonged exposure to moisture and paint, pipe threads and seams often fuse with rust and debris, requiring techniques beyond standard wrenching. The practitioner assesses stability, clears loose corrosion with a wire brush, and applies penetrating oil to soak overnight. Gentle tapping with a hammer can fracture rust bonds; repeat penetration and heat cycles cautiously, avoiding excessive force that deforms fittings. Once movement begins, use a properly sized pipe wrench with steady, controlled pressure, repositioning teeth periodically to maintain grip. Inspect threads for reuse; replace severely damaged sections. Safety gear and patience prevent escalation to more invasive repairs.
- Satisfying progress
- Frustration eased
- Calm confidence
Dealing With Paint Build-Up
How should one approach a pipe whose threads or flats are obscured by paint, overcoating, or mild corrosion? A careful inspection and gentle cleaning restore defined contact points before using a pipe wrench. Use a wire brush, scraper, or chemical stripper where safe; protect adjacent surfaces. After cleaning, test fit the wrench on clean flats or uncovered threads, ensuring teeth bite securely. If paint persists, score it lightly to prevent slipping. Reclean and dry the area; apply penetrating oil to corroded threads. Proceed with steady pressure and short pulls to avoid damaging the pipe or wrench.
| Tool | Purpose |
|---|---|
| Wire brush | Remove loose paint |
| Scraper | Strip overcoating |
| Chemical stripper | Soften stubborn paint |
| Penetrating oil | Loosen corroded threads |
Gripping Rounded Surfaces
What then is the best way to get reliable bite on a rounded, painted, or lightly corroded pipe? A pipe wrench user should clean the contact area, remove loose paint or rust with a wire brush, and dry the surface.
Choose a wrench sized for maximum jaw contact; adjust so teeth meet firmly without crushing the pipe. Apply steady, controlled force, re-seating the wrench if it slips.
Protect soft surfaces with thin metal shim if needed.
- Increase confidence by prepping the surface.
- Reduce fear of slipping with correct sizing.
- Preserve the pipe while ensuring grip.
Avoid Common Mistakes That Strip Threads or Jaws
Frequently, damage to pipe threads and wrench jaws results from simple errors in technique or tool choice.
Proper size selection prevents excessive force and slippage; using an oversized or undersized wrench concentrates pressure unevenly.
Avoid positioning the wrench teeth directly on painted or soft surfaces; expose clean metal when possible.
Do not apply cheater bars or hammer blows that exceed tool ratings.
Maintain sharp, well-aligned teeth and replace worn jaws promptly.
Use two wrenches for opposing turns to distribute stress rather than forcing a single wrench.
Clean threads before engagement and tighten only to required torque to prevent stripping.
Quick Fixes When the Wrench Slips or Chews the Pipe
When a pipe wrench begins to slip or its teeth start to bite into the pipe, stop and assess the cause before applying more force.
The operator checks jaw alignment, confirms correct wrench size, and inspects the pipe surface for burrs or grime.
Small adjustments restore grip: reposition slightly toward the fixed jaw, tap the handle to seat teeth, or use a cloth for temporary protection on delicate finishes.
If damage risk remains, switch to a strap or adjustable wrench to avoid further harm.
- Reposition to regain control.
- Protect to prevent panic.
- Switch tools to save the workpiece.
Maintain Your Pipe Wrench: Clean, Adjust, and Lubricate
After addressing slipping or surface damage, routine maintenance keeps a pipe wrench reliable and safe. The user should clean jaws and threads with a wire brush to remove grit and scale, wiping residual oil and debris.
Inspect jaws for wear; replace or refile teeth if dull or misshapen. Check adjuster nut and thread engagement for smooth travel; correct bent handles or loose rivets.
Apply light machine oil to the adjusting thread and pivot points, wiping excess to avoid attracting dirt. Store the wrench dry, off the floor, and periodically recheck adjustments to preserve performance and extend service life.
When a Pipe Wrench Isn’t the Right Tool (And What to Use Instead)
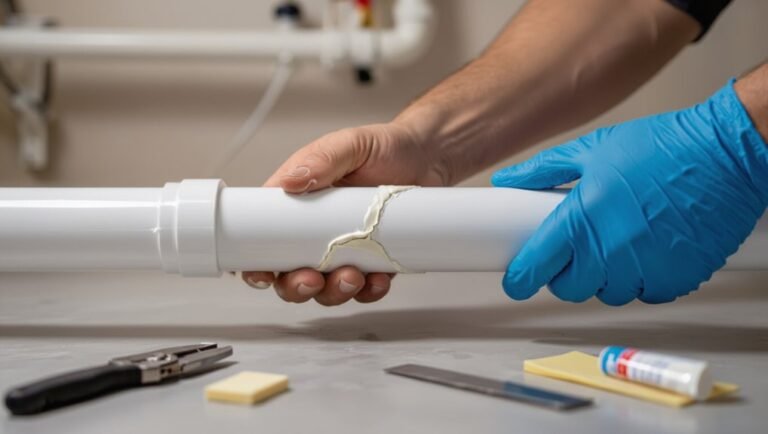
A pipe wrench excels at gripping round, stationary metal pipes, but it is not always the correct choice; using it on soft fittings, finished surfaces, thin-walled tubing, or fasteners can cause damage or slip. Alternative tools provide safer, cleaner results: adjustable wrenches and basin wrenches prevent marring on hex fittings and confined spaces; strap or chain wrenches grip polished or plastic pipes without crushing; vice grips or nut drivers handle fasteners and thin-walled tubing with controlled torque. Choosing the right tool reduces repair time and prevents costly replacements. Consider material, finish, access, and required torque before reaching for the wrench.
- Emotional relief: avoid ruined parts.
- Confidence: execute tasks correctly.
- Satisfaction: faster, cleaner repairs.
Conclusion
The pipe wrench, like a steadfast key, frees stubborn joins and tames spinning metal with patient teeth. Worn jaws and cautious hands remind readers that tools reflect the care given—cleaned, aligned, lubricated—to keep connections strong. When a wrench falters, it signals moments to change course, choosing gentler instruments or fresh technique. In practice and upkeep, the pipe wrench becomes more than hardware: a quiet emblem of skill, prudence, and steady work.