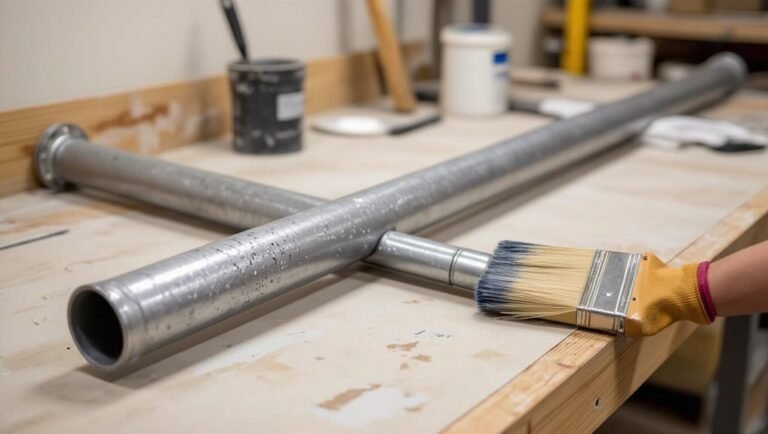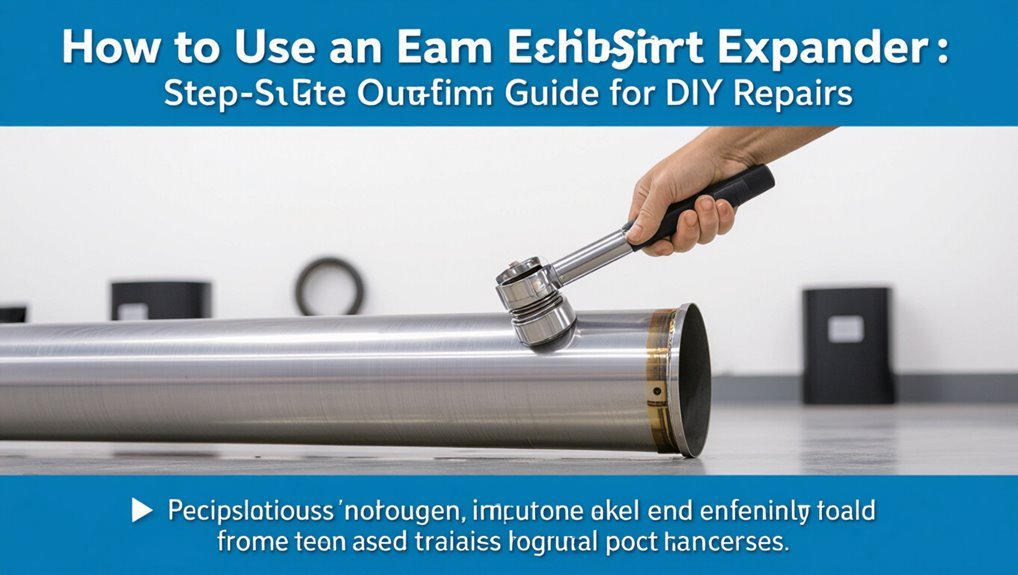
How to Use an Exhaust Pipe Expander: Step-by-Step Guide for DIY Repairs
An exhaust pipe expander is a tool used to enlarge the end of a pipe for a tight fit or for welding. To use it effectively, start by cleaning and deburring the pipe. Then, inspect the wall thickness and measure the diameter. Secure the pipe in place, apply a high-temperature lubricant, and advance the tapered mandrel in small, even increments, watching carefully for any signs of thinning or cracks. Once the desired expansion is achieved, withdraw the tool and test the fit. You can then join the pieces using clamps or welding as needed. For further details on tool selection, safety precautions, and troubleshooting tips, continue reading.
Quick Overview: When and How to Expand an Exhaust Pipe
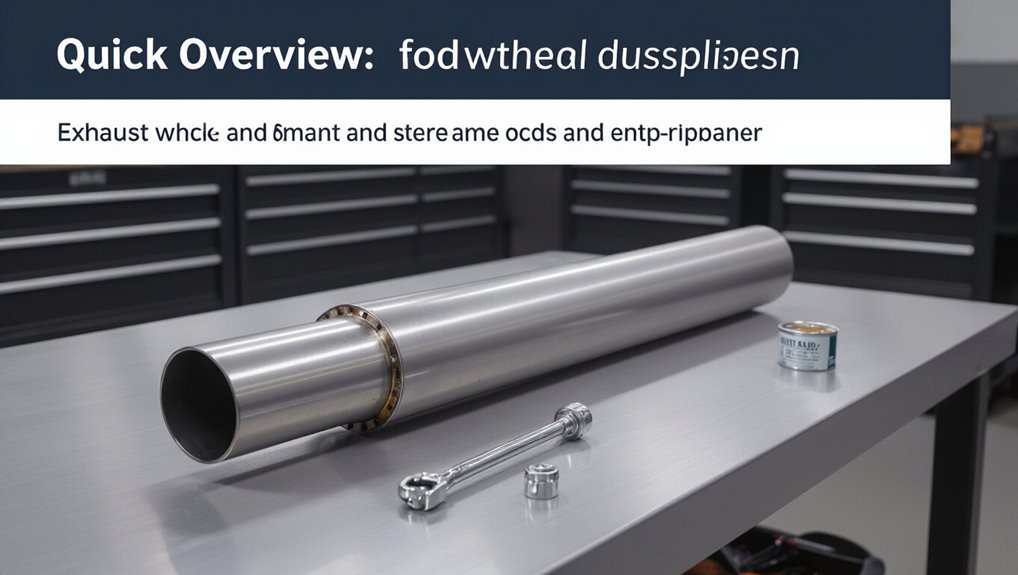
When repairing or fitting exhaust components, expanding the pipe end creates a clean, secure joint for slip-fit connections or new clamps; the process is typically used when joining sections of tubing, installing mufflers, or accommodating slightly oversized fittings.
A user assesses fit, selects the correct expander size, and secures the pipe to prevent rotation.
Gradual, even expansion preserves wall integrity and maintains alignment.
Measuring before and after guarantees appropriate diameter.
Work proceeds with heat or lubricant only if recommended for the material.
Final checks confirm a uniform seat for clamps and verify that exhaust routing and clearances remain correct.
What Is an Exhaust Pipe Expander and When to Use One
Used on the end of an exhaust tube, an exhaust pipe expander is a tapered tool—manual, pneumatic, or hydraulic—that enlarges the pipe mouth slightly to allow a snug slip-fit with another section or fitting.
It achieves uniform expansion without thinning or cracking, preserving flow and alignment.
Commonly used when joining mismatched pipes, fitting pre-cut sections, repairing crushed ends, or preparing tubing for clamps and welds, it reduces gaps that cause leaks and rattles.
Selection depends on pipe diameter, material, and access.
Proper technique guarantees concentricity and prevents over-expansion; inadequate use risks poor seals and premature component wear.
DIY vs Shop: When to Rent a Hydraulic Expander
The decision to rent a hydraulic expander hinges on the scope of the job, the renter’s familiarity with the tool, and whether the expense outweighs doing the work at home.
For one-off repairs or large-diameter pipes the rental cost and superior power often justify the shop option, while routine small projects may favor a hand expander or purchase.
Skill requirements and access to complementary equipment should factor into the cost-versus-benefit assessment.
When To Rent
If a single small repair or occasional shop work is all that’s needed, renting a hydraulic expander typically makes more sense than buying one; for frequent use, a purchase becomes economical.
Renting suits one-off tasks, unfamiliar tools, or projects that require occasional higher-capacity models. It allows access to maintained equipment, avoids storage and maintenance responsibilities, and offers flexibility to test different sizes.
Rent when space, budget, or long-term need are limited, or when a specific job demands a specialty expander. Prioritize reputable rental sources, inspect the tool before use, confirm included fittings, and make certain compatibility with the vehicle’s pipe dimensions.
Cost Versus Benefit
How much sense does buying a hydraulic exhaust expander make versus renting one or paying a shop to do the job? The decision hinges on frequency, immediate cost, and potential resale.
Occasional repairs favor rental or shop service to avoid purchase expense, storage, and maintenance; shops add labor but provide expertise and warranty.
Frequent use or multiple vehicles can justify purchase, spreading cost over projects and enabling on-demand work.
Consider tool depreciation and the value of professional finish versus DIY savings.
Compare rental rates, local shop labor prices, and projected number of uses to determine the most economical route.
Skill And Equipment Needs
Many DIYers with basic mechanical experience can handle simple exhaust expansions, but evaluating skill level and equipment needs determines whether to rent a hydraulic expander or hire a shop. Decision factors include access to proper tools, confidence with tight tolerances, and safety.
For straightforward single-piece pipes, manual expanders may suffice; complex systems, rusted joints, or limited workspace favor hydraulic rental or professional service. Consider time, cost, and risk of damage when choosing.
Typical considerations include:
- Tool access: hydraulic expander, mandrels, lubricants
- Skill: measurement, alignment, controlled expansion
- Conditions: corrosion, hard-to-reach joints
Put On the Right Safety Gear Before Expanding a Pipe
Before starting pipe expansion, wear protective gear designed for metalworking hazards: safety glasses or a face shield, heavy-duty gloves that resist cuts and heat, and ear protection when using power tools.
Respiratory protection is advised if rust, paint, or exhaust residue may be dislodge; use a rated respirator or mask.
Wear long sleeves and flame-resistant clothing to shield skin from sparks and hot metal.
Closed-toe, non-slip footwear protects feet from dropped tools and pipe sections.
Remove loose jewelry and secure long hair.
Inspect gear for damage before use and replace compromised items to maintain effective protection throughout the job.
Essential Tools and Consumables for Exhaust Pipe Expansion
A compact set of dedicated tools and a few consumables make exhaust pipe expansion safe and effective. The list includes the expander, backed by basic hand tools and consumables for clean, secure joints. Proper preparation speeds work and prevents damage.
- Expander tool (manual or hydraulic) with appropriate adapters
- Hand tools: wrenches, hammer, wire brush, and a cut-off or deburr tool
- Consumables: anti-seize, high-temperature sealant, replacement clamps or rivets
Items are selected to match pipe material and condition; consumables guarantee corrosion resistance and airtight joints. Clean surfaces and correct fasteners complete reliable repairs.
Choose the Right Expander: Size, Style, and Pipe Limits
With the tools and consumables assembled, selection of the expander becomes the next practical decision.
The correct expander matches pipe diameter and wall thickness; measure outside diameter and choose a mandrel sized to expand, not overstretch, the metal. Consider style: tapered mandrels suit gradual flares, segmented or scroll-type heads handle irregular or corroded ends. Material and drive method matter—hand-expanders for light-duty steel, hydraulic or pneumatic units for thicker stainless or multiple layers. Verify manufacturer pipe limits for maximum expansion and compatible alloys. Proper selection minimizes cracking, assures secure joints, and reduces the need for corrective welding.
Inspect the Pipe to Confirm Expansion Is Appropriate
If the pipe end shows uniform wall thickness and no deep corrosion, expansion can proceed; however, any visible cracks, severe pitting, or significant ovality require further evaluation or repair. The inspector verifies connection surfaces are clean, free of flaking scale, and accessible for the expander head.
Visual and tactile checks identify weak spots that could split under pressure. If doubt remains, schedule professional assessment or replacement rather than forcing expansion.
- Look for hairline cracks and structural deformities.
- Check for loose rust flakes and compromised sealing edges.
- Confirm flanges, clamps, and mating components are intact and aligned.
Measure Pipe Diameter and Wall Thickness Correctly
Once the pipe end is deemed sound, measurements of outer diameter and wall thickness determine the correct expander head size and the allowable expansion range.
The technician uses calipers to record outer diameter at multiple points, averaging results to compensate for ovality.
Wall thickness is measured with an ultrasonic gauge or micrometer on a cut section; if unavailable, reference original specifications.
Compare figures to the expander head chart, ensuring expansion will not exceed material stretch limits or reduce wall below safe thickness.
Record measurements and selected head size before proceeding.
Accurate data prevents cracks, leaks, and improper joint fit during expansion.
Mark the Exact Area to Expand
Before expansion, the technician precisely marks the section of pipe to be enlarged, aligning the mark with the chosen expander head and the planned joint location.
Measurements and visual checks assure proper overlap and orientation before any tool contact.
The technician notes clear reference lines for depth, rotation, and seam alignment to prevent misalignment during expansion.
- Mark circumference at three equidistant points to maintain even expansion.
- Indicate insertion depth and maximum spread to avoid over-expansion.
- Label seam and orientation relative to adjoining components for correct reassembly.
These marks guide consistent, controlled expansion and minimize fitting errors.
Remove the Exhaust From Mounts for Better Access
Before loosening anything, the mounting hardware should be inspected for rust, wear, and seized fasteners.
The exhaust must be supported securely with a jack or stand to prevent movement while work proceeds.
Hangers and brackets are then detached carefully to free the pipe without bending or overstressing adjacent components.
Inspect Mounting Hardware
With the exhaust lowered from its hangers, the technician examines each mount and bracket for wear, corrosion, or damaged rubber isolators that could compromise alignment.
Fasteners are checked for seized threads or missing hardware; metal brackets are inspected for cracks or bending.
Rubber components are compressed to test elasticity and replaced if hardened.
Corrosion at weld points prompts cleaning or part replacement to guarantee secure reattachment.
- Replace cracked or split rubber hangers.
- Tighten or replace corroded bolts and nuts.
- Straighten or change bent brackets to restore proper fitment.
Documentation of findings guides parts ordering and reassembly.
Support Exhaust Safely
Using sturdy support stands and transmission jacks, the technician secures the exhaust so it can be removed from its mounts without risk of sudden drops or strain on adjacent components.
The supported assembly is aligned to relieve weight from rubber hangers and brackets before any fasteners are loosened.
Pressure points are checked to prevent contact with fuel lines, brake hoses, or heat shields.
With the system stable, bolts or clamps are unfastened progressively, keeping the exhaust balanced.
Components are lowered incrementally onto the supports, maintaining access for expansion work while preserving vehicle and technician safety throughout the removal process.
Detach Hangers Carefully
Several hands-on steps are required to detach exhaust hangers safely and efficiently. The technician inspects each hanger, notes rubber isolation condition, and plans removal sequence. Proper tools and protection prevent damage and injury. Steps focus on controlled release of the exhaust from mounts to improve access for expansion work.
- Use penetrating lubricant on seized metal hooks, wait before attempting removal.
- Support the pipe with a jack or stand, then unhook hangers one at a time.
- Replace worn rubber isolators and confirm alignment before lowering the exhaust.
Document hanger locations for reassembly and avoid overstressing adjacent components.
Secure the Pipe Safely for Expansion
Before expansion begins, the pipe must be guaranteed to be immobilized to prevent rotation or axial movement that could compromise the seal or cause injury. The technician positions sturdy clamps on solid sections, uses padded blocks to avoid deformation, and verifies stability by applying moderate manual force. Support points align near the work zone while leaving access for the expander tool. Safety goggles and gloves remain worn; bystanders keep distance. Confirm vehicle is securely raised and chocked if applicable. Final checks guarantee clamps are tight and the pipe won’t shift during gradual expansion, reducing risk and improving final fit.
| Tension | Trust | Relief |
|---|---|---|
| Grip | Care | Success |
| Firm | Calm | Secure |
Lubricate the Expander and Pipe for Smoother Operation
Before expanding the joint, a technician selects a lubricant compatible with the pipe material and high temperatures.
The lubricant is applied evenly to the expander head and pipe interior to reduce friction and guarantee uniform expansion.
After forming, any excess lubricant is wiped away to prevent contamination and allow proper sealing.
Choose The Right Lubricant
Which lubricant suits both the expander and the tailpipe depends on materials and temperature: a high-viscosity, anti-seize compound or a silicone-based spray is preferred for steel pipes to reduce friction and prevent galling, while a light machine oil can be used for softer metals or moving parts inside the tool; the chosen product should resist high heat, repel moisture, and leave minimal residue to guarantee smooth expansion and an easy release.
- Anti-seize or high-temp paste: use for stainless/steel joints where corrosion and galling are concerns.
- Silicone spray: good for heat resistance and clean release on metal surfaces.
- Light machine oil: appropriate for bearings, linkages, and softer alloys.
Apply Lubricant Evenly
Consistently applying a thin, even film of the chosen lubricant to both the expander head and the inside of the tailpipe guarantees smooth movement and reduces the risk of scoring or seizing.
The technician brushes or sprays a modest amount, covering contact surfaces without pooling.
Attention focuses on the mandrel, expanding lobes, and the pipe mouth where metal bears against metal.
Even coverage prevents uneven expansion and reduces required force.
Reapply sparingly during prolonged use, wiping any displacement onto a rag away from the joint.
Excessive lubricant near welds or sensors is avoided to prevent contamination or interference with subsequent steps.
Clean Excess Lubricant
Occasionally excess lubricant gathers around the expander head and pipe mouth and must be removed to prevent slipping, contamination, or interference with welds and sensors.
The technician inspects joints after expansion, wiping away residue with a clean rag and a suitable solvent.
Attention focuses on sensor ports and mating surfaces to assure no film remains that could impair sealing or corrosion protection.
Proper cleanup improves safety and prepares the area for welding or clamps.
Recommended steps:
- Wipe bulk lubricant with a lint-free cloth, then recheck.
- Use mild solvent for stubborn residue, ventilate area.
- Dispose of contaminated rags per local regulations.
Use a Hand-Held Exhaust Pipe Expander (Mandrel) Step-by-Step
Before expanding a pipe, the operator inspects the mandrel and selects the correct cone size for the tube diameter and wall thickness.
The operator inserts the lubricated mandrel into the pipe end, aligning it for even expansion.
With steady pressure, the handle is turned or tapped to advance the cone, gradually stretching the tube wall.
Progress is monitored visually and by feel to prevent overexpansion.
Once the desired diameter and fit are achieved, the operator reverses the handle to withdraw the mandrel slowly.
The expanded end is inspected for uniformity, cleaned of excess lubricant, and prepared for final fitting or welding.
Use a Hydraulic or Threaded Exhaust Pipe Expander Step-by-Step
When using a hydraulic or threaded exhaust pipe expander, the operator first selects the correct mandrel size and verifies the tool’s condition, fittings, and hydraulic pressure ratings to match the pipe diameter and wall thickness.
The expander is positioned squarely in the pipe, hydraulic lines are connected, and safety gear is worn. The operator applies pressure slowly, monitoring mandrel alignment and pipe deformation, stopping at the desired diameter.
For threaded expanders, the screw mechanism is turned steadily while checking for chatter or uneven spread. After achieving the fit, pressure is released, the mandrel withdrawn, and the joint inspected.
- Verify alignment and fittings
- Increase pressure gradually
- Inspect for cracks or overexpansion
Expand a Pipe for Slip-Fit Joints Without Cracking
Proper lubrication and slow, controlled increments are critical to expanding a pipe for slip-fit joints without causing cracks.
Technicians should apply a high-temperature anti-seize or thin assembly lube evenly inside the bell and on the expander mandrel before each pass.
Expansion should proceed in small, measured steps with inspection between increments to verify even metal flow and prevent overstretching.
Proper Lubrication Techniques
Frequently, technicians rely on the right lubricant to prevent scoring and cracking when expanding exhaust pipe ends for slip-fit joints. The chosen lubricant reduces friction, eases mandrel rotation, and protects metal edges during expansion.
Apply sparingly to the pipe mouth and the expander head; excess attracts debris and interferes with weld later. Use temperature-resistant, non-reactive lubricants formulated for high heat and metalworking. After expansion, wipe residues that could impede fit or corrosion protection.
- High-temp anti-seize: withstands exhaust heat, prevents galling.
- Copper-based paste: good for steel, resists breakdown.
- Silicone spray: temporary lubrication for alignment.
Controlled Incremental Expansion
Begin expansion gradually to control metal stress and prevent cracking: the technician advances the mandrel in small, measured increments, allowing the pipe to yield evenly rather than forcing a single large deformation. Controlled incremental expansion minimizes work hardening and preserves material ductility, ensuring a uniform bore and reliable slip-fit. Measurements are taken after each turn, and pause times permit springback assessment. Proper tool alignment, consistent torque, and light lubricant reduce friction and hotspots. If resistance spikes, back off and re-approach with smaller steps. Record final diameter and fit tolerance to confirm a secure, vibration-resistant joint.
| Step | Action | Check |
|---|---|---|
| 1 | Align mandrel | Visual |
| 2 | Increment mandrel | Measure |
| 3 | Verify fit | Torque |
Check Fit, Alignment, and Finish After Expanding
After expanding the pipe, inspect the joint for smooth mating surfaces, correct axial alignment, and consistent gaps.
The inspector verifies that the expanded end seats evenly over the mating section, free of ridges, tears, or sharp deformations.
Radial uniformity is checked by rotating the assembly and probing gaps at multiple points.
Any misalignment is noted for correction before final fastening.
Surface finish is assessed for burrs and scale that could impede sealing.
Record findings and mark high or low spots for adjustment.
- Rotate and probe gaps at four quadrants
- Scan for burrs, cracks, or thinning
- Note axial offset and seating depth
Weld, Clamp, or Seal the Expanded Joint Properly
The technician evaluates whether welding, clamping, or sealing best suits the pipe material and service conditions.
If welding is chosen, the appropriate method (MIG, TIG, or stick) and weld profile are selected to guarantee strength and corrosion resistance.
When using clamps, they are positioned evenly and tightened to manufacturer torque specifications to prevent leaks and stress concentrations.
Choosing Welding Methods
Deciding how to join an expanded exhaust pipe—by welding, clamping, or sealing—depends on factors like material, anticipated permanence, vibration exposure, and available tools.
The section outlines trade-offs and selection guidance for DIYers evaluating methods for a secure, durable connection.
- Welding: provides strongest, permanent bond; requires proper filler, technique, and safety; best for stainless or mild steel where heat won’t damage nearby components.
- Clamping: offers removable, moderate-strength connection; choose corrosion-resistant clamps sized to fit the expanded joint.
- Sealing: uses high-temp gasket or paste for temporary or low-stress repairs; inspect regularly and replace when compromised.
Proper Clamp Placement
Proper clamp placement guarantees a secure, leak-free joint and minimizes stress on the expanded pipe and mating connector.
The technician positions the clamp over the expanded area so the band centers on the sleeve, covering both pipe and mating tube evenly.
Torque is applied gradually and uniformly, following manufacturer specs to avoid crushing or distortion.
For welded joints, tack welds at opposing points precede full welds to maintain alignment.
Where sealing is needed, a high-temperature gasket or sealant complements the clamp or weld.
Final inspection checks for gaps, movement, and exhaust leakage before road testing.
Repair Common Problems: Cracks, Uneven Expansion, Gaps
Address common issues encountered when using an exhaust pipe expander—cracks in the flange or pipe end, uneven or incomplete expansion, and persistent gaps—and outline how to diagnose which problem is present before attempting repairs.
Inspection should include visual checks, feel for sharp edges, and trial-fit to identify misalignment.
Measure expanded diameter and compare to mating pipe.
If cracks appear, stop expansion and replace or weld; small gaps may accept shims or sealant; uneven expansion often indicates incorrect mandrel size or worn expander jaws.
- Check for hairline cracks and metal fatigue.
- Verify mandrel and pipe alignment.
- Measure diameters and test-fit before final sealing.
Expand Coated or Galvanized Exhaust Pipes Safely
After inspecting for cracks, misalignment, and uneven expansion, attention should turn to coated or galvanized exhaust pipes, which require different handling to avoid damaging the coating or creating hazardous fumes.
The operator should avoid grinding or heating the coating; instead, use a nonabrasive expander head and light, incremental expansions to preserve the finish. Wear appropriate respiratory protection and work in well-ventilated areas to minimize inhalation risk from any disturbed coating.
After expanding, inspect the coating for cracks or delamination; touch up with manufacturer-approved high-temperature paint or sealant if necessary to restore corrosion resistance and appearance.
When to Replace the Pipe Instead of Expanding It
When damage, severe corrosion, or dimensional distortion compromises the pipe’s structural integrity or sealing surface, replacement is preferable to expansion. The person evaluating the exhaust should prioritize safety and long-term function over a quick fix. Expansion suits minor deformations and surface rust, but not through-holes, deep pitting, or flattened sections that prevent a reliable seal.
- Replace when cracks, perforations, or missing material exceed repairable limits.
- Replace if wall thickness loss undermines clamp or welded joint strength.
- Replace when past repairs, alignment issues, or heat damage indicate recurring failure.
Document findings and choose a matched replacement component.
Maintenance Tips to Keep Expanded Joints Leak-Free
Regularly inspecting expanded joints and maintaining clean, properly torqued clamps helps prevent leaks and extends service life. Technicians should check for corrosion, soot, or deformation at each service interval and after thermal cycling.
Fasteners require torque verification to manufacturer specifications; loose clamps allow movement and exhaust leakage. Apply high-temperature anti-seize or exhaust paste sparingly on mating surfaces to improve sealing where recommended.
Replace distorted or pitted clamps and gaskets promptly. Make certain proper alignment to avoid side loads on the joint.
Record inspections and corrective actions to track wear trends and schedule proactive maintenance before leaks develop.
Conclusion
An unexpected coincidence often seals the best repairs: the exact expander that fits a stubborn tailpipe is found in the back of the very toolbox bought for a different job. This serendipity mirrors the practical truth: proper technique, safety gear, and correct tools transform small cracks and gaps into lasting joints. When expansion isn’t enough, replacement is the sensible choice. With routine checks and seals, expanded exhausts stay sound and leak-free for miles.