Remove a Toilet Flange Stuck to Pipe: Easy DIY Guide
To remove a stuck toilet flange from a pipe, start by identifying the flange’s material and how it’s attached. If possible, drain and detach the toilet. Then, apply penetrating oil, gently tap around the flange, and use an oscillating tool or reciprocating saw to carefully cut and pry the flange away from the pipe, ensuring you protect the drain pipe during the process. Always wear eye, respiratory, and hand protection. After removal, clean the pipe, check for any damage, and decide on the best repair method, whether it be repair clamps, epoxy, or a replacement flange and extender. Follow detailed step-by-step techniques and safety tips for a successful removal.
When Removing a Flange Is Appropriate
When the toilet flange shows signs of severe corrosion, cracking, or warping that compromises the seal or mounting stability, removal becomes necessary to restore a reliable connection between the toilet and drain.
Replacement is appropriate when leaks recur despite new wax rings, when flange bolts strip or detach, or when the flange sits below finished floor level preventing a secure toilet fit.
Also warranted after sewer gas odors persist, flange material crumbles during inspection, or previous repairs used temporary fixes.
Structural damage to surrounding flooring or PVC solvent-fused failures that prevent effective sealing justify full flange removal and replacement.
How Do You Remove a Flange Stuck to the Outside of a Pipe?
Begin by evaluating why the flange is stuck and what material the pipe and flange are made, since removal methods differ for cast iron, cast-iron-clad, PVC, and ABS.
If corroded metal bonds flange to pipe, apply penetrating oil, let soak, then tap lightly to break corrosion.
For cast-iron-clad or fused fittings, cut flange with an angle grinder or reciprocating saw, avoiding deep cuts into pipe.
For PVC or ABS, score and split flange with a saw or chisel, then pry off.
Work gradually, avoiding excessive force that could crack the pipe.
Inspect remaining pipe for damage before proceeding.
Gather Safety Gear and Tools
Before beginning work on a stuck toilet flange, the person gathers protective clothing and durable gloves to prevent cuts, chemical exposure, and contamination.
They also assemble essential tools and equipment—pipe wrench, hacksaw or reciprocating saw, pry bar, screwdriver set, and safety goggles—to guarantee the job can proceed efficiently.
A clear layout of gear nearby reduces delays and keeps the workspace safer.
Protective Clothing And Gloves
Often a few simple protective items make the task safer and more comfortable: sturdy gloves to guard against sharp flange edges and chemical exposure, long sleeves and durable pants to protect skin from debris and sewer residue, and closed-toe, slip-resistant shoes to prevent foot injuries.
The wearer should choose puncture-resistant gloves—nitrile or cut-resistant leather—depending on chemical use and tool contact.
Clothing should fit without loose cuffs that can catch on fittings.
Consider disposable coveralls for heavy contamination and a washable apron for lighter jobs.
After work, remove contaminated garments carefully and wash hands and exposed skin thoroughly.
Essential Tools And Equipment
A compact toolkit and appropriate safety gear make removing a stuck toilet flange feasible and safer.
The writer recommends safety glasses, nitrile gloves, and a dust mask to prevent exposure to debris and pathogens.
Essential tools include an adjustable wrench, socket set, flathead and Phillips screwdrivers, and a putty knife to scrape sealant.
A reciprocating saw with a metal-cutting blade or oscillating multi-tool helps cut corroded flanges; a hacksaw can substitute.
Plumber’s putty, flange repair ring, replacement bolts, and a torque-limited driver complete the list.
A flashlight and bucket improve visibility and manage water or rust debris.
Identify Flange Type and How It’s Attached
When approaching a stuck toilet flange, it helps to first determine its material and how it’s secured to the drain pipe and floor.
Visual inspection distinguishes plastic (PVC or ABS), cast iron, brass, or older lead-lined types. Note whether the flange is bolted, screwed, solvent-welded, or sealed with a leaded or rubber gasket.
Check for a hub connection, spigot, or clamp ring and observe corrosion, broken fasteners, or visible caulk.
Measure flange thickness and look for integral flange-to-pipe assemblies versus separate rings.
Document findings to select appropriate extraction techniques and replacement parts without prematurely disturbing the fixture.
Remove the Toilet or Work With Flange in Place?
The author considers whether to remove the toilet first or attempt flange work with the fixture in place.
Removing the toilet gives full access to the flange and piping, making stubborn or corroded connections easier to address.
Working with the flange installed can save time on simple repairs but may limit visibility and maneuverability for more involved removal.
Remove Toilet First
Consider whether to remove the toilet before tackling a stuck flange or to work with the fixture in place; each option affects access, safety, and the risk of damaging the flange or waste pipe.
Removing the toilet gives clear visibility, unimpeded tool access, and easier flange replacement or repair. It reduces contamination risk and allows inspection of the closet flange, pipe, and surrounding subfloor.
Removal requires draining the bowl, disconnecting water, and handling a heavy, awkward fixture—risks include breaking the porcelain or disturbing a sealed wax ring. If unsure, preparing to lift with a helper and proper PPE minimizes injury and damage.
Work With Flange
Deciding whether to remove the toilet or work with the flange in place hinges on trade-offs between access and risk: keeping the fixture seated preserves the wax seal and avoids heavy lifting but restricts visibility and tool maneuverability, while removing it provides full access for safe flange removal or replacement at the cost of handling a bulky, fragile fixture and resealing the drain. The choice depends on user strength, available helpers, and the flange condition; minor corrosion can be managed with the bowl installed, severe damage usually requires removal. Assess risks, gather tools, and plan for seal replacement if the toilet is moved.
| Factor | Consideration |
|---|---|
| Access | Limited vs full |
| Seal risk | Preserved vs disturbed |
| Effort | Low vs high |
| Tools | Hand tools vs power tools |
| Damage level | Minor vs severe |
Loosen a Glued PVC Flange With Heat and Leverage
Using targeted heat and controlled leverage, a glued PVC flange can be softened and eased from its pipe without breaking the surrounding waste line. The operator warms the flange lip evenly with a heat gun at low setting, avoiding overheating the pipe.
Once pliable, gentle prying with a thin pry bar and a rag-protected block transfers force to the flange rather than the pipe. Work around the circumference gradually to avoid stress points.
If adhesive remains, reheating and repeating the leverage sequence loosens it. Clean residue with a plastic scraper and solvent recommended for PVC before installing a replacement flange.
- Heat evenly
- Protect pipe
- Pry gradually
- Clean residue
Cut, Pry, and Use Rotary Tools Safely
Before cutting or prying a stuck flange, the worker dons appropriate safety gear—gloves, eye protection, and a dust mask—to guard against debris and chemical residue.
They select the right tools for the task, choosing pry bars, handsaws, or a rotary tool with the correct blade or bit for PVC or cast-iron.
Controlled, steady cuts and measured prying motions minimize pipe damage and reduce the risk of slippage or injury.
Safety Gear First
Usually, a worker puts on eye protection, gloves, and a dust mask before cutting or prying a stuck toilet flange to safeguard against flying debris, sharp edges, and inhaled particles.
The worker also confirms a clear work area, adequate lighting, and a nearby first-aid kit.
When using rotary tools, hearing protection and firm two-handed control are emphasized to prevent slips.
Disposable coverings protect surrounding fixtures from dust and fragments.
A brief checklist helps guarantee no step is missed.
- Eye protection: safety glasses or a face shield
- Hand protection: cut-resistant gloves
- Respiratory: N95 or equivalent mask
- Hearing protection: earmuffs or plugs
Proper Tool Selection
Select tools that match the flange material and the available space: a reciprocating saw or oscillating multi-tool with a metal-cutting blade for corroded cast-iron or brass, a hacksaw or carbide-grit blade for PVC, and a pry bar and plumber’s wrench for stubborn mechanical fasteners.
Choose compact tools when access is limited and low-vibration options to reduce fatigue. Match blade tooth count and material rating to the flange for efficient cutting. Include replacement blades, spare batteries, and a utility light. Prioritize insulated handles and secure grips.
When using rotary tools, employ guards, correct RPM, and clamp workpieces to prevent kickback.
Controlled Cutting Technique
With the right tools laid out, attention shifts to the controlled cutting technique: making measured cuts, using pry leverage where appropriate, and operating rotary tools with deliberate safety measures.
The practitioner assesses material, marks cut lines, and plans pry points to prevent pipe damage.
Protective gear and steady grips guarantee control.
Rotary tools run at appropriate speeds; cutting wheels are replaced if worn.
Debris is cleared progressively to maintain visibility.
- Measure and mark cut locations precisely.
- Use a slim pry bar to separate flange edges gently.
- Cut incrementally; avoid forcing blades.
- Wear gloves, eye protection, and a dust mask.
Solvents and PVC-Safe Chemicals: What Works and What’s Dangerous
When chemical methods are considered for freeing a toilet flange from a PVC drain, the focus should be on products that dissolve organic sealants without harming PVC or weakening its joints.
Mild solvents like isopropyl alcohol or citrus-based adhesive removers can soften wax and old gasket residues safely.
Avoid PVC cement, MEK, acetone, or ketone-rich strippers; they can craze or soften PVC.
Enzyme cleaners and biodegradable degreasers are low-risk for organic buildup but act slowly.
Always test any product on an inconspicuous scrap of the same pipe material, use ventilation, and follow manufacturer safety and disposal instructions.
Avoid Damaging the Drain Pipe During Removal
During flange removal, priority must be given to preserving the integrity of the drain pipe by using controlled, non-invasive techniques and avoiding excessive force or heat that can crack, deform, or delaminate PVC.
The technician should work methodically, inspecting the joint and softening adhesive with PVC-safe methods rather than prying.
Mechanical advantage tools must be used carefully to prevent chomping or gouging the pipe wall.
If the flange is bonded, slow, incremental steps reduce risk; if the pipe moves, stop and reassess support.
- Apply heat-free solvent and wait recommended time.
- Use padded pry bars and block supports.
- Cut only flange material, not pipe.
- Replace damaged seals immediately.
Removing Corroded Metal Flanges on Cast-Iron or Galvanized Pipes
Removing corroded metal flanges from cast-iron or galvanized drain pipes demands a deliberate, tool-specific approach because rust and galvanic bonding can fuse flange to pipe and risk pipe damage if mishandled. One method uses penetrating oil, heat, and gradual mechanical persuasion: cut flange tabs, score between flange and pipe, apply oil, tap gently, then use a flange puller or pipe extractor. If corrosion is extreme, sectioning the flange with a reciprocating saw or grinder avoids excessive leverage. Protect pipe interior, work slowly, and stop at any sign of cracking. Seek professional help if the pipe integrity is uncertain.
| Tension | Frustration | Relief |
|---|---|---|
| Locked flange | Rusted fasteners | Slow progress |
| Stuck pipe | Fear of damage | Careful tools |
| Heavy corrosion | Time drain | Safer removal |
Choose the Right Replacement Flange for Your Pipe
Choosing the right replacement flange requires matching the pipe material, diameter, and connection style to assure a secure, code-compliant seal; cast-iron, PVC, ABS, copper, and galvanized systems each need specific flange types and fittings, and the choice also depends on whether the toilet will bolt directly to the flange, use a wax ring or wax-free seal, or require a spacer or flange adapter for height correction.
Consider these points when selecting a replacement:
- Confirm pipe material and diameter (2″, 3″, 4″) to select compatible flange type.
- Choose connection method: hub, no-hub, or slip-fit.
- Match bolt pattern and offset for toilet fit.
- Select corrosion-resistant material suitable for the environment.
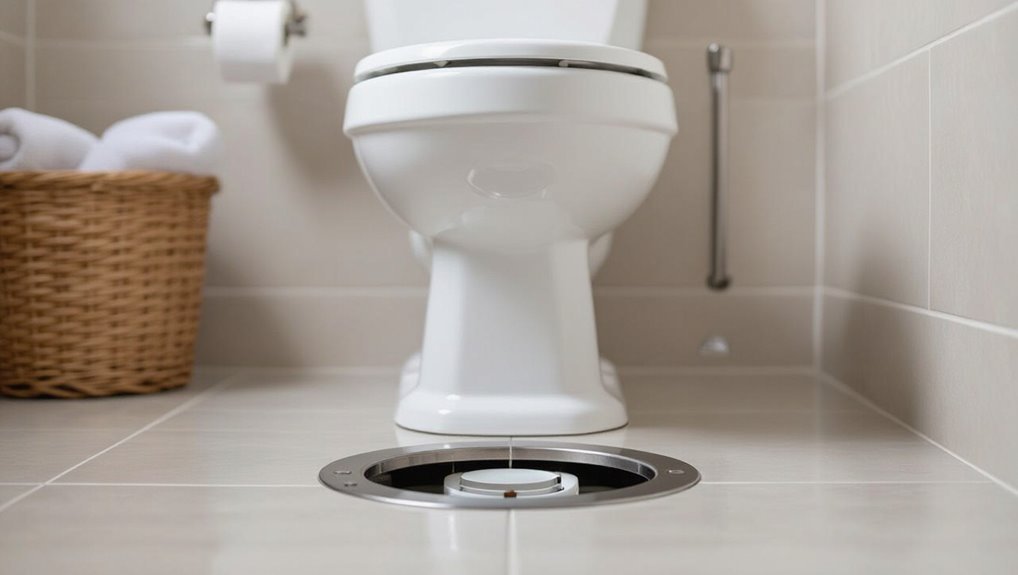
Install a New Flange on an Existing Pipe
With the old flange cleared and the pipe surface prepared, installing a new flange on an existing pipe requires careful alignment, secure attachment, and a proper seal to guarantee a leak-free, stable toilet connection.
The installer places the flange over the pipe, confirming it sits flush and level with the finished floor. Fastening method depends on flange type: screw through hub into pipe or secure with stainless clamps for PVC/ABS adaptor.
Apply a suitable wax ring or rubber gasket, align bolt slots, and gently lower the toilet to compress the seal. Finally, tighten bolts evenly and check for wobble and proper seat height.
Repair Options If the Pipe’s Outer Surface Is Damaged
If the pipe’s outer surface is damaged, several repair paths are available depending on the extent and material of the damage: minor scratches or shallow gouges can be smoothed and sealed, while deep cracks, crushed sections, or corroded metal often require a replacement sleeve, coupling, or short splice section.
- Sand and epoxy: sand blemishes, clean, apply plumbing-grade epoxy for a watertight patch on PVC or cast iron.
- Clamp sleeve: use a stainless repair clamp for localized crushed or corroded areas.
- Slip coupling: cut out a short section and join with a coupling for irreparable segments.
- Replace riser: for extensive damage, remove and replace the damaged riser.
Troubleshooting: Common Problems and Fixes
Common trouble includes a corroded flange that bonds to the pipe, a compromised wax ring that causes leaks, and misaligned piping that prevents a proper seal.
Each issue requires a specific approach — careful flange extraction or replacement, wax ring removal and reseating, and realignment or shimming of the pipe or flange.
The following section outlines practical fixes and warning signs for each problem.
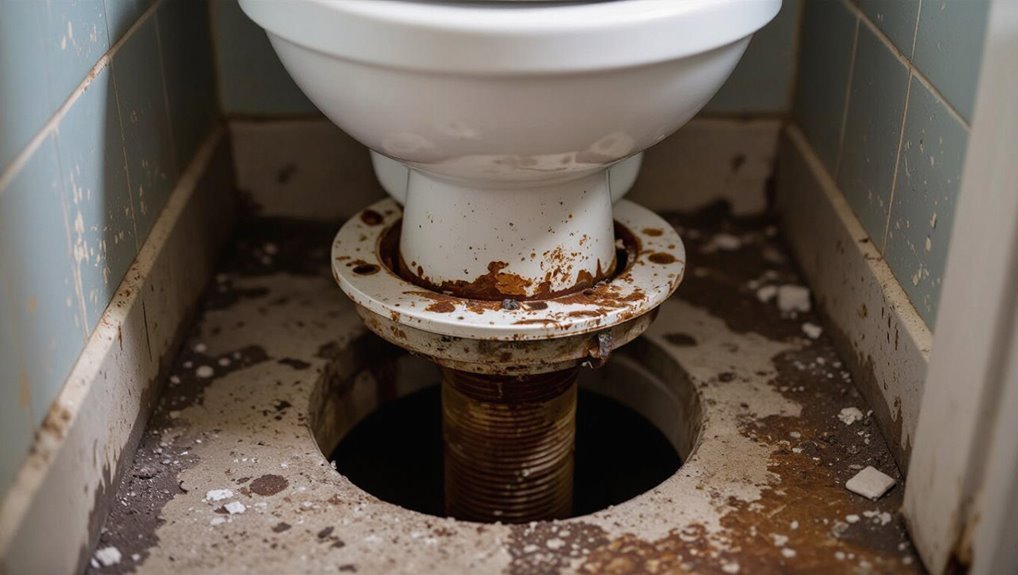
Corroded Flange Removal
Corroded toilet flanges present a frequent obstacle when removing a flange stuck to a cast-iron or steel waste pipe, as rust and mineral deposits fuse the two parts together and hide fasteners. The process requires patience, proper tools, and corrosion-specific tactics to avoid pipe damage.
- Apply penetrating oil and allow ample dwell time to loosen seized screws and flange segments.
- Use heat cautiously (propane torch) on the flange, not the pipe, to expand metal and break corrosion bonds.
- Cut the flange with a rotary tool or reciprocating saw if fasteners fail.
- Inspect the pipe for thin or pitted metal before reinstalling a new flange.
Damaged Wax Ring Issues
Failure of the wax ring is a frequent source of toilet leaks and odors, and diagnosing the issue requires careful inspection of seal integrity, alignment, and bolt tightness.
When water appears at the base or sewer gas is noticed, the wax may be compressed, torn, or installed improperly. Remove the fixture to inspect the ring and flange surface; replace with a properly sized wax or wax-free seal if damaged.
Make certain flange height is adequate and bolts are snug without warping the bowl.
After replacement, test for leaks by flushing and checking around the base and inside the closet flange.
Pipe Alignment Problems
Inspecting pipe alignment begins with a clear understanding that even slight misalignment between the toilet flange and drainpipe can compromise the seal, cause leaks, or stress mounting bolts.
Assessment involves measuring flange height, checking flange centering over the pipe, and confirming the pipe’s angle. Common fixes include shimming, using an extender flange, or repiping when offsets exceed repairable limits.
Recommended steps:
- Measure flange offset and height relative to finished floor.
- Recenter flange using flexible coupling if minor misalignment.
- Shim or use flange spacer to correct height discrepancies.
- Replace or reroute pipe for severe misalignment.
When to Call a Pro : Red Flags and Costs
Judgment calls are necessary when removing a stuck toilet flange, especially if unusual noises, persistent sewer smell, visible cracks in the flange or pipe, severe corrosion, or extensive rusted bolts are present; these signs indicate risks—structural damage, hidden leaks, or compromised drainage—that often exceed DIY skills and warrant professional assessment.
A plumber can evaluate unseen sewer-line damage, compromised subflooring, or corroded cast-iron that requires specialty tools or partial pipe replacement. Emergency containment or odor mitigation may be needed.
Expect higher labor rates for diagnostics, confined-space work, and structural repair; obtaining multiple quotes and verifying licenses reduces surprise costs and liability.
Time, Cost, and Material Checklist
For planning purposes, estimating the time, cost, and materials for removing a stuck toilet flange typically involves three components: labor (including disassembly, flange removal, and any subfloor or pipe repair), parts (new flange, bolts, wax ring or rubber gasket, sealant, and fasteners), and contingency for unexpected issues such as corroded pipe sections or rotten subflooring; a straightforward flange replacement usually takes 1–3 hours and costs $50–$200 in parts for a DIY job, while professional work can add $150–$500 in labor and rise substantially if structural or cast-iron pipe replacement is required.
- Tools: wrench, screwdriver, pry bar, saw, utility knife.
- Parts: flange, bolts, gasket/wax ring, sealant.
- Time: 1–3 hours DIY; longer if repairs needed.
- Contingency: budget 20–50% extra for surprises.
Conclusion
Like a tired key finally freeing a stubborn lock, removing a flange reveals the path for renewal. The DIYer, patient as a gardener pruning roots, uncovers new footing where corrosion once held fast. Small repairs become seeds of lasting function; careful tools and calm judgment turn trapped metal into steady ground. When confidence or damage exceeds skill, calling a pro is the bridge to safety—restoring flow, order, and peace.