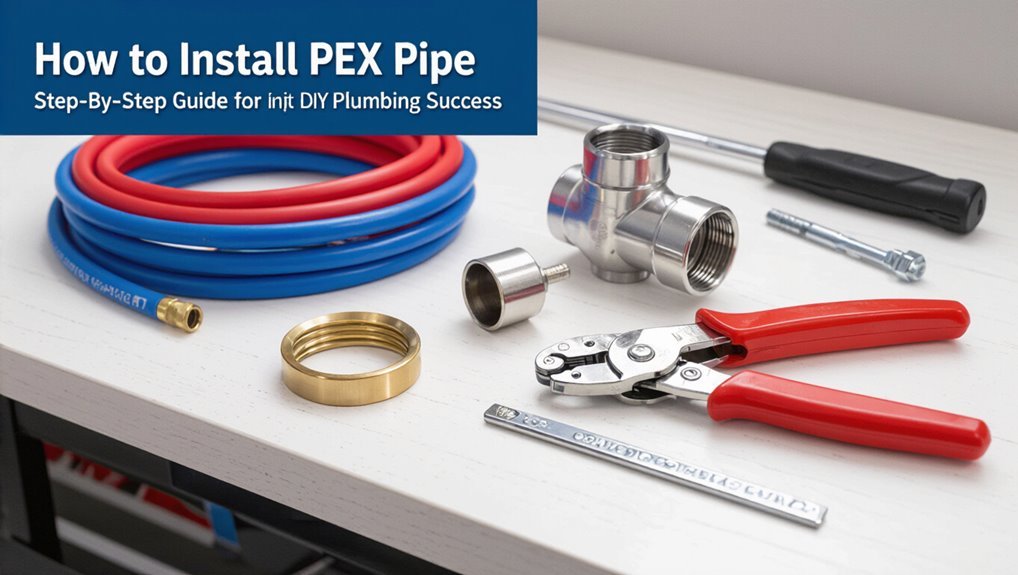
How to Install PEX Pipe: Step-by-Step Guide for DIY Plumbing Success
To successfully install PEX pipe, start with a well-planned layout, ensuring you check local permits and codes. Select the appropriate PEX type and fittings for your project. Measure and cut the tubing accurately, deburr the ends, and assemble the fittings or crimp rings using the right tools. Secure the lines to prevent movement and pressure-test the system for any leaks. Take care to avoid overbending, UV exposure, and issues with thermal expansion. For detailed step-by-step procedures, tool lists, and troubleshooting tips, continue reading.
Quick PEX Install Overview: Steps, Time, and Risks
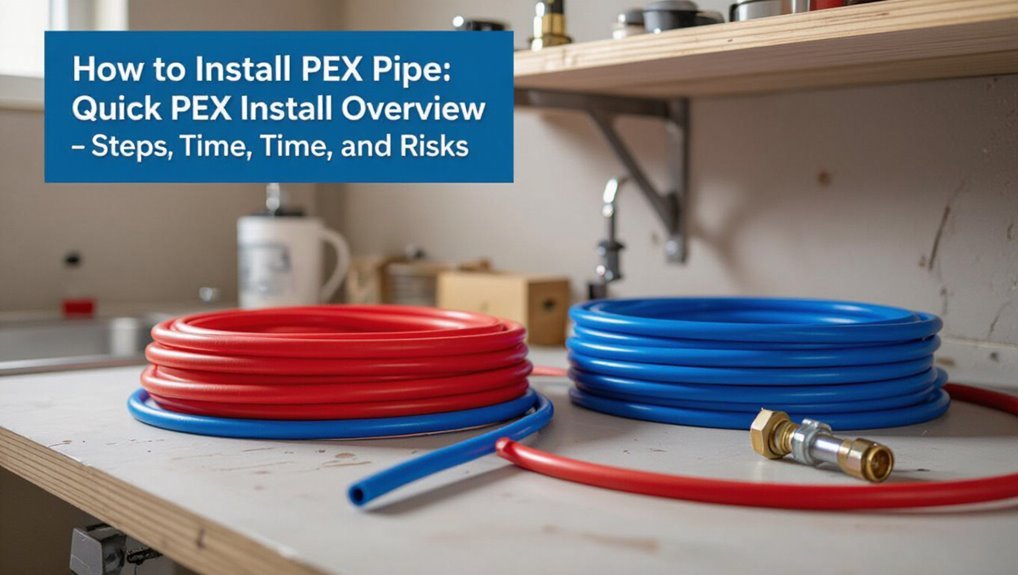
How long does a basic PEX installation take and what steps are essential? A typical small run finishes in a few hours; larger projects span a day or more.
The installer measures and plans layout, cuts and deburrs tubing, fits fittings or crimps rings, secures lines, and pressure-tests the system.
Essential steps: accurate measuring, proper tool selection, secure fastening, and thorough leak testing.
Risks include improper connections, overbending, inadequate support, and thermal expansion issues.
Mitigation requires following manufacturer specs, using correct fittings, and validating joints under pressure.
Attention to detail reduces leaks, water damage, and costly rework.
Check Permits and Local Codes Before You Start
Permit requirements for PEX installations vary by municipality and can affect scope, materials, and inspection needs.
Before beginning work, the homeowner or contractor should check local zoning and plumbing codes to determine applicable standards.
If permits are required, they must be obtained and inspections scheduled to verify the installation meets code.
Permit Requirements Vary Locally
Where local regulations apply, homeowners and contractors should verify whether a plumbing permit is required before beginning PEX installation.
Permit requirements differ by municipality, county, and utility district; some projects like simple repairs may be exempt while system alterations, relocations, or new branches often require approval.
Required documentation can include plans, load calculations, and installer credentials.
Fees, inspection schedules, and allowable materials vary.
Failure to obtain permits can lead to fines, mandated rework, or problems selling the property.
Contacting the local building department early clarifies obligations and timelines, ensuring compliance before work begins.
Inspect Zoning And Codes
Before work begins, the property owner or contractor must review local zoning ordinances and plumbing codes to confirm that the planned PEX installation complies with land-use restrictions, pipe routing limitations, and materials approvals. The review should identify setback rules, allowable fixture locations, and any special requirements for potable or outdoor lines. Documentation of code citations, manufacturer certifications, and inspection contact information streamlines later steps. When uncertainty exists, consulting the local building office or a licensed plumber avoids noncompliance. Use the table below to record quick references for review.
| Item | Source | Notes |
|---|---|---|
| Zoning | Local ordinance | Setbacks |
| Plumbing | Code book | Materials |
| Contacts | Building dept | Inspector info |
Obtain Necessary Permits
When preparing to install PEX, the property owner or contractor must secure all required permits and verify applicable local codes to prevent delays or enforcement actions.
They should contact the local building department to determine permit types, submission requirements, fees, and inspection schedules.
Plans and specifications, including piping layout and materials, may be required.
Applications must be completed accurately to avoid rejection.
Permit approval guarantees work meets health and safety standards and preserves warranty validity.
Arrange inspections at prescribed stages and retain documentation.
Noncompliance risks fines, mandatory removal, or failed resale disclosures, so adherence to permitting procedures is essential.
Is PEX Right for Your Project? Pros, Cons, and Checklist
Deciding whether PEX is appropriate for a project requires weighing its advantages, limitations, and site-specific constraints. PEX offers flexibility, corrosion resistance, and faster installs but may be vulnerable to UV, rodents, or high-temperature misuse. Consider local code, fixture compatibility, and long-term access for repairs.
- Assess site: exposure to sunlight, mechanical protection needs, and available access for runs.
- Evaluate system goals: budget, water quality, and desired lifespan versus metal alternatives.
- Prepare checklist: required fittings, clamps, expansion tools, permits, and contingency for future changes.
A practical decision matches PEX benefits to project constraints.
Which PEX Type to Choose: PEX‑A, PEX‑B, or PEX‑C
When choosing between PEX types, the discussion often centers on PEX‑A for its superior flexibility and memory versus PEX‑B for lower cost and greater rigidity.
PEX‑A typically bends more easily and recovers from kinks, making it well suited for tight runs and fewer fittings.
PEX‑B can be a budget-friendly choice where stiffness is acceptable and mechanical connections are used.
PEX-A Flexibility
Preferring PEX‑A often comes down to its superior flexibility and memory, which allow it to bend around corners with fewer fittings and to recover from kinks when heated.
Installers note its ease when routing in tight spaces and its smoother bends reduce joint count and potential leak points.
Thermal memory aids repairability: a kink can often be fixed with heat rather than replacement.
For DIYers this means faster runs and cleaner layouts.
Consider these practical benefits:
- Easier bending reduces fittings and installation time.
- Kink recovery via heat saves material and effort.
- Better maneuverability in cramped or retrofit spaces.
PEX-B Cost And Rigidity
While PEX‑A is prized for flexibility and memory, PEX‑B is often chosen for its lower cost and greater stiffness.
PEX‑B’s manufacturing yields a more rigid tube that resists kinking and holds shape in long runs, easing alignment and support in straight sections. It generally costs less than PEX‑A, making it attractive for budget-conscious projects.
Downsides include less freeze‑resistance and reduced ability to recover from bends, so fittings and expansion methods differ. Installers select PEX‑B where rigidity and price outweigh flexibility needs, especially in concealed, linear installations with compatible crimp or clamp connection systems.
Plan Your PEX Layout to Minimize Runs and Heat Loss
To reduce material use and heat loss, the installer should design PEX runs that keep pipe lengths short and routing direct, grouping fixtures served from the same zone and positioning manifolds centrally.
Careful planning reduces pressure drop, simplifies insulation, and limits fittings.
Consider routing within conditioned space and along exterior walls only when necessary.
Use consistent rise/fall to avoid traps and avoid excessive bends.
Balance accessibility for maintenance with concealment.
- Map zones by proximity and demand to shorten main runs.
- Insulate exposed lines and prioritize shortest cold-to-hot distances.
- Minimize fittings and choose gentle bends to preserve flow.
Choose Manifold vs. Trunk‑and‑Branch Plumbing
The choice between a manifold and a trunk‑and‑branch layout affects material use, balancing, and ease of future maintenance.
A manifold system sends dedicated PEX runs from a central hub to each fixture, simplifying shutoffs and flow control but requiring more tubing.
Trunk‑and‑branch uses a main run with lateral drops, reducing piping length but increasing the risk of pressure drop and shared shutoffs.
Manifold System Benefits
Manifold plumbing centers each fixture on its own dedicated supply line, eliminating shared branches and balancing pressure and flow across the system.
It simplifies isolation, reduces noise from pressure fluctuations, and makes troubleshooting straightforward.
Installation often uses shorter runs and fewer fittings, lowering leak risk and conserving water during shutoffs.
- Easier maintenance: individual shutoffs let one fixture be worked on without disturbing others.
- Consistent performance: balanced flow minimizes pressure drops when multiple fixtures operate.
- Future flexibility: adding or rerouting fixtures requires minimal changes at the manifold.
Trunk‑And‑Branch Basics
While both approaches distribute water throughout a building, trunk‑and‑branch systems route a main feed with lateral branches to individual fixtures, contrasting with the dedicated runs from a manifold.
Trunk‑and‑branch installations use fewer long runs, reducing initial tubing and fittings cost, but risk pressure loss and simultaneous-use issues. They simplify layout for renovations and straight runs, yet balancing hot and cold delivery requires careful planning.
Manifolds offer superior control, easier isolation, and consistent pressure at fixtures but increase tubing length and material.
Decision criteria include budget, fixture count, desired control, space limitations, and anticipated future modifications.
Tools You Need for a DIY PEX Install
For a successful DIY PEX install, a compact set of reliable tools guarantees speed, safety, and secure fittings. Essential tools include a PEX crimp or clamp tool, a quality pipe cutter, and a deburring tool to assure clean, square cuts and leak-free joints. Other helpful items are a tape measure, marker, adjustable wrench, and a stud finder for routing.
Safety gear — gloves and eye protection — is nonnegotiable. Properly maintained tools reduce mistakes and rework.
Below are three core items to prioritize for any home PEX project:
- PEX crimp or clamp tool
- PEX pipe cutter
- Deburring tool
Buy List: PEX Pipe, Manifolds, Adapters, Rings, and Insulation
The next step lists what must be purchased for a PEX install, starting with the common PEX types (PEX-A, B, and C) and their suitable uses.
It then outlines essential fittings and manifolds required for connections and zoning, plus spare rings or clamps for secure joints.
Finally, it covers insulation and small accessories that prevent heat loss and protect piping during and after installation.
PEX Types Overview
A clear understanding of PEX types and the associated components is essential before purchasing materials for a hydronic or potable-water installation.
The overview distinguishes PEX-A (most flexible, good for expansion fittings), PEX-B (stiffer, common and cost-effective), and PEX-C (less common, for specific uses).
Color coding and oxygen-barrier variants matter for potable versus radiant heating.
Manifolds, adapters, rings, and insulation choices depend on system type and PEX flexibility.
Consider installation environment, freeze resistance, and compatibility with chosen fittings.
Evaluate length, diameter, and pressure ratings to match application and local code requirements.
- PEX-A: flexibility
- PEX-B: economy
- PEX-C: niche
Essential Fittings Needed
Gathering the correct fittings guarantees a reliable PEX installation and prevents costly rework. Required items include PEX pipe in appropriate diameters, a manifold to centralize supply lines, and adapters to convert between PEX and existing copper or threaded fixtures.
Crimp or clamp rings and compatible fittings—elbows, tees, couplers, and valves—ensure secure, code-compliant joints. Hose-bib and appliance adapters provide connections for outdoor spigots and washers.
A reliable PEX-compatible toolset (crimper or cinch tool and gauge) is essential for proper ring installation. Select fittings rated for potable water and local plumbing codes; quality prevents leaks and future maintenance.
Insulation And Accessories
Moving from fittings to thermal protection and supporting accessories, attention shifts to items that preserve system performance and longevity. The installer selects foam or rubber insulation sleeves sized to pipe diameter, manifold mounting brackets, and PEX rings for secure runs. Adapters match PEX to existing plumbing; clamps or crimp tools make certain reliable joints. Proper insulation reduces heat loss and prevents freezing; accessories simplify organization and maintenance. Consider material compatibility and local code requirements when buying.
Typical shopping list: PEX pipe, manifolds, adapters, rings, and insulation — chosen to fit layout, flow needs, and anticipated service access.
- Foam or rubber insulation
- Manifold brackets and rings
- Adapters and clamps
Measure and Calculate Pipe Runs
Measure the layout of the space and record the exact distances along walls, between fixtures, and through bulkheads before cutting any PEX; accurate field measurements minimize waste and prevent awkward fittings.
The installer should sketch routes, noting bends, offsets, and entry/exit points.
Add allowance for fittings and required bends, using manufacturer bend-radius guidelines.
Tally lengths per run and group similar runs to optimize material use and reduce joints.
Mark pipe lengths on the sketch and label corresponding fixtures.
Verify measurements against the plan and site obstructions, then prepare a cutting list and parts list to confirm correct quantities before beginning installation.
Size PEX Pipe for Supply Lines and Fixtures
Selecting the correct PEX diameter guarantees adequate water volume and maintains pressure throughout the supply system.
Careful assessment of each fixture’s flow requirements determines whether 1/2-inch, 3/4-inch, or larger PEX is appropriate.
Sizing decisions should balance fixture demand, run length, and peak simultaneous usage to avoid undersizing or unnecessary oversizing.
Selecting PEX Diameter
Which pipe size will deliver adequate flow without excessive cost or pressure loss? The installer evaluates run length, fixture grouping, and available water pressure to choose PEX diameter. Common sizes balance flow and material cost; upsizing reduces pressure loss but adds expense. Consider velocity limits and code minimums when planning mains and branches. Use tables or charts for head loss estimates and validate with simple calculations. Typical practice reserves larger mains and smaller branches for individual fixtures. Follow manufacturer guidance and local codes to guarantee compatibility with fittings and manifolds, avoiding unnecessary oversizing that increases cost and complicates installation.
- Assess run length
- Check pressure
- Follow code
Fixture Flow Requirements
Determine each fixture’s required flow rate and pressure to size PEX lines appropriately: identify the peak gallons per minute (GPM) demand for sinks, showers, toilets, and appliances, then match those demands to pipe diameters that maintain acceptable velocity and head loss over the planned run lengths. Calculate cumulative demand for simultaneous fixtures and apply fixture unit tables or GPM summation to determine branch and riser sizes. Consider pressure drop rules and velocity limits to avoid noise and wear. For long runs, upsize to compensate for friction loss. Verify local code requirements and manufacturer’s charts to finalize 1/2″, 3/4″ or larger selections.
Map Shutoffs and Service Access Points
Before laying any PEX runs, a clear map of shutoff valves and service access points should be created so future isolation and repairs can be performed quickly and without guesswork.
The plan pinpoints main and branch shutoffs, access panels, and routing clearances. Labels and a simple diagram near the manifold aid homeowners and technicians.
Consider accessibility, freeze protection, and separation from electrical or heat sources. Create durable labels and keep a digital copy with photos.
Recommended checklist:
- Locate and mark main and branch shutoffs.
- Identify and note access panels and inspection points.
- Verify clearance and protection requirements for each point.
Prepare the Work Area and Turn Off the Water
With the work area cleared and well-lit, the installer secures tools, materials, and a drain container within easy reach and confirms that protective gear is on hand.
Next, the installer locates and shuts off the appropriate main or localized shutoff valves, verifying isolation by testing nearby fixtures.
Pressure is relieved by opening faucets and flushing toilets until flow stops and gauges read zero.
Any downstream heaters or valves are tagged to prevent accidental reactivation.
Floors and electrical sources are protected from water.
The workspace is organized to avoid tripping or contamination, and a helper is notified of the shutdown plan.
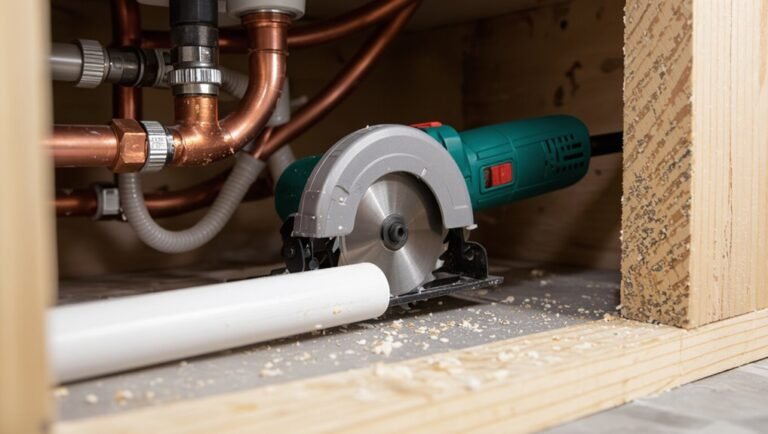
Remove Old Pipe and Prepare Connection Points
With the water supply shut off, the old piping can be removed safely and any residual pressure relieved.
Cut ends should be cleaned of corrosion and burrs to guarantee a proper seal with new fittings.
The work area is kept dry and debris-free before proceeding with PEX installation.
Shut Off Water Supply
Shut off the main water supply and drain the lines to create a safe, dry workspace for removing the old pipe and preparing connection points.
The technician confirms isolation at the meter or main valve, then opens faucets and relief valves to expel residual water.
After ensuring no pressure remains, the old pipe is exposed and capped as needed to prevent contamination.
- Verify isolation: close main, test multiple fixtures.
- Drain system: open lowest and highest points until flow stops.
- Secure area: place buckets, towels, and a shutoff tag to avoid accidental reopening.
Clean And Deburr
Before fitting the new PEX, the technician removes the old pipe and thoroughly cleans each connection point to guarantee a secure, leak-free joint.
Corroded fittings and residual sealant are scraped away with a wire brush; solder and burrs are removed using a file or deburring tool.
The tubing ends are cut square with a PEX cutter, then inspected for cracks or distortions.
Surfaces are wiped with a clean cloth and appropriate solvent to remove oil and debris.
Clean, smooth mating surfaces assure proper seating of fittings and rings, reducing the risk of leaks and simplifying assembly.
Cut PEX Cleanly to Length
Cut the PEX pipe squarely to the measured length using a sharp tubing cutter or a fine-tooth saw, ensuring the cut face is smooth and free of burrs.
The installer checks alignment, supports the pipe to prevent crushing, and makes a single decisive cut.
Clean, straight cuts help fittings seat correctly and prevent leaks.
After cutting, the end is inspected for ovality and any visible deformation.
If the cut is imperfect, the section is recut rather than force-fitting.
Follow these practical tips:
- Use a dedicated PEX cutter for consistent results.
- Cut slowly to avoid splintering.
- Keep blades sharp and clean.
Deburr and Ream PEX Ends
Before making connections, the cut ends are cleaned to remove any burrs that could interfere with seals.
The inner edge is reamed smooth to promote unobstructed flow and proper seating of fittings.
Each prepared end is then inspected to confirm correct dimensions and fit before assembly.
Remove Burrs Cleanly
After the pipe is severed, any raised edges or plastic slivers at the PEX end must be removed to guarantee a proper seal and prevent damage to fittings. A firm, single-handed deburring tool or sharp utility blade can trim the exterior rim; care is taken to avoid nicking the tubing. Interior burrs are addressed with a dedicated PEX deburring tool that rotates gently. Final inspection confirms a clean, even face for insertion.
- Trim exterior burrs smoothly, rotating the blade around the circumference.
- Remove internal slivers with a round reamer or deburring bit.
- Wipe and visually verify the finished end.
Ream For Smooth Flow
Ream the PEX end to remove any internal irregularities that can restrict flow or abrade fittings; a smooth bore guarantees consistent water velocity and reduces turbulence where the tubing meets a fitting. The installer uses a reamer or deburring tool, rotating evenly and removing only necessary material. Clean shavings from the lumen and check the cut for concentricity. Proper reaming preserves wall thickness and assures reliable seals without overworking the tubing.
| Tool | Action | Tip |
|---|---|---|
| Reamer | Rotate gently | Avoid gouging |
| Deburr tool | Remove lip | Inspect shavings |
| Sandpaper | Light smoothing | Keep concentric |
Inspect For Proper Fit
With the PEX end smoothed and cleaned, the installer inspects the fit against the chosen fitting to confirm concentric seating and correct insertion depth. The process guarantees reliable seals and leak-free joints.
Visual and tactile checks verify the pipe sits flush without gaps or angled entry. Any burrs or uneven cuts are corrected immediately.
- Align: slide the PEX onto the fitting, noting full insertion to the stop mark.
- Rotate: feel for smooth rotation or resistance indicating imperfections.
- Confirm: measure insertion depth and inspect for gaps before crimping or clamping.
Choose Between Crimp, Clamp, Expansion, or Push‑to‑Connect Fittings
Selecting the right fitting type shapes installation speed, tool needs, and long-term reliability.
Homeowners weigh crimp, clamp, expansion, and push-to-connect options by compatibility, code acceptance, and required equipment.
Crimp rings use a permanent metal seal with basic tools; clamp (cinch) systems employ stainless steel bands and a simple cinching tool.
Expansion fittings demand an expander tool and trained technique for secure, seamless joints.
Push-to-connect fittings offer fastest installation with no special tools, ideal for repairs and tight spaces.
Material compatibility, expected access for future service, and budget guide the final choice.
Install Crimp Rings Step‑by‑Step
Having chosen a crimp-style connection for its permanence and tool simplicity, the installer prepares to attach crimp rings to PEX tubing using a few disciplined steps.
The process is methodical: cut squarely, slide the ring, and seat the fitting fully. Position the ring 1/8″–1/4″ from the pipe end, verify alignment, and guarantee the tube is flush against the fitting shoulder.
Compress the ring evenly with a calibrated crimp tool until the tool clicks or indicates completion. After crimping, inspect the deformed ring visually and with a go/no-go gauge to confirm a secure, leak-free joint.
- Cut square and deburr.
- Slide ring and insert fitting.
- Crimp, inspect, gauge.
Use Stainless‑Steel Clamp (Cinch) Connections
For stainless‑steel cinch (clamp) connections, the installer secures a machined, worm‑style or ear clamp over PEX tubing and a barbed fitting to create a reliable, serviceable joint.
The tubing must be cut square, deburred, and fully pushed onto the fitting shoulder. Position the clamp 1/8–1/4 inch from the tubing end, centered over the barb.
Use a calibrated crimping or cinch tool to compress the clamp until the specified torque or tool stop is reached. Inspect each connection for even compression and absence of tubing distortion.
Perform a pressure test per code to verify leak‑free performance before concealing lines.
Install Expansion Fittings With Pex‑A
Using PEX‑A’s inherent flexibility and memory, expansion fittings are installed by expanding the tubing over a fitting body, inserting a properly sized ring, and allowing the pipe to recover to form a secure, leak‑resistant joint.
Installers measure and cut squarely, deburr, and mark insertion depth. An expansion tool sized to tubing diameter creates uniform expansion; the ring (sleeve) is slipped immediately onto the expanded tubing. Recovery guarantees a tight mechanical grip without clamps or adhesives.
Inspection confirms ring seating and proper alignment before pressure testing. Follow manufacturer tolerances for tool cycle counts and ambient temperature.
- Prepare tubing: cut, deburr, mark depth
- Expand tubing with correct tool
- Seat ring and allow recovery, then test
Use Push‑To‑Connect Fittings With PEX
In many residential and light‑commercial applications, push‑to‑connect fittings provide a quick, tool‑free method to join PEX tubing by simply inserting the tube into the fitting until it seats against an internal stop.
These fittings work with PEX, copper and CPVC, offering versatility for repairs and modifications. Properly cut, deburred and straightened tubing guarantees a reliable seal; mark insertion depth to confirm full engagement.
They are reusable in some brands—confirm manufacturer guidance—and suitable for accessible locations where vibration is minimal.
While convenient, verify pressure, temperature ratings and local code acceptance before selecting push‑to‑connect fittings for a PEX installation.
Secure PEX Runs to Studs and Joists Correctly
After choosing appropriate fittings, attention turns to securing PEX runs to studs and joists to maintain alignment, prevent movement, and protect the tubing from abrasion or heat sources. Clips or straps designed for PEX should be spaced per code, avoiding overtightening that can deform the pipe.
Where pipes cross framing, use nail plates to shield from fasteners. Maintain clearance from heat sources and insulate where required. Use organized runs to simplify future repairs and label lines near manifolds. Follow local code for fastening intervals and hole placement to preserve structural members.
- Use PEX-specific clips at code intervals.
- Install nail plates at crossings.
- Keep clearances from heat.
Bend and Support PEX Without Kinks
How can installers bend PEX tubing cleanly while preventing kinks and maintaining flow? Installers should use gentle, gradual bends and appropriate tools: spring or accordion-style bend supports for tight radii, and hand-held bending springs for longer curves. Maintain manufacturer minimum bend radius; mark bend points before forming.
Support bent sections with clamps or straps at intervals to preserve shape and prevent sagging. Inspect for stress or deformation and replace any kinked segments. For longer unsupported spans, add intermediate supports to avoid weight-induced distortion.
Proper bending preserves internal diameter, assures consistent flow, and reduces the need for fittings or repairs.
Route PEX Through Framing and Maintain Required Clearance
When passing PEX through studs, joists, or plates, installers should drill or notch openings that align with the pipe run while keeping holes centered in framing members to preserve structural integrity and meet code requirements.
Pipe should be routed to minimize turns and avoid contact with sharp edges. Protect with grommets or nail plates where pipes pass near fasteners. Maintain required clearance from heat sources and electrical wiring, following local codes.
- Plan runs to reduce penetrations and allow access.
- Use proper drill bit sizes and protective sleeves.
- Secure piping to prevent movement and abrasion.
Install a PEX Manifold for Multi‑Zone Supply
The installer selects a central, accessible location for the PEX manifold that minimizes long runs and allows future service.
Manifold placement is coordinated with zoning plans so each branch serves a specific zone with balanced flow.
Clear labeling and logical pipe routing are used to keep the multi‑zone supply organized and easy to troubleshoot.
Manifold Location Planning
For a multi‑zone PEX system, selecting the manifold location balances accessibility, minimal tubing runs, and protection from temperature extremes; positioning it centrally to the served zones reduces tubing length and pressure drop, while ensuring the manifold remains reachable for shutoff, adjustment, and maintenance.
The planner considers space, freezing risk, and service access. Mounting near a mechanical room, utility closet, or dedicated cabinet simplifies connections and keeps valves visible.
Wall or recessed installations should allow clearance for labels and tool use.
Key considerations include:
- Central placement to minimize run lengths.
- Freeze protection and temperature stability.
- Clear access for maintenance and valve operation.
Zoning And Piping
Having selected a location that balances accessibility, short runs, and temperature protection, attention turns to configuring zoning and piping around a PEX manifold to supply multiple areas.
The manifold becomes a central hub: assign each zone a dedicated port, label ports clearly, and size supply lines to match fixture demand. Use straight, short runs to minimize pressure loss and avoid unnecessary bends; secure lines with clips at regular intervals. Install shutoff valves on each branch for isolation and balance flow with adjustable flow meters or valves if available. Test the system under pressure, inspect for leaks, and document zone assignments for future maintenance.
Connect Fixtures and Appliances to PEX
Connecting fixtures and appliances to PEX requires matching fittings and proper support to guarantee leak-free, code-compliant installations.
The installer selects appropriate connector types (crimp, clamp, push-fit) and sizes, confirms temperature and pressure ratings, and isolates appliances with shutoffs.
Mounting brackets and straps prevent strain and movement; maintain manufacturer-specified bend radius and protect against abrasion.
Test each connection with a pressure test before finishing walls or cabinets.
Typical steps include:
- Measure, cut squarely, and deburr tubing end.
- Install matching fitting and secure per method.
- Pressure test, inspect for leaks, then finalize supports.
Tap Into Existing Copper or CPVC Lines
When tying PEX into existing copper or CPVC lines, the installer confirms material compatibility and chooses an appropriate connector fitting or adapter rated for the system’s temperature and pressure. The installer isolates the branch, drains water, and cleans the mating surfaces. Proper clamping, crimping, or push-fit procedures are used to guarantee leak-free joins. Pressure is restored and inspected for leaks; any movement or corrosion at the junction prompts remediation. Documentation of the connection type and location aids future maintenance. The approach minimizes disturbance to existing plumbing while meeting code and safety requirements.
| Calm | Trust | Relief |
|---|---|---|
| Secure | Quick | Clear |
| Safe | Smart | Certain |
Handle Transitions: PEX‑to‑Metal Adapters
When connecting PEX to existing copper or other metal lines, selecting the correct adapter size and material is essential to secure a reliable seal and prevent galvanic corrosion.
The installer must consider fitting types—crimp, clamp, push‑to‑connect, or threaded—and match them to pipe diameters and system pressure.
Proper installation technique and following manufacturer torque and preparation instructions determine long‑term joint integrity.
Choosing The Right Adapter
Several common factors determine the appropriate adapter for a PEX‑to‑metal conversion: pipe size, metal type (copper, galvanized steel, brass), connection method (crimp, clamp, push‑fit, or threaded), and the service conditions (pressure, temperature, and exposure to corrosive elements).
Selection prioritizes material compatibility to prevent galvanic corrosion and match thermal expansion.
Durability under expected pressure and temperature governs pressure‑rated options.
Threaded adapters require proper sealant; push‑fit offers ease but verify temperature limits.
Consider code compliance and spare parts availability.
- Match size and material compatibility.
- Verify pressure/temperature ratings.
- Prefer certified fittings for longevity.
Transition Installation Methods
In adapting PEX to metal piping, installers must follow proven methods of changeover that guarantee mechanical integrity, prevent leaks, and minimize corrosion risks.
Proper conversion begins with clean, square cuts on both materials and removal of burrs and oxidation.
Use compatible PEX‑to‑metal adapters: crimp, clamp, or push‑fit fittings for copper and threaded or compression unions for steel.
Apply appropriate thread sealant or tape on metal threads only.
Ensure correct support and avoid strain at connections; leave short, accessible straight runs for future inspection.
Pressure‑test the assembly and monitor for galvanic activity when dissimilar metals are joined.
Install PEX for Hot Water Loops and Recirculation
For hot water loops and recirculation systems, PEX tubing offers flexibility, corrosion resistance, and ease of installation that streamline routing and reduce joint count.
The installer plans loop layout, locates pump and check valve, and sizes tubing to maintain desired flow rates.
Connections use crimps or expansion fittings rated for hot water; test the system under pressure before energizing the pump.
Balance valves and thermostatic controls help prevent overheating and guarantee rapid delivery.
- Map loop path and minimize fittings.
- Select pump, check valve, and fitting types.
- Pressure-test and adjust flow before finishing.
Insulate PEX to Prevent Heat Loss and Freezing
After completing routing, connections, and pressure testing of hot water loops, attention turns to insulating PEX to limit heat loss and protect against freezing. Insulation maintains temperature, improves energy efficiency, and reduces condensation on cold lines.
Choose closed-cell foam sleeves or rubber insulation sized to pipe diameter; continuous sleeves minimize joints. Secure with zip ties or compatible tape, avoiding compression that reduces R-value.
Insulate exposed runs in unconditioned spaces, basements, attics, and exterior walls; include elbows and fittings with molded insulation or wrap. Leave identification labels visible and follow local code for minimum insulation thickness and accessibility for future maintenance.
Pressure Test Your PEX System Safely
Before pressurizing, the system should be prepared by capping open ends, securing fittings, and purging air.
A controlled hydrostatic test at the recommended pressure verifies joint integrity and reveals leaks.
Any detected leaks are inspected and repaired, then the test is repeated until the system holds pressure.
Prepare The System
When preparing the system, the installer must verify that all fittings, manifolds, and pipe runs are secure and that shutoff valves and test ports are accessible; then a controlled pressure test using air or water confirms integrity and identifies leaks before covering or insulating any PEX runs.
The technician isolates supply lines, installs temporary caps or test plugs, and guarantees pressure gauges and relief methods are ready.
Safety measures and documentation are set before testing.
Follow these steps:
- Confirm all connections are properly crimped or clamped and manifolds are mounted.
- Install test plugs and connect gauges.
- Record baseline pressure and inspect for drops.
Perform A Hydrostatic Test
Begin the hydrostatic test by gradually pressurizing the isolated PEX system to the specified test pressure using water through the installed test ports and gauges.
Observe pressure rise and allow stabilized readings for the required duration, typically 15–30 minutes.
Monitor gauges for steady pressure; note initial and final values.
Check visible fittings, manifolds and exposed runs for weepage while avoiding intrusive inspection procedures reserved for later.
Depressurize slowly after completion, recording results and any anomalies.
Document test pressure, duration and observations for records and code compliance.
Only use water—no air—unless local code explicitly permits it.
Inspect And Repair
Inspect the PEX system methodically after a hydrostatic test to locate leaks, pressure loss sources, and any compromised fittings or tubing. The inspector notes audible hisses, wet spots, and pressure gauge trends. Isolation valves are cycled to confirm zones.
Repairs use compatible fittings, proper crimping or expansion tools, and replacement tubing cut squarely; joints are retested. Any visible abrasion or kinking prompts rerouting or protection.
After repairs, the system is pressurized to the test level for the recommended duration, then depressurized slowly. Documentation of findings, repairs, and final pressures completes the safe, traceable workflow.
- Identify
- Repair
- Retest
Find and Fix Leaks After Pressure Testing
Pressurize the PEX system to the specified test pressure and observe all fittings, joints, and exposed tubing for signs of leakage — drips, wetness, or pressure drop on the gauge. Mark any leak locations with a nonpermanent marker.
Isolate the affected section by shutting valves and relieve pressure before repairs. For compression or crimp connections, cut out the faulty fitting and prepare fresh tubing ends; then install a new fitting using the correct tool and verify seating.
For small pinholes in exposed tubing, replace the damaged length and rejoin with approved fittings. Re-pressurize and monitor until the gauge and visual inspection confirm no leaks.
Common Mistakes That Cause PEX Leaks and How to Avoid Them
After fixing detected leaks and confirming the system holds pressure, attention turns to common installation errors that most often cause PEX failures. Installers sometimes overtighten or under-crimp fittings, cut tubing unevenly, or route lines incorrectly, each leading to leaks. Prevention relies on proper tools, technique, and inspection.
- Use correct cutting tools and square cuts; deburr and inspect tube ends before fitting.
- Follow manufacturer crimp/expansion specs and verify ring alignment and tool calibration.
- Avoid sharp bends, contact with abrasive edges, and unsecured tubing that allows movement or strain.
Routine checks and adherence to specs prevent most PEX leaks.
Install Expansion Loops for Thermal Expansion
When exposed to temperature changes, PEX expands and contracts markedly, so installers must incorporate movement loops at strategic locations to absorb movement and prevent stress on fittings and anchors.
Expansion loops are simple U-shaped bends sized to allow linear change without kinking; their length and radius depend on pipe size, run length, and temperature range.
Place loops near long straight runs, near rigid movement points, and at fixed support intervals, ensuring clearance from framing.
Secure loops with supports that allow sliding, avoid tight clamps, and test for smooth movement.
Properly installed loops reduce joint fatigue and extend system longevity.
Protect PEX From Sunlight and Chemical Exposure
Typically, PEX should be kept out of direct sunlight and away from incompatible chemicals because ultraviolet light and certain solvents degrade its polymers, reducing flexibility and strength. Installers should store coils indoors or under UV‑blocking covers and route tubing inside walls or conduit where exposure is possible.
Avoid contact with petroleum‑based products, strong acids, and solvents; use manufacturer lists for chemical compatibility. When penetration through structural members is necessary, protect with sleeves or grommets to prevent chafing and contamination.
- Use UV‑resistant wrap for temporary outdoor storage.
- Keep PEX separated from chemical storage and HVAC exhaust.
- Follow manufacturer compatibility charts.
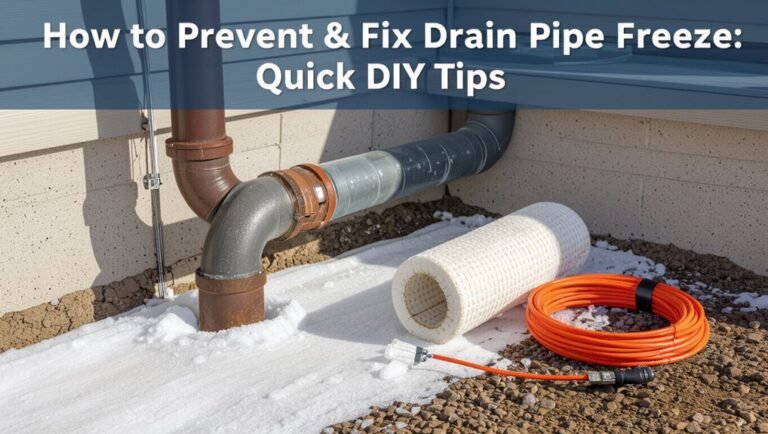
Best Practices for Snow, Cold, and Freeze Protection
Exposed PEX in cold climates requires deliberate routing, insulation, and heat protection to prevent freezing and burst pipes.
Install runs away from exterior walls, maintain slope for drainage, and minimize exposure in unheated spaces.
Use closed-cell foam sleeves or spray foam around fittings, and wrap lines with appropriate thermal insulation rated for the temperature range.
Employ heat tape with thermostat control where necessary, following manufacturer instructions and electrical codes.
Seal wall penetrations and add vapor barriers to reduce cold-air infiltration.
Regularly inspect attic, crawlspace, and exterior junctions each season to catch insulation gaps or compromised heat devices early.
Repair a Damaged PEX Section Quickly
Act quickly to isolate the damaged section and stop water flow by shutting off the nearest shutoff valve or the main supply.
Then assess the damage, dry the area, and plan a repair using compatible PEX materials. Typical steps include:
- Cut out the damaged PEX with a square, clean cut and deburr the ends.
- Install a replacement section using push-fit or crimp rings and approved fittings, ensuring correct insertion depth and secure connections.
- Pressure-test the repair at low pressure, inspect for leaks, then restore normal pressure and monitor briefly.
Use manufacturer-approved parts and replace only the affected section.
Replace Fittings Without Rerunning Entire Pipes
Replacing a faulty fitting on a PEX run can usually be completed without pulling new pipe by isolating the section, cutting back to sound tubing, and installing a compatible connector or coupling.
The technician drains and depressurizes the line, then measures and trims evenly to reach undamaged PEX.
Choosing the correct connection method—crimp, clamp, expansion, or push-to-connect—ensures compatibility with existing fittings.
Proper insertion depth, tool calibration, and visual inspection of seals prevent leaks.
After reassembly the line is pressure-tested and observed for a settling period.
Documentation of materials and location aids future maintenance and warranty claims.
Inspect PEX Installs for Code Compliance
After completing a repair, the installer should examine the entire PEX run for conformity with local and national codes before restoring regular service.
The inspector verifies correct pipe support spacing, protection from heat and physical damage, and approved fittings and methods.
Check for proper expansion/contraction allowances and maintain required clearances from electrical and gas lines.
Assure pressure testing records meet specified durations and pressures.
Confirm labeling, accessibility of shutoffs, and absence of prohibited installations (e.g., concealed without access where code forbids).
Document findings and correct noncompliances before finalizing the job.
- Support and protection
- Pressure testing
- Labeling and access
Tips for Neat, Fast, and Serviceable PEX Work
Often, experienced installers follow a few steady habits that make PEX runs neater, faster, and easier to service: plan the route before cutting, group and parallel tubing where possible, maintain consistent support spacing, and use color-coding or labels for hot/cold lines.
They cut squarely, deburr as needed, and leave service loops near manifolds for future repairs. Use matching clamps and fittings, secure tubing to avoid rubbing, and protect lines where they pass through framing. Document configurations with photos or simple diagrams.
Routinely test systems before concealment and keep a small kit of common spare fittings accessible for quick field fixes.
Cost Comparison: DIY PEX Versus Hiring a Plumber
A comparison of DIY PEX and hiring a plumber begins with upfront material costs versus billed labor.
Time investment and the homeowner’s hourly value affect the true cost of a self-installation.
Long-term maintenance expenses and potential repair risks should factor into the final decision.
Upfront Material Costs
Many homeowners weigh upfront material costs when choosing between a DIY PEX installation and hiring a plumber, since those initial expenses directly influence the project’s breakeven point.
A concise comparison focuses on parts, fittings, and tools; buying quality PEX, manifolds, and valves raises the initial tab but avoids premature replacements.
- PEX tubing: price varies by type (PEX-A/B/C), length, and diameter—bulk purchases lower per-foot cost.
- Fittings and manifolds: brass or plastic options change cost and durability; specialized fittings (crimp, clamp, expansion) add expense.
- Tools and consumables: crimpers, expansion tools, and rings represent one-time or occasional investments.
Labor Versus Time
Weighs the time commitment against hourly labor rates when comparing DIY PEX installations to hiring a plumber: homeowners must factor actual hours spent learning, prepping, and executing the job (including troubleshooting) versus the billed time a professional charges, which typically includes travel, overhead, and warranty coverage.
A DIYer saves on labor but invests nonbillable hours, possibly extending project duration. A pro completes work faster, with predictable hourly or flat fees and fewer callbacks.
Decision hinges on skill level, schedule flexibility, and complexity of the job; simple runs favor DIY, while extensive reroutes or time-constrained owners often justify hiring a plumber.
Long-Term Maintenance Expenses
Considering long-term maintenance expenses, homeowners should compare not just initial installation costs but predictable future outlays for repairs, parts, and service calls. A clear cost comparison evaluates frequency of leaks, warranty coverage, and typical part prices. DIY installations can lower labor expense but may increase repair frequency if skill is limited; professional work raises upfront cost yet may reduce recurring failures and include guarantees. Budgeting should include emergency call fees and replacement fittings. Risk tolerance and skill determine effective long-term cost.
- Estimate repair frequency and part costs.
- Compare warranty and service inclusions.
- Factor emergency call fees and labor.
Time Estimates for Typical PEX Projects
For common residential jobs, estimating the time required for PEX installations depends primarily on project scope, system layout, and installer experience.
A simple single fixture replacement with PEX and push-fit fittings typically requires 30–90 minutes. Replacing a water heater with new PEX connections often takes 2–4 hours. Running a new branch to multiple fixtures in an accessible basement or crawlspace can be completed in 3–6 hours. A whole-house repipe using trunk-and-branch or manifold systems generally spans 1–3 days for one experienced installer; crews shorten that to a single day. Allow extra time for inspection and unforeseen access issues.
When to Call a Pro: Complex or Risky Scenarios
When should a homeowner call a professional? A professional is advisable when risks, code compliance, or system complexity exceed DIY skill. Consider these situations:
- Major structural work: relocating walls, cutting joists, or routing PEX through load-bearing elements requiring permits and inspections.
- Connections to mains, gas appliances, or water heaters: improper fittings, backflow prevention, or ventilation issues can cause hazards and fail inspections.
- Replacing aging or unknown materials: braided hoses, corroded manifolds, or mixed-metal systems that risk leaks, contamination, or require system-wide assessment and pressure testing.
In such cases, licensed plumbers make certain safety, code adherence, and reliable outcomes.
Upgrading a Whole‑House Plumbing System to PEX
Upgrading an entire home’s plumbing to PEX requires planning, permits, and a clear sequence of work to minimize disruption and guarantee code compliance. A phased approach isolates zones, schedules inspections, and reduces downtime. Materials, manifolds, and fittings are selected for layout efficiency; shutoff strategies protect occupants. Professionals verify system sizing, pressure, and thermal protection; homeowners prepare access and budget. Post‑installation flushing and leak testing follow inspector approval. The project balances DIY tasks with licensed trades when required to make certain warranties and safety.
| Phase | Key action |
|---|---|
| Prep | Obtain permits |
| Install | Run PEX and connect manifolds |
| Test | Pressure test and inspect |
Long‑Term Maintenance and Inspection Checklist
Regularly scheduled inspections keep a PEX system reliable and help catch wear, connections issues, and thermal or pressure-related problems before they escalate. A concise checklist guides homeowners and professionals through visual checks, quick tests, and record-keeping.
- Inspect exposed runs and fittings for discoloration, deformation, leaks, or brittle sections; tighten or replace clamps and sleeves as needed.
- Test system pressure and individual fixture flow; note drops, noises, or temperature inconsistencies; flush lines after sediment or stagnation concerns.
- Verify insulation, support spacing, and protection from UV or heat sources; document date, findings, and corrective actions for future reference.
Longevity Expectations and Warranty Considerations
Typical PEX installations are expected to last several decades under normal conditions, with many manufacturers citing service lives of 25–50 years.
Warranty coverage varies by maker and often depends on correct installation, water quality, and UV exposure.
The actual durability will hinge on factors such as chemical exposure, operating temperatures, mechanical stress, and adherence to installation guidelines.
Typical Lifespan Expectations
Many manufacturers rate PEX piping to last 25–50 years under normal conditions, though actual service life depends on water quality, installation practices, and exposure to UV or chlorinated chemicals.
Typical lifespan is influenced by material type (PEX-A, -B, -C), pressure/temperature cycles, and maintenance. Practitioners assess risk factors and plan replacements accordingly.
- Regular inspection: check fittings, bends, and areas prone to abrasion.
- Water quality control: mitigate high chlorine, hardness, or corrosive pH to slow degradation.
- Proper installation: avoid kinks, secure supports, and limit UV exposure to maximize service life.
Manufacturer Warranty Coverage
Beyond expected service life and maintenance practices, attention turns to what manufacturers guarantee: warranty terms that define longevity expectations and coverage limits. Manufacturers typically specify years of coverage, conditions for validity, and whether labor or replacement parts are included.
Warranties often require proper installation per instructions, use of approved fittings, and documentation such as receipts and installation dates. Exclusions commonly cover chemical damage, freezing, misuse, and improper water quality.
Transferability, pro-rated schedules, and claim procedures vary; users should record lot numbers and register products when required. Reviewing warranty language clarifies recourse and aligns expectations before installation.
Factors Affecting Durability
Against a backdrop of expected service life and warranty terms, several interrelated factors determine PEX pipe durability: material formulation and manufacturing quality, installation practices, water chemistry and temperature cycles, mechanical stress and UV exposure, and maintenance or inspection regimes.
Longevity estimates hinge on controlled manufacturing and correct fittings; improper crimping, sharp bends, or unsupported runs reduce life. Corrosive water, fluctuating temperatures, and repeated thermal cycling accelerate degradation.
UV exposure and abrasion cause surface embrittlement.
Warranties often require documented installation and water treatment.
Key considerations include:
- Material quality and certification
- Installation technique and support
- Water chemistry and thermal management
Troubleshoot Temperature or Pressure Issues
How should one proceed when a PEX system delivers water that is too hot, too cold, or fluctuates unpredictably? Inspect thermostat settings on water heaters and mixing valves, confirming temperature and functioning.
Check for cross-connections between hot and cold lines at fixtures or faulty single-lever faucets.
Measure pressure with a gauge to detect spikes or drops; consider pressure-reducing valves if feed pressure exceeds recommended limits.
Examine manifold balancing and loop lengths for uneven flow; adjust or rebalance circuits.
Replace defective check valves, thermostatic mixing valves, or pressure regulators.
If issues persist, isolate sections to narrow the fault and consult a licensed plumber for complex diagnostics.
PEX‑Specific Environmental and Safety Benefits
PEX piping offers distinct environmental and safety advantages compared with traditional materials: it reduces leak-induced water waste through flexible, continuous runs with fewer joints, lowers energy loss with better thermal resistance, and resists corrosion and scale that can compromise water quality.
Installers note reduced material use and lighter transportation impacts, plus recyclability of some PEX types. Its freeze-resistance lowers burst risk, enhancing occupant safety.
Considerations include proper UV protection and avoiding exposed flame.
Benefits summarized:
- Lower water loss and energy use from fewer fittings and better insulation.
- Reduced contamination risk from corrosion-free surfaces.
- Fewer burst incidents due to flex and freeze tolerance.
Conclusion
PEX offers a durable, flexible alternative to copper for many DIY plumbing projects, with careful planning and code compliance reducing common risks. One compelling statistic: PEX systems can reduce labor time by up to 50% compared with rigid piping, highlighting savings in both time and cost for homeowners. With proper installation, periodic inspection, and attention to manufacturer warranties, PEX can deliver reliable service for decades while simplifying repairs and upgrades.