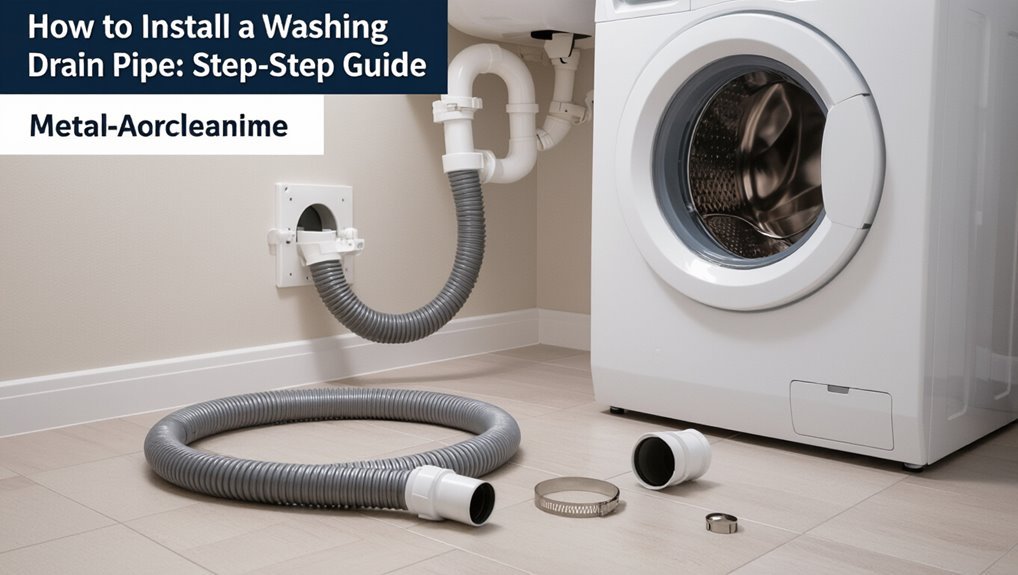
How to Install a Washing Machine Drain Pipe: Step-by-Step Guide
Key Takeaway: Installing a washing machine drain pipe involves several steps to ensure proper function and compliance with plumbing codes.
To install a washing machine drain pipe, follow these essential steps:
- Locate a Drain: Measure and find a nearby standpipe or sink for drainage.
- Shut Off Water and Power: Ensure safety by turning off the water supply and disconnecting the power.
- Assemble Fittings: Gather the necessary materials, including PVC/ABS or metal pipes and fittings.
- Cut and Deburr Pipe: Cut the pipe to length and smooth any rough edges.
- Dry-Fit: Assemble the pieces without adhesives to check for proper slope and alignment.
- Install P-Trap and Vent: Use a correctly sized P-trap and either a vent or air admittance valve (AAV) to prevent sewer gases.
- Join Pipes: Secure the connections by solvent-welding or threading the joints.
- Secure Standpipe: Install the standpipe at a height of 36–42 inches.
- Test for Leaks: Once everything is in place, run water through the system to check for leaks.
By following these steps, you can successfully install a washing machine drain pipe that meets plumbing standards.
Quick Install Overview (7-Step Summary)
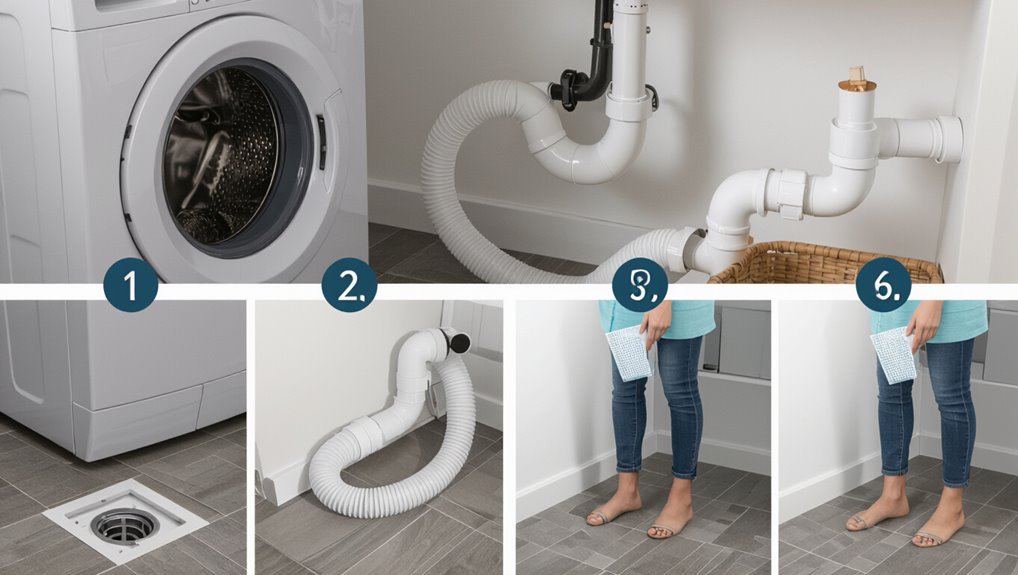
Although the complete installation involves several detailed checks, a concise seven-step overview clarifies the core sequence.
First, inspect location and measure for drain alignment.
Second, turn off water and power to the laundry area.
Third, assemble required fittings and test-fit the drain assembly.
Fourth, cut and prepare pipe to proper lengths, deburring edges.
Fifth, join sections with appropriate solvent or mechanical connectors, ensuring proper slope.
Sixth, secure the trap and vent connections per code.
Seventh, run a water test for leaks and confirm stable, unobstructed flow before returning the appliance to service.
Do You Need a Standpipe, Sink, or Floor Drain?
Determine the appropriate discharge receptor—standpipe, laundry sink, or floor drain—by evaluating local plumbing code, available space, expected discharge rate, and potential for backups.
A standpipe is common where a vertical inlet with proper trap and air gap fits code and handles rapid discharge; it requires sufficient height and dedicated trap.
A laundry sink offers visible overflow protection and easier maintenance but occupies more room and may need indirect connection per code.
A floor drain suits utility rooms with graded floors and secondary containment but may demand larger trap seal and backflow prevention.
Choice hinges on code compliance, room layout, and overflow risk.
Tools and Materials for a Washing Machine Drain
A concise list of essential tools—pipe cutter, adjustable wrench, pliers, sealant, and a level—prepares the installer for most washing machine drain work.
Required materials and parts, such as PVC or ABS piping, standpipe fittings, hose clamps, and appropriate traps, should be confirmed before starting.
Basic safety gear—gloves, eye protection, and a dust mask—protects against common hazards during installation.
Essential Tools List
For a smooth washing machine drain installation, gather a compact set of reliable tools and materials tailored to the job: adjustable wrench, pliers, pipe cutter or hacksaw, PVC or ABS drainpipe and fittings, primer and solvent cement (for plastic pipes), plumber’s tape, a level, measuring tape, and appropriate clamps or hangers; include a standpipe trap or P-trap kit and a short length of flexible hose for the appliance connection.
Essential tools also include a utility knife, screwdriver set, bucket, gloves, safety glasses, and a flashlight.
Optional but helpful items: caulk gun with silicone, pipe deburring tool, and a small hand saw for tight spaces.
Materials And Parts
With the tool kit assembled, attention shifts to the specific materials and parts required to construct a reliable washing machine drain system.
Required items include a length of PVC or ABS drain pipe sized to the machine’s outlet, appropriate 90° and straight fittings, a standpipe (minimum code height), and a P-trap assembly.
Also needed are pipe straps, a sanitary tee or adapter for connection to the house drain, solvent cement or primer, and plumber’s tape for threaded joints.
Optional but recommended parts include a rubber hose clamp, a hose box or inlet, and an air gap where local codes demand it.
Safety Gear Needed
Wearing appropriate safety gear protects against common hazards when installing a washing machine drain, including sharp edges, chemical exposure from solvent cement, and accidental contact with electrical components.
Safety essentials include chemical-resistant gloves for primer and cement, cut-resistant work gloves for handling metal or PVC edges, and safety glasses to shield eyes from splashes and debris.
A dust mask or respirator is recommended when cutting PVC or working in poorly ventilated areas.
Knee pads provide comfort and protection during floor-level work.
Non-slip footwear helps prevent falls.
High-visibility clothing is optional when working in shared spaces or near traffic.
Check Local Plumbing Codes and Permits
Before beginning work, the installer should verify whether a local permit is required for washing machine drain modifications.
Relevant codes will specify measurement standards for trap placement, pipe diameter, and venting that must be met.
Failure to follow permit rules or code measurements can result in failed inspections or required rework.
Local Permit Requirements
When tackling a washing machine drain installation, homeowners should first verify local plumbing codes and permit requirements to make certain the work meets legal and safety standards. Local permit requirements determine whether permits are needed, inspection schedules, fee structures, and licensed-contractor mandates. Contacting the municipal building or plumbing department clarifies application steps and documentation. Failing to obtain required permits can result in fines, forced removal, or complications on resale. Record permit numbers and inspection dates, and follow any specified qualifications for who may perform the work. Consult the authority having jurisdiction for definitive guidance.
| Permit Type | Typical Fee | Inspection Required |
|---|---|---|
| Minor Repair | $25–$75 | Often |
| New Drain | $50–$200 | Yes |
| Contractor-Only | Varies | Yes |
Code Measurement Standards
In accordance with local plumbing codes, precise measurement standards govern trap arm length, standpipe height, pipe diameter, and slope to guarantee proper drainage and prevent siphoning or backflow.
Installers must verify standpipe height (typically 30–42 inches above the trap weir) and trap arm length within the code’s maximum to maintain venting.
Pipe diameter usually requires a minimum 2-inch drain for washing machines; check allowed reductions.
Slope must be 1/4 inch per foot for horizontal runs unless otherwise specified.
All measurements should be documented, referenced to the applicable code section, and confirmed during permit inspection to make certain compliance.
Where to Place the Standpipe: Measuring Tips
Although the exact placement varies with laundry room layout and local code, the standpipe should be measured from the finished floor and nearby fixtures to guarantee proper drain height and hose reach. Measure vertical height to meet code (typically 18–30 inches), horizontal clearance from walls and appliances, and distance to water hookups to avoid strain. Confirm trap location and access for maintenance. Use a level and tape measure; mark studs and obstacles. Record dimensions before cutting. Simple planning prevents rework and leaks.
| Height | Clearance | Distance |
|---|---|---|
| Floor | Wall | Hookup |
| Trap | Appliance | Studs |
Check Sewer/Vent Capacity and Drain Slope
After locating the standpipe and confirming hookup clearances, attention shifts to the sewer and vent system capacity and the required drain slope.
The installer verifies that the local waste line and vent can handle the washer’s discharge rate, consulting plumbing codes or a professional when uncertain. Make sure the standpipe ties into a trap and a vented drain to prevent siphoning and odors.
Measure the horizontal run and set a consistent slope—typically 1/4 inch per foot—toward the main drain to avoid standing water. Correct slope and adequate venting make certain reliable flow and prevent slow draining or backups.
Turn Off Water and Power Safely
Before work begins, the water supply to the washing machine should be shut off at the shutoff valves to prevent leaks.
The appliance must be disconnected from electrical power by unplugging it or switching off its circuit at the breaker.
Finally, confirm zero flow by opening a tap or checking the inlet hoses to make certain no water is still present.
Shut Off Water Supply
Shut off the water and power to the washing machine before beginning any work to prevent flooding and electrical hazards.
Next, close the machine’s hot and cold supply valves—typically located behind the appliance—by turning them clockwise until fully seated.
If individual valves are absent, shut off the household water supply at the main shutoff valve.
Open a nearby faucet to relieve residual pressure and drain remaining water from supply lines.
Inspect valves for leaks and guarantee firm closure before proceeding.
Keep a small bucket and towels handy to catch drips when later disconnecting hoses during the drain-pipe installation.
Disconnect Electrical Power
Cut power at the source to eliminate electrical risk while working on the washer.
The technician locates the home’s circuit breaker or fuse box and switches off the dedicated washing machine circuit, confirming the breaker is fully tripped.
If the machine uses a fused outlet, the fuse is removed.
For added safety, the power cord is unplugged from the wall.
Any visible power switches on the appliance are left off.
Lockout-tagout procedures are recommended where available.
Properly documenting the power-off step and posting a warning prevents accidental re-energizing during drain pipe work.
Verify Zero Flow
With electrical power confirmed off, the technician next verifies that no water can flow into the washer while the drain pipe is worked on. They close both hot and cold supply valves at the wall and then open the machine’s faucets briefly to relieve pressure and confirm there is no discharge.
A bucket is placed beneath supply fittings to catch residual drips. If valves are stiff or leaking, the technician isolates the house water using the main shutoff.
Finally, a visual check of the supply lines and meter (if accessible) guarantees zero flow before proceeding with drain pipe removal or installation.
Remove Old Drain Connections Without Damage
Begin by inspecting the existing drain connections to identify fasteners, seal types, and any corroded or brittle sections that could fracture during removal. The technician proceeds methodically to prevent damage to surrounding plumbing or framing. Use appropriate tools, support fittings, and contain residual water. Work slowly where seals or threads show age.
Follow these steps:
- Drain and cap supply lines; place a bucket under the trap.
- Loosen clamps and fasteners progressively to relieve tension.
- Pry seals gently with a flat tool; avoid twisting joints.
- Remove remaining gasket material and clean mating surfaces for inspection.
Choosing Pipe Material: PVC vs ABS vs Metal
The author compares PVC and ABS as common plastic options, noting differences in rigidity, solvent-weld compatibility, and local code acceptance.
Metal piping is presented as a durable alternative with different fittings, corrosion concerns, and noise characteristics.
Material choice is framed around code requirements, cost, and the specific installation environment.
PVC Versus ABS
Choosing pipe material for a washing machine drain involves balancing cost, durability, and local code requirements; PVC and ABS are the common plastics, while metal options are less typical.
PVC offers wider availability, easier solvent-weld joints, and typically lower cost. ABS is impact-resistant and performs better in colder conditions, with a different solvent and sometimes stricter code acceptance. Selection depends on compatibility with existing plumbing and local regulations.
- PVC: inexpensive, common, solvent-weld fittings
- ABS: more impact-resistant, suited to cold
- Jointing: use matching solvent cement per material
- Codes: verify allowed materials and connections
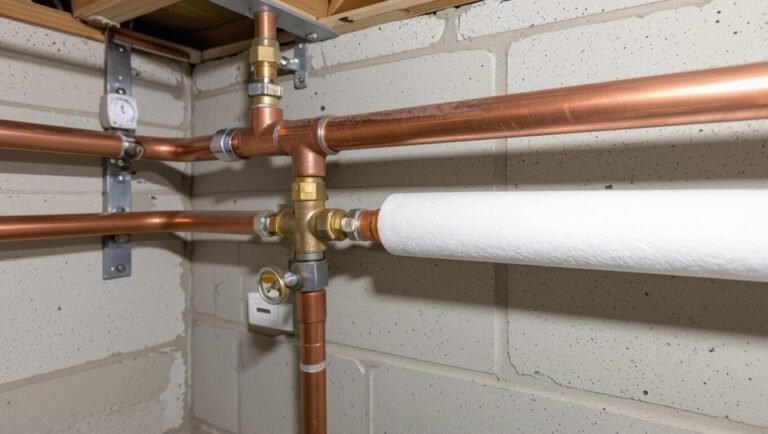
Metal Pipe Considerations
After comparing PVC and ABS for washing machine drains, attention turns to metal options, which bring different strengths and limitations. Metal pipes—typically galvanized steel or copper—offer durability and heat resistance. They resist rodents and some chemical degradation but can corrode, scale, or be noisy. Installation may require threading or soldering, increasing labor and cost compared with plastic. Metal connections must be properly sealed to prevent leaks and electrolysis where dissimilar metals meet. Consider local codes, budget, and longevity needs when choosing metal versus PVC or ABS. The table below summarizes key differences.
| Material | Strength | Typical Drawback |
|---|---|---|
| PVC | Lightweight, cheap | PVC solvent joints |
| ABS | Tough, cold-resistant | Fewer fittings |
Correct Pipe Diameter for Washing Machines
A properly sized drainpipe prevents backups and reduces wear on the washing machine’s pump.
The recommended minimum is 1.5 inches (38 mm) internal diameter for most residential machines; 2 inches (50 mm) offers extra margin for heavy discharge or shared drains.
Use smooth-walled pipe to reduce clogs and make certain fittings maintain internal diameter.
Local codes may mandate specific sizes or materials; verify before installation.
- Typical residential: 1.5″ (38 mm) minimum
- Recommended for heavy use/shared: 2″ (50 mm)
- Prefer smooth interior pipe (PVC/ABS)
- Confirm local plumbing code requirements
Plan the Route: Minimize Bends, Maximize Slope
The installer should choose the straightest possible path from the washer to the drain to reduce flow resistance and clog points.
Any bends that are unavoidable must be gentle and limited in number. Throughout the run a continuous downward slope should be maintained to guarantee reliable gravity drainage.
Straightest Possible Path
Plan the drain route to keep the pipe as straight as possible, reducing bends and short turns that slow flow and increase clog risk.
The installer evaluates the room layout and selects a direct line to the standpipe or drain inlet.
Short, gentle deviations replace sharp angles; unnecessary offsets are eliminated.
Support points are planned to prevent sagging between fittings.
Consider access for future cleaning and guarantee fittings align without forcing joints.
- Choose the most direct wall or floor path
- Avoid tight elbows; use long-radius bends if needed
- Minimize fittings and transitions
- Locate supports near each joint
Maintain Continuous Slope
After selecting the straightest possible path and minimizing bends, attention turns to ensuring a continuous slope so wastewater flows by gravity without pooling.
The installer measures run length and sets a consistent fall—typically 1/4 inch per foot for horizontal sections—avoiding flat spots. Pipe supports are spaced to prevent sagging and adjusted to maintain gradient through joists and around obstacles. Changes at fittings are aligned to preserve slope; flexible couplings are used sparingly. Before final fastening, a water test confirms smooth drainage. Any low points are corrected by repositioning supports or regrading the pipe run.
Cut and Dry-Fit Pipes and Fittings Accurately
Measure each run and mark cuts precisely before removing material to guarantee proper alignment and slope. The installer verifies lengths, accounts for fittings, and keeps a consistent fall toward the standpipe or waste.
Pipes are cut squarely, deburred, and test-fitted without adhesive to confirm fit and access. Movement and clearances are checked, including trap placement and wall penetration.
- Confirm socket depths and alignment visually
- Test assembly for interference with framing or appliances
- Make certain joints sit fully home without forcing
- Verify final slope with a level across assembled sections
Adjust as needed before proceeding to permanent joining.
Gluing PVC/ABS Joints for a Leak-Free Seal
Begin by preparing each joint area so the solvent cement can form a complete, durable bond: make certain pipe ends and fitting sockets are clean, dry, and free of burrs or debris, and verify that the correct primer and cement for PVC or ABS are on hand.
Apply primer where required, scrubbing evenly and allowing it to evaporate.
Brush cement onto both pipe and fitting, ensuring full coverage near the socket edge.
Insert pipe fully with a 1/4-turn twist to distribute adhesive, hold briefly to prevent push-out, then wipe excess.
Allow the specified cure time before pressure testing or burying the joint.
Soldering and Threading Metal Fittings for Tie-Ins
Soldering and threading metal fittings for tie-ins require different tools and techniques than plastic connections, so the installer selects the appropriate materials and prepares the pipe ends accordingly.
Heat, flux, and solder create watertight copper joints, while pipe thread compound and proper taper guarantee secure threaded steel or brass connections.
Safety and cleanliness matter: remove corrosion, deburr cut edges, and protect surroundings from heat.
- Use a torch, flux, and lead-free solder for copper sweat joints.
- Apply PTFE tape or pipe dope to tapered threads.
- Tighten threaded fittings with appropriate wrenches.
- Inspect joints for leaks after cooling.
P-Trap Requirements and Placement
A P-trap is an essential plumbing component installed beneath a washing machine drain to maintain a water seal that prevents sewer gases from entering the home; it must be properly sized, positioned, and vented to function reliably.
The trap should match the drain diameter—typically 1½ or 2 inches—and be accessible for cleaning. Install the trap as close to the drain inlet as code permits, keeping fittings minimal and avoiding high points where air can collect.
Use materials compatible with the waste line (PVC, ABS, or metal) and secure connections with approved seals or solvent welds.
Make certain the trap outlet ties into a vented system.
Trap Arm Length and Slope Limits
After locating and installing the P-trap near the washing machine drain, attention turns to the trap arm—the horizontal run between the trap outlet and the vented stack—which must meet specific length and slope requirements to preserve the trap seal and guarantee proper drainage.
The trap arm should be as short as practical and sloped to prevent standing water without siphoning the trap.
- Maximum length commonly limited by code (typically 4–6 feet depending on pipe diameter)
- Minimum slope 1/8 inch per foot (standard for larger drains)
- Avoid excessive slope that accelerates flow and risks siphoning
- Keep unobstructed, accessible run
Venting Options: Vent or Air Admittance Valve?
The article compares traditional vent piping with air admittance valves (AAVs) by first outlining basic venting functions and why they matter for a washing machine drain.
It summarizes advantages of AAVs such as easier installation and space savings while noting their mechanical limitations.
It then emphasizes checking local plumbing codes and inspector preferences before choosing a venting method.
Venting Basics Explained
When choosing between a traditional vent and an air admittance valve (AAV), the key consideration is how each method manages air pressure to prevent siphoning and guarantee proper drainage; a through-roof vent provides continuous atmospheric connection, while an AAV admits air only when negative pressure occurs and remains closed otherwise.
The installer evaluates local code, roof access, and routing complexity.
Properly sized venting maintains trap seal and prevents slow drains or gurgling.
Consider durability, maintenance, and freeze risk.
Typical factors include:
- Code acceptance and inspection requirements
- Location and distance to roof penetration
- Risk of freezing or blockage
- Long-term maintenance access
Air Admittance Valve Pros
Choosing an air admittance valve (AAV) can simplify venting in situations where routing a through-roof vent is impractical or costly. An AAV provides one-way airflow into the drain system, preventing siphoning of traps while eliminating the need for extensive vent piping.
Installation is typically faster, involves fewer roof penetrations, and reduces material and labor costs. AAVs are compact, fit near fixtures or appliance drains, and can be used in remodels or tight spaces.
Maintenance needs are minimal but periodic inspection is advised. Performance is reliable when installed per manufacturer instructions and used within recommended fixture unit limits.
Local Code Considerations
Why do local regulations matter for venting choices? Local codes determine whether a mechanical vent or an air admittance valve (AAV) is permitted, where it may be placed, and required materials. Compliance avoids failed inspections, rework, or unsafe installations.
- Permit and inspection requirements vary by jurisdiction.
- Some codes prohibit AAVs in specific rooms or on exterior walls.
- Vent sizing and connection standards must match code language.
- Manufacturer listings and local amendments influence acceptable products.
Installers should consult the local plumbing code and authority having jurisdiction before choosing a venting method to guarantee a compliant, safe washing machine drain.
Install a Dedicated Standpipe: Height & Mounting
A vertical standpipe provides a secure, code-compliant connection for a washing machine drain and must be placed and mounted to control flow and prevent backflow.
The installer locates the standpipe near the washer within allowed distances, choosing materials and diameters that match code and drain capacity.
The top of the standpipe is set between 36 and 42 inches above the trap weir unless local code specifies otherwise.
Secure mounting uses brackets or straps to the framing or blocking to prevent movement and vibration.
A properly aligned trap and vent are verified before finalizing installation and testing for leaks.
Connect the Washer Hose to the Standpipe
Connect the washing machine’s discharge hose to the standpipe by first guaranteeing the hose, standpipe opening, and surrounding area are clean and free of obstructions.
The hose end should be inspected for splits or deformities and the standpipe checked for debris.
Insert the hose straight into the standpipe until it reaches secure seating depth without forcing.
Confirm the hose runs without kinks and maintains a smooth curve from machine to standpipe.
Recommended checks include:
- Verify hose diameter matches standpipe opening.
- Guarantee hose end sits above the trap weir.
- Check for tight, even alignment.
- Test with a short water run for proper drainage.
Secure the Hose to Prevent Dislodgment
Secure the discharge hose to prevent it from slipping out of the standpipe during a wash cycle by fastening it at the point where it exits the machine or at the standpipe itself. Use a hose clamp, zip tie, or factory bracket to secure the connection without kinking the hose.
Anchor the hose to a nearby structural element or the washer’s rear tie-off point to limit movement. Make certain the hose retains its high loop above the trap to prevent backflow.
Check that fasteners are snug but not over-tightened to avoid crushing the hose. Inspect periodically for wear and reposition as needed.
Tie Into Existing Drain With a Wye or Tee
The installer evaluates whether a wye or a tee provides the best flow and access for the washing machine connection.
Selection depends on pipe orientation, ease of future maintenance, and local code requirements.
Once chosen, the installer maintains the proper slope and makes a smooth tie-in to prevent siphoning and backups.
Choosing Between Wye And Tee
Deciding whether to use a wye or a tee fitting hinges on flow direction and future access: a wye provides a smoother, angled connection that promotes drainage and reduces clog risk, while a tee makes tying into a horizontal drain simpler but can create turbulence and trap debris.
The installer weighs orientation, available space, and maintenance needs. Code preferences and appliance load matter. A wye often suits vertical drops and high-flow appliances; a tee may be chosen for tight horizontal runs. Consider future snaking and inspections when selecting.
- Wye: smoother flow, fewer clogs
- Tee: easier horizontal tie-in
- Maintenance access
- Code and load compatibility
Proper Slope And Tie-In
After selecting a wye or tee based on flow and access, attention turns to achieving the correct slope and making the tie-in to the existing drain.
The branch should descend at 1/4 inch per foot (2%) to guarantee gravity drainage; for longer runs, maintain that slope consistently.
Cut the existing pipe squarely, deburr, and test-fit the fitting without solvent.
Align the wye to avoid upstream traps or backflow; a tee requires careful venting consideration.
Apply appropriate primer and solvent or approved gaskets, then secure joints.
Finally, run water to verify smooth flow and check for leaks at the connection.
Transitioning Between PVC, ABS, and Metal Safely
When joining different pipe materials, attention to compatibility, code requirements, and proper adapters prevents leaks and failures. Shifting between PVC, ABS, and metal requires using listed transition fittings or mechanical couplings, ensuring solvent welds or primer where required, and avoiding incompatible glues. The installer should verify local code for approved materials and use dielectric unions for dissimilar metals to prevent corrosion.
- Use manufacturer-approved PVC-to-ABS transition fittings.
- Select flexible rubber couplings with stainless steel bands for mixed materials.
- Employ thread sealant or PTFE tape on metal threaded joints.
- Inspect joints and test for leaks before concealment.
Install a Laundry Sink Drain as an Alternative
As an alternative to connecting a washing machine directly to the standpipe, a laundry sink drain can be installed to provide a more accessible, trap-equipped discharge point that simplifies maintenance and reduces splashback.
A sink offers a visible trap, easier clog clearing, and a convenient place to catch lint or small items.
Installation requires aligning sink outlet to existing drain or adding a short drain branch, installing a P-trap sized to the machine’s flow, and securing venting to prevent siphoning.
Use appropriate fittings and slope, test for leaks, and make certain the standpipe and sink comply with local codes for combined use.
Installing a Basement Floor Drain for Laundry
When adding a basement floor drain for a laundry area, proper placement near the washing machine and low spot of the floor is essential to guarantee rapid drainage.
The drain must include an accessible trap to prevent sewer gases from entering the space and be tied into a vented system or an approved air admittance device per local code.
Attention to location, trap configuration, and venting will minimize backups and odor issues.
Floor Drain Location
For a basement laundry floor drain to function reliably, it must be placed at the lowest point of the laundry area and routed to the home’s main sanitary system with a minimum slope and accessible cleanout. The chosen location avoids appliance interference, enables positive drainage, and simplifies future maintenance.
Consider proximity to the washer, distance from electrical panels, and access for service. Placement should respect local codes and avoid structural footings or finished thresholds.
Recommended considerations include:
- Locate at the natural low point and make certain unobstructed flow.
- Maintain shortest practical run to main drain.
- Provide an accessible cleanout nearby.
- Keep clearances from utilities and access panels.
Trap And Venting
Install a properly sized trap and vent to prevent sewer gases from entering the laundry area and to guarantee reliable drainage from the washer into the basement floor drain.
The trap must be a P-trap or S-trap configured to local code depth, with correct trap seal to block odors while allowing flow. Venting prevents siphonage; connect to an existing vent stack or install an air admittance valve where permitted.
Make certain sloped pipe runs, accessible cleanouts, and durable materials rated for laundry discharge.
Test for leaks and proper venting by running water through the washer and observing trap seal retention and flow.
Pressure-Test the New Drain for Leaks
Begin by sealing the drain openings and applying a controlled air or water pressure to the new assembly to confirm watertight joints and fittings.
The installer observes gauges and joints for a set interval, watching for pressure drops or visible moisture.
If pressure falls, localized inspection isolates the leak; fittings are tightened or resealed as needed.
After repairs, the same test repeats until stable.
Documentation notes test method, pressure level, duration, and outcomes for future reference.
- Maintain recommended test pressure and time per local code
- Inspect all fittings, joints, and trap connections
- Use soapy water to reveal air leaks
- Record results and corrective actions
Verify Flow and Diagnose Air/Vacuum Issues
With pressure integrity confirmed, the installer verifies that the drain actually moves water correctly and checks for air or vacuum conditions that can impede flow. They run several test cycles, observing fill and drain rates, listening for gurgles, and watching for slow emptying. If flow stalls, they inspect trap seal depth, venting, and hose positioning to eliminate siphoning. Small air locks are cleared by briefly elevating the drain hose or adding water to force flow. Results, observations, and corrective steps are recorded.
| Test | Observation | Action |
|---|---|---|
| Cycle drain | Rate steady or slow | Adjust hose/clear obstruction |
| Noise | Gurgle present | Check venting |
| Siphon | Water loss | Modify trap/height |
Avoid Common Mistakes That Cause Backups
Frequently, backups stem from small oversights that compound over time; installers should consequently prioritize a checklist of common mistakes to prevent recurring clogs and slow drains. Errors often involve improper pipe slope, undersized drains, loose connections, or neglecting strainers. Inspecting fittings and following standards reduces failures. Simple verification after installation saves service calls and protects floors.
- Incorrect drain slope that allows standing water
- Using too-small drain or adaptor sizes
- Loose or poorly sealed fittings that leak debris
- Omitting or failing to install accessible lint/strainer traps
Consistent checks and using correct parts minimize future backups and maintenance.
Prevent Siphoning and Protect the Trap Seal
To prevent siphoning and preserve the trap seal, the standpipe must be installed at the correct height to allow proper venting and flow.
An appropriate air gap or venting arrangement should be provided to keep sewer gases from entering the machine or home.
The washing machine hose must be securely attached and fastened to the standpipe to prevent dislodgement and backflow.
Proper Standpipe Height
A standpipe must be tall enough to prevent siphoning and preserve the trap seal while still allowing full drainage of the washer discharge; typically this means a vertical pipe between 18 and 30 inches above the trap weir, depending on local code and washer flow rate.
The installer should size and position the standpipe to match washer output and code minimums.
Consider these points:
- Minimum and maximum heights required by local plumbing code
- Washer pump flow rates and intermittent surge volumes
- Secure mounting to prevent movement or dislodgement during cycles
- Proper trap configuration and slope to make certain reliable drainage
Air Gap Requirements
Following the standpipe height considerations, attention must be given to the air gap between the washer discharge and the standpipe or trap to prevent siphoning and protect the trap seal.
Building codes often require a minimum vertical clearance—commonly 2 inches—between the end of the discharge hose and the overflow rim or standpipe top; some jurisdictions specify greater distances.
The air gap prevents wastewater backflow and maintains trap water seal integrity during sudden pressure changes.
Installers should verify local code, make certain the hose remains unobstructed and free-floating within the standpipe, and avoid submerging the hose end to eliminate siphon risk.
Secure Hose Attachment
Securely fastening the washing machine discharge hose prevents siphoning and maintains the trap seal by keeping the hose end stable and correctly positioned within the standpipe.
The installer should secure the hose at the required height, use a firm support or clamp, and avoid kinks or long unsupported runs that invite backflow.
Make certain the hose is inserted but not sealed into the standpipe so air can break any potential siphon.
Check connections periodically and after movement.
- Place hose loop or hook above appliance outlet
- Use a U‑bracket or strap to anchor hose
- Maintain 2–3 inch insertion depth
- Inspect for wear and tightness
Lint and Debris Protection: Screens and Traps
Preventing lint and debris from entering the drain extends plumbing life and reduces clogs.
Install a lint screen on the washer’s standpipe or over the drain inlet to catch fibers; choose a stainless or plastic mesh rated for fine particles. For added protection, fit an accessible trap or lint catcher inline between the hose and drain—prefer models with a removable basket for periodic cleaning.
Secure fittings to prevent leaks and assure the screen does not obstruct flow. Inspect and clean screens and traps monthly or per laundry frequency.
Properly maintained barriers minimize buildup and prolong drain and pump performance.
Fix Slow Drains or Gurgling After Install
Address slow drainage or gurgling promptly to avoid standing water and recurring clogs. The installer should inspect the trap and P-trap for kinks, verify proper sloping of the drain hose, and check that the standpipe height meets code. Airflow issues from an improperly vented standpipe can cause gurgling; confirm the venting and hose connection are secure. If partial blockage is suspected, use a handheld auger or remove the trap for cleaning.
Recommended steps:
- Inspect and straighten the drain hose and fittings
- Clean or replace the P-trap and lint trap
- Use an auger for partial clogs
- Verify standpipe height and venting
Solutions for Tight Spaces and Offset Drains
When space is limited or the drain outlet is offset, installers must adapt hose routing and fittings to maintain proper flow and prevent strain on connections.
Use short, flexible drain hoses and rigid elbow adapters to negotiate tight corners without kinking. Install adjustable-height standpipes or extend the trap with appropriate fittings to align offsets while preserving the required trap seal.
Secure hoses with clamps and straps to prevent movement and stress at joints. Consider low-profile laundry boxes or recessed outlets to save room.
Measure twice and test for leaks and proper drainage before finishing cosmetic covers or cabinets.
When to Call a Plumber: Red Flags
Recognize clear warning signs that a washing machine drain issue exceeds DIY repairs: persistent clogs that recur after snaking, slow drainage accompanied by gurgling or sewer odors, repeated leaks at the trap or hose connections, sewage backup into the machine or laundry area, or visible damage to the drain pipe or trap such as cracks, corrosion, or displaced joints.
When these occur, a professional assessment prevents escalation. Call a plumber if experienced troubleshooting fails or when structural, sewer-line, or mold risks appear. Consider urgent service for health or property threats.
- Recurring clogs after standard snaking
- Sewage odors or backups
- Visible pipe/trap damage
- Repeated or hidden leaks
Cost Estimate: DIY vs Hiring a Pro
Although some homeowners can keep costs low by installing a washing machine drain pipe themselves, the decision hinges on skill level, tools, and local code requirements; DIY expenses typically include pipe and fittings ($15–$75), a P-trap ($10–$40), clamps and hoses ($10–$30), and any specialty tools or permits, while hiring a licensed plumber adds labor and travel, pushing total professional fees commonly into the $150–$500 range for a standard installation and higher if access, repairs, or sewer-line work is required.
| Option | Cost Range | Feeling |
|---|---|---|
| DIY basic | $35–$145 | Empowered |
| DIY complex | $150–$300+ | Anxious |
| Pro standard | $150–$500 | Relieved |
| Pro complex | $500+ | Secure |
Routine Maintenance for Your Laundry Drain
Regularly inspecting and maintaining the laundry drain prevents clogs, odors, and premature pipe damage. The homeowner checks the trap and standpipe monthly, clears lint from the washer hose screen, and makes certain the vent is unobstructed. Recommended routine tasks reinforce functionality and prevent costly repairs.
- Flush the drain with hot water after heavy loads to remove soap residue.
- Use a lint trap on the washer discharge to catch fibers.
- Inspect hose connections and clamps for leaks or deterioration.
- Apply a biodegradable enzyme cleaner monthly to break down organic buildup.
Consistent, simple care extends drain life and preserves plumbing performance.
Documenting the Install for Permits and Buyers
Why document the washing machine drain installation? A concise record supports permit approvals, demonstrates code compliance, and reassures future buyers.
Include date, installer contact, permit numbers, inspected components, materials used, pipe sizes, joint types, slope details, and venting or trap placement.
Attach clear photos of rough-in, connections, and final inspection stickers.
Preserve receipts, manufacturer instructions, and any deviation explanations.
Store records digitally and in hard copy within home files.
Well-organized documentation simplifies future repairs, validates warranty claims, and adds resale value by proving the drain was professionally or correctly installed and inspected.
Eco Tips: Reduce Wastewater Risk and Save Water
Conserving water and preventing wastewater problems around a washing machine reduce utility costs and protect the home’s plumbing system. A concise set of eco tips helps minimize runoff, lessen strain on drains, and cut water bills while maintaining proper installation integrity.
- Use high-efficiency (HE) cycles and load-sizing to reduce water per wash.
- Install a drain pan with a gravity drain or leak sensor to capture accidental discharge.
- Avoid pouring chemicals down the drain; dispose of detergents and spot removers per local hazardous-waste guidelines.
- Regularly inspect hoses and fittings for leaks and replace aged components to prevent slow leaks and wasted water.
Final Checklist to Verify a Safe Install
A final checklist guarantees all components meet safety and code standards before the washing machine is put into use.
Inspect connections for tightness and correct fittings; verify the trap and vent are installed and unobstructed.
Confirm proper slope and secure mounting of the drain line to prevent sagging.
Test for leaks by running water and a short drain cycle; check underfloor and adjacent finishes for moisture.
Assure the standpipe height and overflow protection comply with local code.
Verify that the water supply valves operate and the electrical connection is safe.
Record installation details and schedule routine inspections.
Conclusion
A proper washing machine drain install ties the laundry’s plumbing together like the final stitch in a quilt: sturdy, neat, and built to last. Following codes, placing the standpipe correctly, and keeping clear documentation protect both home and homeowner. Regular maintenance prevents clogs and costly damage, while eco-conscious choices reduce wastewater and save money. With tools, measurements, and a final checklist in hand, the job is safe, compliant, and dependable for years to come.