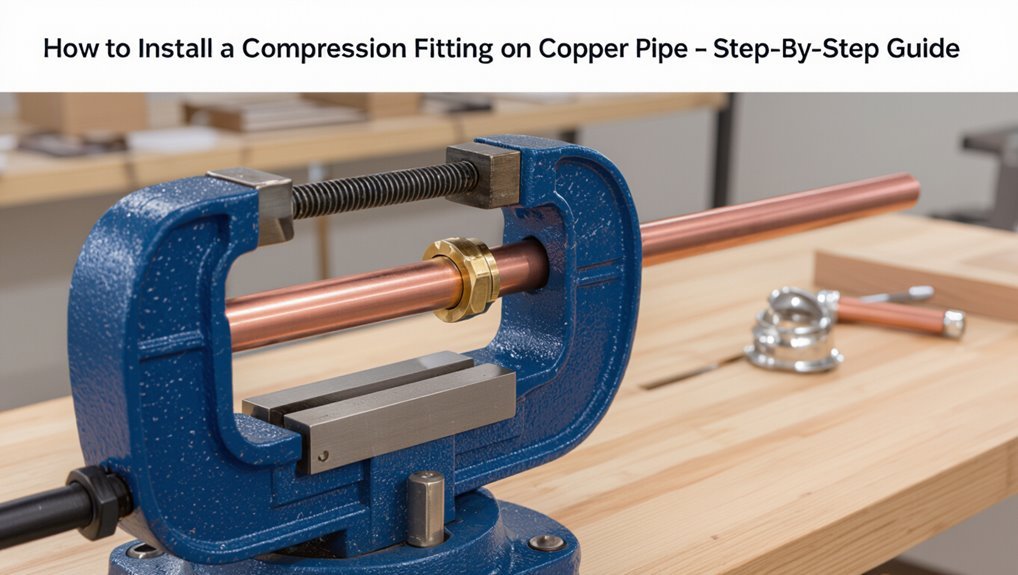
How to Install a Compression Fitting on Copper Pipe €” Step-By-Step Guide
Key Takeaway: How to Install a Compression Fitting on Copper Pipe
To install a compression fitting on copper pipe, follow these steps:
- Cut the copper tube squarely.
- Deburr both the inside and outside edges of the cut.
- Slide the compression nut onto the tube.
- Place the ferrule onto the tube with the tapered face facing the fitting.
- Insert the tube fully into the fitting stop.
- Hand-tighten the nut securely.
- Use two wrenches to tighten the nut with a controlled quarter to half turn until the ferrule bites into the pipe.
After installation, gradually pressurize the system and inspect for leaks. If necessary, retighten or remake the joint. Additional steps may cover testing, repair, and material selection.
Make a Compression Joint on Copper Pipe : Step‑by‑Step

Before assembling the fitting, make certain the copper pipe end is clean, square, and free of burrs; this preparation guarantees a tight, leak‑free compression joint.
The technician slips the compression nut over the tube, followed by the ferrule with its tapered face toward the fitting body.
The tube is inserted fully into the fitting until it seats.
The nut is hand‑tightened, then tightened further with a wrench while holding the fitting body stationary.
Tighten until resistance increases and the ferrule bites the tube; avoid over‑tightening.
After assembly, pressurize the line and inspect for leaks, retightening one quarter turn if necessary.
When to Use Compression Fittings vs Solder or Push‑Fit
Choosing between compression, solder, and push‑fit depends on factors like permanence, skill level, and the working environment.
Soldering provides a durable, leak‑resistant joint for permanent installations but requires heat and practice.
Push‑fit offers fast, tool‑free connections for repairs or tight spaces, while compression fits serve as a middle ground for reliable, non‑soldered joints.
When To Choose Compression
In situations where soldering is impractical or where a future disassembly may be required, compression fittings offer a reliable, tool‑limited alternative for joining copper pipe.
They suit tight spaces, temporary setups, and applications where heat or open flames are restricted. Selection depends on pressure, accessibility, and anticipated maintenance. Consider materials and fitting quality to prevent leaks and galvanic issues.
- Tight or confined areas where torch use is unsafe
- Temporary or modular systems needing periodic disassembly
- Works with existing fittings without cutting back heavily
- Situations lacking soldering skill or certification
Choose compression when convenience and reversibility outweigh permanent joints.
Benefits Of Soldering
While compression fittings excel where removability and flame-free installation matter, soldering remains the preferred method when permanence, strength, and long-term leak resistance are priorities.
Soldered joints create a continuous metallic bond that resists vibration and thermal cycling better than mechanical seals. Properly executed solder connections are slimmer, allowing passage through tight spaces and minimizing profile changes. They withstand higher internal pressures and temperatures, making them suitable for critical water supply and heating systems.
Skilled soldering yields durable, maintenance‑free joints with predictable performance over decades, provided flux, cleaning, and adequate heat are applied correctly.
Advantages Of Push‑Fit
Why opt for a push‑fit connection? Push‑fit fittings offer speed and ease, allowing reliable joins without heat, tools, or soldering expertise. They suit repairs, tight spaces, and temporary installations where minimal disruption matters. Performance is consistent across copper, PEX, and CPVC when rated appropriately.
- Instant installation: simply push pipe into fitting for a watertight seal.
- No flame or flux: safer in occupied or confined areas.
- Reusable: many models can be removed and repositioned.
- Versatile compatibility: works with multiple pipe materials and sizes.
Choose push‑fit when convenience, safety, and flexibility outweigh long‑term permanence.
Quick Steps: Overview in 5–7 Bullets
A concise list of preparatory and installation steps helps guarantee a reliable compression joint.
First, assemble the required tools and verify pipe ends are clean and cut square.
Then position the ferrule and nut and tighten to manufacturer torque or hand-plus-quarter turn as specified.
Prepare Tools
Gather essential tools before beginning to fit a compression connector onto copper pipe to guarantee a smooth, safe job. The preparatory phase lists only the necessary items and checks to streamline work and prevent mistakes.
Confirm tool condition and appropriate sizes for the pipe and fitting. Include a brief inspection of the pipe end for burrs and proper length. Keep materials and safety gear within reach to avoid interruptions.
- Tube cutter sized for copper
- Deburring tool or reamer and fine file
- Adjustable wrench or two open-ended wrenches
- Safety glasses and work gloves
Tighten Nut
With the pipe cut, deburred, and the compression ring and nut slid into place, attention turns to tightening the nut to create a reliable seal.
- Hold the fitting body steady with one wrench.
- Align the nut squarely onto the fitting threads.
- Use a second wrench to turn the nut clockwise until hand-tight.
- Apply an additional 1/4 to 1/2 turn with the wrench; avoid over-tightening.
- For larger fittings, add another 1/4 turn.
- Check alignment so the ferrule compresses evenly.
- Inspect visually and test under pressure for leaks.
Essential Tools and Replacement Parts (Wrenches, Ferrules, Fittings)
Several basic tools and a few common replacement parts are required to install a compression fitting on copper pipe. The installer needs reliable hand tools and spare components to guarantee a proper seal and to address minor issues during assembly.
Essential items include adjustable and open-end wrenches sized for plumbing nuts, a tubing cutter for square cuts, and emery cloth or a deburring tool to clean pipe ends. Replacement parts should be on hand in case of damage or wear.
- Adjustable wrench
- Open-end wrench (correct sizes)
- Ferrules (compression rings)
- Spare compression nuts
Pick the Right Fitting Size and Material
Before selecting a compression fitting, the installer measures the pipe’s outside diameter to make certain a proper ferrule fit.
Materials for fitting and pipe must be compatible—mixing dissimilar metals can cause corrosion or galvanic reaction.
Finally, the chosen fitting should match the system’s pressure rating to maintain safety and longevity.
Measure Pipe Outside Diameter
Measure the pipe’s outside diameter (OD) accurately to select a compression fitting that matches both size and material compatibility. The technician uses calipers or a reliable OD tape, measuring perpendicular to the pipe axis at a clean section. Record the measurement to the nearest 0.1 mm or 1/64 inch. Compare the value to standard fitting sizes rather than nominal pipe sizes. Check for dents, burrs, or corrosion that might alter the effective OD before cutting or fitting. Final verification after cleaning guarantees the chosen ferrule and nut will seat properly.
- Use calipers for best accuracy
- Measure across outside surface
- Note exact units (mm or inches)
- Inspect measurement area first
Choose Compatible Materials
When selecting a compression fitting for copper pipe, the technician must match both the exact outside diameter and the fitting material to the service conditions; mismatched sizes or incompatible metals can cause leaks or galvanic corrosion.
The technician verifies pipe OD against the fitting’s specified size, choosing fittings labeled for Type K, L, or M copper as appropriate.
Material choices—brass, bronze, or stainless steel—depend on water chemistry and presence of dissimilar metals nearby.
Use dielectric or plastic washers where necessary to isolate metals.
Confirm nut and ferrule materials match the body to guarantee uniform thermal expansion and chemical compatibility.
Account For Pressure Rating
After confirming size and material compatibility, the technician next evaluates the system’s maximum working pressure and selects a compression fitting rated to exceed that value with an appropriate safety margin.
The installer verifies stamped pressure ratings on fittings, compares them to peak and sustained pressures, and accounts for temperature effects that reduce allowable pressure. Where system pressure fluctuates, a higher-rated fitting is chosen.
Consideration is given to joint orientation and potential mechanical loads.
Documentation of selected ratings is kept for future maintenance.
- Check stamped or published pressure ratings
- Add margin for pressure spikes and temperature
- Match ratings to pipe size and application
- Record selections for maintenance
Safety: Shutoff, Pressure Check, and PPE
Before any work begins, confirm the water supply is fully shut off at the appropriate valve and relieve system pressure by opening a downstream faucet or drain; this prevents sudden flow during fitting installation. The installer verifies zero pressure with a gauge or visual check, wears eye protection, gloves, and appropriate clothing, and keeps a bucket and rags ready. Attention to pressure indications and PPE reduces injury and property damage. Inspect tools and fitting for defects before use. Record observations if uncertainties arise and pause work until resolved.
| Item | Purpose | Action |
|---|---|---|
| Gauge | Check pressure | Attach, read |
| Gloves | Hand protection | Wear |
| Goggles | Eye safety | Wear |
| Bucket | Contain water | Place beneath joint |
How to Shut Off and Drain the Pipe Section
Before cutting or fitting, the technician shuts off the main water supply to isolate the work area.
Next, system pressure is relieved by opening a nearby tap or pressure-relief valve until flow stops.
Finally, the specific pipe section is drained into a bucket or drain to remove remaining water and prevent leaks during the repair.
Turn Off Main Supply
Shut the building’s main water supply and relieve pressure in the pipe section to be worked on. The technician locates the main shutoff—often near the water meter, basement, or exterior wall—then closes it fully. Verify closure by opening a nearby fixture until flow stops. Isolate the specific branch valve if available to limit drainage. Confirm tools and safety gear are ready before proceeding to drain.
- Locate main shutoff and confirm identification
- Close valve slowly to prevent hammer
- Open nearby taps to verify flow cessation
- Note valve type and orientation for reopening
Relieve System Pressure
Isolate the work section by closing the appropriate branch valve or the main shutoff, then open the nearest downstream fixture to bleed residual water and pressure from the line.
Confirm gauges or indicators show pressure drop.
Wear eye protection and gloves.
If the system includes multiple zones, verify each relevant zone is isolated to prevent backflow.
Relieve trapped pressure by opening an air admittance valve or a high point vent where available.
Listen for steady drip indicating pressure equalization.
Keep towels or a small container at the open fixture to catch remaining water.
Re-check isolation before cutting or loosening fittings.
Drain The Pipe Section
With the supply secured and downstream fixtures opened, the technician drains the targeted section by loosening an accessible low point drain valve or removing a fitting at the lowest reachable point; this allows water to flow out under gravity into a bucket or drain until the run is empty and flow slows to a trickle.
The technician inspects for residual water, towels the area, and rechecks isolation points. Air may be introduced briefly to aid drainage. Once dry, the pipe is cleaned and prepped for the compression fitting installation. Final verification confirms no pressurized flow remains before proceeding.
- Locate lowest drain point
- Use a bucket or hose
- Pat dry and inspect
- Confirm isolation and zero pressure
How to Cut Copper Pipe Squarely and Deburr the Edge
Cut the copper pipe squarely and remove any burrs before fitting to guarantee a proper seal and prevent damage to the compression ring. Use a tube cutter or hacksaw, rotating smoothly and aligning the cutter at 90 degrees. Inspect the cut for distortion and correct with light filing if needed. Remove internal and external burrs with a deburring tool or round file, working gently to avoid removing excessive material. Clean the outside with emery cloth. Verify the end is perpendicular and smooth before assembling the fitting.
| Tool | Action | Result |
|---|---|---|
| Tube cutter | Rotate | Square cut |
| Deburr tool | Pass through | Smooth edge |
| Emery cloth | Light rub | Clean surface |
| File | Touch up | Correct distortion |
How to Measure and Mark Insertion Depth
After confirming the pipe end is square, deburred, and clean, determine the proper insertion depth for the compression fitting by comparing the pipe to the fitting body or using a depth gauge. Mark the pipe at the measured depth with a fine-tip marker or scribe. Verify the mark aligns with the fitting’s shoulder when the pipe is inserted fully; this guarantees the ferrule seats correctly. Recheck measurement after any chamfering. If multiple fittings are used, repeat and label each mark to prevent confusion.
- Use the fitting body as a visual reference
- Measure twice, mark once
- Use a permanent, thin mark
- Confirm alignment before assembly
How to Slide the Nut and Ferrule Onto the Pipe Correctly
The installer slides the compression nut onto the prepared copper pipe with the threaded end facing the fitting.
Next, the ferrule is placed onto the pipe with its tapered end oriented toward the fitting body so it can seat properly.
Care is taken to push each component fully back to the measured mark before assembling.
Slide Nut Onward
With the pipe held steady, the compression nut is slipped onto the tubing with its threaded end facing the fitting body; next, the ferrule (or ring) follows, tapered side toward the fitting.
The installer makes certain both parts slide smoothly without twisting, stopping so the ferrule sits near the pipe end but not over it. Proper spacing allows the nut to engage the fitting threads fully.
If resistance occurs, withdraw and inspect for debris or burrs. Repeat until movement is smooth.
- Verify nut threads face the fitting body
- Slide ferrule close to pipe end
- Avoid forcing components
- Inspect for damage before assembly
Orient Ferrule Correctly
Once the nut and ferrule are slid onto the tubing, attention shifts to ferrule orientation: the tapered edge must face the fitting body so that, when tightened, it compresses evenly around the pipe.
The installer positions the ferrule about 1/8 to 1/4 inch from the tubing end, ensuring the tapered side points toward the fitting receiver.
The flat or split end should face the technician. Confirm the ferrule sits squarely and not cocked; a misaligned ferrule risks leaks and deformed tubing.
Hold components steady, slide the nut forward, then insert the pipe into the fitting before tightening to proper torque.
How to Insert the Pipe Fully Into the Fitting Body
Align the prepared copper pipe with the fitting body and push it straight in until it seats firmly against the internal stop.
The installer confirms seating by feeling resistance and observing the pipe end flush with the fitting inlet.
Maintain a steady, axial push; avoid rocking or angling that can displace the ferrule.
If resistance occurs before full insertion, withdraw and inspect for burrs or debris, then re-debur and clean.
Once seated, mark the pipe at the nut edge to verify position after any handling.
- Check alignment visually before insertion
- Apply even pressure, not forceful hammering
- Inspect for obstructions if seating fails
- Mark pipe position for confirmation
Hand‑Start the Compression Nut Without Cross‑Threading
How should the installer begin threading the compression nut to make sure it engages squarely? The installer places the nut on the fitting by hand, aligning threads visually and seating the ferrule against the fitting body.
Turn the nut counterclockwise until threads clear, then clockwise slowly with fingertips, feeling for smooth engagement. If resistance or binding occurs, stop, back off, realign, and reattempt. Avoid forcing with tools at this stage.
Proper hand-starting prevents cross-threading and protects threads and ferrule. Once the nut turns freely several full rotations by hand and feels uniformly snug, it is ready for the final tightening procedure.
How to Tighten a Compression Nut to the Correct Torque
Begin tightening the compression nut with controlled, steady turns using a properly sized wrench while the fitting remains supported to prevent torque transfer to the pipe.
The installer counts turns after finger‑tight, typically 1/4 to 3/4 of a turn depending on ferrule design and pipe size, watching for ferrule compression against the fitting body.
Stop when resistance increases and the nut seats firmly; avoid over‑torquing which can deform the ferrule or crush the pipe.
If specified, use a torque wrench to the manufacturer’s recommended value.
Allow the fitting to cool or settle before any movement.
- Count incremental turns past fingertight
- Support fitting to isolate torque
- Watch for firm seating resistance
- Use torque wrench when available
Test the Joint for Leaks After Tightening
After the nut is seated and allowed to settle, the installer verifies the joint by pressurizing the line and inspecting for leaks.
Water or air is introduced slowly to recommended system pressure while nearby valves remain closed. The installer watches the fitting, ferrule area, and adjacent pipe for visible drips, wetness, or hissing. A soapy solution may be applied to reveal small bubbles indicating seepage. Observations continue for several minutes to catch slow failures.
If no signs of leakage appear, pressure is held to confirm stability. The test is documented and the system returned to normal service after successful verification.
Fix a Slow Leak: Tighten, Reseat Ferrule, or Remake the Joint
Occasionally a compression joint that passed initial testing will develop a slow leak; when that happens the installer should diagnose and correct the problem before putting the line back into service.
The technician first isolates the section, dries the joint, and inspects for visible gaps, nicks, or misalignment. Light tightening often stops seepage; over-tightening is avoided.
If leaks persist, the nut is loosened, the ferrule repositioned and the nut retightened to proper torque. When reseating fails, the joint is remade with a new ferrule or cutting back the tube for a fresh seat.
- Isolate and dry the joint
- Try incremental tightening
- Reseat the ferrule carefully
- Remake the joint if needed
When and How to Replace a Ferrule or Fitting
When a compression joint continues to leak after careful tightening or reseating, the ferrule or the mating fitting should be replaced to restore a reliable seal.
Inspect the ferrule for deformation, cracks, or embedded burrs; inspect the fitting and pipe for scoring or corrosion.
Cut back the pipe past damaged areas, deburr, and clean.
Select an identical-size ferrule and nut or a matched replacement fitting.
Slide nut then ferrule onto the pipe, seat the ferrule against the fitting, hand-tighten, then open the nut an additional one-quarter to one-half turn with a wrench while holding the fitting steady.
Test for leaks.
Compression Fittings in Tight Spaces, Angled Runs, and Tees
In confined or awkwardly angled installations, compression fittings remain a reliable choice provided installers adapt techniques for limited access and directional changes.
Proper planning, measured cuts, and selecting compact or angled fittings reduce stress on joints.
Short stub-outs benefit from internal support sleeves; apply consistent torque to avoid overcompression.
When fitting tees, align ferrules squarely and use backing wrenches to prevent twisting.
Deburr and clean each tube end even in tight spots.
- Choose mini or elbow compression fittings for space constraints
- Use tube supports or sleeves for short engagement
- Employ two wrenches to stabilize fittings
- Verify alignment before final tightening
Maintenance Tips and Expected Lifespan of a Compression Joint
Regular inspection and basic maintenance will keep a compression joint functional for many years.
Periodic checks for leaks, corrosion, and movement are recommended; tighten mildly if slow seepage appears, but avoid over-torquing.
Replace olives and nuts showing deformation or pitting.
Make sure surrounding insulation remains intact to prevent galvanic corrosion and freezing.
Record installation dates and component types to anticipate wear.
Under normal domestic water conditions, a well-installed compression joint can last 10–25 years; lifespan shortens with aggressive water chemistry, vibration, or thermal cycling.
Proactive replacement of aging fittings prevents failures and minimizes repair scope.
Conclusion
Like a gardener fastening a trellis to guide vines, the craftsman secures copper with a compression fitting—firm ferrule grip, patient wrench turns, and occasional pruning when leaks appear. Over seasons the joint endures if tended; replace worn ferrules as one replaces weathered ties. In tight beds or branching rows, choose the right size and angle so the plumbing grows true. With steady care, the connection stands quiet, steadfast as a well-tended garden trellis.