How to Turn On Water Pump in RV: Step-by-Step Guide for Beginners
To turn on the water pump in your RV, first ensure the fresh water tank is filled or a city water hose is connected. Open a faucet to relieve pressure, then check the battery voltage and fuses, and inspect for any leaks in the lines. Once everything is in order, flip the pump switch ON at the control panel. Watch for a steady flow and check for leaks. After closing the faucet, confirm that the pump cycles normally. For ongoing reliability, follow up with troubleshooting, maintenance, and efficiency tips.
Quick answer How to turn on the water pump in an RV
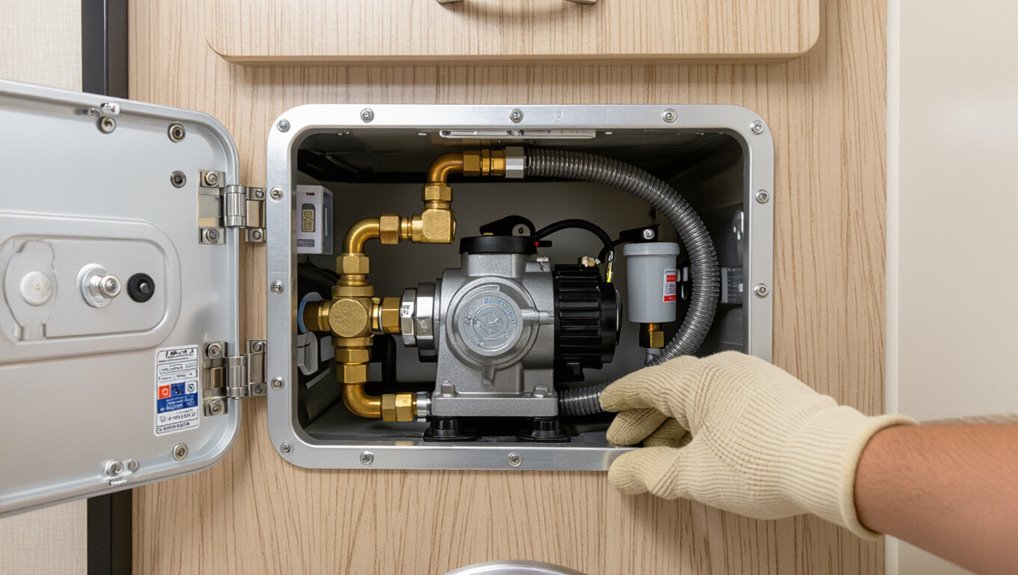
A concise procedure is provided: verify the fresh water tank has water, switch the RV’s water pump to the ON position, and open a faucet to purge air and confirm flow.
The pump is commonly needed when parked without city water hookups, boondocking, or using onboard tanks at campsites.
The following section expands on precautions and step-by-step checks.
One-sentence summary of the steps
Turn on the RV water pump by ensuring the freshwater tank is filled or a hose is connected to city water.
Then open a faucet to relieve pressure, switch the pump to ON at the control panel, check for steady flow and leaks, close the faucet, and confirm pump cycles normally.
This concise how to turn on water pump in rv summary outlines the essential steps.
Common scenarios when you need the pump on
Frequently, the pump must be on whenever the RV is stationary without a pressurized city water hookup—such as when boondocking, parked at a campsite using only the onboard freshwater tank, or running faucets, showers, or toilets where pressurized flow is needed.
It’s also used for filling tanks, operating outdoor showers, flushing black tanks, and supplying water to washing machines or dishwashers when shore power is absent or pressure regulators aren’t in use.
Understanding RV water systems before powering the pump
Before switching on the pump, the reader should understand how freshwater tanks, city water hookups, and the pump itself interact to supply water throughout the RV.
Different pump types (demand vs. constant-pressure) have distinct behaviors and power needs, and the electrical supply can be either the coach 12V battery or shore power via an inverter/charger.
Key components to locate first include the pump, on/off switches, the appropriate fuse or breaker, and the freshwater tank.
Freshwater tank, city water connection, and pump roles
When preparing to power an RV’s water pump, it helps to distinguish between the freshwater tank, the city water connection, and the pump itself.
The freshwater tank stores potable water for onboard use. The city water connection supplies continuous external pressure when hooked up.
The pump pressurizes tank water for faucets and fixtures when no external supply is present; valves and filters manage flow.
Types of RV water pumps and how they differ
Although RV water systems share the same basic purpose, the pumps themselves vary considerably in design, power source, flow rate, and pressure control.
Common types include diaphragm (positive-displacement) pumps for steady pressure at low flow, centrifugal pumps for higher flow but variable pressure, and demand/automatic models that activate with faucet use.
Selection depends on required flow, noise, size, and pressure consistency.
Electrical supply options: 12V battery vs. shore power
Power sources for RV water pumps fall into two main categories: 12V battery systems that supply DC power directly and shore power setups that run the pump through an AC-to-DC converter or a separate AC pump.
Battery operation enables off-grid use but depends on charge level and fuse protection.
Shore power offers consistent voltage and less battery drain, requiring appropriate converters or compatible pump models.
Key components to locate: pump, switches, fuse/breaker, water tank
Before turning on an RV water pump, identify four essential components: the pump itself, the control switches, the protective fuse or breaker, and the freshwater tank.
Locate the pump near the tank or under a cabinet, find interior and exterior switches, verify the inline fuse or breaker in the 12V circuit, and confirm tank water level and venting.
Guarantee access for inspection and maintenance.
Safety checks to perform before turning the pump on
Before powering the RV water pump, the operator should confirm the fresh water tank has adequate level and that its vent is clear.
Lines and fixtures must be inspected for visible leaks while battery voltage and the pump fuse or breaker are checked to guarantee reliable power.
If shore power is connected, it should be disconnected when required by the RV’s electrical setup to prevent backfeed or damage.
Verify fresh water level and tank venting
A quick visual and tactile check of the fresh water tank and venting system minimizes the risk of pump damage and plumbing failure when the pump is started.
Confirm sufficient water level to prevent dry-run, feel exterior for fullness, open vent cap briefly to ascertain airflow and no blockage, and clear debris or insect nests.
Re-secure vent and caps before energizing the pump.
Inspect lines and fixtures for leaks
Inspecting the RV’s water lines and fixtures for leaks guarantees system integrity and prevents water damage once the pump is activated.
The technician visually examines visible pipes, joints, faucets, and connections for drips, corrosion, or loose clamps. Flexible lines and under-sink areas receive tactile checks.
Any detected leak is tightened, sealed, or replaced before pump startup to avoid flooding and pressure loss.
Check battery voltage and fuse/breaker status
With leaks repaired and fittings secure, attention shifts to the electrical supply that powers the pump.
One must measure battery voltage to confirm sufficient charge (typically around 12.6V for a full lead-acid battery).
Inspect the inline fuse and pump circuit breaker for proper rating and continuity.
Replace blown fuses, reset tripped breakers, and secure corrosion-free battery connections before powering the pump.
Ensure shore power is disconnected when necessary
Before activating the water pump, verify that shore power is disconnected when the RV electrical system or onboard inverter is involved, since simultaneous shore and battery/inverter connections can create backfeed risks and unexpected voltage sources.
Confirm the shore power cord is unplugged and the breaker is off.
Inspect transfer switches and inverter settings to guarantee the pump draws only from the designated battery circuit.
Step-by-step procedure to turn on the RV water pump
The procedure begins with preparing the RV by ensuring the fresh water tank is filled, valves are correctly positioned, and appliances are closed.
Next, the operator locates the pump switch or control panel, turns the pump on, and listens for normal operation.
Finally, fixtures are tested for proper pressure and flow, and the pump is turned off after use or when switching to city water.
Step 1 Prepare the RV (water tank, valves, and appliances)
Inspect the RV’s water system components and confirm they are set for pump operation: ensure the freshwater tank contains sufficient water, close any open city-water inlet or bypass valves, and verify faucets and appliances are shut to prevent pressure surges.
Then confirm drain valves are closed, secure low-point drains, and make certain filters and inline screens are seated to avoid air ingestion or debris before pump activation.
Step 2 Locate the pump switch and control panel
Locate the pump switch and control panel inside the RV, typically on a central control panel, near the kitchen or utility area, or in an exterior service bay.
Inspect labels for “water pump,” “pump,” or a pictogram. Confirm power source (battery/distribution panel) nearby.
Note any fused switches or protective covers.
Photographs or owner’s manual diagrams aid quick identification during routine checks.
Step 3 Turn on the pump and listen for normal operation
Activating the pump requires switching it on at the control panel and immediately listening and feeling for normal operation: a steady hum from the motor, smooth flow at faucets, and no rattles, grinding, or excessive vibration.
Confirm the pump cycles briefly as expected, then remains steady.
If unusual noises, overheating, or leaks occur, switch off and inspect electrical connections, mounts, and the pump housing before restarting.
Step 4 Test faucets and fixtures for pressure and flow
Open each faucet and fixture one at a time to check that the pump provides steady pressure and adequate flow, watching for consistent stream strength, air sputtering, or drops in pressure that indicate leaks, clogged lines, or an air pocket.
Note temperature stability at hot taps, inspect under-sink and exterior fittings for drips, and test shower, toilet flush, and pressure at multiple outlets.
Step 5 Turn off pump after use or when switching to city water
Turn off the pump promptly after use or when switching to city water to prevent unnecessary wear, conserve battery power, and avoid pressure conflicts between systems.
Confirm faucets are closed, switch the pump control to OFF, and verify the indicator light is out.
When connecting to city supply, leave the onboard pump off.
Regularly inspect the pump switch and wiring for proper operation.
How to troubleshoot common pump startup problems
When the RV water pump fails to start or behave normally, a systematic checklist helps isolate electrical, plumbing, and mechanical causes.
Basic diagnostics include verifying power and fuses, eliminating airlocks and clogs, checking pressure-switch operation and leaks, and inspecting mounting and pump wear for noise or vibration.
Each symptom—no start, no flow, low pressure, short cycling, or unusual sounds—points to a different set of targeted tests and corrective steps.
Pump won’t turn on electrical checks and fuse troubleshooting
Begin by isolating the electrical system and confirming the pump receives power: check the battery voltage at the pump harness, inspect the inline fuse and main RV fuse panel for blown fuses, and verify any inline switches or relay connections for corrosion or loose terminals.
Test continuity across the fuse, swap a known-good fuse, inspect wiring for breaks or shorts, and bench-test the pump with a direct 12V source.
Pump runs but produces no water airlocks and priming methods
Diagnose the cause of a running pump that fails to deliver water by checking for airlocks, blocked inlet lines, and closed or clogged valves.
Bleed trapped air at hose connections, open faucets while cycling the pump, and inspect inlet strainer and tank pickup for debris.
Prime manually if needed by filling inlet hose or pump chamber.
Replace damaged fittings and retest for steady flow.
Low pressure or sputtering clogged filters and intake issues
Inspecting low pressure or sputtering at startup focuses on clogged filters and intake problems that restrict flow and cause the pump to cavitate.
Technicians check inline and mesh filters for debris, clean or replace cartridges, and inspect strainer bowls.
They examine inlet hose kinks, collapsed lines, or blocked fittings and clear obstructions.
After repairs, they retest flow for steady pressure and quiet operation.
Pump keeps cycling on and off pressure switch and leak diagnosis
When an RV water pump cycles rapidly between on and off, it usually signals a pressure-switch response to a leak or a failing seal rather than an electrical fault.
Inspect visible plumbing, hose connections, tank fittings, and faucet seals for drips.
Check for a ruptured accumulator or bladder loss and test pressure switch settings.
Repair leaks, tighten fittings, or replace defective components to stop short cycling.
Unusual noises or vibration mounting, cavitation, and wear
After addressing rapid cycling and suspected leaks, attention shifts to mechanical symptoms that indicate mounting, cavitation, or component wear.
Inspect mounts and tighten loose bolts; add isolation pads if vibration transmits.
Listen for high-pitched cavitation under low flow—check inlet strainers and restrictors.
Grinding or rough bearings require pump replacement.
Regularly inspect seals and impeller for erosion to prevent failure.
Maintenance tasks to keep the pump reliable
Routine maintenance keeps the RV water pump operating dependably and prevents costly failures.
Recommended tasks include regular inspections and cleaning, timely replacement of filters, pressure switches, and seals, and proper winterizing of the pump and lines in cold climates.
Attention to battery condition and secure electrical connections rounds out a basic maintenance program.
Regular inspections and cleaning schedule
Establishing a consistent inspection and cleaning schedule prevents minor issues from escalating into pump failure.
Routine checks include visual inspection, leak detection, and operation tests. Cleaning removes sediment and buildup that reduce performance.
Record findings and actions to track trends and plan repairs.
- Monthly visual and hose checks
- Quarterly operation run and flow test
- Semiannual sediment flushing
- Log inspections and corrections
Replacing filter, pressure switch, and seals
Replace worn components promptly to maintain pump reliability and prevent downtime.
The filter should be inspected and replaced when clogged; a clean filter improves flow and protects the pump.
Test and replace the pressure switch if cycling is erratic.
Inspect seals and O-rings for cracks or deformation; replace with correct-size parts and apply compatible lubricant to guarantee watertight connections and proper operation.
Winterizing the pump and lines for cold climates
Prepare the pump and plumbing for freezing temperatures by draining water, protecting vulnerable components, and using antifreeze where appropriate to prevent burst lines and internal damage.
The operator should depressurize, remove and drain low points, and apply RV-safe antifreeze to passages. Secure external fittings and insulate exposed pipes to minimize freeze risk.
- Drain all supply and pump housings
- Bypass and add RV antifreeze
- Insulate exposed lines and fittings
- Remove or protect pressure sensors and pumps
Battery care and electrical connection maintenance
After winterizing the pump and plumbing, attention should turn to the electrical system that powers the unit: reliable battery care and clean, secure connections are key to preventing failures and extending component life.
Inspect terminals for corrosion, clean with a baking soda solution, tighten clamps, and apply dielectric grease.
Test battery voltage regularly, maintain proper charge, and replace aged batteries to guarantee consistent pump operation.
When to call a professional or replace the pump
Persistent noises, leaking seals, loss of pressure, or repeated failures indicate the pump should be replaced.
Complex leaks, electrical faults, or inaccessible plumbing connections warrant professional RV plumbing or electrical help.
When replacing a pump, the owner should match size, flow rate, and compatibility with the RV’s system to guarantee proper performance.
Signs the pump should be replaced
Recognize that not all pump issues require replacement; however, certain clear symptoms indicate the pump has reached the end of its serviceable life or that repairs would be impractical.
Persistent loud grinding or rattling, frequent cycling with adequate tank pressure, visible leaks from the housing, overheating or burning smell, and failure to prime or build pressure despite correct wiring and valves all signal replacement is warranted.
Situations that require professional RV plumbing or electrical help
Call a professional when troubleshooting steps—such as checking power connections, inspecting valves, and bleeding air from the lines—fail to restore proper pump function or when symptoms suggest electrical or structural hazards.
Seek expert help for persistent leaks, burning smells, tripping breakers, corroded wiring, irregular pressure, damaged plumbing fittings, or suspected frozen/burst lines.
Professionals guarantee safe diagnosis, repair, and code-compliant solutions.
Choosing a replacement pump: size, flow rate, and compatibility
Selecting the right replacement water pump requires matching the unit’s size, flow rate, and electrical compatibility to the RV’s existing plumbing and power system to guarantee reliable performance and avoid damage. Professionals are advised for complex wiring or unusual fittings. Consider flow (GPM), pressure, amperage, and mounting. Consult manual or dealer when unsure.
| Feature | Typical Range | Note |
|---|---|---|
| Flow | 1–6 GPM | Match demand |
| Pressure | 30–60 PSI | System limits |
| Voltage | 12V DC | RV standard |
| Amperage | 2–10 A | Fuse sizing |
Tips for conserving water and extending pump life
Practical water-saving habits and low-flow faucet or showerhead choices can greatly reduce demand on the RV pump.
Installing an accumulator or pressure tank minimizes short cycling and lowers wear by maintaining steady pressure between pump cycles.
When camping off-grid, planning water use and running the pump only when necessary extends both water supply and pump life.
Water-saving habits and faucet choices
Conserve water to reduce pump cycling and extend its service life: adopt shorter showers, shut off faucets while soaping or brushing teeth, and rinse dishes in a basin rather than under running water.
Use low-flow fixtures and consider aerators to maintain pressure with less volume.
- Install low-flow showerheads
- Fit aerators on taps
- Collect greywater for rinsing
- Time showers and set limits
Using an accumulator tank or pressure tank to reduce cycling
After adopting water-saving habits and low-flow fixtures, adding an accumulator or pressure tank provides a mechanical way to reduce pump on/off cycles and prolong pump life.
These tanks store pressurized water, smoothing demand spikes and preventing short cycling.
Selection depends on tank size, precharge pressure and plumbing space.
Proper installation and periodic pressure checks guarantee reliable operation and extended pump longevity.
Efficient use of pump while camping off-grid
Campers should prioritize measured water use and pump-friendly routines to get the longest service from an RV pump while off-grid.
Adopt short showers, turn taps off firmly, and collect greywater for nonpotable needs.
Run the pump only when necessary, use low-flow fixtures, and inspect fittings for leaks.
Periodic rest cycles and keeping the pump clean reduce wear and extend service life.
Checklist: Turning on the RV water pump (printable)
Use this concise printable checklist to confirm the RV water pump is activated safely and correctly:
- Confirm fresh water tank has sufficient water and intake valve is open.
- Verify electrical power or battery switch is on; check pump switch in the ON position.
- Open a nearby faucet to release air; verify steady flow and no leaks.
- Turn off pump when not in use and recheck fittings for tightness.
Conclusion
Like a seasoned captain finding the lighthouse after fog, the RV owner who follows basic checks, clear steps, and routine maintenance will keep the water pump steady and dependable. Simple troubleshooting averts most storms; professional help is there for reefs beyond routine care. With mindful water use and timely service, the pump will hum like a well-tuned engine on a long road, ready whenever the next campsite appears on the horizon.