How to Tell if Your Toilet Is Leaking Underneath: Quick Tests and Fixes
To determine if your toilet is leaking underneath, look for signs such as pooled water, warped flooring, musty odors, or rusty flange hardware. Quick tests include adding food coloring to the tank and observing the bowl, placing paper towels around the base to check for moisture, and listening for hissing or drips. If you suspect a leak, turn off the water and inspect the bolts, wax ring, and flange for any damage. Temporary fixes may involve tightening bolts or replacing the wax ring. Further guidance on these repairs can be provided.
How to Quickly Tell If Your Toilet Is Leaking Underneath
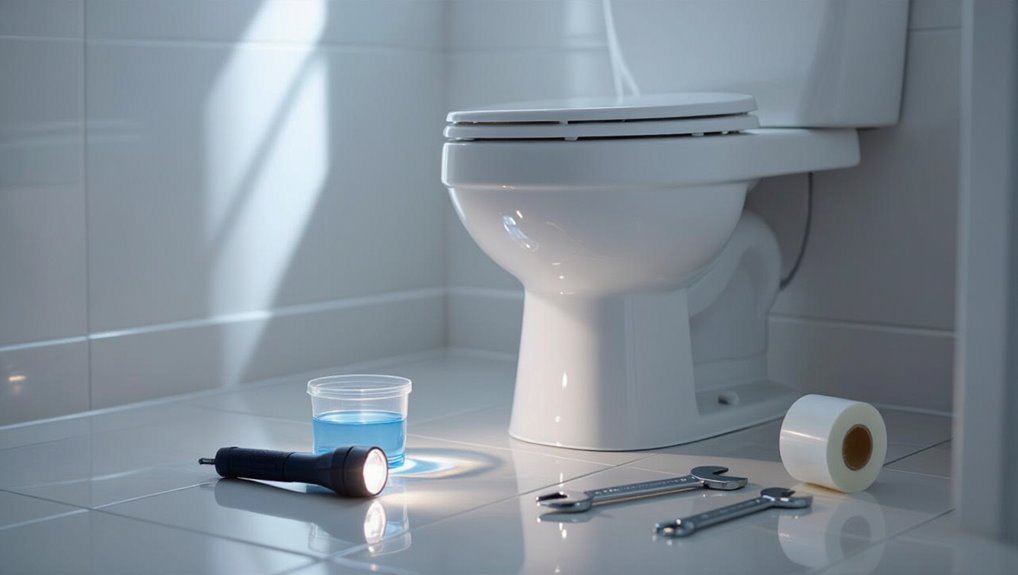
A quick inspection of the floor around the toilet can reveal obvious signs of a leak, such as pooling water, warped flooring, or discolored tiles.
They should check beneath and behind the toilet base for soft spots, staining, or rusted flange hardware that indicate ongoing water damage.
Unusual musty odors or faint running or dripping sounds can also point to a hidden leak that warrants further investigation.
Immediate signs to look for on the floor around the toilet
Several clear indicators on the bathroom floor point to an active toilet leak: pooled water, darkened or swollen flooring, persistent dampness despite drying, and water stains radiating from the base.
Observers checking how to tell if toilet is leaking underneath should also note musty odors, damaged grout, loose base bolts, and discoloration patterns that appear after flushing or standing water, signaling immediate attention.
How to check for water damage under and behind the toilet base
Inspecting under and behind the toilet base reveals subtler signs of leakage that floor-level checks can miss.
Remove base molding if present; use a flashlight to spot softened, discolored, or warped flooring and wall material.
Probe gently with a screwdriver for sponginess.
Check caulk lines and base bolts for corrosion or mineral deposits.
Document findings and plan targeted repairs or professional evaluation.
Smell and sound indicators of a hidden leak
How can smell and sound reveal a concealed toilet leak?
Faint sewage odors near the base or persistent damp, musty scents indicate water or sewer gas escaping from a failing seal.
Listen for steady drips, hissing, or continuous running when fixtures are off.
Intermittent gurgling during flushing also signals escaping air or water.
These clues warrant immediate inspection.
Fast Tests You Can Do Right Now
Quick, simple checks can identify common toilet leaks without tools.
A dye test using food coloring in the tank and bowl reveals hidden flow, while paper towels or tissue around the base catch external seepage.
Inspecting under the rim and around bolts with a flashlight or a moisture sensor confirms small drips.
Dye test for the toilet tank and bowl
Place a few drops of food coloring or a commercial dye into the toilet tank and wait 10–15 minutes without flushing to reveal any slow leaks into the bowl.
If colored water appears in the bowl, the flapper or flush valve seal likely leaks.
Inspect the flapper, chain, and seat for wear or misalignment, then replace faulty parts and retest until no dye transfers.
Paper towel or tissue test around the base
Tear off a few sheets of paper towel or a single tissue and press them around the base of the toilet, checking for moisture after sitting undisturbed for 5–10 minutes.
If dampness appears, it indicates water escaping at the seal or flange.
Repeat after flushing to catch intermittent leaks.
Note location and intensity; use findings to decide on tightening, seal replacement, or professional inspection.
Food coloring or dye in the tank with timed observation
Add a few drops of food coloring or a dye tablet to the toilet tank, then leave the bathroom undisturbed and check the bowl after 10–15 minutes; any colored water appearing in the bowl indicates a leak from the tank into the bowl.
If dye appears, the flapper, flush valve seat, or overflow tube may be leaking and should be inspected and replaced as needed.
Moisture sensor or phone flashlight inspection under the rim and bolts
Often a quick visual or sensor check can reveal leaks that the dye test misses. A moisture meter or phone flashlight illuminates hidden damp under the rim, around bolt caps, and at the base flange.
Inspect for darkening, mineral trails, or soft caulk. Probe seals gently; document locations.
Small persistent wet spots indicate gasket, bolt, or wax ring failure requiring targeted repair or replacement.
Step-by-Step Leak Detection Procedures
The following section outlines a concise sequence for locating and confirming toilet leaks, beginning with preparing the area and basic safety measures.
It covers shutting off the water supply and watching for residual leaks. Then, it explains when removing the toilet is warranted for a full inspection.
Procedures for examining the flange, wax ring, and closet bolts are provided to identify common failure points.
Preparing the area and safety precautions
Before any inspection begins, clear the area around the toilet and put on basic protective gear—gloves and safety glasses—to prevent contact with contaminated water and cleaning chemicals.
Remove rugs and obstacles, improve lighting, and place absorbent towels or drip trays to catch spills.
Make certain electrical devices are kept dry, ventilate the room, and have a phone nearby in case assistance is needed.
Shutting off water and observing residual leaks
Shut off the toilet’s water supply at the shutoff valve and flush to drain the bowl and tank.
Then observe for any remaining drips or wetness around the base, supply line, tank bolts, and connections.
Note slow seepage from the wax ring area, damp flooring, or residual water pooling.
Record locations, frequency, and extent; repeat observation after several minutes to confirm persistent leaks.
Removing the toilet for a full inspection (when to do this)
Lift the toilet only when visible signs or repeated tests indicate a persistent leak that cannot be located with the tank intact.
Removal is warranted if water persists after shutoff, dye tests, and flange-area drying.
Prioritize documenting drain alignment and nearby floor damage.
If uncertainty remains or seepage continues, proceed with safe removal to expose subfloor and confirm source before repairs or part replacement.
How to inspect the flange, wax ring, and closet bolts
Several clear steps guide a focused inspection of the flange, wax ring, and closet bolts to locate a toilet leak.
First, remove the toilet and examine the flange for cracks, corrosion, or warping.
Assess the wax ring for flattening, contamination, or gaps.
Check closet bolts and washers for rust, looseness, or shearing.
Replace damaged components and reseat the toilet evenly.
Visual and Structural Checks for Under-Base Leaks
Visual and structural checks begin with a careful inspection of floor finishes for cracked grout, buckled vinyl, or darkened hardwood planks.
The condition of the subfloor should be assessed by pressing for soft spots or signs of rot near the toilet base.
Bolts and the flange should be examined for corrosion or rust that can indicate a history of leakage.
Inspecting floor finishes: tile, vinyl, hardwood signs of damage
Floor finishes often reveal the earliest evidence of under-base toilet leaks through changes in appearance and structure.
Tile may show grout discoloration, loose or hollow-sounding tiles, and hairline cracks.
Vinyl can bubble, lift at seams, or warp.
Hardwood exhibits staining, cupping, dark spots, or raised boards.
Note localized patterns around the toilet base and document findings for repair.
Checking subfloor integrity and soft spots
Noticing surface damage around a toilet should prompt an inspection of the subfloor beneath, since hidden rot and structural weakness often accompany visible finish issues.
Probe gently with a screwdriver to detect soft spots, check for sagging or bounce when weight is applied, and inspect attic or crawlspace below for stains.
Mark compromised areas for repair or replacement to prevent further collapse.
Identifying corrosion or rust on bolts and flange
A close inspection of the toilet’s base should include the bolts and flange, since rust or corrosion here often signals slow leaks or seal failure.
Visible rust, pitted metal, or flaking indicates moisture exposure and weakened fasteners.
Corroded bolts may break during removal; a damaged flange compromises wax-ring seals.
Replace corroded parts promptly and check surrounding flooring for hidden water damage.
Diagnosing Leak Causes
Next, the guide shifts to diagnosing common causes behind toilet leaks to help identify whether water is coming from the seal, hardware, porcelain, or outside factors.
Consider these key possibilities:
- Worn or damaged wax ring
- Loose or broken closet bolts
- Cracked toilet base or tank hairline cracks
- Faulty flange or improper installation
Finally, distinguish condensation from a true leak by observing water timing, location, and repeatability.
Worn or damaged wax ring
Check the seal between the toilet base and the flange for signs of a failing wax ring, a common source of hidden leaks that can cause water to pool around the base or stain the subfloor.
If odors, soft flooring, or intermittent seepage occur, the wax ring may be compressed, cracked, or misaligned.
Replacement requires removing the toilet, inspecting the flange, and installing a proper new seal.
Loose or broken closet bolts
When the wax ring has been ruled out, attention should turn to the closet bolts that secure the toilet to the flange.
Loose or corroded bolts allow movement, breaking the seal and causing intermittent dampness at the base.
Inspect for wobble, rust, or missing caps.
Tighten evenly with care or replace broken bolts and flange bolts to restore a stable, watertight connection.
Cracked toilet base or tank hairline cracks
Although often subtle, hairline cracks in a toilet’s base or tank can allow slow leaks that mimic other problems, so they should be inspected once bolts and the wax ring are ruled out.
Visual inspection under good light, dye or food coloring in the tank, and feeling for dampness at the porcelain surface help locate cracks.
Small hairlines may require replacement of the cracked component.
Faulty flange or improper installation
A common but often overlooked source of toilet leaks is a damaged or improperly positioned flange—the pipe fitting that secures the toilet to the waste line and seats the wax ring.
A broken, corroded, or recessed flange prevents a proper seal and can allow water to escape beneath the bowl.
Inspect flange height, cracks, and bolt alignment; replace or shim and reseat the toilet if misaligned.
Condensation vs. actual leak: how to tell the difference
Beyond issues at the flange, not all moisture around a toilet signifies a plumbing leak; distinguishing condensation from an actual leak prevents unnecessary repairs.
Condensation forms when warm, humid air meets a cold tank, producing periodic surface water without pipe seepage.
Inspect after flushing, feel for drips at connections, check floor for steady puddles, and use tissue tests to confirm persistent leakage.
Quick Fixes You Can Try Yourself
After identifying the likely leak source, the homeowner can attempt a few targeted quick fixes before calling a pro.
Common DIY steps include re-seating or replacing the wax ring with basic tools and clear steps, safely tightening or swapping closet bolts, and applying silicone or sealant to small gaps at the base.
For immediate relief, temporary measures—such as placing a waterproof mat, towels, or a bucket—can limit damage until a permanent repair is completed.
Re-seating or replacing the wax ring (tools and steps)
Lift and inspect the toilet seal to determine whether reseating or replacing the wax ring is needed: this component sits between the toilet base and the flange and prevents sewer gases and water from escaping.
Gather gloves, wrench, putty knife, new wax ring and rags.
Shut off water, drain bowl, unbolt and lift toilet, remove old wax, seat new ring on flange, reset toilet, tighten bolts evenly and reconnect water.
Tightening or replacing closet bolts safely
Check the closet bolts for looseness or corrosion before assuming a wax ring issue; these bolts secure the toilet to the flange and a failing bolt can cause rocking, leaks, and odor.
Tighten nuts evenly with a wrench, alternating sides to avoid cracking the bowl. Replace corroded bolts and use new washers and nuts.
Verify flange integrity and test stability before flushing.
Applying silicone or sealant for minor base gaps
Seal small gaps at the toilet base with a silicone or specialized bathroom sealant to prevent water intrusion and reduce odors.
Make certain the area is clean and dry, remove old caulk, apply a continuous bead, and smooth with a wet finger or tool for full contact.
Allow proper cure time per manufacturer instructions before resuming normal use; inspect periodically for deterioration.
Temporary stops until a permanent repair
If a temporary measure is needed while arranging a full repair, a few quick fixes can stop most minor leaks and limit water damage.
Apply plumber’s tape to loose tank bolts, snug but do not overtighten.
Place a waterproof tray or bucket under the base.
Use temporary wax ring replacements or an inflatable toilet seal to stem seepage until a professional installs a new flange and proper wax ring.
When to Call a Plumber
If leaks persist after basic fixes, if water runs continuously, or if there is visible damage to the floor or seal, a professional repair is warranted.
Homeowners should be ready to describe symptoms (sound, frequency, visible leaks), when they started, and any DIY steps already taken to speed diagnosis.
The plumber can then provide likely repair options with typical costs and timeframes for parts and labor.
Signs that indicate a professional repair is needed
When persistent symptoms—such as continuous water running, repeated toilet bowl overflows, loud or irregular noises from the tank, or water pooling around the base—appear despite basic troubleshooting, it indicates issues beyond simple DIY fixes and warrants a professional plumber.
Additional signs include worsening floor damage or rot, persistent odors, recurring leaks after repairs, visible cracks in porcelain, and unstable toilet mounting requiring expert assessment.
What to tell the plumber to speed diagnosis
After identifying signs that require professional attention, homeowners can further speed diagnosis by gathering specific information before the plumber arrives.
Provide clear details: when the leak started, frequency, visible locations, any patterns (after flush, overnight), recent repairs or installations, water level changes, and photos or videos.
Note water meter readings, shutoff valve position, and any odors to help prioritize inspection.
Expected costs and timeframes for common repairs
Several common toilet repairs have predictable cost and time ranges that help homeowners decide whether to call a plumber promptly.
- Wax ring replacement: $75–$200, 30–60 minutes.
- Flange repair: $100–$350, 45–90 minutes.
- Tank-to-bowl gasket: $50–$150, 20–45 minutes.
- Full toilet replacement: $200–$800+, 1–3 hours including removal and installation.
Preventing Future Under-Base Toilet Leaks
Preventing under-base toilet leaks begins with correct installation, including proper flange height, secure bolts, and an appropriately compressed wax ring.
Routine maintenance—inspecting seals, tightening bolts, and checking for wobble—should be performed at least annually or after any settling or repairs.
Selecting durable components such as high-quality wax rings, reinforced flanges, and stainless or coated bolts reduces the risk of future failures.
Proper installation tips to avoid leaks
Proper installation reduces the risk of under-base toilet leaks by ensuring a watertight seal and stable mounting from the outset.
Install a new flange or repair damaged flanges, use the correct wax or rubber gasket, align bolt holes, tighten bolts evenly without overtightening, and level the bowl.
Check flange height relative to finished floor and secure the toilet to prevent movement that compromises seals.
Regular maintenance checklist and frequency
Although under-base leaks often stem from installation issues, a simple, regular maintenance routine greatly reduces the chance of recurrence. Homeowners should inspect and service specific components on a scheduled basis.
- Check for floor moisture and odors monthly.
- Tighten seat and base bolts quarterly.
- Test tank fill and flapper operation every six months.
- Inspect surrounding grout and caulk annually for breaches.
Choosing durable parts: wax rings, flanges, bolts
After routine checks reveal any weakness around the base, attention should turn to the components that form the toilet’s seal and support: the wax ring (or modern alternatives), the flange, and the closet bolts.
Select high-density wax or rubber seals for longevity, corrosion-resistant flanges (stainless or PVC) sized to floor thickness, and brass or stainless bolts with nylon caps to prevent loosening and moisture damage.
Tools, Materials, and Parts You Might Need
A quick inventory of tools and parts helps determine whether a toilet leak can be fixed with basic DIY effort or requires a pro.
Consider these essentials before starting repair work:
- Adjustable wrench and pliers
- Screwdrivers and utility knife
- Replacement flapper, fill valve, and wax ring
- Plumber’s tape, sealant, and a bucket for water control.
Keeping these items on hand speeds diagnosis and makes most common fixes straightforward.
Basic tools for DIY inspection and repair
Gathering the right tools and parts before beginning a toilet inspection saves time and prevents mid-repair trips to the hardware store.
A basic kit includes an adjustable wrench, pliers, screwdriver set, utility knife, flashlight, bucket, absorbent towels, putty knife, sponge, and a small mirror.
Gloves and safety glasses protect the user.
These tools enable most inspections and simple fixes.
Replacement parts and material options with brief uses
Several common replacement parts and materials are typically needed for toilet repairs, each serving a specific function:
| Part/Material | Use |
|---|---|
| Wax ring | Creates seal between bowl and flange to prevent leaks |
| Tank-to-bowl gasket | Seals connection to stop internal leaks |
| Closet bolts | Secure bowl to flange and maintain alignment |
Additional items: adjustable wrench, silicone caulk, replacement flapper for flush control.
Signs of Serious Water Damage and Mold Risk
Visible stains, musty odors, and fuzzy or discolored growth along baseboards or under flooring are early indicators of mold and concealed leaks.
When drywall, subflooring, or joists become soft, warped, or sagging, the damage has likely progressed to require structural repair.
Professional remediation—removing affected materials, drying the area, and treating or replacing contaminated components—is necessary to prevent recurring mold and rot.
How to spot mold and odor problems early
How can subtle signs of mold and persistent odors indicate a hidden toilet leak? Inspect base trim, grout lines, and adjacent flooring for discoloration, fuzzy growth, or musty scent.
Check under the tank and around bolts for dampness. Small black or green spots, peeling vinyl, and recurring mildew despite cleaning suggest chronic moisture and warrant prompt sealing or moisture control to prevent spread.
When water damage requires structural repair
When moisture has progressed beyond surface staining, structural materials may be compromised and professional repair is likely required.
Indicators include sagging subflooring, soft or spongy areas around the toilet, visible framing deterioration, persistent dampness after drying attempts, and recurring staining despite sealing.
Extensive discoloration or pervasive musty odors suggest mold growth risk; documented structural movement or rot warrants contractor assessment and possible replacement.
Remediation steps for mold and rot
Addressing mold and rot requires prompt, methodical action to prevent further structural compromise and health risks: isolate the affected area, stop ongoing moisture sources, and assess the extent of contamination to determine whether surface treatment or full material removal is necessary.
Remove compromised materials, dry thoroughly, treat remaining surfaces with appropriate antimicrobial agents, and replace structural components as needed.
Document repairs and monitor for recurrence.
Quick Recap: How to Confirm and Fix an Under-Base Toilet Leak
A concise checklist helps confirm whether water is escaping from beneath the toilet base: inspect for pooled water, test with food coloring in the tank, and check the floor around the flange for soft spots.
If a leak is confirmed, immediate steps include shutting off the water, drying the area, and tightening or replacing the wax ring as appropriate.
After repairs, follow up by monitoring for new moisture, checking for lingering odors, and scheduling a professional inspection if problems persist.
Short checklist for diagnosis
How can a homeowner quickly confirm and begin fixing a toilet leak beneath the base?
Inspect for pooled water, soften floor, or discoloration; run dye test in tank; dry area and retest after flushing; check bolts and caulk for looseness or gaps; note wobble indicating failed wax ring; document findings and measure gap or damage to inform repair or replacement decisions.
Short checklist for immediate actions and follow-up
One clear checklist summarizes immediate actions and follow-up steps to confirm and fix a toilet leak beneath the base:
inspect and dry the area, perform a tank dye test, tighten or replace loose bolts, reseal or replace the wax ring if the bowl wobbles, and document damage for repair or replacement decisions.
Then monitor for recurring moisture, check floor integrity, engage a plumber if staining or structural concerns persist.
Conclusion
A homeowner can perform simple tests and visual checks to determine whether a toilet is leaking underneath, then choose an appropriate fix or call a professional if needed. Quick dye tests, towel checks, and inspecting the wax ring area reveal common problems like a failed seal, loose bolts, or cracked flange. If repair seems challenging, who wouldn’t prefer timely intervention to avoid mold and structural damage? Prompt action prevents costly, extensive repairs.