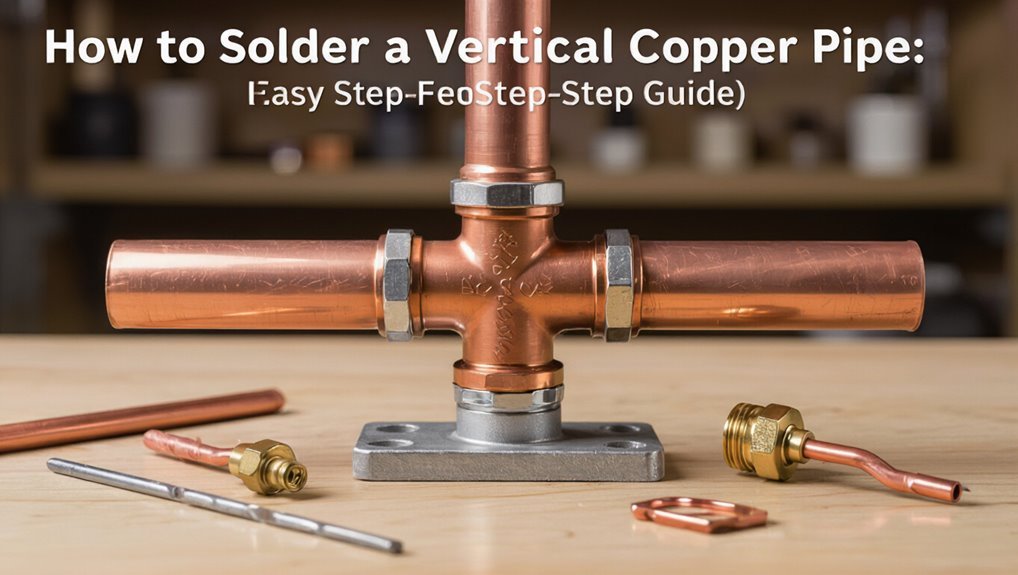
How to Solder a Vertical Copper Pipe: Easy Step-by-Step Guide
To solder a vertical copper pipe, start by cutting the pipe square, deburring the edges, and cleaning both the pipe and fitting until they are bright. Next, apply a thin coat of flux to the inside of the fitting and the outside of the pipe. Support the joint to keep it plumb, then heat the fitting from below with a controlled torch flame until the flux melts. Introduce small solder into the lower seam, allowing capillary action to draw it upward. After the joint cools naturally, clean off any flux residue and perform a pressure test to ensure a secure connection. Follow these steps for effective soldering along with necessary safety precautions for the best results.
What This Guide Teaches About Soldering Vertical Copper Pipe
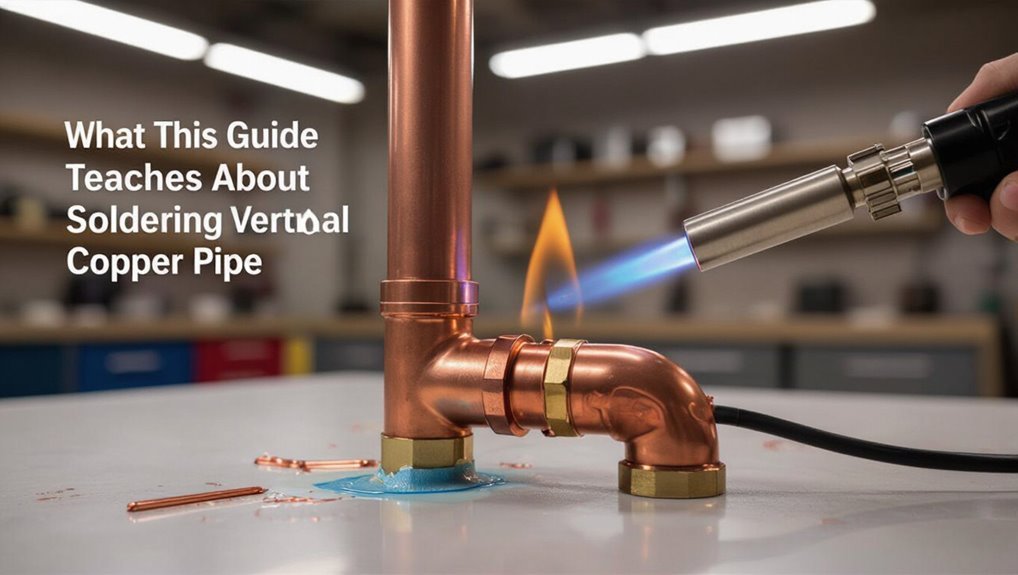
When soldering vertical copper pipe, the guide focuses on techniques that prevent uneven solder flow and guarantee reliable joints under gravity; it emphasizes proper cleaning, correct flux application, controlled heat distribution, and the use of capillary action to draw solder upward without pooling.
It explains preparation steps: deburring, sanding, and degreasing for ideal metal contact.
Heat application is described to promote even solder migration, with advice on torch angle and distance.
Solder type and placement are specified to avoid excess.
Safety precautions and testing for leaks complete the instruction set, ensuring durable, professional-grade vertical soldered connections.
When to Solder Vertical Copper Pipe vs Use Push-Fit Fittings
Choosing between soldering vertical copper pipe and using push-fit fittings depends on factors like permanence, pipe accessibility, pressure requirements, and the installer’s skill level.
Soldering offers a durable, watertight joint suited for permanent installations and higher-temperature or high-pressure systems, but requires heat access and competence.
Push-fit fittings provide speed, ease, and no-flame installation, ideal for tight spaces, temporary work, or less experienced installers.
Consider code and warranty implications: some jurisdictions or appliances mandate soldered joints.
Assess long-term reliability needs, future disassembly, and the surrounding materials before selecting the method that best balances durability and practicality.
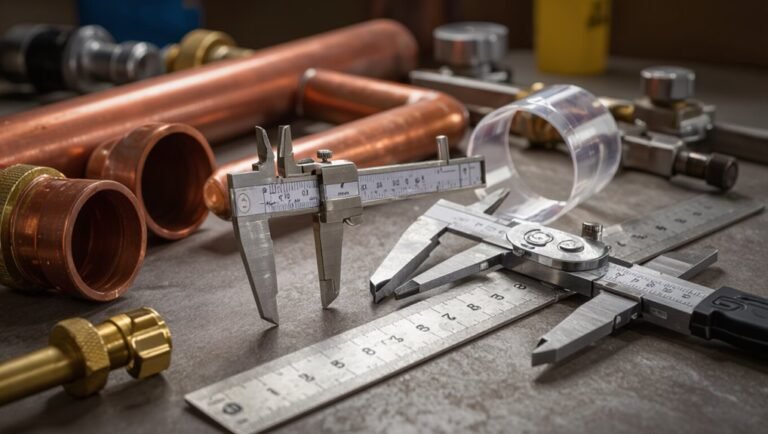
Tools You Need for Vertical Copper Pipe Soldering
The next section lists the specific tools required for soldering a vertical copper run, beginning with essential hand tools like cutters, reamers, and pipe wrenches.
It then covers appropriate fluxes and solder types for drinking-water and HVAC applications.
Finally, safety and support gear — gloves, eye protection, fire blankets, and pipe supports — are outlined to guarantee a secure, code-compliant job.
Essential Hand Tools
For vertical copper pipe soldering, a concise set of hand tools enables precise joint preparation and secure fittings; essential items include a pipe cutter, deburring tool or reamer, wire brush or emery cloth, flux applicator (brush), lead-free solder, plumber’s torch with appropriate tip, heat shield or wet rag, and a pair of locking pliers or pipe vise to steady the work.
The operator also benefits from measuring tape, marker, safety glasses, and heat-resistant gloves. Proper selection and maintenance of these tools reduce leaks and rework. Clean, square cuts, smooth interiors, and controlled heating produce reliable capillary action and strong joints.
- Pipe cutter and reamer
- Wire brush or emery cloth
- Plumber’s torch and heat shield
- Locking pliers or pipe vise
Flux And Solder Types
When preparing vertical copper joints, selecting the correct flux and solder guarantees consistent capillary flow and strong, leak-free bonds. The writer recommends water-soluble flux for cleanability and rosin-based flux where corrosion protection matters. For solder, 95/5 lead-free or tin-silver alloys suit potable systems; 50/50 leaded solders remain unsuitable for drinking lines. Apply flux sparingly to the cleaned joint, heat evenly, and feed solder into the heated seam, allowing capillary action to draw it. Proper compatibility between flux and solder secures wetting, reduces voids, and produces durable joints that resist vibration and thermal cycling.
| Emotion | Choice |
|---|---|
| Confidence | 95/5 tin-silver |
| Relief | Water-soluble flux |
| Trust | Rosin-based flux |
| Pride | Clean, shiny joint |
Safety And Support Gear
Often overlooked, proper safety and support gear is essential for vertical copper pipe soldering to protect the worker and stabilize the assembly. The technician uses heat-resistant gloves and eye protection to prevent burns and sparks, a respirator for flux fumes, and flame-retardant clothing when working near insulation.
Pipe hangers, straps, and a sturdy stand secure vertical runs, minimizing movement during heating. A torch holder or tripod frees hands for fluxing and soldering.
Proper lighting and a fire extinguisher improve safety. Attention to gear reduces accidents and improves joint quality through steady, controlled work.
- Heat-resistant gloves and safety goggles
- Respirator and flame-retardant clothing
- Pipe hangers, straps, and stands
- Torch holder/tripod and nearby fire extinguisher
Materials: Solder, Flux, and Copper Pipe Types
The article next outlines the common solder types—lead-free and leaded alloys—and their suitability for plumbing joints.
It also explains the role of flux in promoting a clean, strong bond.
Finally, it distinguishes common copper pipe varieties (Type K, L, M and fittings) so readers can match materials to application.
Solder Types Overview
Which solder is right for a given copper joint depends on the pipe’s size, water use, and local code requirements. The overview compares common solders and their typical uses, noting lead-free requirements for potable water, flux compatibility, and melting ranges. Proper selection balances strength, flow, and regulatory compliance.
Solder alloys affect joint reliability and heat needed; plumbers match solder grade to pipe diameter and operating pressure. Flux type influences capillary action and cleaning. Consider local codes before choosing.
- Lead-free 95/5 (tin/copper): potable water, general repairs
- 50/50 (tin/lead): easy flow, nonpotable
- Silver-bearing: higher strength, larger pipes
- Flux types: water-soluble vs. non-water-soluble
Copper Pipe Varieties
Copper plumbing systems combine distinct materials—solder alloys, flux formulations, and several copper pipe types—that must be matched for compatibility and code compliance. Copper pipes come in three common types: Type K (thickest walls for underground and high-pressure), Type L (general water distribution), and Type M (thinner walls for low-pressure residential).
There are also soft (annealed) and rigid (drawn) variants; soft is easier to bend, rigid better for pressurized runs. Selecting pipe type depends on application, local code, and joint method. Proper pairing with lead-free solder and appropriate flux guarantees durable, leak-free soldered connections.
Safety Gear and Working With a Propane Torch
Before lighting a propane torch, make certain appropriate personal protective equipment is in place: heat-resistant gloves, safety glasses or a face shield, long sleeves made of natural fibers, and closed-toe footwear.
The operator inspects the torch, checks connections for leaks using a soapy solution, and positions a fire-resistant pad behind the joint.
Ignition follows manufacturer instructions; flame size is adjusted to avoid overheating nearby fittings. A heat sink or wet rag can protect adjacent joints. Ventilation prevents fume buildup.
After soldering, the torch is shut off and allowed to cool fully before storage.
- Inspect torch and fittings
- Use fire-resistant backing
- Control flame size
- Assure ventilation
Shut Off and Drain the Water Safely
To prevent water from being trapped in the line and to reduce the risk of burns or flooding, the water supply to the affected pipe should be fully shut off and the system drained.
The person locates and closes the appropriate shutoff valve or the main supply, then opens nearby hot and cold taps to relieve pressure.
A drain or hose bib at a low point is opened to remove remaining water; a bucket collects residual flow.
After draining, a pressure gauge or visual check confirms zero pressure.
Valves are tagged closed and the work area is dried before proceeding with soldering preparations.
Cutting Vertical Copper Pipe Cleanly and Square
When working on a vertical run, the cutter must produce a clean, square end to guarantee a reliable solder joint and proper fit with fittings.
The technician selects an appropriate tubing cutter, positions it perpendicular to the pipe, and scores with steady increments, rotating evenly to avoid angled cuts or oval deformation. Cutting slowly prevents tool chatter and burrs at the edge. Support the pipe below the cut to prevent bending or twisting. Verify squareness visually and with a try-fit before proceeding to the next step.
- Use a quality tubing cutter sized to the pipe
- Keep the cutter wheels aligned and perpendicular
- Rotate evenly with controlled pressure
- Support the pipe to avoid distortion
Deburr and Clean Pipe Inside and Out
After cutting, the pipe ends should be inspected and any sharp burrs removed carefully to prevent interference with the joint.
The exterior surface must be cleaned of oxidation and grime to guarantee proper solder flow.
Finally, the interior should be cleared of metal shavings and debris to avoid blockages and weak joints.
Remove Burrs Carefully
Using a file or deburring tool, the installer removes sharp edges and internal ridges left by cutting, ensuring the pipe end is smooth and free of metal shavings that could contaminate the joint.
The process targets both the inner lip and outer edge, rotating the tool evenly to avoid creating flats or uneven surfaces.
Light passes are preferred to preserve pipe dimensions. Vacuuming or blowing out loose particles follows deburring.
A final quick inspection with fingers and light verifies no burrs remain before assembly.
- Remove inner burrs with a proper reamer
- File outer edge smooth
- Clear metal shavings thoroughly
- Inspect for uniform roundness
Clean Exterior Surface
For ideal solder adhesion and a leak-free joint, the pipe exterior and interior must be thoroughly cleaned and deburred so that flux and solder can wet the metal evenly.
The technician uses a rotary brush or emery cloth to remove oxidation and machine marks from the outside of the pipe and fitting ends, working until a consistent bright finish appears. Edges are chamfered lightly to prevent gouging the fit.
After mechanical cleaning, a solvent or approved flux cleaner eradicates oils, cutting debris, and dust. Gloves prevent recontamination; a lint-free cloth ensures surfaces remain immaculate before flux application.
Clear Interior Debris
With the exterior prepared, attention turns to the pipe interior where burrs, chips, and swarf can obstruct flow or prevent a proper seal.
The pipe end is reamed with a deburring tool, removing sharp edges and internal ridges. A brush or rag clears remaining particles; compressed air or a quick water flush verifies cleanliness.
Flux will not adhere to contaminated surfaces, so inspection with light confirms a smooth, bright interior. Properly cleaned joints reduce leak risk and improve capillary action during soldering.
- Ream interior with proper deburring tool
- Brush or rag to remove swarf
- Blow out with compressed air or flush
- Inspect for smooth, bright surface
Pick the Right Fitting: Sweat, Compression, or Push-Fit
Which fitting suits the job depends on pipe size, access, permanence, and skill level.
Sweat (solder) fittings require flux, heat, and clean joints; they provide a durable, low-profile connection ideal for permanent installations and are preferred when soldering skill and clearance permit.
Compression fittings assemble without heat, using a nut and ferrule; they suit repairs or connections where disassembly may be needed but add length and can leak if overtightened.
Push-fit fittings offer fast, tool-free installation and good reliability for tight spaces or temporary work, though they are bulkier and costlier than soldered joints.
Position and Support a Vertical Fitting Securely
After selecting the appropriate fitting type, attention turns to positioning and supporting a vertical fitting so it remains stable during assembly and curing.
The fitting is aligned plumb, ensuring the joint faces mate fully without stress.
Temporary supports are installed to bear the fitting’s weight and prevent movement from fixtures or vibration.
Clearance for the torch and solder must be maintained; obstructing materials are moved or shielded.
Final checks confirm the fitting is immobile before heating.
- Use a pipe stand or block to carry weight
- Secure with a strap or clamp to a framing member
- Verify plumb with a small level
- Leave access gap for tools
Apply Flux Correctly to a Vertical Joint
Before applying flux to a vertical joint, the technician inspects and thoroughly cleans the mating copper surfaces to remove oxidation and debris.
A thin, even layer of flux is then brushed onto the cleaned areas, using only as much as needed to promote solder flow without excess.
Care is taken to prevent flux runoff down the pipe, positioning the joint and brushing technique so stray flux does not migrate into the system or onto surrounding materials.
Clean Joint Surfaces
Prepare the joint by ensuring both the outside of the male pipe and the inside of the female fitting are clean and dry; any residual oil, dirt, or oxidation will prevent proper capillary action.
The worker removes burrs, uses a wire brush or emery cloth to expose bright copper, and wipes both parts with acetone or a suitable cleaner.
Metal should be shiny and free of loose particles.
Fit should be snug and fully seated before fluxing.
Inspect visually and by touch to confirm cleanliness.
- Deburr pipe end
- Brush inside fitting
- Wipe with solvent
- Verify tight fit
Apply Flux Sparingly
With clean, tightly fitted surfaces, the worker applies a thin, even coat of flux to the mating areas—both the outside of the pipe and the inside of the fitting—using only enough to wet the metal without pooling.
The worker avoids heavy application that can create drips or collect debris. Coverage is limited to the joint area so capillary action draws solder inward. Excess is wiped sparingly with a clean cloth if it gathers.
The chosen flux suits solder type and pipe material. Properly applied flux promotes wetting and reliable flow of solder while minimizing contamination and post-solder cleaning.
Prevent Flux Runoff
When working on a vertical copper joint, apply flux in controlled, minimal strokes to prevent it from running downward and pooling at the seam; excess flux can carry contaminants into the joint, interfere with solder flow, and drip onto surrounding surfaces.
The technician uses a small brush or syringe to deposit a thin, even film only where the pipe and fitting meet. Wiping stray beads immediately with a lint-free cloth reduces runoff.
Work from the bottom of the joint upward, rotating the fitting as needed to keep flux contained. Allow brief tack time so flux remains where placed before heating.
- Use small brush or syringe
- Thin, even film only at seam
- Wipe stray beads immediately
- Heat from bottom upward
Heat Vertical Copper With a Propane Torch
Before applying flame, the plumber positions the torch so the tip points slightly downward along the pipe’s vertical axis to heat evenly and let flux and solder flow toward the joint.
The torch is ignited at low to medium setting; flame is directed to the fitting body, not the solder or flux.
The plumber moves the flame in slow, circular sweeps around the joint to distribute heat uniformly.
Heat is applied until the flux becomes liquid and the fitting edge shows slight discoloration.
Once ready, solder is introduced at the heated seam, melting and drawn into the joint by capillary action.
Test Pipe Temperature Before Soldering
To verify the joint is ready, the plumber checks the pipe temperature using a non-contact infrared thermometer or by briefly touching the heated fitting with a soldering pick (protected by a heat-resistant glove). The goal is uniform heat at the joint area; uneven temperature risks poor solder flow.
Aim for the metal to reach the solder’s melting range, not the torch’s hottest flame. Allow brief cooling if hotspots appear, then reheat evenly. Confirm surrounding fittings remain cool enough to avoid damage.
- Use an infrared thermometer for quick, accurate readings
- Look for even coloration on the copper
- Avoid overheating flux
- Wear heat-resistant gloves
Feed Solder on a Vertical Joint Without Drips
If gravity pulls the molten solder downward, the plumber mitigates drips by controlling heat, feed rate, and posture so solder flows steadily into the joint without running past the seam.
The torch heats evenly until flux liquefies; solder is introduced at the lower edge of the joint, drawn by capillary action.
Small-diameter solder and short, consistent feeds prevent excess.
The plumber tilts slightly to let gravity assist while keeping movement minimal.
Immediate gentle wiping with a dry, heatproof rag is avoided; instead, cooling is managed so solder solidifies in place.
Consistent practice yields predictable, drip-free vertical feeds.
Create a Neat Solder Fillet on a Vertical Pipe
Often the plumber completes a vertical joint by forming a clean, evenly tapered solder fillet that reinforces the seam and improves appearance.
The technician applies heat evenly, feeds solder at the joint root, and lets capillary action draw the alloy into the gap.
Once melted, the solder is smoothed by slightly rotating the torch flame and avoiding excess flow.
Cooling should be undisturbed until solid.
- Make sure flux is cleaned from the visible area before soldering.
- Maintain consistent torch distance for uniform fillet profile.
- Use minimal solder to avoid bulging.
- Inspect the fillet for continuous, shiny coverage.
Avoid Cold Joints When Soldering Vertical Pipes
When soldering vertical pipes, achieving even heat distribution along the joint is essential to prevent cold solder joints. Proper flux application and a steady torch technique help the solder flow smoothly upward rather than balling or stopping.
Securing the pipe in position minimizes movement and maintains consistent contact while the joint is heated and filled.
Proper Heat Distribution
Holding the torch steady and moving heat deliberately along the joint guarantees consistent solder flow on a vertical copper pipe.
Heat should be applied to the fitting, not the solder, raising metal temperature evenly to prevent cold spots.
Rotate flame slowly around the circumference, pausing briefly at cooler areas.
Monitor color and temperature; touch the solder to the joint when the metal glows a dull red or the solder melts and draws by capillary action.
- Direct heat to the fitting body, not the filler
- Move flame methodically to equalize temperature
- Watch for uneven melting or beading
- Allow short dwell time before adding solder
Flux Application Technique
Before applying heat, the joint must be evenly coated with a thin, consistent layer of flux to assure solder flows smoothly along a vertical copper pipe.
The technician brushes flux into the bore and onto the fitting face, avoiding excess that can drip or attract debris.
A uniform film prevents oxidation, promoting capillary action as molten solder travels upward.
After assembly, any visible gaps receive a light touch-up of flux; surplus is wiped away to limit corrosive residue.
Compatible flux for potable systems is selected and applied sparingly.
Proper flux technique reduces cold joints and assures reliable, leak-free vertical soldered connections.
Secure Pipe Positioning
With flux applied and surplus cleaned, proper pipe positioning must be established to prevent cold joints on vertical runs. The installer aligns the male and female ends, ensuring full contact and correct depth. Support clamps hold the joint steady while gravity-wicking solder is anticipated. Heat is applied evenly around the circumference to draw solder upward; movement or sagging must be avoided. Preparation reduces rework.
- Use a temporary support or strap to prevent separation
- Verify alignment and seating before heating
- Maintain steady tension with a clamp or vise grip
- Check for gaps; re-clean and re-flux if movement occurred
Soldering in Tight Ceilings and Crawlspaces
In cramped ceilings and crawlspaces, soldering copper pipe demands compact tools, deliberate movements, and careful planning to maintain proper heat and joint cleanliness. The technician works methodically: flux is applied sparingly, fittings are aligned, and a short, controllable torch is used. Limited space requires steady hands, good lighting, and periodic inspection of solder flow. Ventilation and a fire watch remain essential. Small jigs or straps stabilize joints. Accessibility dictates solder quantity and bite size to avoid excess. Cleanliness is paramount: wipe flux residue and inspect joints for continuity and proper capillary action before restoring service.
| Tool | Purpose |
|---|---|
| Mini torch | Controlled heat |
| Mirror/light | Visibility |
| Strap/jig | Stabilization |
Prevent Heat Damage to Nearby Materials
When soldering near combustible or sensitive surfaces, the worker should place heat shields or fire-resistant blankets to protect nearby materials.
Attention to heat transfer paths—such as metal studs, pipes, and framing—helps prevent unintended conduction of heat.
Small measures like removing insulation from the work area or using heat sinks on adjacent pipes further reduce the risk of damage.
Shielding Nearby Surfaces
Before applying heat, surrounding surfaces must be protected to prevent scorch marks, melting, or fire hazards from the torch’s flame and radiant heat.
The operator should place noncombustible shields and heat-resistant barriers between the joint and nearby materials, securing them to prevent movement.
Reflective shields redirect radiant heat while fire blankets and ceramic boards absorb stray sparks. Combustible items must be removed or fully covered with approved materials.
Continuous observation during heating guarantees shields remain effective; any smoldering is addressed immediately.
Post-job inspection verifies no hidden heat damage before restoring the workspace.
- Reflective metal shields
- Ceramic boards or fire blankets
- Heat-resistant tape or clamps
- Clear workspace and removed combustibles
Control Heat Transfer Paths
To prevent unintended heat transfer to adjacent materials, the operator must identify and interrupt conductive, convective, and radiant paths between the heated joint and vulnerable surfaces.
Conductive control includes removing combustible insulation, inserting thermal barriers, and using heat sinks or wet rags to draw heat away.
Convective measures involve blocking airflow with shields or temporary enclosures to limit hot gas movement.
Radiant mitigation requires reflective shields and positioning work to reduce line-of-sight exposure.
Continuous temperature monitoring and staged heating minimize excessive dwell.
After cooling, inspect surrounding materials for discoloration or deformation; repair or replace compromised components before restoring service.
Solder Vertical Runs With Minimal Flame Exposure
Holding the torch steady below the joint, a plumber controls heat flow so solder travels upward by capillary action without overheating surrounding fittings.
The practitioner applies brief, focused heat to the pipe, watching flux melt and draw solder into the seam.
Flame is moved smoothly to avoid concentrated hot spots; fuel adjustment yields a narrow, controllable flame.
Work proceeds in short bursts, allowing the metal to equalize temperature and minimizing heat transfer to adjacent components.
- Aim flame at the pipe body, not the fitting
- Use minimal flame length and intensity
- Feed solder once flux liquefies
- Pause between heating pulses
Cool and Clean the Joint After Soldering
After the solder bead cools visibly and the joint no longer radiates heat to the touch, the technician quenches any remaining flux residue and scorched debris with a damp rag or brush to prevent future corrosion.
Once cool, the joint is inspected for voids, excess solder, or sharp fillets; small imperfections are gently dressed with a file or emery cloth. The area is wiped clean, ensuring no abrasive particles remain. A final rinse with water removes soluble flux. If solder spatter occurred, it is removed to avoid electrical shorts or staining. Cleanliness preserves joint integrity and longevity.
Pressure-Test a Newly Soldered Vertical Joint
Before restoring system pressure, the technician secures the newly soldered vertical joint and prepares for a controlled pressure test to verify leak-free integrity.
The technician isolates the section, attaches a pressure gauge and test pump, and fills the line with water to eliminate air pockets.
Pressure is increased to the specified test value and held while the joint is inspected visually and with a dry paper towel for seepage.
Readings are monitored for any drop over the required hold time; stability confirms a sound solder.
If pressure holds, the system is depressurized and returned to service.
- Isolate the section
- Attach gauge and pump
- Hold test pressure
- Inspect for leaks
Repair a Leaking Vertical Solder Joint
When a vertical solder joint begins to leak, the technician assesses the cause and selects the least invasive repair method that will restore a reliable, code-compliant seal.
First, water is shut off and the area drained and dried.
The joint is cleaned of debris, corrosion, and old solder using a wire brush or emery cloth.
If the fitting is sound, flux is applied and the joint is reheated evenly to draw fresh solder in, ensuring capillary action.
If the fitting is cracked or damaged, the technician cuts out and replaces the defective section, deburring and fluxing before properly resoldering.
Reflow a Tacky or Underheated Vertical Joint
If reheating a vertical joint with intact fittings fails to draw new solder and the bead remains tacky or appears dull, the technician must reflow the joint to restore full capillary flow.
The process involves cleaning the joint, applying flux sparingly, and evenly heating until flux liquefies and solder flows smoothly. Care is taken to avoid overheating or burning flux.
Once a shiny continuous fillet forms, remove heat and allow controlled cooling. Test for leaks after cooling.
Rework only when necessary to prevent weakening fittings.
- Clean surfaces and remove old solder residue
- Apply appropriate flux thinly
- Heat evenly until solder wets
- Inspect for continuous shiny fillet
Solder Vertical Joints on Types M, L, and K
For vertical joints on Types M, L, and K copper, the technician must control heat and solder flow to guarantee a uniform capillary fillet without over-saturating the joint or forming cold solder.
Preparation includes cleaning surfaces and applying appropriate flux sparingly.
Heat the fitting evenly from the bottom upward until flux sizzles and solder drawn into the seam by capillary action forms a smooth, continuous bead.
Withdraw heat once solder wets the entire joint; avoid pooling.
Allow natural cooling; do not disturb.
Inspect for complete fillet coverage and solid adhesion.
Remove excess flux residue to prevent corrosion and secure long-term reliability.
Solder Copper to Brass or Bronze Fittings Safely
Because brass and bronze have different thermal conductivity and melting characteristics than copper, soldering these alloys to copper requires adjusted heat control and flux selection to guarantee reliable joints.
The installer should clean mating surfaces thoroughly, use a flux formulated for copper alloys, and apply heat to the thicker fitting first so solder is drawn toward the lesser-mass copper.
Avoid overheating which can damage alloy plating or cause flux burnoff.
Use appropriate lead-free solder for potable water and inspect joints for full capillary fill.
Allow cooling undisturbed and wipe excess flux to prevent corrosion.
- Clean metal to bright finish
- Use alloy-compatible flux
- Heat fitting, not solder
- Inspect and cool before handling
Working With Lines You Can’t Fully Drain
When soldering near valves or branch lines that cannot be completely drained, extra precautions are necessary to prevent water from interfering with the joint and to protect surrounding components.
Use a wet rag or heat sink on adjacent fittings to absorb stray heat. Isolate the section as much as possible with shutoffs or temporary plugs; purge minimal residual water with compressed air or a torch-safe cloth.
Apply flux and heat quickly, working in short bursts to limit heat transfer. Keep a bucket and heat-resistant shields ready.
Inspect the joint for cold solder or leaks, and retest under normal pressure once cooled.
Soldering Vertical Pipe in Cold Conditions
Soldering vertical copper pipe in cold conditions demands faster work and careful heat management to overcome rapid heat loss to the surrounding metal and air. Technicians should preheat fittings, use higher-output torches briefly, and keep flux and solder warm until use.
Avoid prolonged overheating that can char flux or damage nearby finishes. Work in short, controlled bursts, checking solder flow quickly and wiping excess to prevent cold joints.
Insulation and temporary heat shields help maintain joint temperature without trapping moisture. Plan each step to minimize delays and confirm a smooth, continuous fillet before cooling.
- Preheat fittings slightly
- Use brisk, higher-output heat
- Protect surrounding areas
- Insulate joint after soldering
Solder Vertical Pipe in Tight Attic or Crawlspace Spaces
In confined attics or crawlspaces, proper lighting is essential to see joints and flux clearly without creating hazards.
The pipe and fittings must be held with solid, stable support to prevent movement while heating and cooling.
Attention to both visibility and secure bracing reduces the risk of poor joints and accidental burns.
Tight Space Lighting
Under cramped attic joists or within a narrow crawlspace, proper lighting becomes essential for safely soldering a vertical copper pipe. The work area requires focused, hands-free illumination to reveal joint gaps, flux coverage, and heat application without casting blinding glare. Portable LED headlamps, clip-on work lights, and magnetic base fixtures provide adaptable options.
Battery backups and narrow-beam lamps reduce shadowing behind joists. Safety considerations include avoiding cords across the workspace and keeping lights away from flux and hot solder.
- Headlamp with adjustable beam
- Slim, magnetic LED strip
- Rechargeable cordless work light
- Auxiliary flashlight with clip
Maintain Solid Support
Before applying heat, the pipe and the installer must be firmly supported to prevent movement that can break joints or cause hot solder to run.
In tight attics or crawlspaces, braces, straps, or a temporary scaffold stabilize the vertical pipe and free both hands.
Use padded clamps to avoid denting copper and position supports below the joint to bear weight.
A magnetic or spring clamp can hold fittings steady while flame is applied.
Make sure access for the torch and flux brush without bending the pipe.
Periodically check supports as solder cools to confirm the joint remains aligned and secure.
Avoid Fire Hazards and Use Fire Blankets Correctly
Always maintain a vigilant watch for sparks and open flames when soldering copper pipe; proper fire prevention and correct use of fire blankets reduce the risk of accidental ignition and serious injury.
A worker inspects the area, removes combustibles, and positions a flame-resistant blanket to shield nearby materials.
Fire blankets must lie flat, cover gaps, and be secured; they are not a substitute for active supervision.
A ready extinguisher and clear escape path complement blanket use.
After cooling, the blanket is folded away from sparks and stored.
Regular checks confirm blankets are intact and rated for hot work.
- Remove combustibles before heating
- Drape blanket to fully cover surroundings
- Keep extinguisher and watchperson nearby
- Inspect and store blankets after cooling
Choosing Between Leaded and Lead-Free Solder
When selecting solder for copper pipe work, considerations include health and safety risks from lead exposure, differences in joint strength between leaded and lead-free alloys, and local plumbing codes and material compatibility.
The choice affects not only long-term corrosion and mechanical performance but also whether the installation meets regulatory requirements. Evaluating these factors helps determine the appropriate solder for a given application.
Health And Safety
Regarding solder choice, the health risks and regulatory requirements make lead-free solder the preferred option for potable water and household plumbing: it eliminates lead leaching into drinking water and complies with modern plumbing codes in most jurisdictions.
The installer should prioritize ventilation, eye protection, and gloves when soldering to limit fume and burn exposure. Avoid eating or drinking near the work area and wash hands after handling flux or solder. Keep solder and scraps away from children and pets. Dispose of leaded solder or contaminated materials per local hazardous-waste rules to prevent environmental contamination.
- Ventilation and fume control
- Personal protective equipment
- Hygienic work practices
- Proper disposal and containment
Joint Strength Differences
Although both leaded and lead-free solders create mechanically sound connections when properly applied, their metallurgical properties and melting characteristics produce measurable differences in joint strength and durability. The installer should note that leaded solder flows at lower temperatures, often yielding slightly stronger fillets in thin-wall joints, while lead-free alloys require higher heat and can be more brittle if overheated. Longevity, vibration resistance, and thermal cycling tolerance vary by alloy composition. Selection balances immediate joint strength against long-term corrosion resistance and safety considerations; testing on representative samples is recommended before finalizing material choice.
| Alloy | Feel | Emotion |
|---|---|---|
| Leaded | Smooth | Reassurance |
| Lead-free | Stiffer | Caution |
| Fluxed | Warm | Confidence |
Code And Compatibility
In selecting between leaded and lead-free solder, local plumbing codes, potable water regulations, and the planned/target/purposed application determine permissible alloys and installation methods. The code review guides material choices: potable systems generally require lead-free solder; repair on older systems may permit leaded where not potable.
Compatibility with pipe metallurgy, flux, and joint temperatures affects reliability. Inspectors may require certification marks. Installers should document approvals and follow manufacturer and code-prescribed procedures to guarantee safety and inspection acceptance.
- Potable water: use certified lead-free alloys
- Non-potable: check local allowances
- Temperature and flux compatibility
- Documentation for inspection
Estimate Time and Cost for a Vertical Soldering Job
For a vertical soldering job, estimating time and cost hinges on pipe diameter, joint complexity, and access constraints.
A straightforward single 1/2″ joint in an open crawlspace typically takes 20–40 minutes, including prep and cleanup; a 3/4″ or larger run and multiple joints can require 1–2 hours.
Materials (solder, flux, cleaning pads) usually add $5–15 per joint; minor tools or propane torch rental may add $10–30.
Difficult access, insulation removal, or rusted fittings increase labor and materials.
Always factor a contingency of 20–30% for unexpected complications or additional fittings.
When to Call a Licensed Plumber Instead
Estimating time and cost helps a homeowner decide whether a vertical soldering job is manageable as a DIY task, but certain circumstances clearly warrant calling a licensed plumber instead.
A professional is recommended for leaks from concealed systems, failed soldering after repeated attempts, complex fittings or multiple joints, and when local codes or permits apply.
Safety, warranty, and insurance considerations favor licensed work for gas lines, main shutoff issues, or where structural damage is possible.
Time-sensitive emergencies, lack of proper tools, or uncertainty about pipe material justify professional intervention to prevent larger failures and costly repairs.
- Concealed or extensive leaks
- Gas or code-regulated lines
- Repeated failed repairs
- Emergency or structural risk
Maintain Soldering Tools and Store Leftovers
Regularly inspect and clean soldering tools to guarantee reliable joints and safe operation. Tools should be wiped, tips tinned, and hoses checked for leaks; worn tips and damaged hoses must be replaced. Leftover flux and solder require sealed containers and clear labeling, stored away from heat and moisture. Waste solder should be recycled per local regulations. Keep a small maintenance kit with spare tips, flux, and a brush near the work area. Log tool maintenance dates to track service intervals and avoid unexpected failures.
| Item | Action | Frequency |
|---|---|---|
| Tip | Clean/tin | Weekly |
| Hose | Inspect | Monthly |
| Flux | Seal/store | After use |
| Solder scraps | Recycle | As generated |
| Kit restock | Check | Monthly |
Common DIY Mistakes When Soldering Vertical Copper
When soldering vertical copper, common DIY errors can lead to cold joints from insufficient or uneven heat.
Excessive flux application is frequently mentioned as a cause of messy joints and potential corrosion.
Overheating may burn the pipe finish, weakening the joint and requiring extra cleanup.
Cold Joints From Poor Heat
Often, inadequate heat during soldering causes cold joints, a common failure where solder does not properly bond to the copper surface. The pipe and fitting must reach proper temperature so solder flows and wets metal; otherwise joints appear dull, crumbly, and leak-prone.
Symptoms include gaps, poor capillary action, and solder that scrapes away. Remedies focus on correct torch technique, even heating, and pausing to verify temperature before applying solder.
Inspect joints for shiny, continuous fillets and reheat and reapply solder if necessary, after cleaning oxides and removing excess debris.
- Make certain even, sustained heating around the joint
- Verify temperature, not guesswork
- Heat until flux bubbles and flows
- Reheat and reapply when solder fails
Excessive Flux Application
Excessive flux application is a frequent DIY error when soldering vertical copper: too much flux runs into the joint, collects at the bead, and prevents proper solder wetting.
Technicians note that surplus flux creates a barrier between solder and clean metal, causing weak joints and potential leaks.
It also burns and leaves corrosive residue inside the fitting if not removed.
Best practice is a thin, even coat applied sparingly to mating surfaces only; wipe excess from pipe ends before heating.
Controlled application improves capillary action and joint strength while simplifying post-solder cleaning and inspection.
Burned Pipe Finish
Frequently, a scorched or discolored pipe finish signals excessive heat or a stationary flame during vertical soldering. The technician notices bluing, blackening, or burnt flux residues that weaken joints and mar appearance. Proper flame movement, correct torch size, and controlled heating prevent overheating. Cooling too quickly or using abrasive cleaning after burning can hide but not fix damage. Inspect joints for weakened solder flow and rework if necessary, removing contaminants first and reheating evenly.
- Move torch continuously to avoid concentrated heat
- Use appropriate tip size and flame intensity
- Clean surfaces before re-soldering
- Rework damaged joints rather than conceal them
Quick Pre-Solder Checklist for Vertical Copper Joints
Before lighting the torch, the installer runs a focused pre-solder checklist to guarantee a reliable vertical joint: verify pipe and fitting fit-up with 1–2 mm clearance, clean both surfaces with a wire brush or emery cloth to bare copper, apply flux evenly without excess, support the joint so the fitting bears the pipe weight, and confirm the system is drained and vented of air and combustible vapors.
The installer also inspects for burrs, aligns flow direction marks, removes nearby combustible materials, positions a heat shield and fire-resistant pad, tests gas and torch function, wears PPE, and stages a fire extinguisher within reach.
Conclusion
In closing, the process of soldering a vertical copper pipe can be described as a careful “appliance of persuasion” rather than hard labor — coaxing metal to cooperate through heat, skill, and patience. By choosing the right tools, flux, and safety measures, a homeowner can achieve a reliable joint; yet when uncertainty lingers, engaging a licensed professional is a discreet way to avoid future embarrassment. Confidence comes with prudent practice and respect for the job.