How to Reseal Grout Lines in a Shower: Step-by-Step Guide for a Long-Lasting Finish
Resealing shower grout is essential for maintaining a water-resistant barrier, reducing mold growth, and extending the lifespan of your tiles. To effectively reseal grout lines, start by inspecting and cleaning the grout with a pH-neutral cleaner. Remove any mold and test the grout’s porosity. If you find any damaged grout, repair or replace it and allow it to cure completely. Select either a penetrating or topical sealer based on your grout type, apply it evenly in small sections, wipe away any excess, and ensure you follow the recommended cure time. For ongoing maintenance, use gentle cleaners and perform periodic inspections. Follow the detailed step-by-step application tips and troubleshooting guidance for optimal results.
Why Resealing Grout Lines Matters for Shower Longevity
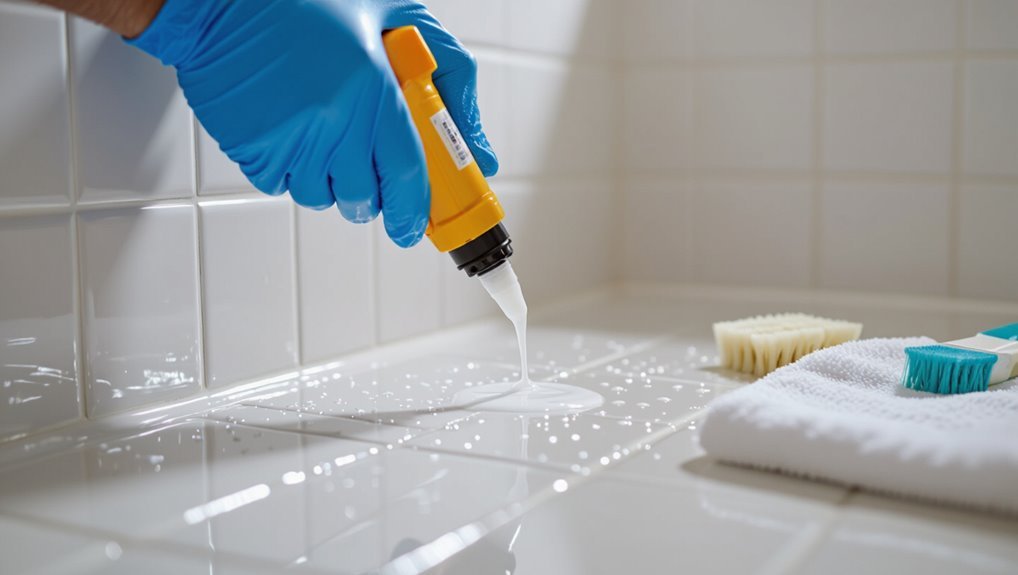
Resealing grout creates a protective barrier that limits water penetration, reduces mold growth, and helps prevent stubborn stains.
Visible cracking, darkening grout lines, persistent mildew, or water pooling indicate that resealing is needed now.
Grout sealers form a surface-level repellent, whereas waterproofing membranes provide full substrate protection, so choice depends on the extent of moisture risk.
How grout sealing protects against water, mold, and stains
Protecting grout with a proper sealant creates a barrier that markedly reduces water penetration, the primary cause of tile-bed deterioration.
Properly applied sealers, as emphasized in guides on how to reseal grout lines in a shower, repel moisture, limit mold spores’ access to porous grout, and prevent staining from soaps and minerals.
This preserves grout integrity and simplifies routine cleaning.
Signs your shower grout needs resealing now
When should a homeowner act on shower grout deterioration?
Visible darkening, crumbling, or powdery grout, persistent water beading or discoloration, and recurring mold or mildew despite cleaning indicate compromised sealing.
Water penetration often causes loose tiles, efflorescence, or grout shrinkage.
Prompt resealing and targeted repair prevent structural damage, costly tile replacement, and ongoing moisture-driven deterioration.
Difference between grout sealers and waterproofing membranes
After signs of grout failure appear, homeowners should understand that grout sealers and waterproofing membranes serve different roles in shower longevity.
Grout sealers penetrate or coat grout to repel moisture and stains but do not stop structural leaks.
Waterproofing membranes form a continuous barrier behind tiles to prevent water reaching substrate.
Both complement each other: sealer protects mortar grout while membrane prevents larger-scale water damage.
Types of Grout Sealers and How to Choose One
Different sealers offer distinct benefits: penetrating silane/siloxane products repel water below the surface while topical sealers create a surface barrier but may alter appearance.
Selection depends on grout type (epoxy often requires different treatments than cementitious grout), tile material, grout color, and the shower’s exposure to moisture and cleaners.
Prioritize sealers with proven water-repellency, UV and chemical resistance, and relevant safety or performance certifications.
Penetrating (silane/siloxane) sealers pros and cons
Understanding is essential when selecting a grout sealer, and penetrating (silane/siloxane) options merit consideration for their unique chemistry and performance.
These sealers penetrate pores, repel water and salts, and preserve breathability. Advantages include long-lasting water resistance and minimal surface change.
Drawbacks: limited stain protection on the surface, slower application sensitivity to moisture, and usually higher cost than basic alternatives.
Topical sealers pros and cons
Several topical sealers, including acrylics, urethanes, and epoxy-based coatings, form a surface film that blocks stains and eases cleaning.
They provide strong surface protection and quick recoat times but can alter grout appearance, become slippery, peel with poor adhesion, and trap moisture beneath if applied over damp grout.
Maintenance often requires periodic stripping and reapplication to retain effectiveness.
Epoxy grout vs cementitious grout: sealing considerations
While topical sealers work by forming a surface film, their suitability varies markedly depending on the grout material beneath.
Epoxy grout is inherently nonporous and usually needs only routine cleaning; topical sealing is often unnecessary and can impair breathability.
Cementitious grout absorbs water and benefits from penetrating sealers to reduce staining and mildew.
Choose sealers that match grout chemistry and maintenance expectations.
How to select sealer based on tile type, grout color, and shower use
Choosing the right grout sealer depends on three practical criteria: tile material, grout color, and the shower’s frequency and type of use.
Porous natural stone needs penetrating sealers; glazed ceramic and porcelain accept topical or penetrating options.
Dark grout can hide slight sheen; light grout benefits from invisible, non-yellowing formulas.
High-use showers require more durable, water-repellent sealers and frequent reapplication.
Recommended product features and safety certifications
A few key product features and recognized safety certifications help guarantee a grout sealer performs well and poses minimal health or environmental risks.
Recommended attributes include water repellency, breathability, and UV resistance.
Look for low-VOC formulas and certifications such as EPA Safer Choice or Green Seal.
Consider professional-grade penetration depth and clear application instructions.
- Water repellency
- Low‑VOC / certified
- Penetration depth
Tools and Materials You’ll Need
Before beginning, gather the essential cleaning supplies and mildew removers to guarantee grout is free of soap scum and mold.
Necessary repair tools include a grout saw and replacement grout, while sealer application requires brushes, rollers, or applicator bottles.
Protective gear and ventilation equipment are important for safety, with optional professional-grade tools available for larger or more stubborn jobs.
Cleaning supplies and mildew removers
Gather effective cleaning supplies and a reliable mildew remover to confirm grout is free of soap scum, discoloration, and biological growth before resealing.
Essential items include pH-balanced tile cleaner, oxygen bleach or diluted hydrogen peroxide, a mildew-specific spray, stiff nylon brushes, microfiber cloths, and a spray bottle.
Gloves and eye protection confirm safe handling of cleaners and prevent contamination prior to sealing.
Grout repair materials (grout saw, replacement grout)
Inspect the grout lines closely to determine which sections require removal and replacement.
Then assemble the essential repair tools: a grout saw or oscillating tool with a grout-removal attachment, replacement grout matched to the tile (sanded for joints wider than 1/8 inch, unsanded for narrower joints), a grout float or rubber spreader, a margin trowel for mixing, and a small bucket for grout slurry.
Select matching grout color and appropriate curing instructions.
Sealer application tools (brushes, rollers, applicator bottles)
With grout replaced and cured, attention turns to tools for applying sealer to guarantee even coverage and penetration.
A small nylon brush helps force sealer into joints; foam rollers quickly cover larger tile areas without leaving fibers.
Narrow applicator bottles with angled tips deliver controlled bead application along grout lines.
Choose tools based on sealer type and grout width for efficient, uniform results.
Protective gear and ventilation equipment
One set of basic safety items — chemical-resistant gloves, protective eyewear, and a respirator rated for organic vapors — should be on hand before applying grout sealer; they protect skin, eyes, and lungs from irritants and solvent fumes.
Additionally, use disposable coveralls or old clothing, non-slip shoe covers, and a snug-fitting mask for dust.
Make certain exhaust fans and a window create cross-ventilation.
Optional professional-grade equipment
Gather specialized tools to speed work and improve results when resealing grout lines; these optional professional-grade items are not required but make the job cleaner and more durable.
Recommended items include a pneumatic grout saw for rapid removal, a variable-speed rotary tool with grout-cleaning bits, a high-quality caulking gun with pressure rod, and a HEPA-rated vacuum adapter to collect dust during prep.
Preparing the Shower for Resealing
Before resealing, the shower’s grout lines are inspected for cracks, crumbling, or staining and tested to determine porosity and whether an old sealer remains.
A thorough cleaning—removing soap scum, mildew, and efflorescence—and safe removal of any existing sealer are performed next.
Finally, surfaces are allowed to dry fully following manufacturer-recommended wait times before applying new sealer.
Inspecting grout lines and identifying damage
A careful inspection of grout lines reveals the extent and type of damage that will dictate resealing needs and methods.
The inspector notes cracks, crumbling, staining, mold growth, and gaps at tile edges. Measure joint width and depth, document loose or missing grout, and check for hairline fractures.
Photographs and notes guide repair scope and prioritize areas requiring full removal versus spot treatment.
Testing grout porosity and old sealer presence
With damage documented, the next step is to determine whether the grout will accept a new sealer and whether remnants of a previous sealer remain.
Perform a water-drop porosity test: place droplets on grout, observe absorption time. If water beads, an old sealer likely exists.
Record results and mark areas needing stripping or additional preparation before proceeding to deep cleaning and resealing.
Deep cleaning steps to remove soap scum, mildew, and efflorescence
Begin by removing loose debris and surface soap film using a soft brush or non-abrasive sponge and warm water.
Apply a pH-neutral cleaner for soap scum, scrubbing grout lines gently.
Treat mildew with a diluted bleach solution or commercial mildew remover, rinsing thoroughly.
For efflorescence, use a mild acidic cleaner (vinegar solution) sparingly, rinse completely, and allow full drying before inspecting.
How to remove old sealer safely
After the grout has been cleaned and fully dried, attention shifts to removing any remaining sealer that could prevent a new coat from adhering.
Wear gloves, eye protection, and a mask. Test a small area with a manufacturer-recommended sealer stripper or isopropyl alcohol.
Gently agitate with a nylon brush, rinse thoroughly, and repeat until residue is gone.
Ventilate the space during the process.
Drying requirements and optimal waiting times
A fully dry surface is essential before applying sealer: grout and surrounding tile must be free of visible moisture and dampness to guarantee proper adhesion and curing.
Allow at least 24 hours of air drying after cleaning; longer in humid conditions. Use a moisture meter or touch test.
After sealing, wait recommended cure times—typically 24–72 hours—before exposing to water for full protection.
Repairing Damaged Grout Before Sealing
Before applying a sealer, the condition of existing grout should be assessed to determine whether targeted repairs or full regrouting is required.
Small cracks and holes can be patched with a simple step-by-step method, while larger damaged areas require removal and regrouting with proper technique and curing times.
Attention to common mistakes—insufficient cleaning, improper mixing, or inadequate curing—will improve durability and sealant performance.
When to repair versus when to replace grout
Determining whether to repair or replace grout depends on the extent of damage, substrate stability, and presence of mold or water infiltration.
Minor hairline cracks, surface wear, or isolated missing grout can be repaired; widespread crumbling, hollow sounds, persistent moisture behind tiles, or recurrent mold indicate full removal and replacement.
Structural compromise or failed waterproofing mandates replacement to guarantee long-term integrity.
Step-by-step grout repair for small cracks and holes
When minor hairline cracks or isolated missing sections are identified rather than widespread failure, proceed with targeted grout repair before sealing.
Clean area, remove loose grout with a pointed tool, and vacuum debris. Damp thoroughly.
Mix matching grout to manufacturer ratio, apply with a grout float or syringe for precision, smooth joints, remove excess, and allow proper cure time before sealing.
Regrouting tiled areas: technique and curing times
Regrouting tiled areas requires removing the old, compromised grout to a uniform depth, preparing joints for a fresh, well-adhered bed, and following manufacturer curing times to guarantee durability.
This process involves careful tooling, consistent grout mixing, and controlled drying conditions to prevent shrinkage or premature failure.
Technicians pack joints firmly, finish profiles for water shedding, then respect manufacturer cure and final set periods before sealing or light use.
Preventing common regrouting mistakes
After removing old grout and following manufacturer cure times, attention must turn to repairing damaged joints before applying any sealant.
Inspect for cracks, voids, and loose grout. Remove debris, guarantee surfaces are dry, and use matching grout mix.
Avoid overfilling, uneven tooling, or premature sealing. Allow adequate curing, clean haze promptly, and verify adhesion to prevent future failures.
Step-by-Step Resealing Process
Before applying any sealer, a final inspection checklist confirms grout is clean, fully repaired, and free of moisture.
The resealing process then covers selecting and applying either a penetrating or topical sealer—with method-specific coverage tips, application patterns, and overlap techniques to avoid streaks.
Finally, clear guidance on drying and curing times between coats guarantees a durable, long-lasting finish.
Final pre-seal inspection checklist
Once cleaning and drying are complete, a focused pre-seal inspection confirms readiness and prevents common sealant failures.
Check grout for cracks, missing sections, or loose material; verify tile and substrate are dry and free of residue; guarantee joints are uniform and properly shaped; confirm ventilation and temperature meet product specifications; gather required tools and replacement grout.
Note any repairs before sealing.
How to apply penetrating sealer method and coverage tips
With repairs noted and the surface confirmed dry and clean, attention shifts to applying a penetrating grout sealer using a systematic, step-by-step approach.
The technician brushes or sprays sealer evenly, working small areas. Allow recommended dwell time, then blot excess with a lint-free cloth.
Apply a second coat if manufacturer advises. Note coverage rates on the product label to estimate required quantity.
How to apply topical sealer method and coverage tips
Apply the topical sealer in defined sections, brushing or rolling a thin, even film over grout and adjacent tile according to the manufacturer’s instructions.
Work methodically, maintaining wet edges and avoiding pooling. Note recommended coverage rate and dry times printed on the container.
Allow full curing before water exposure, typically 24–72 hours. Reapply if coverage appears thin or manufacturer advises multiple coats for durability.
Application patterns, overlap, and avoiding streaks
Begin each section by laying down a straight, continuous pass of sealer along the grout line, working from a corner or edge toward the center of the wall.
Follow with overlapping passes about a third of the brush width to guarantee even coverage.
Maintain light, steady strokes to prevent pooling or streaks.
Inspect visually and smooth any excess immediately with the applicator.
Drying and curing times between coats
Patience governs the effectiveness of each coat: after the initial application, the sealer should be allowed to dry until the surface is no longer tacky—typically 30 minutes to 2 hours depending on product and humidity—before evaluating readiness for a second coat.
Subsequent coats often require shorter waits; follow manufacturer cure times.
Full cure may take 24–72 hours before light use; avoid water exposure until fully set.
How to seal corners, niches, and grout-to-caulk joints
When treating corners, niches, and grout-to-caulk joints, work methodically to guarantee a watertight seal: clean and dry the area thoroughly, inspect for cracked or failing caulk, and remove any loose grout or mildew before proceeding.
Use a compatible silicone or hybrid sealant for connections, apply smooth even beads, tool joints for adhesion, and allow full cure per manufacturer instructions before exposing to moisture.
Post-Sealing Care and Maintenance
Allow adequate curing time before wetting the sealed grout, following the product’s recommended wait period to guarantee full effectiveness.
A gentle cleaning routine using pH-neutral cleaners and soft tools will protect the sealer, while persistent mildew or staining may require targeted cleaners or reapplication in affected areas.
Periodic testing with water beading and visual inspection indicates when resealing is needed, typically every one to three years depending on use and sealer type.
How long before using the shower after sealing
How long one should wait before using a shower after resealing grout depends on the sealer type and environmental conditions.
Typically, wait 24–48 hours for water-based sealers and 48–72 hours for solvent-based or penetrating sealers.
Confirm full curing by keeping the bathroom ventilated and dry. Avoid heavy steam or direct water contact until manufacturer-recommended cure time elapses to preserve seal integrity.
Cleaning routine to protect the new sealer
Establish a gentle cleaning routine to preserve the new grout sealer’s effectiveness: use a mild, pH-neutral cleaner and a soft brush or microfiber cloth to remove soap scum and residue without abrading the sealed surface.
Rinse thoroughly and squeegee walls after each use to limit moisture.
Perform weekly light cleaning and inspect grout monthly for wear; reapply sealer when water no longer beads.
How to handle persistent mildew or staining after sealing
If persistent mildew or staining appears after sealing, address it promptly to prevent deeper penetration and discoloration.
Inspect affected grout, then test a mild cleaner on an inconspicuous area. Use an oxygen-based bleach or enzyme cleaner, scrub gently with a soft brush, rinse thoroughly, and dry.
For stubborn stains, consult a professional before aggressive stripping to avoid damaging sealer or grout.
When to reseal again: timelines and testing methods
When should grout be resealed depends on the sealer type, shower use, and water chemistry: penetrating sealers typically last 1–3 years, while surface sealers may need reapplication every 6–12 months.
Inspect visually for darkening or water absorption, perform a 24-hour bead test, and note high-traffic or hard-water areas for earlier reapplication.
Keep a maintenance log for timing and product consistency.
Common Problems and How to Fix Them
Common problems after resealing include visible sealer failure—flaking, hazing, or patchy coverage—and the piece lists likely causes such as improper surface prep, incompatible product, or incorrect application.
It also explains straightforward fixes for uneven or peeling sealer, steps to reduce lingering odors or allergic reactions, and when those issues indicate a deeper problem.
Guidance is given on when to attempt DIY remedies and when to call a professional.
Sealer failure signs and root causes
Why has the sealer lost its protective effect? Inspectors note common signs: darkened or water-absorbing grout, increased staining, mold recurrence, and a loss of sheen.
Root causes include inadequate initial application, wrong sealer type, heavy abrasion, chemical breakdown from harsh cleaners, and prolonged UV or moisture exposure.
Identifying these factors guides appropriate resealing and prevention steps.
Fixing flaking, hazing, or uneven sealer coverage
Peeling, hazing, or patchy sealer on shower grout signals an incomplete bond or surface contamination that undermines water resistance and appearance.
To correct this, remove failed sealer with a grout brush and solvent or gentle mechanical abrasion, clean thoroughly, and allow complete drying.
Reapply a compatible sealer in thin, even coats, wiping excess promptly and curing per manufacturer instructions to guarantee uniform coverage.
Addressing sealer smell or allergic reactions
Many people notice a strong chemical odor or experience irritation after applying grout sealer in a shower, which typically indicates volatile organic compounds (VOCs) or an allergic response to resin, solvent, or additives.
Ventilate immediately, open windows, and run exhaust fans.
Remove excess sealer with mild solvent per label, rinse thoroughly, and replace with low‑VOC or hypoallergenic sealer.
Use gloves and a mask until reactions subside.
When to call a professional
If persistent odors, ongoing allergic reactions, or visible damage continue after basic remedies, it is time to contemplate professional help.
A contractor can assess water intrusion, mold behind tiles, or failed substrate. Hire a licensed tile or waterproofing specialist for structural issues, extensive mold remediation, or repeated sealant failure.
Obtain estimates, check references, and confirm proper warranties before authorizing work.
Cost, Time, and Effort Estimates
The article compares DIY and professional resealing, noting typical pros, cons, and cost ranges so readers can weigh skill, time, and budget.
It outlines expected time per shower based on size and condition, from a few hours for a small stall to a day or more for large or complex jobs.
It also summarizes how proper sealing reduces long-term repair and replacement costs by limiting water damage and mold.
DIY vs professional service: pros, cons, and cost ranges
Choosing between a DIY reseal and hiring a professional hinges on trade-offs in cost, time, and expected results. DIY saves money (materials $20–$80), requires homeowner effort, and fits small jobs. Professionals charge more ($150–$600), offer warranty and skill for complex issues.
| Option | Pros | Cons |
|---|---|---|
| DIY | Low cost | Time, skill required |
| Pro | Warranty, expertise | Higher cost |
Typical time required per shower size and complexity
How long does resealing a shower typically take? Time varies with size and condition; simple refreshes require less prep, while heavy repairs demand more drying and curing intervals.
Typical timelines:
- Small alcove shower: 1–3 hours active, 24–48 hours curing.
- Standard tub/shower: 3–6 hours active, 48–72 hours curing.
- Large/custom stalls or repairs: 6–12+ hours active, 72+ hours curing.
Long-term cost savings from proper sealing
Properly sealed grout reduces water intrusion, mold growth, and tile damage, producing measurable long-term savings by lowering repair, cleaning, and replacement costs.
Routine sealing extends grout life, cutting frequency of deep cleans, mold remediation, and tile replacement.
Initial material and labor costs are modest compared with avoided structural repairs and resale value preservation.
Homeowners typically recoup investment within a few years.
Tips for a Long-Lasting Finish
For a durable finish, attention to application technique—clean grout, apply sealant evenly, and allow full curing time—is essential.
Regular preventative habits such as wiping down walls after use and addressing leaks promptly can greatly extend the interval between resealing.
Consider seasonal and climate factors, since humidity and temperature during application and curing affect sealant performance and longevity.
Best practices during application for durability
Apply the sealer with steady, deliberate strokes and consistent pressure to confirm an even coat that penetrates grout without pooling on tile.
Work in small sections, overlap slightly, and maintain a wet edge to prevent lap marks. Allow manufacturer-recommended dwell time before wiping excess.
Verify adequate ventilation and stable temperature.
Inspect for complete coverage, reapply only if absorption indicates insufficient initial penetration.
Preventative habits to reduce future resealing frequency
After sealing, routine habits that limit moisture and grime buildup will extend the interval between reseals.
Maintain dryness, reduce residue, and inspect grout regularly to catch issues early.
- Squeegee or wipe walls after each use to remove water.
- Use a mild, non-abrasive cleaner weekly to prevent soap scum.
- Improve ventilation and dry grout lines promptly after spills.
Seasonal and climate considerations for sealant performance
Longevity depends on temperature, humidity, and seasonal cycles that affect how a sealant cures and performs over time.
Cold slows curing and reduces adhesion; heat and high humidity can cause blistering or extended tackiness.
Apply sealant within manufacturer-recommended temperature and moisture ranges, allow extra cure time in winter, and postpone resealing during extreme weather to guarantee consistent bonding and long-term waterproofing.
Product Comparison and Buying Checklist
A concise comparison of popular grout sealers, including coverage, drying time, and suitability for different tile types, helps narrow choices quickly.
Clear instructions on reading product labels and technical data sheets enable accurate matching of sealer performance to project needs.
Purchase decisions should also factor in retailer availability, warranty terms, and manufacturer customer support.
Quick comparison table of popular grout sealers
Clarity matters when choosing a grout sealer, so this quick comparison table highlights key differences among popular options: sealer type (penetrating vs. surface), water resistance, VOC level, cure time, and best-use scenarios. A concise table follows, then brief guidance on selecting by substrate and exposure.
| Product A | Penetrating; high water resistance |
|---|---|
| Product B | Surface; low VOC, faster cure time |
How to read product labels and technical data sheets
After comparing key sealer types and performance traits, attention shifts to the labels and technical data sheets that define a product’s real-world suitability.
Inspect barrier type (penetrating vs surface), VOCs, cure and recoat times, coverage per square foot, substrate compatibility, temperature/humidity limits, and expected durability.
Look for ASTM or ANSI standards, application instructions, and safety precautions to guarantee proper selection and use.
Where to buy and warranty/customer support considerations
Where can a buyer find the right grout sealer and what warranty or support should influence the choice? Retailers, specialty tile stores, and reputable online vendors provide options; compare manufacturer warranties, coverage length, and claim procedures.
Prefer products with clear technical support, accessible SDS, and documented performance.
Check return policies, installation guidance, and customer reviews to assess responsiveness and real-world durability before purchasing.
Visual Guide and Troubleshooting Reference
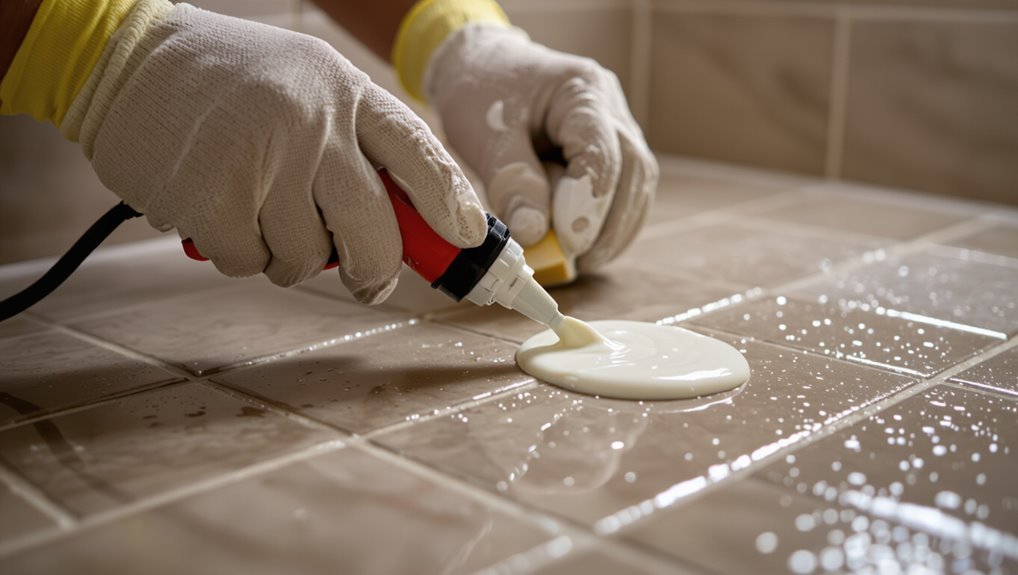
A sequence of clear images identifies key inspection points, shows step-by-step repairs, and demonstrates proper application techniques.
Each photo is captioned to highlight common problems and the corrective action required.
Readers can use the visuals as a quick troubleshooting reference during resealing.
Images showing inspection points, repair steps, and application techniques
Clear, annotated images guide users through key inspection points, step-by-step repairs, and proper application techniques so that visual cues replace guesswork.
Photographs highlight cracked, stained, or missing grout, demonstrate grout removal and replacement, and show sealant application angles and bead smoothing.
Close-ups of drying stages and common mistakes aid troubleshooting.
Captions specify tools, materials, and safety steps for accurate replication.
Conclusion
Resealing revitalizes and protects grout, presenting practical payoff for persistent prevention. Proper preparation, prudent product picking, and precise application produce profound protection against mold, moisture, and mildewy mishaps. Regular reinspection and rapid repairs reinforce resilience, reducing repair costs and restoring radiance. With sensible supplies, steady steps, and simple sanitation, homeowners secure a strong, stain-resistant shower sanctuary—sustaining surface strength, saving time, and safeguarding satisfaction for seasons to come.