How to Remove Drip Line Connectors Quickly and Without Damaging Your Irrigation System
To quickly remove drip line connectors without damaging your irrigation system, first shut off and depressurize the drip line. Identify the connector type: for barbed fittings, use twisting motions; for insert fittings, utilize release collars or quick-release tools; and for compression or threaded joints, apply the appropriate wrenches. If barbs are stubborn, heat or lubricant can assist. For brittle sections, simply cut and replace them. Work systematically by zone, tag any removed parts, and inspect seals and tubing ends before reassembly. Adhere to safe tool use and inspection practices to minimize damage, and consult detailed techniques and troubleshooting as needed.
Quick answer: Removing drip line connectors safely and efficiently
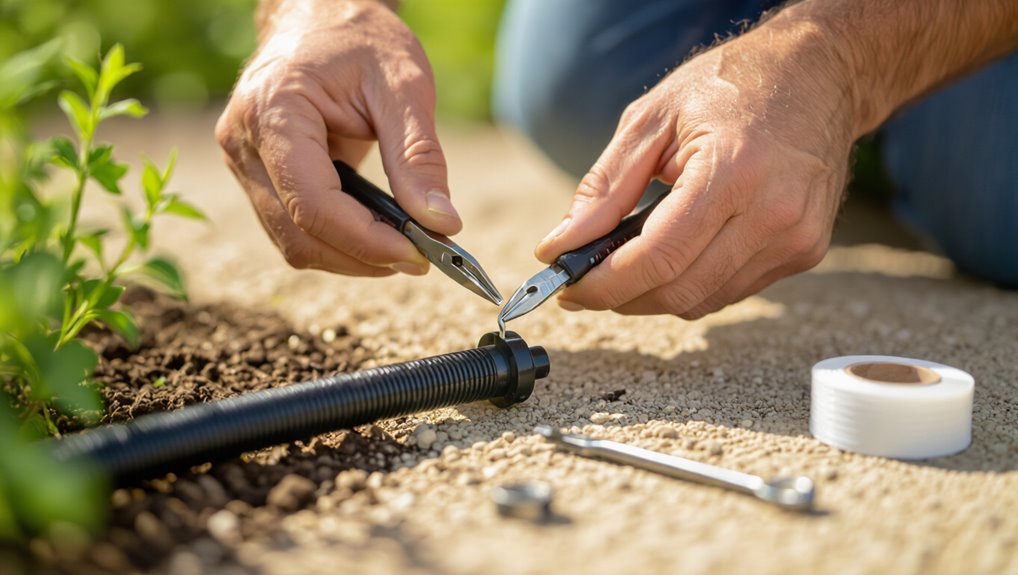
Begin by shutting off the water supply and relieving pressure in the drip line to prevent spills; then inspect the connector type to determine whether it requires twisting, pulling, or a quick-release tool so removal proceeds smoothly and without damage.
The technician evaluates fittings, uses appropriate hand or tool techniques, gently detaches connectors, checks seals for wear, and prepares replacements, demonstrating how to remove drip line connectors efficiently.
Why and when you should remove drip line connectors
Homeowners and gardeners remove drip line connectors for routine repairs, system upgrades, or winterization. Doing so at the appropriate time prevents prolonged leaks or component failure.
However, improper removal can damage tubing, emitters, or valves, so care and the right technique are essential.
Common reasons for removal (repairs, upgrades, winterization)
Routine maintenance, system upgrades, and seasonal winterization are the most common reasons to remove drip line connectors.
Technicians remove connectors to replace worn emitters, fix leaks, reroute lines for landscape changes, or install higher-efficiency components.
Seasonal disassembly prevents freeze damage in cold climates.
Removals also enable pressure adjustments and repairs after rodent or root intrusion, ensuring reliable irrigation performance.
Risks of improper removal (damage to tubing, emitters, valves)
Improper removal of drip line connectors can crack or deform tubing, dislodge emitters, and stress valves, creating leaks or reducing system performance. Technicians should use proper tools, steady pressure, and support tubing ends. Timely inspection prevents cumulative damage and costly replacements. Follow manufacturer removal steps to protect seals and pressure settings; document changes for future maintenance.
| Risk | Cause | Outcome |
|---|---|---|
| Tubing damage | Excessive force | Leaks |
| Emitter dislodgement | Twisting | Uneven watering |
| Valve stress | Pulling | Malfunction |
Tools and materials needed
A concise set of tools and materials makes connector removal smoother and reduces the chance of damaging tubing. Essential items include pliers, a pick tool, a hose cutter, and protective gloves.
Optional quick-release tools or specialized connector pliers can speed the job. It is also wise to have replacement parts on hand such as barbed couplers, goof plugs, and end caps.
Essential tools (pliers, pick tool, hose cutter, gloves)
Begin by assembling a small kit of durable tools: needle-nose pliers for gripping and twisting, a slender pick or awl for releasing retaining tabs, a plastic tubing cutter or sharp utility knife for clean cuts, and sturdy gloves to protect hands.
Each tool should be in good condition: pliers with secure jaws, a pointed pick, a sharp cutter for smooth edges, and puncture-resistant gloves.
Optional tools to speed the process (quick-release tools, connector pliers)
Speeding the removal process often requires purpose-built accessories: quick-release tools that depress retaining clips and specialty connector pliers that grip and disengage fittings without crushing tubing.
These optional implements reduce effort, lower risk of damage, and speed repetitive work. Choose corrosion-resistant, ergonomically shaped tools sized for common drip fittings.
Use them selectively for stubborn or frequently serviced connections to save time.
Replacement parts to have on hand (barbed couplers, goof plugs, end caps)
Several small replacement parts are worth keeping on hand for routine drip-line maintenance: barbed couplers to rejoin cut tubing, goof plugs to seal mistakenly punched emitters, and end caps to close open line ends.
Each part should match tubing diameter and material. Keep a small selection of sizes, plus replacement emitters and a few extra stakes, to enable quick, correct repairs and minimize downtime.
Understanding common connector types
The section outlines the most common drip line connectors to help identify what must be removed.
It covers barbed fittings and couplers, insert/press-fit types, and compression or threaded connectors.
Specialty pieces such as L- and T-shaped fittings and stakes with integrated connectors are also noted for their unique removal needs.
Barbed fittings and couplers
Explore how barbed fittings and couplers join drip irrigation tubing: barbed fittings have ridged stems that grip soft polyethylene or vinyl tubing when pushed on, while couplers connect two lengths of tubing inline or at an angle.
Barbs rely on friction and often a clamp; couplers may be straight, elbow, or tee.
Removal requires careful twisting and pulling to avoid tearing tubing.
Insert/press-fit connectors
Insert/press-fit connectors join drip tubing and fittings by being pushed into place until their barbed or tapered ends seat, creating a snug mechanical seal without clamps or adhesives.
Typically molded from plastic, they rely on interference fit and sometimes internal ribs for retention.
Removal requires careful pulling and gentle twisting to avoid tearing tubing; replacement is simple when the tube end remains intact.
Compression and threaded connectors
Compression and threaded connectors secure drip tubing using mechanical pressure or mating screw threads rather than relying on barbs.
Compression fittings clamp tubing with a ferrule tightened by a nut; removal requires loosening the nut and gently withdrawing the tube.
Threaded connectors screw into emitters or fittings; removal involves unscrewing while supporting adjacent tubing to avoid twisting or stretching that could damage seals.
Specialty connectors (L-shaped, T-shaped, stakes with connectors)
After loosening or unscrewing standard fittings, attention turns to specialty connectors—L-shaped elbows, T-shaped branches, and stakes with integrated connectors—which manage directional changes, splits, and anchoring within a drip system.
- Inspect joint type before removal.
- Support tubing to prevent stress.
- Release clips or twist fittings gently.
- Replace damaged stakes or seals promptly.
Safety precautions before you start
Before any removal work begins, the water supply should be shut off and pressure relieved to prevent leaks and injury.
The tubing layout and the specific connectors slated for removal should be marked to preserve system integrity and ease reassembly.
Plants and surrounding landscape should be protected with barriers or temporary covers to avoid accidental damage.
Shutting off water and relieving pressure
Shut off the water at the main supply or the specific valve feeding the drip line to prevent flow into the system while connectors are removed.
Next, open a downstream faucet or bleed cap to release residual pressure and drain standing water from lines.
Verify pressure gauge reads zero if present.
Use gloves and eye protection; confirm isolation before cutting or disconnecting any tubing to avoid sprays and contamination.
Marking tubing layout and connectors to remove
With the supply closed and pressure relieved, the worker should map the drip tubing and identify every connector to be removed.
They mark lines and fittings with waterproof tape or colored flags, noting orientation and depth.
Use a sketch or photo for reference. Label problematic joints and nearby valves.
Confirm marks before cutting to prevent accidental disconnection or loss of system alignment.
Protecting plants and landscape
Although the work focuses on tubing and connectors, the operator should first shield nearby plants, mulch, and hardscaping to prevent trampling, debris, and accidental cutting.
Clear a workspace, lay boards or drop cloths, and use low-impact tools. Move pots and fragile specimens aside, secure branches, and avoid chemical spills.
Document sensitive areas to restore original placement after connector removal.
Step-by-step removal methods by connector type
The following section outlines concise, step-by-step procedures tailored to each common connector type.
It covers techniques for removing barbed fittings without causing damage, detaching insert or press-fit connectors, and loosening compression and threaded joints.
Methods for extracting specialty connectors and stake attachments are also presented with attention to tool choice and preventing line injury.
Removing barbed fittings without damage
The section explains techniques for removing barbed fittings without damaging tubing.
It recommends applying a steady twisting motion to loosen most connections before pulling them free.
For stubborn fittings, controlled heat or a suitable lubricant can soften the tubing or reduce friction to aid removal.
Loosening the connection with twisting motion
Begin by firmly gripping the tubing just behind the barbed fitting and the connector itself. Then apply a gentle back-and-forth twisting motion while pulling straight outward.
The twist reduces friction and helps the barb clear the tube lip. Maintain steady, moderate force to avoid tearing.
If progress stalls, pause, reposition grip, and repeat until the connector slides free without stretching or deforming the tubing.
Using heat or lubricant on stubborn fittings
Apply gentle heat or a small amount of lubricant when a barbed fitting resists removal to soften the tubing and reduce friction without damaging components.
Warm tubing with a hair dryer for 20–30 seconds; avoid open flames.
Use food-grade silicone lubricant sparingly on the barb, work the tubing off with steady back-and-forth twisting.
Inspect for splits; replace damaged sections and clean residual lubricant before reinstalling.
Detaching insert/press-fit connectors
When removing insert or press-fit connectors, the first task is to locate and release any locking tabs or retaining rings that secure the joint.
Once the lock is disengaged, a quick-release tool or collar can be used to withdraw the insert cleanly without stressing the tubing.
Careful, steady pressure during tool operation minimizes damage and guarantees a reusable connection.
Releasing locking tabs or rings
Releasing locking tabs or retaining rings on insert and press-fit drip line connectors requires a precise, gentle approach to avoid damaging the barb, seal, or tubing. The technician depresses tabs evenly, pries retaining rings outward with a small flat tool, then withdraws the insert while supporting tubing. Inspect seals and replace if torn.
| Tool | Action | Caution |
|---|---|---|
| Pick | Depress tab | Avoid sharp force |
| Flat tool | Pry ring | Support tubing |
Using quick-release tools for clean removal
After gently depressing tabs or prying retaining rings as described previously, quick-release tools provide a cleaner, faster method for detaching insert and press-fit drip line connectors without stressing the tubing or seals.
The technician inserts the tool around the connector base, compresses the collar, then pulls the tubing free with steady axial force.
Inspect seals, trim damaged tubing, and replace worn connectors before reassembly.
Removing compression and threaded connectors
The section explains how to loosen compression nuts and unscrew threaded fittings while protecting any thread seal material to preserve future connections.
It outlines techniques for backing off fittings without tearing or flattening tubing ends, including the use of appropriate wrenches and support jaws.
Safety tips cover holding the ferrule or tubing steady to prevent twisting and scoring during removal.
Unscrewing and protecting thread seals
Begin by identifying whether each connector is compression-style or threaded since removal techniques and thread-seal protection differ; compression fittings rely on ferrules and may require gentle backing out to avoid deforming the tubing.
Threaded connectors need careful unscrewing and assessment of existing sealant. For threaded connectors, hold the mating piece, use appropriate wrenches, remove old PTFE tape or sealant, inspect threads, and apply fresh tape sparingly before reassembly.
Preventing damage to tubing ends
With threaded fittings cleared of old sealant and compression types identified, attention shifts to removing connectors without nicking, crushing, or stretching the tubing ends.
Use proper cutters and firm support near the joint, back off compression nuts slowly, and hold tubing straight.
For threaded connectors, loosen fittings gradually while preventing torque on the soft tubing; inspect ends and trim cleanly before reassembly.
Extracting specialty connectors and stake attachments
Identify each specialty connector and stake attachment before attempting removal, noting type, orientation, and any securing features such as barbs, clips, or sealing rings. Use appropriate pliers, twist while pulling, depress barbs or release clips, and warm brittle tubing. For stakes, unclip or cut ties and lift straight up to avoid bending fittings.
| Connector | Removal tip |
|---|---|
| Barb | Depress then pull |
| Clip | Release then slide |
Techniques for removing connectors from aged or brittle tubing
When tubing has become rigid or brittle, technicians often weigh cutting and replacing short sections against attempting to extract stubborn connectors.
Simple repairs such as patching cracks or using compression couplers can restore function for localized damage.
Complete replacement is recommended when multiple splits, extensive hardening, or frequent failures undermine system reliability.
Cutting and replacing short sections vs. attempting removal
Decide whether to cut out and replace a short section of tubing or attempt to remove an old connector by evaluating the tubing’s age, brittleness, and the connector’s condition.
Aged or UV-degraded tubing often cracks or tears under force, so cutting and reinstalling a fresh segment is usually faster, safer, and more reliable than fighting a stuck fitting.
When tubing is flexible and connector intact, careful removal may preserve length.
Repair options for cracked or split tubing
Evaluating repair options for cracked or split drip tubing requires acknowledging that aged, UV-brittle material responds differently to removal attempts than fresh tubing. Techniques include careful heating to soften ends, using lubricant, gentle twisting with pliers, or cutting back to sound material and installing a repair coupling. Minimize stress and test under low pressure.
| Technique | Tool | Risk |
|---|---|---|
| Heating | Heat gun | Moderate |
| Lubricant | Soap/WD-40 | Low |
| Twisting | Pliers | Moderate |
| Cutting & coupling | Knife, coupler | Low |
When to replace tubing entirely
Why replace tubing instead of repairing it? Deteriorated, sun‑brittle tubing often fails repeatedly; repairs become temporary and leak-prone.
When cracking spreads, walls thin, or fittings no longer grip, full replacement guarantees reliable flow and prevents future digging.
Techniques include cutting back to sound material, removing aged sections with heat or gentle twisting, and installing new tubing rated for UV and soil conditions.
How to remove connectors quickly (time-saving techniques)
For large installations, operators can speed work by grouping connectors and removing them in batches rather than addressing each fitting individually.
Employing dedicated quick-release tools or simple jigs reduces hands-on time and minimizes fumbling at the pipe.
Prepping connectors—loosening clamps, labeling lines, and staging replacement parts—further shortens each removal cycle.
Batch removal strategies for large systems
When tackling large irrigation arrays, technicians should adopt batch removal methods that prioritize organized sequencing, appropriate tools, and safety checks to minimize downtime and error rates.
They group connectors by zone, shut zones sequentially, tag removed sections, and log defects.
Teams work in parallel with clear roles, staging replacement parts nearby, verifying pressure relief before disconnection to prevent system damage and contamination.
Using dedicated quick-release tools and jigs
Employing dedicated quick-release tools and jigs streamlines connector removal by providing consistent grip, controlled leverage, and repeatable alignment that reduce time and damage risk.
Purpose-built pliers, rotary extractors, and bench jigs stabilize fittings, limit tubing distortion, and allow single-handed operation.
Standardized tool use speeds tasks, minimizes fumbling, and preserves component integrity, especially on repetitive runs or confined spaces where precision prevents costly repairs.
Prepping connectors in advance for faster work
Staging connectors before starting a job reduces downtime and errors by grouping, labeling, and partially disassembling fittings so each removal becomes a predictable, repeatable step.
Technicians prepare trays with common sizes, tag locations, and pre-cut replacement tubing. Sharp cutters, lubricants, and spare clamps are placed within reach.
This preparation minimizes tool searches, speeds turnover between fittings, and lowers risk of accidental damage.
Reconnecting or sealing after removal
After removal, attention turns to selecting the correct replacement connector by matching pipe size and material.
Proper insertion depth and securely tightened fittings guarantee leak-free reconnection.
Unused lines should be sealed with goof plugs or end caps rated for the system pressure.
Choosing the right replacement connector
When replacing a drip line connector, the homeowner must match the connector type and size to the existing tubing and gardening needs to guarantee a watertight, durable repair.
Select material resistant to UV and chemicals, choose barbed, compression, or threaded styles compatible with flow requirements, and prefer rated replacements.
Inspect seals and consider clamp or O‑ring options for longevity without overfitting or unnecessary complexity.
Proper insertion depth and secure fittings
Insert the replacement connector fully until the tubing shoulder or depth mark meets the fitting to guarantee a reliable seal; inadequate insertion leaves gaps prone to leaks, while over-insertion can stress the tubing or displace internal O‑rings.
After seating, secure the connection with the specified clamp or barb retainer, trim uneven tubing ends, and test at working pressure for leaks before burying or finalizing the line.
Using goof plugs and end caps to seal unused lines
Seal unused drip lines with purpose-built goof plugs or end caps to prevent water loss, debris entry, and insect nesting after a connector has been removed.
Select fittings matching tube diameter and material, press or clamp securely, and test under low pressure.
For temporary closures use push-in plugs; for long-term use prefer threaded or crimp-style caps.
Inspect periodically for leaks and degradation.
Common mistakes and how to avoid them
Common errors when removing drip line connectors include pulling instead of twisting, reusing damaged connectors or tubing, and failing to relieve line pressure beforehand.
Each mistake can cause leaks, breaks, or unsafe spray when the system is depressurized. The following section explains how to recognize these issues and prevent them.
Pulling instead of twisting
Grasping connectors and yanking them off is a frequent mistake that can damage drip tubing, fittings, and emitters. Pulling vertically stresses joints, tears soft tubing, and loosens barbed fittings.
Instead, stabilize the tubing, grip the connector close to the joint, and apply a firm twisting motion while pulling gently. Use pliers with padded jaws for stubborn connections to prevent slipping and crushing.
Reusing damaged connectors or tubing
Reusing cracked connectors or split tubing often leads to leaks, reduced water pressure, and premature system failure.
Insisting on worn parts compromises seal integrity and spreads damage along lines. Replace brittle, distorted, or hardened pieces rather than forcing them back in place.
Stock common connector sizes and keep short tubing splices on hand to guarantee reliable, quick repairs and minimize downtime.
Failing to relieve line pressure
After replacing brittle connectors, technicians must remember to relieve line pressure before disconnecting fittings; neglecting this step can cause sudden sprays, hose blowouts, and damaged components.
Professionals should shut valves, release downstream pressure, and open drain ports. Using pressure gauges verifies safe levels. Skipping these controls risks personal injury and costly repairs.
Routine pressure checks prevent surprises and extend system lifespan.
Troubleshooting problems after removal
After reconnecting components, the homeowner should inspect joints for leaks and tighten or reseal fittings as needed.
If water flow is reduced or emitters appear clogged, flushing the line and checking filters and emitter openings can restore performance.
Finally, verifying alignment and system pressure guarantees even distribution and prevents stress on fittings.
Leaks at reconnected joints
Inspecting reconnected joints for leaks is a critical step in troubleshooting drip line systems; even small misalignments, damaged O‑rings, or debris trapped in fittings can cause noticeable seepage.
The technician should dry joints, pressurize briefly, and observe. Tighten fittings incrementally, replace compromised O‑rings or seals, clean mating surfaces, and retest.
Persistent leaks may require swapping the connector or rerouting the line.
Reduced flow or clogged emitters after reassembly
Check for reduced flow or clogged emitters immediately following reassembly, as debris, misaligned fittings, or trapped air often restrict output and mimic emitter failure.
Inspect emitters and inline filters, flush lines to expel particulates and air, and remove any visible blockages.
Replace damaged emitters or clean with a soft brush.
Verify flow restoration before finalizing the repair.
Addressing alignment and pressure issues
Address alignment and pressure issues by confirming that connectors, drip lines, and emitters are seated straight and secured to prevent kinks or gaps that alter flow patterns.
Inspect for bends, loose fittings, or misaligned stakes. Check system pressure with a gauge and adjust regulator or valve settings.
Replace damaged sections and use proper clamps or barbed fittings to restore uniform pressure and consistent emitter output.
Maintenance tips to make future removal easier
Routine inspections and gentle disconnects help prevent stuck fittings and reduce wear on drip line connectors.
Where suitable, using removable or quick-release connectors simplifies future removal and replacement.
Clear labeling and a simple map of the irrigation layout speed troubleshooting and guarantee connectors are removed in the correct sequence.
Regular inspections and gentle disconnects
When performed at consistent intervals, short inspections and careful disconnects prevent buildup and make future removal faster and less damaging.
Technicians check joints for debris, mineral deposits, and wear, loosening fittings slightly before full removal. Gentle wiggling and steady pressure avoid cracks.
Recording problem spots and replacing compromised tubing minimizes future effort. Consistent routine reduces time, risk, and repair needs.
Using removable connectors where appropriate
Select removable connectors that match tubing size and system pressure to simplify future disassembly.
Use quick-release or barbed compression fittings in high-access areas to permit tool-free removal and reduce stress on tubing.
Prefer UV-resistant, corrosion-proof materials for longevity.
Reserve permanent fittings for buried or hidden runs.
Store spare connectors and a compact tool kit nearby to expedite repairs and replacements.
Labeling and mapping the irrigation layout
After installing removable connectors, documenting the irrigation layout saves time and prevents mistakes during future disassembly. A clear map and labels reduce guesswork and protect components during seasonal work.
Recommendations include:
- Number zones and lines on a schematic.
- Label connectors with durable tags.
- Note flow direction and valve IDs.
- Record connector types and installation dates.
When to call a professional
Signs of cracked or collapsed tubing, widespread leaks, or damaged emitters suggest the system may require professional assessment.
A qualified technician can diagnose hidden problems and prevent costly mistakes during repair.
Homeowners should weigh the service cost against the potential for worsening damage or repeated DIY attempts.
Indicators of complex system damage
Several clear indicators suggest a drip irrigation system requires professional attention rather than DIY repairs.
Persistent pressure loss, widespread emitter failure, buried mainline breaks, or recurring leaks after repeated fixes indicate systemic issues.
Visible root intrusion, extensive tubing collapse, or malfunctioning electronic controllers also warrant expert diagnostics.
Professionals can detect hidden faults, prevent further damage, and guarantee long‑term system reliability.
Cost vs. DIY considerations
When weighing whether to tackle drip line connector issues personally or hire a professional, the decision hinges on the scale of the problem, the homeowner’s skill level, and the cost-benefit tradeoffs.
Small leaks, a few failed connectors, or simple replacements often justify DIY fixes, while widespread failures, inaccessible lines, or tasks requiring specialty tools and permits typically make professional service more cost-effective and reliable.
Assess time, tool costs, warranty loss, and potential water damage before proceeding.
Quick checklist for safe, fast connector removal
Begin by preparing a clear workspace and gathering safety gear — gloves, eye protection, and a clean container for small parts — to guarantee any connector removal proceeds smoothly and without contamination.
- Shut off water and relieve line pressure.
- Inspect connector type and surrounding tubing.
- Use correct tool, apply steady, controlled force.
- Store removed parts labeled and check seals for reuse.
Conclusion
Removing drip line connectors carefully preserves system integrity and saves time. Studies show proper technique prevents about 70% of common leaks caused by rough removal, highlighting the value of care. After following safety steps, identifying connector type, and using the right tools, most homeowners can finish quickly without damage. Regular maintenance and gentle handling reduce future problems; call a professional for stubborn or brittle fittings to avoid costly repairs.