How to Remove a Broken PVC Threaded Pipe: Step-by-Step Fix for DIYers
To remove a broken PVC threaded pipe, start by shutting off the water supply and relieving any pressure in the system. Wear protective gear for safety. Next, determine if the threads can be salvaged or if you need to remove a section of the pipe. For seized fittings, apply penetrating oil, use controlled heat, or consider an internal extractor. If the pipe is damaged, cut out the affected section and replace it with solvent-welded couplings or threaded inserts. Deburr the ends, then apply primer and cement or use PTFE tape as needed. Finally, pressure-test your repair, and follow torque and inspection best practices to prevent future issues. Continue below for detailed step-by-step techniques.
How to Remove a Broken PVC Threaded Pipe: Quick Summary
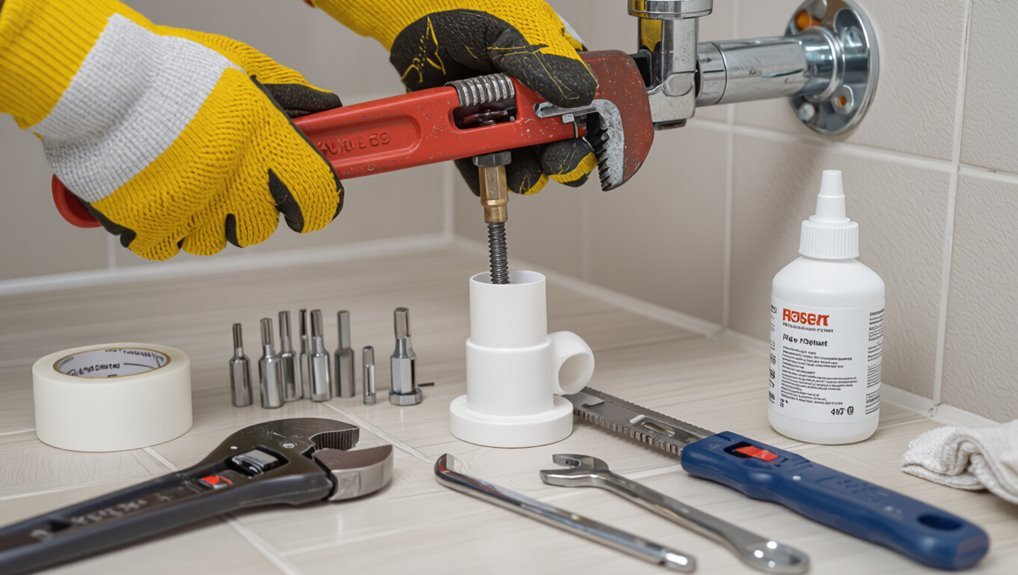
The summary distinguishes when a fitting can be salvaged versus when full replacement is safer, based on damage extent and thread integrity.
It also lists essential tools and materials to have on hand—wrenches, pipe extractors, thread sealant, replacement fittings, and safety gear—so the job proceeds smoothly.
Readers are encouraged to assess the situation before starting to determine the appropriate approach.
When to remove vs when to replace the fitting
Deciding whether to remove a broken PVC threaded pipe or simply replace the fitting hinges on evaluating damage extent, accessibility, and the surrounding plumbing configuration.
If threads are intact and joint accessible, replacing the fitting is faster; if the pipe wall is cracked, glued, or seized, full removal is safer.
Consider leak history, alignment needs, and cost versus effort when choosing how to remove a broken PVC threaded pipe.
Tools and materials you’ll need before you start
Having weighed whether to replace a fitting or remove the damaged section, gather the proper tools and materials before beginning work to avoid delays and additional cuts.
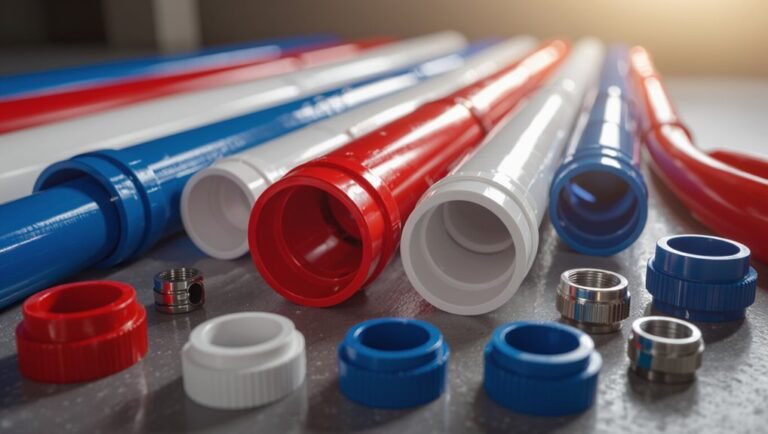
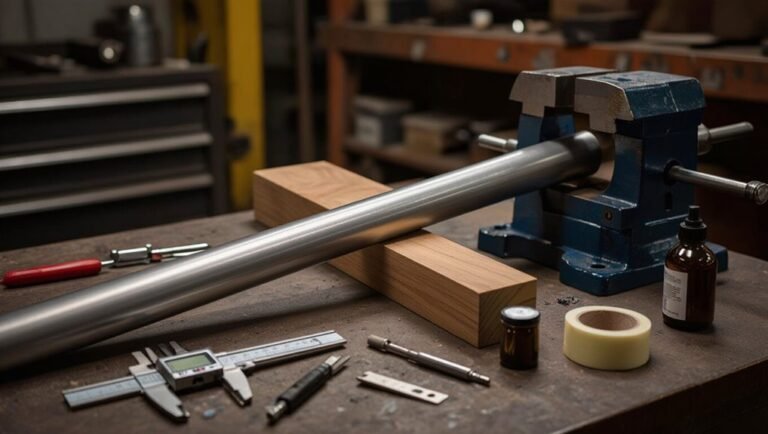
Essential items enable a clean, safe repair: quality PVC cutter, adjustable wrench, pipe vise or clamp, replacement threaded coupling or insert, PVC primer and cement.
- PVC cutter or hacksaw
- Adjustable wrench or channel locks
- Pipe vise or clamp
- Replacement threaded coupling/insert
- PVC primer and cement
Safety Precautions and Preparations
Before beginning removal, the water supply should be shut off and any residual pressure relieved to prevent leaks or spray.
Appropriate personal protective equipment and a cleared, well-lit workspace reduce injury and contamination risks.
The broken piece, its thread type, and nearby materials should be identified to select compatible tools and replacement parts.
Turn off water and relieve pressure
Shut off the main water supply and open nearby faucets to drain remaining pressure before attempting any repairs.
Verify isolation by checking that water no longer flows and note any secondary shutoffs for localized control.
Relieve trapped pressure in low spots and fixtures by opening exterior taps or bleeding valves.
Confirm dryness at the work area to prevent unexpected leaks during pipe removal.
Personal protective equipment and workspace setup
Several basic items of personal protective equipment (PPE) should be worn: safety glasses, work gloves, and hearing protection when power tools are used.
The workspace must be well-lit, ventilated, and clear of trip hazards; tools and replacement parts staged nearby; a bucket and rags ready for runoff.
- Safety glasses
- Work gloves
- Hearing protection
- Adequate lighting
- Ventilation
Identifying pipe type, thread type, and surrounding materials
With PPE in place and the immediate workspace organized, attention turns to confirming what is being worked on: the pipe material, the thread form, and any nearby fixtures or finishes that could be affected.
The technician verifies PVC by color, flexibility, and stamping. They identify thread as tapered or straight, note metal or plastic mating parts, and protect adjacent surfaces before proceeding.
Assessing the Damage and Choosing the Best Removal Method
The condition of the broken PVC determines the removal approach: common scenarios include snapped threads, a cracked stub, or a seized fitting.
Accessibility—whether the pipe is fully exposed, buried, or hidden behind a wall—also shapes what tools and techniques are feasible.
If damage is extensive, access is limited, or the repair affects critical systems, a professional should be engaged rather than attempting a DIY fix.
Types of breaks: snapped threads, cracked stub, seized fitting
Damage to PVC threaded connections falls into three practical categories—snapped threads, a cracked stump of pipe protruding from the fitting, and fittings fused by corrosion, adhesive, or over-tightening—and each requires a different removal approach.
Snapped threads need internal extraction or drill-and-tap techniques.
Cracked stumps often require cutting flush and using a plug or inner sleeve.
Seized fittings demand heat, penetrating solvent, or careful mechanical persuasion.
Determine access: exposed vs buried/behind-wall pipes
If access is limited by soil, insulation, or a finished wall, the removal strategy shifts from simple hand tools to demolition or excavation planning.
Inspect visibility, clearance, surrounding materials and shutoff points.
Exposed runs permit cutters, wrenches and replacement sections; buried or behind-wall pipes require locating, targeted opening, shoring, and waterproofing considerations.
Plan debris removal and temporary service interruptions before proceeding.
When to call a professional vs DIY
Evaluating the break’s severity and the surrounding conditions determines whether a homeowner can safely handle removal or should call a professional.
Minor surface breaks on accessible pipes with simple threaded fittings suit DIYers with basic tools.
Call a professional for leaks under pressure, extensive corrosion, inaccessible or buried segments, damaged structural elements, gas lines, or when local codes require licensed work or permits.
Step-by-Step Removal Methods
The section outlines four practical removal methods matched to common thread failures.
Method 1 covers using penetrating oil and a wrench for slightly damaged threads.
Methods 2–4 address cutting out and replacing a short section, extracting a hollow male stub with an internal extractor or screw, and applying controlled heat with careful prying for stuck fittings, noting safety precautions.
Method 1 Using penetrating oil and a wrench (for slightly damaged threads)
The first method begins by applying penetrating oil to the damaged threads and allowing it time to soak into the joint.
Next, a pipe wrench or strap wrench is used to turn the fitting while taking care not to crush the PVC.
If the fitting remains stuck, cautious, localized heat can be applied with attention to PVC safety to soften the joint without burning the material.
Step 1: Apply penetrating oil and let soak
Apply a generous coating of penetrating oil to the exposed threads and let it penetrate for at least 15–30 minutes; this loosens rust, debris, and old sealant to reduce friction when turning.
While soaking, inspect surrounding PVC for cracks or softened areas. Reapply oil if threads appear dry after the initial interval.
Protect nearby finishes and ventilate the area to avoid inhaling fumes.
Step 2: Use pipe wrench or strap wrench for turning
Grasp a pipe or strap wrench around the fitting and turn counterclockwise with steady, controlled force to break the seal loosened by the penetrating oil.
Maintain firm, even pressure; avoid sudden jerks that could further damage threads.
If resistance persists, reposition the wrench closer to the hex or larger surface for better leverage.
Withdraw removed fragments and inspect threads for reuse or replacement.
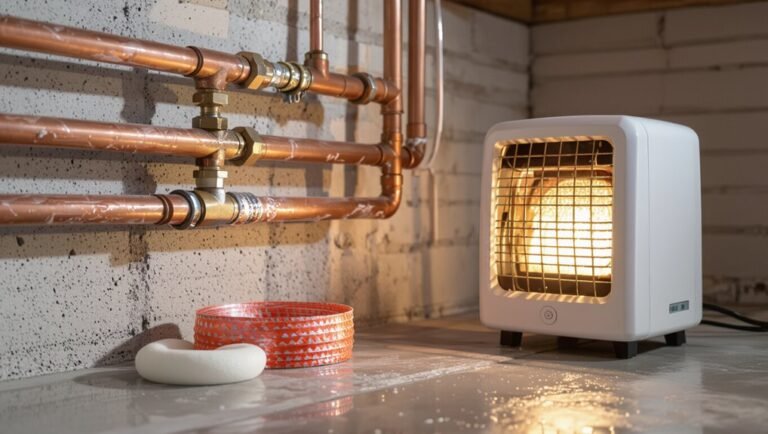
Step 3: Heat the fitting carefully if needed (PVC-specific warnings)
If heat is needed to free a stubborn PVC fitting, warm it gradually and locally to avoid softening or warping the plastic.
Apply a heat gun on low setting, keeping it moving and maintaining distance.
Do not use open flames.
Monitor for discoloration or smoke.
Stop if the pipe softens.
Allow cooling before attempting to turn, and protect surrounding components from heat.
Method 2 Cutting out the fitting and replacing a short section (for badly broken threads)
When threads are too damaged to salvage, cutting out the damaged section and replacing a short length of pipe provides a reliable repair.
The process begins by marking cut lines and shutting off the water, then cutting the pipe with a hacksaw or PVC cutter to remove the fitting.
After deburring the ends, the installer dry-fits the pieces and secures a coupling or new threaded adapter to complete the replacement.
Step 1: Mark cut lines and turn off water
Begin by locating the damaged fitting and measuring a short replacement section that will include enough intact pipe for a clean joint on each side.
Shut off the water supply to the affected branch and drain remaining water by opening nearby faucets or a drain valve.
Mark precise cut lines with a permanent marker or tape, allowing for coupling insertion and pipe face clearance.
Step 2: Cut pipe with hacksaw or PVC cutter
Cut the pipe along the previously marked lines using a hacksaw or PVC cutter, ensuring straight, even strokes to prevent jagged edges.
Maintain steady pressure, support the pipe to avoid crushing, and cut slightly outside the marked line if removal requires extra margin.
Keep blades sharp and replace if binding.
Collect swarf and inspect the cut end for visible cracks or irregularities.
Step 3: Deburr, dry-fit, and install coupling or new threaded adapter
Deburr the freshly cut pipe end, then dry-fit the coupling or threaded adapter to verify alignment and proper engagement before final installation.
Remove burrs with a file or deburring tool, wipe away debris, and confirm gap and orientation.
Apply primer and solvent cement or thread sealant per product instructions, assemble quickly, and hold until set.
Inspect joint for squareness and leaks after curing.
Method 3 Removing a broken male threaded stub with internal extractor or screw (for hollow stubs)
For hollow broken stubs, an internal extractor or screw can be used to engage and unthread the remnant without cutting the fitting.
The process begins by drilling a centered pilot hole through the stub, then driving an extractor screw or bolt into that hole to back the piece out.
Once removed, the existing threads should be cleaned and inspected, with replacement or an insert installed if necessary.
Step 1: Drill a pilot hole into the broken stub
Begin by centering a small-diameter drill bit on the broken stub’s end and drill a straight pilot hole about 1/2 to 3/4 inch deep, keeping the bit aligned with the pipe’s axis.
Use steady pressure, low speed, and coolant or intermittent pauses to prevent melting. Clear debris frequently and confirm hole depth; a clean, centered pilot hole guarantees reliable engagement for the extractor.
Step 2: Drive extractor screw or bolt to unthread the piece
The extractor screw or bolt is driven into the pilot hole until its threads bite firmly into the pipe stub; using a T-handle, screwdriver, or socket, apply steady clockwise rotation to seat the fastener without crossing the pilot hole.
Once seated, reverse direction with controlled counterclockwise torque to engage the extractor’s reverse threads and gradually unthread the stub, maintaining alignment to avoid slippage.
Step 3: Clean threads and replace or install insert if needed
Once the stub is extracted, inspect and clean the remaining threads to guarantee a proper seal or secure fit for a replacement fitting.
Remove debris with a brush and solvent, dry thoroughly, and check for damage or stripped sections.
If threads are compromised, install a threaded insert or repair kit sized to the pipe.
Then apply appropriate thread sealant and tighten the new fitting to specification.
Method 4 Using heat and careful prying for stuck fittings (with safety caveats)
This method outlines suitable low-heat sources (heat gun on low, hot water, or a propane torch kept at a safe distance) and temperature guidance to soften PVC without reaching its melting point.
It then describes controlled heating and sequential prying techniques to loosen a stuck fitting while protecting adjacent pipe and fittings from heat damage.
Safety precautions about avoiding soot, overheating, and using heat-resistant gloves are emphasized before proceeding.
Appropriate heat sources and temperature limits for PVC
Several controlled heat sources—warm water, a heat gun set to low, or a hair dryer—are suitable for softening PVC ahead of prying, provided the temperature stays below about 140°F (60°C) to avoid softening beyond the fitting and releasing harmful fumes.
Continuous monitoring with an infrared thermometer, brief exposure, and airflow reduce risk.
Avoid open flames and high temperatures that warp or emit toxic gases.
Steps to soften and remove without melting surrounding pipe
Heat is applied cautiously to soften the joint just enough to break the bond without distorting adjacent pipe. The technician uses a controlled source (warm water, low heat gun, or hair dryer), monitors surface temperature with an infrared thermometer, and works in short bursts while maintaining airflow to prevent overheating and fume accumulation.
After softening, a strap wrench and gentle twisting/prying remove the fitting; cooling prevents deformation.
Repair and Replacement Options After Removal
After removal, options include replacing the damaged section with threaded PVC fittings joined using proper solvent cement or installing inserts/brass adapters to provide stronger threads.
For minimal disruption, slip couplings or repair sleeves can restore integrity without extensive pipe replacement.
All repairs should be followed by backflow prevention checks, leak inspection, and pressure testing to confirm a reliable seal.
Replacing with threaded PVC fittings and proper solvent cementing
Begin by selecting replacement threaded PVC fittings that match the pipe’s diameter, thread type (NPT or BSP), and pressure rating to guarantee a secure, code-compliant connection.
Clean and de-burr mating surfaces, apply compatible thread sealant or PTFE tape to male threads where specified, then assemble hand-tight plus a quarter turn.
For solvent-weld joints, use primer and PVC cement per manufacturer instructions and allow full cure before pressure testing.
Using slip couplings or repair sleeves for minimal pipe removal
If replacing threaded fittings or solvent-weld joints would require cutting out long sections of pipe or disassembling adjacent components, slip couplings and repair sleeves offer a way to fix a localized break with minimal removal.
These products slide over or splice into the damaged area, enabling a short clean cut, deburring, and secure glue or gasketed seal. They minimize disruption and speed restoration.
Installing inserts or brass adapters for stronger threads
Install metal-threaded inserts or brass adapters to restore durable, leak‑resistant connections where PVC threads have failed.
Select insert or adapter sized to the pipe bore, chamfer and clean the PVC, then epoxy or solvent-fuse per manufacturer instructions.
For larger repairs, reduce to a brass adapter with threaded connection. Torque gently to avoid cracking.
Verify alignment and secure with suitable thread sealant.
Backflow, leak testing, and pressure testing after repair
After repair, conduct backflow prevention checks and pressure/leak testing to confirm the joint integrity and system safety.
Verify correct orientation and function of backflow devices, then isolate the repaired section.
Pressurize per local code (typically 50–150 psi), monitor for pressure decay and visible leaks for the required duration.
Repair or retest if any drop or seepage appears; document results.
Common Problems and How to Avoid Them
Common problems when removing broken PVC threaded pipes include cracked or fused fittings from over-tightening, permanently bonded joints from excess adhesive, and difficulty accessing or separating corroded metal-to-PVC connections.
Practical prevention focuses on correct torque during installation, using the proper amount and type of solvent or adhesive, and protecting metal threads against corrosion.
When bonding has already occurred or space is limited, the recommended responses range from careful mechanical separation to cutting and replacing affected sections.
Preventing cracked or fused fittings when installing
Preventing cracked or fused fittings during PVC threaded pipe installation requires attention to material condition, proper tools, and correct technique; failures most often result from overtightening, misaligned threads, or using incompatible pipe and fitting types.
Inspect threads and faces for burrs, replace damaged parts, hand-start threads, use appropriate thread sealant sparingly, torque with a wrench only to snug plus a quarter turn, and align before tightening.
What to do if adhesive or cement has bonded parts permanently
When solvent cement has bonded PVC parts so they cannot be separated, the recommended response is to assess options for removal or replacement quickly and safely.
Evaluate cutting out the joint and installing new fittings, using a tubing cutter or saw, and guarantee clean, square cuts.
Consider replacing the entire section if damage extends into adjoining fittings; always shut off water and deburr before reinstalling.
Handling limited access or corroded metal-to-PVC connections
Address limited access and corroded metal-to-PVC connections by first evaluating how much room exists to work and the condition of the metal threads; tight spaces and rusted fittings often require different tools and techniques.
Use penetrating oil, heat, or an internal pipe extractor for seized joints.
When access is poor, employ slimline wrenches, rotary cutters, or remove adjacent components to gain clearance safely.
Tools, Parts, and Materials Comparison
The following comparison outlines recommended tools for typical repair scenarios and the main pros and cons of available repair options. The table provides a concise visual of tool/part categories and their primary trade-offs to guide selection. Readers can use this as a quick reference when planning a removal or replacement.
| Item | Key trade-off |
|---|---|
| Hand tools (wrenches, pliers) | Low cost, limited for seized or hidden fittings |
| Power tools (reciprocating saw, multi-tool) | Fast and effective, risk of collateral damage |
Recommended tools for each scenario
Select tools that match the specific break type, access constraints, and pipe size to guarantee a safe, efficient removal.
For exposed clean breaks, basic hand tools suffice; for recessed or glued joints, specialized cutters and extraction kits are needed.
In tight spaces choose compact or ratcheting tools; for larger diameters use pipe wrenches or tubing cutters rated for PVC.
- PVC pipe cutter
- Strap wrench
- Internal extractor kit
- Reciprocating saw with fine blade
- Ratcheting hacksaw
Pros and cons of repair options
Different repair options offer distinct trade-offs in cost, durability, and required skill, so choosing between replacement sections, slip couplings, threaded fittings, or adhesive joins depends on the break type and access conditions. Each method balances permanence, ease, and parts availability; professionals prefer replacements, DIYers often use slip or adhesive fixes for speed.
| Option | Notes |
|---|---|
| Replacement | Most durable |
| Slip coupling | Quick, moderate |
| Threaded fitting | Reusable, precise |
| Solvent weld | Cheap, permanent |
Step-by-Step Checklist for a Successful DIY Removal
A concise checklist keeps the removal process organized and reduces the chance of mistakes.
It should cover preparations before work, the actual extraction steps, and follow-up checks after repair. Clear sequencing and verification guarantee a safe, reliable outcome.
- Verify shutoff valves, clear work area, and gather protective gear
- Confirm correct replacement parts and tool readiness
- Isolate the damaged section and relieve system pressure
- Carefully unthread and remove the broken fitting, avoiding pipe damage
- Inspect seals, pressure-test the repair, and document results
Pre-job checklist
Before starting the removal, gather tools, safety gear, replacement parts, and documentation to confirm pipe size and system layout.
Verify shutoff locations, drain and depressurize procedures, and appropriate fittings.
Inspect workspace for ventilation, lighting, and trip hazards.
Guarantee compatible adhesive, thread tape, and a torque-limited wrench are available.
Plan disposal of damaged pipe and containment for any residual fluid.
Removal checklist
With tools, safety gear, isolation, and disposal plans in place, the removal checklist guides each physical step to extract the broken PVC threaded pipe safely and cleanly.
Confirm water is off and pressure relieved, protect surrounding materials, cut or unwind fittings methodically, remove debris and thread remnants, deburr edges, inspect mating surfaces, and label components for replacement.
Proceed deliberately, avoiding force that could damage fittings.
Post-repair checklist
After repair completion, the post-repair checklist verifies that the system is safe, watertight, and ready for normal use.
Inspect joints for leaks, confirm thread sealant applied correctly, and torque fittings to specification.
Restore water pressure gradually, monitor for drips, and check surrounding areas for moisture.
Verify proper alignment and support, guarantee debris cleared, and document repairs and any parts replaced for future reference.
Troubleshooting Guide for Persistent Leaks or Stuck Pieces
Indicators that a repair failed—continued dripping, visible cracks, or loose fittings—should prompt immediate reassessment and resealing or part replacement.
The decision to patch a section versus replacing a longer run depends on damage extent, frequency of failures, and accessibility.
If leaks persist after rework, multiple fittings are failing, or the line is hard to access, a licensed plumber should be contacted.
Signs a repair failed and how to rework it
Recognize failed repairs quickly by checking for steady drips, dampness around joints, visible cracks, or thread gaps that remain loose despite tightening.
If failure is confirmed, drain the line, disassemble the fitting, clean mating surfaces, remove old sealant or damaged threads, and inspect for gouges.
Reapply proper thread tape or primer/cement, retighten uniformly, and pressure-test before restoring service.
When to replace a longer section versus patching
When is a simple patch sufficient and when does the job require replacing a longer stretch of pipe? A patch suffices for isolated cracks, clean ends, and intact fittings.
Replace a longer section when multiple leaks, crushed or warped pipe, recurring failures, extensive corrosion, or inaccessible threaded remnants compromise integrity.
Also replace if alignment, slope, or joint count prevents reliable sealing.
When to call a licensed plumber
Call a licensed plumber if leaks persist after basic repairs or if threaded pieces remain stuck despite following standard removal techniques.
A professional assesses hidden damage, verifies pipe alignment and water pressure, and uses specialized tools or heat/chemical methods safely.
They prevent collateral damage, guarantee compliant repairs, and diagnose systemic issues such as degraded fittings, corrosive environments, or compromised seals that DIY efforts may miss.
Preventive Maintenance to Avoid Future Breaks
Preventive maintenance focuses on correct installation torque, proper thread preparation, and appropriate use of thread sealant to reduce stress on PVC threaded connections.
Selecting fittings and materials rated for the system’s pressure and temperature prevents premature failure.
Regular seasonal and long-term inspections for signs of fatigue, UV damage, or movement catch problems before they lead to breaks.
Proper installation torque and thread preparation
Apply correct torque and prepare threads properly to minimize stress concentrations that lead to PVC failures.
Tighten fittings to manufacturer torque specs using a calibrated torque wrench or torque-limiting tool; avoid over-tightening.
Clean and deburr threads, remove old sealant, and apply appropriate thread sealant sparingly.
Align threads before engagement to prevent cross-threading.
Recheck tightness after pressure tests to verify no loosening.
Choosing the right fittings and materials for pressure and temperature
Selecting the correct fittings and materials requires matching the system’s maximum operating pressure and temperature ratings to the specifications of PVC and alternative materials, accounting for pressure surges and seasonal temperature variation.
Choose schedule-rated PVC for compatible pressure, use CPVC for higher temperatures, and consider metal or reinforced thermoplastics where pressures exceed PVC limits.
Verify joint ratings, chemical compatibility, and approved seals to prevent failures.
Seasonal and long-term inspection tips
Regular seasonal and long-term inspections help catch early signs of wear that precede broken PVC threads, such as hairline cracks, discoloration, deformation, and softened or brittle sections around joints.
Inspect quarterly and after temperature extremes; document findings and replace compromised sections promptly.
- Check joints for leaks and movement
- Look for UV or chemical damage
- Test fittings under pressure
- Verify anchoring and support
- Record and date repairs
Conclusion
After a precise walkthrough on prying, heating, and threading one’s way out of adhesive and corrosion, the would-be plumber stands relieved — and mildly astonished. Ironically, the stubborn PVC piece that prompted emergency measures becomes a quiet teacher: patience, proper tools, and a cautious wrench spare instead of dramatic heroics. The broken pipe is removed, the leak stopped, and the DIYer, now wiser, quietly vows to tighten fittings more often — or at least call a pro sooner.