
How to Install a Slip Coupling: Step-by-Step Guide for Plumbing Repairs
Installing a slip coupling is a straightforward process for quickly joining or repairing pipe sections. Follow these steps for a successful installation:
1. Select the Right Material and Size: Ensure you have the appropriate slip coupling for your pipe type (plastic or metal).
2. Cut the Pipe: Use a pipe cutter to make square cuts on both ends of the pipe.
3. Deburr the Ends: Smooth any rough edges to prevent damage to the coupling.
4. Clean the Contact Surfaces: Remove any dirt or debris from the pipe ends.
5. Test-Fit the Coupling: Slide the coupling onto the pipe to check for a proper fit.
6. Apply Adhesives:
- For plastic pipes, apply primer and solvent cement.
- For metal pipes, clean the seats and use gaskets, clamps, or solder as needed.
7. Secure the Joint: Tighten everything according to the specified torque settings.
8. Pressure-Test the Connection: Ensure there are no leaks before finalizing the installation.
For troubleshooting, tools, and cost guidance, refer to detailed sections in the complete guide.
What a Slip Coupling Is and When to Use One
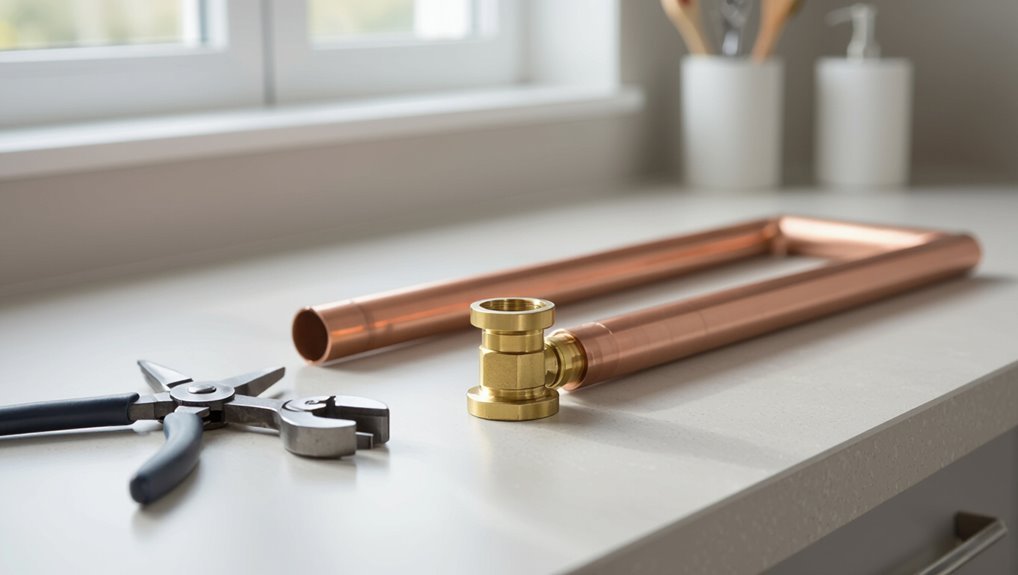
A slip coupling is a short, smooth-bodied connector with internal seals or a compression ring that allows one pipe to slide into the fitting for a secure, leak-resistant joint.
It is commonly used to repair short sections of damaged pipe, join pipes of slightly different alignment, or replace a fitting without rerouting plumbing.
Compared with threaded or rigid couplings, a slip coupling offers faster installation, easier alignment, and a more forgiving seal for tight spaces.
Definition and basic components of a slip coupling
Slip couplings are short, tubular fittings that join two aligned pipes while allowing one to slide partially into the other for easier installation or minor length adjustment.
A slip coupling typically includes a cylindrical body, internal sealing elements (O-rings or gaskets), compression or set screws, and flange ends.
Understanding these components clarifies how to install a slip coupling correctly and guarantee leak-free connections.
Common plumbing scenarios requiring a slip coupling
When pipes must be joined quickly, adjusted for slight misalignment, or sections replaced without disturbing surrounding work, a slip coupling provides a compact, reliable solution.
Typical uses include repairing pinhole leaks, connecting cut pipe after fixture replacement, bridging short gaps from corroded sections, and enabling temporary service while awaiting permanent parts.
It suits tight spaces and modest axial movement without extensive teardown.
Advantages over other repair fittings
Because it combines ease of installation with compact adaptability, the slip coupling often outperforms alternatives for quick repairs and modest alignment issues.
It minimizes pipe preparation, fits confined spaces, and tolerates slight misalignment. Compared with larger repair fittings or full replacement, it saves time, materials, and disruption.
Its reliability depends on correct sizing, clean mating surfaces, and proper sealing technique.
Materials, Types, and Sizes of Slip Couplings
The section reviews common slip coupling materials—PVC, CPVC, copper, stainless steel and rubber repair couplings—and outlines which are suited to different fluids, temperatures, and pressures.
It then compares coupling types such as plain-end, threaded, no-hub, shielded, and compression models, and explains how to measure pipe OD/ID and select the correct coupling size.
A compatibility chart for common pipe pairings is provided to help match materials and avoid galvanic or sealing issues.
Materials explained: PVC, CPVC, copper, stainless steel, rubber repair couplings
Materials for slip couplings vary by application and pressure rating, with common options including PVC and CPVC for nonmetallic, corrosion-resistant service; copper for soldered water lines; stainless steel for high-corrosion or industrial environments; and rubber repair couplings with stainless clamps for flexible, temporary, or emergency repairs.
Selection depends on media compatibility, temperature limits, pressure rating, joint method, and code compliance.
Types: plain-end, threaded, no-hub, shielded, compression slip couplings
A range of slip coupling types addresses different pipe systems and installation needs:
plain-end couplings provide basic, smooth-join connections;
threaded couplings mate with male threads for removable joints;
no-hub couplings join cast-iron hubs using clamps;
shielded couplings include protective sleeves for repairs under stress;
compression slip couplings use compression rings and nuts for tool-assisted, leak-resistant seals without soldering or solvent welding.
How to measure pipe size and choose the correct coupling
How can the correct slip coupling be selected without precise measurements and material awareness?
Measure pipe outside diameter or nominal size, verify wall thickness and material (copper, PVC, steel) to determine type.
Select coupling rated for pressure and temperature, matching pipe size or using reducing couplings where needed.
Confirm gasket and clamp compatibility, then choose appropriate length and end style for a secure, code-compliant joint.
Compatibility chart for common pipe materials
Selecting the right slip coupling depends on matching coupling type and size to the pipe material and application. The chart below summarizes common compatibilities and typical size ranges; always confirm manufacturer specifications and pressure ratings before installation.
| Pipe Material | Compatible Coupling Types |
|---|---|
| PVC | PVC solvent, rubber gasket |
| CPVC | CPVC, rubber gasket |
| Copper | Compression, rubber gasket |
| PEX | Crimp, expansion, gasket |
Tools and Supplies You’ll Need
The section lists essential tools required for a proper slip coupling installation, such as pipe cutters, wrenches, and measuring devices.
It then notes optional tools that can speed the job, like power cutters, deburring tools, and a torque wrench.
Finally, it identifies necessary safety equipment, including gloves, eye protection, and a respirator when working with solvents or confined spaces.
Essential tools list
A concise kit of hand and measurement tools, appropriate safety gear, and the chosen slip coupling itself is required before beginning the installation.
The installer should verify pipe compatibility and gather reliable tools to guarantee a secure, leak-free joint.
- Tape measure
- Pipe cutter or hacksaw
- Deburring tool or file
- Adjustable wrench or pliers
- Safety glasses and gloves
Optional tools that speed up the job
Using a few optional tools can greatly reduce time and effort when installing a slip coupling, especially on multiple joints or in tight spaces.
The technician may choose specialized aids to speed alignment, cutting, and cleanup without replacing essential hand tools.
- Rotary pipe cutter for faster, cleaner cuts
- Quick-clamp for holding pipes steady
- Battery-powered reciprocating saw
- Deburring tool with brush
- Small inspection camera for tight spots
Safety equipment to use during installation
After selecting optional aids like a rotary cutter or quick-clamp to speed alignment and cutting, attention must shift to protective gear that keeps the installer safe during the work.
Essential items minimize injury and contamination.
- Safety glasses to block debris
- Nitrile gloves for chemical and grip protection
- Ear protection for noisy tools
- Knee pads for prolonged crouching
- Dust mask for soldering or cutting fumes
Preparing the Pipe for Installation
Before beginning, the water supply is shut off and the system is drained to prevent leaks and pressure.
Pipe ends are then cleaned and inspected for cracks or corrosion, cut square, and deburred to guarantee a proper fit.
Finally, surfaces are prepared according to material—brass, copper, PVC, or PEX—so the coupling seals and joins correctly.
Shutting off water and draining the system
Shut off the main supply valve to isolate the section of pipe where the slip coupling will be installed, then open nearby faucets and a high drain point to relieve pressure and remove standing water.
Confirm isolation by checking that faucets remain dry.
Drain low points and trapped pockets, using a bucket or wet vacuum for residual water.
Verify ambient pressure is zero before beginning work.
Cleaning and inspecting pipe ends for damage
Clean and dry the exposed pipe ends so the coupling can seat properly and form a reliable seal.
The technician removes corrosion, old solder, adhesive, and buildup with a wire brush or cloth, then inspects for pitting, cracks, gouges, or ovality.
Surfaces must be smooth and true; any significant damage or deformation warrants repair or replacement before coupling installation to guarantee leak-free joints.
Cutting and deburring pipes properly
Score each pipe end and mark the cut line to guarantee a square, accurate cut; using a pipe cutter or saw appropriate to the material will minimize deformation.
Cut steadily, support the pipe, and avoid twisting.
Remove burrs with a deburring tool, file, or fine sandpaper until edges are smooth and free of shards.
Verify diameter and fit before coupling installation.
Surface prep for different pipe materials
Prepare each pipe surface to match its material: metallic pipes require degreasing and light abrasion to remove mill scale and promote gasket seating.
Copper and brass need flux-free cleaning of oxidation with a wire brush or abrasive pad.
PVC and CPVC demand wiping with a solvent-compatible cleaner to remove dust and machining residue.
PEX must be kept free of oils and cut debris without aggressive abrasives that can nick the tubing.
Guarantee smooth, square ends and remove burrs before coupling.
Step-by-Step Guide to Installing a Slip Coupling
The installer first test-fits and positions the slip coupling to confirm alignment and proper engagement.
For plastic pipes, they apply primer and solvent, and for copper pipes, they use flux and solder, observing appropriate safety precautions such as ventilation and protective gear.
Once the coupling is slid into place and aligned, clamps or compression nuts are tightened to manufacturer torque specifications.
The joint is allowed to cure or cool before pressurizing.
Positioning and test-fitting the coupling
Position the slip coupling so its sleeve can slide over the prepared pipe ends with about 1/4 to 3/8 inch of engagement on each side; this clearance allows for final alignment while preventing excessive gap that could compromise the seal.
Center the coupling, verify even engagement, and mark pipe ends or sleeve for reference.
Perform a dry fit, rotate slightly to confirm smooth movement and proper seating.
Applying primer and solvent (for plastic pipes) or solder/flux (for copper) with safety tips
With the coupling centered and the fit verified, attention turns to joining methods appropriate for the pipe material: plastic pipes require primer and solvent cement, while copper requires flux and solder.
For plastic, apply primer to pipe and coupling, wait briefly, then coat with solvent and assemble.
For copper, brush flux on cleaned joints, heat evenly, apply solder.
Use goggles, ventilation, gloves, and fire safety.
Sliding and aligning the coupling correctly
Slide the prepared coupling onto one pipe end, then align the other pipe so its cut faces meet squarely within the coupling’s internal stop.
Confirm both pipes are fully seated to the stop to prevent gaps.
Verify concentric alignment and consistent insertion depth.
Support pipes to avoid movement, checking for equal radial clearance.
Re-adjust until the coupling sits flush and straight before proceeding.
Tightening clamps or compression nuts to manufacturer torque recommendations
Begin by confirming that both pipe ends remain fully seated and aligned; then proceed to tighten the coupling’s clamps or compression nuts incrementally to the manufacturer’s specified torque.
Use a calibrated torque wrench, alternate between fastening points if present, and follow the torque sequence.
Recheck torque after initial cycle and inspect seals and ferrules visually for proper compression without distortion or gaps.
Allowing curing or cooling time before pressurizing
Patience is essential: after clamps or compression nuts reach the specified torque, the assembly must be left undisturbed for the manufacturer‑recommended curing or cooling interval before introducing pressure.
During this period adhesives set, seals seat, and metal stabilizes. Disturbing the joint risks leaks or failure.
Verify ambient conditions match recommendations, log start and end times, and only proceed with a controlled, gradual pressurization test.
Verifying the Repair and Restoring Service
After installation, the technician performs pressure testing—using a gauge and isolation valves or a hydrostatic tester—to confirm there are no leaks.
Once pressurized, visual inspections and tactile checks around the coupling and fittings are conducted to catch hairline leaks or seepage.
When the system is returned to service, water is restored slowly and the area is monitored for a period to detect any delayed leaks.
Pressure testing methods for leak detection
When the slip coupling is secured, the technician must perform pressure testing to confirm there are no leaks and that the repair meets system specifications.
Recommended methods include:
- Hydrostatic test at specified psi for a set duration
- Air test with calibrated regulator and safety precautions
- Use of pressure gauges and recorders
- Isolation of adjacent zones to localize leaks
- Soap solution or electronic leak detector for confirmation
Visual and tactile checks after pressurization
Inspectors should visually examine all joints, fittings, and surrounding pipe surfaces immediately after pressurization, looking for any signs of weeping, hairline seepage, or distortion of the coupling.
They should then run gloved fingers along seams and coupling ends to detect dampness or soft spots, note any temperature anomalies, and document findings with photos and concise notes for repair validation and recordkeeping.
Restoring water and monitoring for delayed leaks
With visual and tactile checks completed, service can be restored methodically while verifying the repair holds.
The main valve is opened slowly, downstream fixtures are run to purge air, and pressure is observed for stability.
The repair area is rechecked for moisture and softened fittings.
The system is monitored periodically over several hours to detect delayed leaks and confirm a fully restored, watertight joint.
Common Problems and How to Fix Them
After installation, common issues include persistent leaks, uneven or misaligned pipe ends, and mismatched coupling size or material that prevent a proper seal.
Remedies range from retightening and reseating the coupling to trimming or realigning pipes and selecting the correct coupling type and size.
If corrosion or pipe damage extends beyond the coupling’s repair capacity, full pipe replacement is recommended.
Leaks after installation: causes and remedies
Leaks from a newly installed slip coupling most often stem from improper seating, damaged seals, or incorrect torque on the fasteners.
Common causes include debris on pipe surfaces, cut gaskets, or loose clamps.
Remedies involve shutting water, disassembling, cleaning surfaces, replacing seals, and retorquing fasteners to manufacturer specs.
After reassembly, pressure-test to confirm no leakage before restoring service.
Misaligned or uneven pipe ends: corrective steps
Addressing misaligned or uneven pipe ends requires evaluating the gap, angular offset, and end-face condition before attempting correction.
Cut ends square with a pipe cutter or saw, deburr and chamfer to guarantee proper seating.
Use measured repositioning, clamp or support to align axial and angular offsets.
If alignment remains inadequate, shorten pipe ends incrementally until the slip coupling fits evenly and seals.
Incompatible materials or wrong size coupling: solutions
Select the correct coupling material and size before installation to prevent chemical incompatibility, galvanic corrosion, or poor sealing.
If mismatched, replace with a compatible type (PVC to PVC, copper to copper, or use dielectric unions).
Measure pipe OD and wall thickness; choose couplings rated for pressure and temperature.
Use adapters or connector couplings for differing materials, and verify gasket compatibility to guarantee a reliable seal.
Corrosion or damaged pipe beyond coupling repair: when to replace pipe
If corrosion or structural damage extends beyond the area a slip coupling can securely cover, the pipe section must be assessed for replacement rather than repair.
A thorough inspection determines extent, material compatibility, and surrounding integrity.
Replace when thinning, widespread pitting, cracks, or compromised joints exist.
Select matching pipe, cut back to sound metal, deburr, and install new coupling or fitting per code and pressure ratings.
Best Practices and Professional Tips
The section outlines practical steps to maximize the long-term reliability of a slip coupling repair, including correct material selection and thorough leak testing.
Guidance is provided on when the job should remain a DIY task and when conditions—such as complex piping, lack of access, or code requirements—warrant calling a professional plumber.
Recommended preventive maintenance measures, like periodic inspections and addressing water quality issues, are summarized to reduce the risk of future failures.
How to ensure long-term reliability of the repair
Maintain consistent attention to materials, installation technique, and post-repair checks to guarantee a slip coupling remains reliable over time.
Inspect seals periodically, confirm torque specifications, and monitor surrounding joints for stress or corrosion.
Use compatible materials and replace any degraded components.
Pressure-test after installation, document procedures and dates, and schedule routine inspections to catch deterioration early and prevent leaks or failures.
When to call a professional plumber vs. DIY
After completing checks and routine inspections, homeowners should assess whether a slip coupling repair falls within their skill set or requires professional help.
Complex issues—poor access, corroded pipes, gas lines, hidden leaks, nonstandard materials, or failed prior repairs—warrant a licensed plumber.
Simple, visible PVC or copper sleeve replacements with basic tools may be DIY, provided local codes are followed and permits obtained when required.
Preventive maintenance to avoid future failures
Prioritize regular inspections and simple upkeep to reduce the likelihood of slip coupling failures: check joints for signs of corrosion, looseness, or leaks; guarantee surrounding supports prevent undue stress; replace worn seals and clamps promptly; and use compatible materials and approved installation methods to meet code.
Schedule periodic pressure tests, clear debris, apply appropriate lubricants, document repairs, and train occupants to report issues early to prevent escalation.
Typical Costs, Time Estimates, and Warranty Considerations
The section outlines an estimated DIY cost breakdown for parts and common tools, followed by typical time required for standard repair scenarios.
It also highlights manufacturer warranties and product guarantees to check before purchase or installation.
Readers are guided to compare costs, schedule expectations, and warranty terms to make informed decisions.
Estimated DIY cost breakdown
A clear budget outline helps homeowners decide whether to tackle a slip coupling as a DIY project or hire a pro. Typical material costs, tool purchases, and minor unexpected expenses are listed below. Warranties vary: manufacturer covers part defects, installers offer labor guarantees.
| Item | Estimated Cost |
|---|---|
| Slip coupling | $5–$25 |
| Seals/adhesive | $2–$10 |
| Tools (one-time) | $20–$80 |
| Misc/contingency | $5–$30 |
Time required for common repair scenarios
One to three hours typically suffice for straightforward slip coupling repairs.
Small jobs—single joint replacement or minor leak fixes—often finish within this window.
More complex scenarios, such as multiple connections, corroded piping, or access challenges, can require half a day to a full day.
Labor rates, materials, and emergency service premiums affect total cost and scheduling expectations.
Manufacturer warranties and product guarantees to check
Warranty terms and product guarantees vary by manufacturer and can affect both cost and expected repair timelines. Buyers should verify coverage length, parts versus labor, and conditions voiding warranty (e.g., improper installation).
Check transferability, claim process, and required documentation. Some manufacturers offer limited lifetime coverage; others limit to defects.
Comparing warranties helps anticipate replacement expenses and potential service delays.
Examples and Real-World Scenarios
The section presents concise, practical examples: a step-by-step outline for repairing a burst copper joint, procedures for addressing a leaking PVC joint in a slab or crawlspace, and guidance on using an emergency rubber repair coupling as a temporary fix.
Each scenario highlights required tools, key safety considerations, and typical pitfalls to avoid. Readers are encouraged to compare the options to determine when a permanent repair or a temporary measure is appropriate.
Repairing a burst copper joint: step outline
Begin by isolating the affected section and shutting off the water supply to prevent further damage; then drain the line and assess the burst joint to determine whether a slip coupling, soldered repair, or section replacement is appropriate based on access, corrosion, and nearby fittings.
Clean and cut back damaged copper, deburr, fit coupling, test fit, solder or tighten per type, pressure test, restore service.
Fixing a leaking PVC joint in a slab or crawlspace
Locate the leak quickly and assess access limitations before choosing a repair method; in slabs this often means coring or creating an access port, while in crawlspaces confined clearance or poor lighting may dictate using flexible couplings or localized replacement.
Technicians document pipe type and joint condition, expose minimal area, cut out damaged section, deburr, dry, and install an appropriately sized slip coupling or solvent-weld splice.
Emergency rubber repair coupling for temporary fixes
When access is limited or a permanent repair would take too long, technicians often employ emergency rubber repair couplings as a stopgap to contain leaks and restore pressure temporarily.
Examples include sealing cracked PVC in confined crawlspaces, patching corroded metal lines until replacement, and stabilizing joints during building renovations.
These couplings allow safe operation, facilitate scheduled full repairs, and minimize water damage risk.
Quick Troubleshooting Checklist for Slip Coupling Repairs
A concise troubleshooting checklist helps technicians quickly identify and resolve common slip coupling issues by guiding inspections of alignment, seal condition, torque settings, and signs of wear or contamination.
Technicians follow a focused sequence to isolate leaks, assess fastener integrity, and determine repair versus replacement.
- Inspect alignment and pipe engagement
- Check gasket for cuts or hardening
- Verify clamp torque
- Clean mating surfaces
- Look for corrosion or deformation
Conclusion
Slip couplings offer a fast, reliable solution for common plumbing repairs, restoring service with minimal disruption. One interesting statistic: professionals report slip couplings reduce repair time by up to 40% compared with traditional soldered joints, making them cost- and labor-efficient for both emergency fixes and planned work. Homeowners and technicians alike benefit from simple installation, broad compatibility, and durable seals—so choosing the right type and following best practices guarantees long-lasting, leak-free results.
