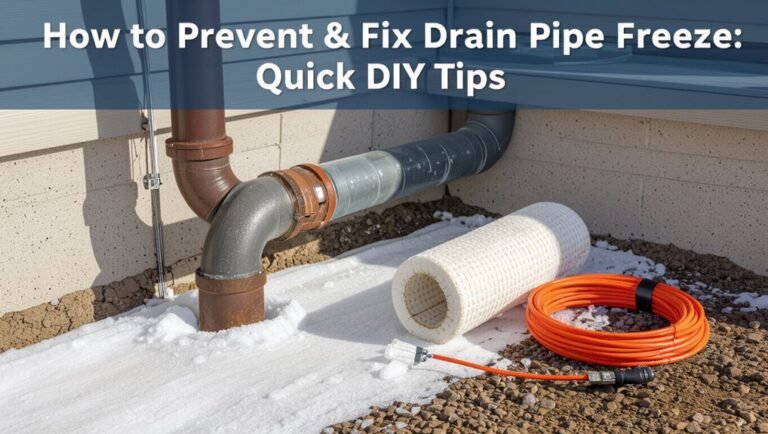
Keep Pipes From Freezing Without Heat: Easy Winter-Proof Tips
To prevent pipes from freezing without using heat, homeowners can utilize insulation, sealing, and passive heat sources. Wrap exposed pipes with foam sleeves, towels, or reflective wraps, and seal any gaps in rim joists and utility penetrations. Open cabinet doors to allow warm air circulation and position pipes near appliances to benefit from their heat. Letting faucets drip slightly can keep water flowing. Additionally, drain and winterize outdoor spigots and irrigation systems. Regularly inspect attics, crawl spaces, and exterior walls for vulnerable pipes and take necessary precautions to protect them.
Top 5 Steps to Stop Pipes Freezing Right Now
When temperatures drop suddenly, homeowners can take immediate, practical measures to prevent pipes from freezing; following five straightforward steps—insulating exposed lines, allowing faucets to drip, opening cabinet doors, sealing drafts, and keeping the thermostat steady—significantly reduces the risk of bursts and costly repairs.
Each action targets heat retention or pressure relief: wrap foam or heat tape around vulnerable runs, maintain a slow trickle to prevent standing water, open vanity and kitchen doors to share warmth, caulk gaps around utility penetrations, and avoid drastic nighttime setbacks.
Together these measures offer simple, low-cost protection until professional fixes or warmer conditions return.
Identify Pipes Most Likely to Freeze
After taking immediate steps like insulating exposed lines and allowing faucets to drip, attention should turn to which runs are most vulnerable.
Pipes in unheated spaces — attics, crawlspaces, garages, basements and exterior walls — face highest risk. Long, narrow runs with little insulation or airflow, and lines routed along exterior walls or near windows, are particularly susceptible.
Outdoor hose bibs, irrigation supply lines and meter connections deserve priority. Copper and thin-walled pipes freeze faster than larger-diameter plumbing.
Identifying locations with cold exposure, limited circulation or known past freezes allows targeted protection: add insulation, reroute, or apply heat tape where most needed.
How Cold Is Dangerous for Pipes?
How cold must it get before pipes are at risk? Pipes begin to freeze when temperatures fall to about 20°F (-7°C) or lower, though freezing can occur at higher indoor temperatures if pipes are exposed, poorly insulated, or in drafts.
Water expands as it freezes, so even brief exposure below freezing can create pressure and cause bursts.
Metal and plastic pipes respond differently; metal conducts cold faster, plastic holds heat slightly longer.
Duration of cold, wind chill around exterior walls, and localized cold spots matter more than outdoor reading alone.
Preventive measures should target temperature, insulation, and exposure.
Find Exposed and Vulnerable Pipes Fast
A quick scan for exposed and vulnerable pipes focuses first on unheated areas such as basements, crawl spaces, attics, and garages.
Exterior walls and rim joists should be inspected for pipes running close to cold air sources or under-slab lines. Where visible runs end, tracing hidden lines along walls and ceilings helps locate sections that may need insulation or heat protection.
Check Unheated Areas
In basements, crawl spaces, attics, garages, and exterior walls, unheated pockets often hide vulnerable plumbing lines; locating these areas quickly is essential to preventing pipe freezes. A systematic sweep identifies exposed runs, valve locations, and connections needing insulation or temporary protection. Note drafty vents, uninsulated joists, and service penetrations. Prioritize accessible routes for quick wrapping or routing of warm airflow. Record vulnerable spots for recurring checks and emergency responses. Use simple fixes first: foam, pipe sleeves, or temporary covers until permanent insulation is installed.
| Area | Typical issue |
|---|---|
| Basement | Uninsulated runs |
| Attic | Cold drafts |
| Crawl space | Exposed joints |
| Garage | Outside-facing pipes |
Inspect Exterior Walls
Exterior walls deserve a focused inspection because they often conceal service lines and fittings exposed to outdoor temperatures.
The inspector scans basements, crawlspaces, and utility closets adjacent to exterior sheathing, noting pipe runs near rim joists, sill plates, and plaster walls.
Look for drywall bulges, cold drafts, condensation, or frost patterns indicating thin insulation or gaps around penetrations.
Check vents, hose bibs, and meter connections for exposed copper or PEX and for deteriorated seals.
Mark vulnerable sections for targeted insulation, foam sealant, or protective sleeves.
Photograph findings and record locations for prompt winterization before temperatures plunge.
Trace Hidden Lines
Start by following visible service routes from meters, hose bibs, and utility entrances toward the interior, noting where pipes run along joists, through walls, or near uninsulated spaces.
Then map likely hidden runs: check basements, crawlspaces, attics, closets, and cabinetry adjacent to exterior walls.
Listen for water flow and tap accessible shutoffs to infer concealed lines.
Use a stud finder, thermal camera, or moisture meter to confirm pipe locations without demolition.
Mark routes on a floor plan and prioritize sections exposed to cold air or drafts.
Document findings for targeted insulation, foam sealant, or rerouting to reduce freeze risk.
Quick Inspection Checklist for Winter Plumbing
A concise checklist helps homeowners spot vulnerable plumbing before cold weather worsens.
A swift inspection targets entry points, visible piping, and fixture performance.
Look for early signs that indicate risk and prioritize simple fixes or professional follow-up.
- Check exterior faucets and hose bibs for leaks and loose connections.
- Inspect crawlspaces, basements, and utility rooms for exposed pipes and drafts.
- Test indoor valves and taps for slow pressure, noise, or corrosion.
- Confirm sump pumps, backflow preventers, and outdoor shutoffs operate smoothly.
Document findings, photograph issues, and schedule repairs before sustained freezing temperatures arrive.
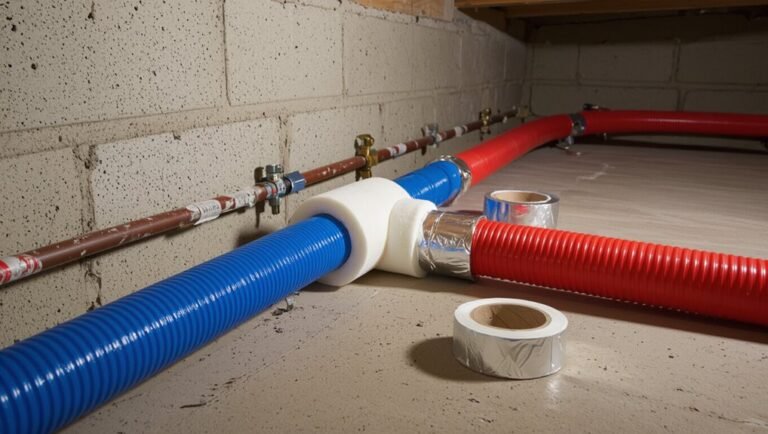
Insulation Sleeves: When and How to Use Them
When temperatures drop, insulation sleeves provide a quick, effective barrier against heat loss and pipe freezing by fitting snugly around exposed plumbing. They suit straight runs in basements, crawlspaces, garages, and unheated exterior walls.
Choose closed-cell foam sleeves sized to pipe diameter; thicker insulation yields better R-value where cold is severe. Measure runs, cut sleeves to length, and secure seams with cable ties or manufacturer-recommended fasteners.
Leave access points and valves reachable and avoid compressing insulation, which reduces performance. Inspect annually for compression, moisture, or damage and replace degraded sections to maintain continuous thermal protection.
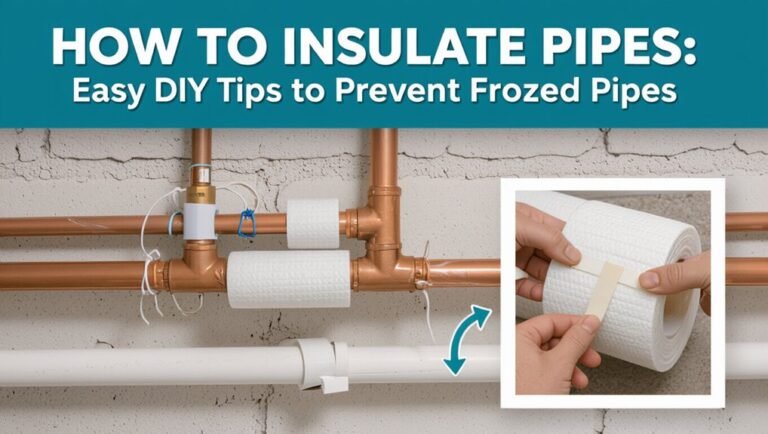
Foam Pipe Tape for Tight Spots
For tight spots and irregular fittings where slip-on sleeves won’t fit, foam pipe tape offers a flexible, adhesive-backed solution that conforms to bends, valves, and cramped clearances.
It adheres easily, seals gaps, and adds insulating thickness in places otherwise hard to reach. Proper application improves freeze resistance and reduces condensation on cold-water lines.
Attention to seams and overlap guarantees continuous coverage; exterior exposure may need supplementary protection.
Consider foam tape for short runs, accessory connections, and transitional sections between larger insulators.
- Conforms to awkward shapes
- Self-adhesive for quick installation
- Overlap seams by at least 1 inch
- Best for indoor, sheltered areas
Reflective Foil Wrap for Heat Retention
By applying a reflective foil wrap around exposed pipes, heat radiated from warm water is redirected back toward the pipe surface, improving retention without adding bulk. The thin metallic layer reflects infrared energy, slowing conductive and convective losses where space limits thicker insulation.
Installation involves cleaning the pipe, wrapping smoothly with overlap, and sealing seams with foil tape to maintain reflectivity and air gap. Reflective wraps work best on pipes that carry intermittently warm water and benefit from an adjacent air layer; they are not a substitute for thick insulation in extreme cold.
Durability and moisture resistance vary by product; choose rated materials.
Temporary Household Insulation Options
In colder spells, temporary household insulation options offer quick, affordable methods to reduce heat loss and protect plumbing without major renovation.
Portable solutions can be deployed where needed, slowing conductive and convective cooling around pipes and entry points. Choices suit short-term needs and renters.
- Pipe wrap: foam or rubber sleeves slipped over exposed runs.
- Toweling: tightly rolled, dry towels secured with tape or zip ties.
- Window film: heat-shrink plastic applied to frames to cut drafts.
- Door sweeps and draft stoppers: seal gaps beneath doors and against thresholds.
These measures are reversible, low-cost, and effective as interim defenses.
Where to Place Insulating Foam Board
Along exterior-facing walls, adjacent to crawlspaces, and around basement perimeter piping, rigid foam board should be placed to block cold transfers from outside and unheated voids.
Sections should cover wall cavities where pipes run, framing bays behind utility closets, and the undersides of stair wells that channel cold.
Boards must fit snugly around pipes and be cut to follow joists and rim joists without creating gaps.
Place panels behind mounted fixtures and along exposed service runs in unconditioned sheds or garages.
Secure with appropriate fasteners or adhesive and protect with a fire-resistant facing where local code requires it.
Seal Gaps Around Vents and Foundation
After insulating walls and service runs, attention should turn to sealing gaps around vents and the foundation where air infiltration undermines those measures.
Exterior and interior openings admit cold drafts that cool pipes and reduce insulation effectiveness. Target common leak points and use appropriate materials for durability and moisture resistance.
- Use low-expansion foam around utility penetrations to block airflow without warping casings.
- Apply exterior-grade caulk to cracks under siding and trim.
- Install vent covers with removable dampers to stop drafts while preserving function.
- Seal foundation-to-wall gaps with masonry sealant or backer rod and caulk for a tight, long-lasting joint.
Close Crawlspace Vents and Why It Helps
When cold air is kept out by closing crawlspace vents, the underfloor area stays warmer and less humid, reducing the risk that exposed pipes will freeze or develop condensation-related corrosion.
Closing vents limits drafts and stabilizes temperatures around water lines, especially during prolonged cold snaps.
It also minimizes moisture intrusion from outside, lowering relative humidity that can accelerate metal corrosion and insulation degradation.
Homeowners should confirm vents are sealed seasonally, inspect for pests or trapped moisture, and make certain any mechanical ventilation remains functional.
Properly closed and monitored crawlspaces form a simple, low-cost barrier protecting vulnerable plumbing from winter stress.
Keep Under-Sink and Cabinet Doors Open
Opening under-sink and cabinet doors allows warmer room air to circulate around concealed pipes, improving airflow and reducing cold pockets.
This simple action helps protect exposed plumbing beneath sinks and along interior walls from freezing.
Homeowners are advised to use this method during cold snaps to lower the risk of pipe damage.
Benefits Of Airflow
Although often overlooked, keeping under-sink and cabinet doors open during cold snaps allows warmer room air to circulate around plumbing, substantially reducing the risk of pipes freezing.
This simple action equalizes temperature around vulnerable pipes, lowering cold pockets and slowing heat loss. It’s a no-cost, passive measure that complements other precautions without altering fixtures.
Consistent airflow also helps moisture disperse, reducing condensation that can exacerbate freezing. Quick to implement, it requires only remembering to open doors when temperatures drop and close them again when safe.
- Promotes warmer air contact with pipes
- Reduces cold spots under cabinets
- Low-maintenance, no-cost strategy
- Works alongside other preventive steps
Protects Exposed Plumbing
Keeping under-sink and cabinet doors open specifically shields exposed plumbing runs—such as pipes, valves, and traps—from cold pockets that form in enclosed spaces. This simple action equalizes temperature, allows warmer ambient air to reach vulnerable components, and reduces freeze risk where insulation is absent. It is low-cost, reversible, and complements insulation or heat tape. Households are advised to open doors during cold spells, especially on exterior walls or unheated rooms. Monitor for drafts and make certain stored chemicals or cleaning products are secured. Use door clips or wedges to keep doors ajar safely.
| Benefit | Note |
|---|---|
| Improves airflow | Equalizes temperatures |
| Low cost | No tools needed |
| Quick action | Immediate effect |
| Complements other measures | Works with insulation |
Let Faucets Drip Safely to Prevent Freezing
Frequently, allowing a slow, steady drip from vulnerable faucets is an effective way to prevent pipe freezing by keeping water moving and relieving pressure buildup in cold sections of the plumbing.
The practice targets pipes near exterior walls, unheated crawlspaces, and isolated fixtures.
Flow rate need not be large—just enough to maintain motion. Homeowners should open the tap slightly and monitor for waste.
Consider cold-weather timing: drip during nights and prolonged cold snaps.
Inspect for leaks afterward and collect runoff if necessary. Combine with insulation and sealing efforts for best results.
- Target vulnerable fixtures
- Maintain minimal continuous flow
- Collect and monitor runoff
- Inspect for leaks
Create Thermal Bridges With Towels and Blankets
Wrapping pipes with towels provides an immediate layer of insulation where foam or professional materials are unavailable.
Placing blankets around exposed plumbing and nearby walls extends the thermal barrier and reduces heat loss.
These simple measures create effective thermal bridges that help maintain pipe temperature and lower the risk of freezing.
Wrap Pipes With Towels
Along colder interior walls, towels and blankets can be repurposed as simple thermal bridges to slow conductive heat loss from exposed pipes.
The method is pragmatic: wrap a dry towel snugly around the pipe, secure with tape or string, and layer additional fabric where drafts are strongest.
Focus on continuity of coverage and avoid trapping moisture against metal.
Periodically check for dampness and replace wet fabric.
Use thicker or doubled towels for overnight protection and remove when temperatures rise.
Benefits include affordability and speed; limitations include lower R‑value than purpose-made insulation and the need for routine inspection.
- Wrap snugly along entire exposed run
- Secure ends with tape or twine
- Replace any damp or frozen fabric
- Layer towels where drafts occur
Insulate With Blankets
When temperatures drop, repurposed blankets can provide a quick, temporary layer of insulation over exposed pipes by reducing convective and radiative heat loss.
A folded blanket wrapped snugly around a pipe increases thermal resistance; securing ends with tape, twine, or clips prevents gaps and wind intrusion.
Combining blankets with towels at joints creates thermal bridges, maintaining continuity across fittings and valves.
This method suits short-term use or emergencies when foam insulation is unavailable.
Users should avoid trapping moisture against metal, check regularly for dampness, and remove coverings once temperatures moderate to prevent mold and corrosion.
Alternatives to Heat Tape Without Electricity
Exploring non-electrical options for preventing frozen pipes reveals several effective methods that rely on insulation, passive heat retention, and simple plumbing adjustments; these approaches suit locations where electricity is unavailable or unreliable and can be combined for greater protection.
- Wrap pipes with foam or fiberglass insulation to reduce heat loss.
- Use heat-retaining materials like thermal wraps or phase-change packets placed near vulnerable sections.
- Reroute or elevate exposed runs to warmer interior spaces or away from drafts.
- Install frost-proof hose bibs and add simple drip strategies to keep water moving during extreme cold.
These tactics minimize freeze risk without relying on powered devices.
Low-Cost Materials for Long-Term Protection
Having outlined non-electrical measures, the focus shifts to affordable materials that provide durable protection for vulnerable pipes.
Foam pipe insulation sleeves, available in various diameters, offer easy installation and reasonable R-values; closed-cell foam adds moisture resistance.
Fiberglass wrap with a vapor barrier suits colder climates where higher insulating value is needed.
Pipe insulation tape and self-sealing neoprene strips fill gaps and seal joints.
Heat-reflective pipe jackets combine insulation and radiant barrier properties for crawlspaces.
For outdoor exposures, insulated covers for valves and meter boxes create localized protection.
Proper sizing and thorough sealing determine long-term effectiveness and cost efficiency.
Protect Outdoor Hose Bibs and Spigots
To prevent outdoor hose bibs and spigots from freezing, homeowners should insulate exposed fittings with foam covers or specialized wraps.
They should also shut off and drain exterior supply lines where possible to stop water from remaining in the pipes.
Detached hoses must be removed, drained, and stored indoors to eliminate trapped water that can freeze and damage the fixture.
Insulate Hose Bibs
Insulating hose bibs—outdoor spigots exposed to freezing temperatures—reduces the risk of burst pipes and costly water damage by keeping the fixture and short lengths of exposed pipe above freezing. Protective measures are simple, affordable, and effective when applied before cold snaps.
Foam covers, insulated bags, or pipe wrap create thermal barriers; secure fittings prevent wind-driven heat loss. Inspect annually and replace damaged insulation.
- Use foam bib covers rated for subfreezing temps
- Wrap exposed pipe with closed-cell foam or heat tape alternatives
- Seal gaps around the wall entry with caulk
- Remove or drain hoses to avoid trapped water
Shut Off Supply Lines
After insulating hose bibs, homeowners should shut off the indoor supply valves that feed outdoor spigots to eliminate standing water in the line and reduce freeze risk. Turning the shutoff valve and opening the outdoor spigot drains residual water; draining prevents expansion and cracking. Verify valve operation annually and label it for quick access. If no dedicated valve exists, install one or consult a plumber. Close and secure access panels. Regular checks during cold snaps confirm no leaks or refills from irrigation systems.
| Action | Purpose |
|---|---|
| Locate valve | Identify control point |
| Turn off | Stop water flow |
| Open spigot | Drain line |
| Verify closed | Prevent seepage |
| Label valve | Ease future access |
Remove And Store Hoses
Disconnect and drain all garden hoses before winter to prevent trapped water from freezing and damaging both the hose and the outdoor spigot.
Once removed, inspect, coil neatly, and store hoses indoors or in a shed to extend service life and avoid ice-related stress on hose bibs.
Small protective actions prevent costly repairs.
- Shut off exterior shutoff valves where present
- Use insulated covers on exposed spigots after hose removal
- Repair worn washers and fittings before storage
- Store hoses elevated, away from rodents and extreme cold
This routine protects outdoor plumbing and preserves hose integrity across seasons.
Winterize Irrigation and Sprinkler Lines Quickly
How can homeowners quickly and reliably protect outdoor plumbing from freezing temperatures? Winterizing irrigation and sprinkler lines starts with shutting off the supply and draining systems. Blowout or gravity-drain methods remove standing water; compressed air requires caution. Insulate exposed valves and quick couplers with foam covers. Leave controller valves on a frost setting or disconnect power and store the controller. Test zones briefly after winterizing to confirm dryness.
| Action | Purpose |
|---|---|
| Shut off supply | Prevents new water entry |
| Drain lines | Removes freezeable water |
| Use blowout | Clears stubborn water |
| Insulate fittings | Protects exposed components |
Protect Water Meters and Backflow Devices
Water meters and backflow devices are vulnerable to freeze damage and require targeted protection. Insulating exposed meters, valves, and service lines reduces heat loss and prevents cracks.
Backflow assemblies should be shielded with insulated covers or enclosures to maintain function and avoid costly repairs.
Insulate Meters And Valves
When exposed to freezing temperatures, meters and backflow prevention devices become vulnerable points in a plumbing system and should be insulated to maintain function and prevent costly ruptures. Insulation preserves trapped heat, reduces freeze risk, and extends component life.
Install weatherproof foam covers or custom-fit jackets, ensuring seals around pipe entries. Secure insulation with corrosion-resistant straps and check periodically for moisture accumulation.
For outdoor meters, consider insulated boxes that allow access without removing protection. Hire a certified plumber for complex assemblies or where codes apply.
- Use closed-cell foam sleeves for pipes
- Wrap valves with removable jackets
- Protect meter readouts with clear covers
- Inspect insulation before cold snaps
Shield Backflow Assemblies
Backflow assemblies and meters represent critical weak points in outdoor plumbing that require deliberate shielding to prevent freezing and maintain system integrity. Protective enclosures—rigid insulated boxes or foam covers—should fit snugly, allow drainage, and include removable panels for inspection.
Wrap exposed piping with closed-cell foam and weatherproof tape; avoid materials that trap moisture. Elevate devices slightly where possible to reduce cold transfer from the ground.
Make certain vents or access points are positioned to prevent snow ingress while permitting airflow. Periodic winter checks confirm seals remain intact and insulation uncompressed, preserving functionality and preventing costly freeze damage to meters and backflow devices.
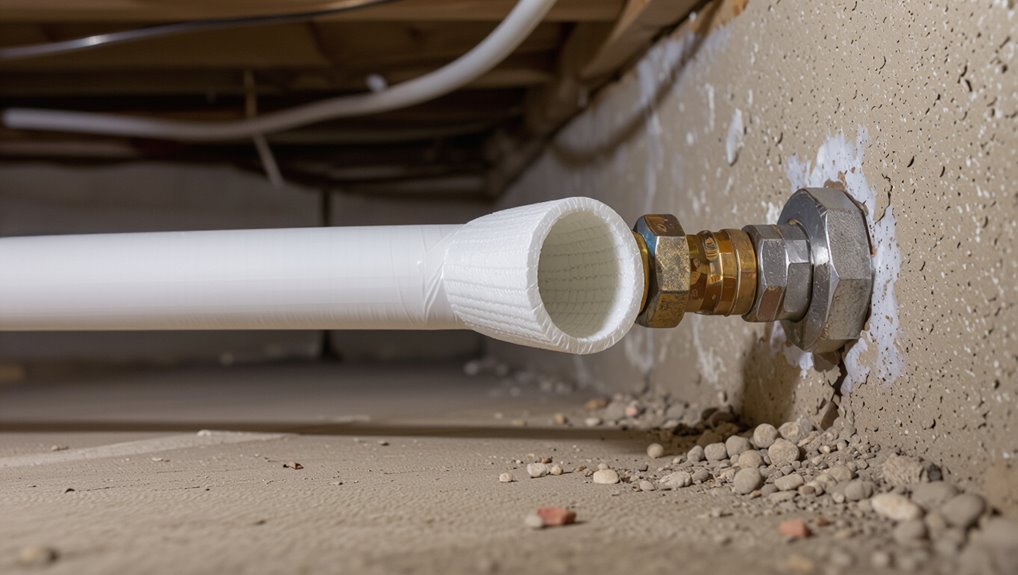
Insulate Water Heater Pipes Without Power
In cold conditions, insulating water heater pipes without relying on electricity focuses on trapping heat and cutting drafts using passive materials and simple techniques.
The goal is to reduce conductive and convective losses on exposed hot and cold lines near the tank. Wrap foam or fiberglass sleeves snugly around fittings and joints, secure seams with tape, and shield exposed valves. Seal gaps in surrounding walls or floors to stop cold air. Regularly inspect insulation for compression or moisture and replace as needed.
- Foam pipe sleeves for straight runs
- Fiberglass wrap for irregular shapes
- Insulating tape for seams
- Weatherstripping around penetrations
When to Shut Off and Drain Lines
During periods of prolonged freezing or after a loss of heat, homeowners should shut off and drain vulnerable water lines to prevent pipe bursts.
Identify and isolate exterior spigots, seasonal irrigation lines, and seldom-used branch lines.
Close the main shutoff for the affected zone, open faucets and drain valves until water stops.
Flush toilets and run tubs briefly to clear residual water.
Leave drain points open and vent enclosed cabinets to allow air circulation.
Tag valves and document procedures for household members.
Refill and restore pressure only after temperatures stabilize and lines are inspected for cracks or leaks.
Use Propylene Glycol in Non-Potable Lines
When protecting non-potable systems such as irrigation, glycol-based antifreeze formulations like propylene glycol provide reliable freeze protection without contaminating potable water supplies. Propylene glycol circulates in closed loops, lowers freeze point, and is less toxic than ethylene glycol. Proper concentration depends on lowest expected temperature and system materials. Consider compatibility, monitoring, and periodic replacement to prevent degradation. Install backflow prevention to protect potable lines. Dispose of used fluid per regulations.
- Calculate percent glycol for target temperature
- Verify pump and seal compatibility
- Test system for leaks and concentration annually
- Label lines and keep safety data on hand
Use Appliance Heat and Hot Faucets Smartly
Appliance heat can be used to warm nearby pipes by positioning units like dishwashers or water heaters so their exhaust or cabinet warmth reaches vulnerable lines.
Running a faucet with a slight trickle of hot water helps keep water moving and reduces the chance of freezing.
Scheduling short, periodic bursts of hot water during extreme cold can maintain flow without wasting significant energy.
Use Appliance Heat Nearby
Direct heat from washers, dryers, water heaters and other household appliances can help keep nearby pipes above freezing; positioning vulnerable lines close to these heat sources or routing them through warm utility spaces reduces freeze risk. The approach emphasizes using existing warmth efficiently without active heating systems.
Inspect pipe runs, seal gaps to retain appliance heat, and avoid blocking vents. Monitor appliance locations relative to insulation and exterior walls. Consider professional relocation for exposed sections.
- Route pipes through basements, utility rooms, or closets with appliances
- Insulate pipes where they pass near appliances to trap heat
- Seal openings that let warm air escape
- Keep appliance access clear for airflow and maintenance
Run Hot Water Slightly
Positioning pipes near household heat sources helps, but running a trickle of hot water provides an active, low-effort layer of protection against freezing. A small continuous flow keeps water moving and raises temperature slightly, reducing ice formation risk in vulnerable sections. Use nearby hot faucets or appliances on low output where safe, monitor water waste, and limit duration to conserve resources. Target taps closest to exposed or exterior walls. Balance prevention with conservation by collecting runoff for chores. Evaluate pipe accessibility to adjust flow points and combine this tactic with insulation and appliance heat for best results.
| Benefit | Action |
|---|---|
| Prevents standing water | Run hot faucet slightly |
| Uses existing fixtures | Choose nearby hot tap |
| Low effort | Set minimal flow |
| Conserves heat | Collect runoff for reuse |
Schedule Short Hot Bursts
Schedule brief, timed bursts of hot water or run heat-generating appliances on short cycles to raise pipe temperatures when freezing risk peaks. The approach conserves energy while targeting vulnerable plumbing during nights or cold snaps.
Timers and smart plugs automate repetition; brief duration prevents waste. Careful coordination reduces load on systems and minimizes scald risk.
- Set faucet timers for 1–3 minutes during pre-dawn coldest hours.
- Use dishwasher or clothes dryer on short, hot cycles when outdoor temps drop.
- Install smart plugs to run water heaters or small space heaters briefly.
- Monitor usage and adjust timing based on weather forecasts.
Simple Sensors and Manual Pipe Checks
With basic temperature sensors and routine manual inspections, homeowners can catch early signs of freezing before damage occurs. Small battery-powered sensors placed near vulnerable pipes alert when temperatures approach critical thresholds. Regular visual checks focus on condensation, frost, or bulging fittings; gentle hand-feeling detects unusually cold spots. Log readings and inspection notes to spot trends over days.
Sensors with simple alerts reduce the need for constant physical checks. Inspection frequency increases during cold snaps and after power outages. Combining inexpensive sensors with disciplined manual checks provides reliable early warning without relying on continuous space heating.
Emergency Fixes for Partially Frozen Pipes
If a pipe is only partially frozen, immediate steps can often thaw it before it bursts. The occupant should act calmly, isolate the section by shutting valves if possible, and reduce pressure by opening nearby taps. Short-term measures stabilize the situation until professional help arrives.
- Open adjacent faucets to relieve pressure and allow water to flow.
- Apply external heat sources cautiously to the accessible section.
- Wrap the pipe with insulating materials to slow re-freezing.
- Monitor for cracking sounds or leaks and shut off the main water supply if damage appears.
Seek a plumber for inspection and permanent repair.
How to Thaw a Frozen Pipe Safely
First, the frozen section of the plumbing should be located by checking exposed pipes, feeling for cold spots, and testing faucets to identify where water stops.
Once found, heat should be applied safely using a hair dryer, heat gun on low, or electric space heater while keeping flammable materials away.
If heat cannot be applied safely or a leak is suspected, professional help should be summoned immediately.
Locate The Frozen Section
Begin by inspecting the coldest and least insulated sections of the plumbing—attics, crawl spaces, exterior walls, basements, and areas near unheated rooms—because frozen pipe runs typically occur where ambient temperatures drop and insulation is thin or missing.
The observer listens for reduced flow, taps pipes to detect solid ice, and checks faucets for sputtering or delayed output.
Visible frost, bulging pipe, or cold spots along exposed runs indicate freeze location.
If multiple fixtures show issues, trace the common upstream pipe path to narrow the section before any intervention.
- Look for frost or condensation patterns
- Feel for temperature shifts
- Note affected fixtures’ common supply line
- Inspect exposed, poorly insulated runs
Safely Apply Heat
After locating the frozen section, attention shifts to applying heat safely to restore flow without causing damage or injury. One-inch gradual warming prevents pipe rupture; begin at the faucet and work toward the freeze.
Use safe heat sources: electric hair dryer, space heater placed on the floor toward the pipe, or specialized infrared lamp. Avoid open flames, torches, or unvented heaters.
Insulate exposed areas as they warm to retain heat. Monitor for leaks as water resumes.
If thawing fails within 30–60 minutes or odors, stop and contact a licensed plumber to prevent greater harm.
Signs of Freeze Damage and Triage Steps
Check for sudden loss of water flow, discolored or odorous water, visible frost or condensation on pipes, bulging fittings, or unexplained wet spots that indicate a burst; these signs, plus unusual sounds like banging or hissing, help prioritize immediate triage actions to shut off supply, isolate affected sections, and call a professional if pressure loss or active leaks are present.
- Locate main shutoff and turn water off to limit damage.
- Open taps to relieve trapped pressure and drain lines.
- Visually inspect accessible pipe runs and joints for cracks or ice.
- Contain and document leaks with towels and photos for repair or insurance.
Cost vs. Effort: Fixes and Upgrades
Weighing cost against effort, homeowners must choose between quick, low-cost fixes and more durable upgrades when preventing frozen pipes.
Temporary measures—insulation wrap, faucet drip, and sealing drafts—require minimal expense and immediate action but demand regular attention each winter.
Midrange options like targeted pipe insulation, heat tape on vulnerable runs, and improved exterior door seals balance installation time with longer service life.
Higher-cost solutions—re-routing exposed lines, full-house pipe insulation, and installing thermostatically controlled cable—offer superior reliability and reduced maintenance.
Selection depends on budget, property value, risk tolerance, and willingness to perform periodic inspections and maintenance.
When to Call a Professional Plumber
Visible pipe damage such as cracks, bulging, or persistent leaks is a clear sign that a professional plumber should be contacted.
Likewise, homes that experience repeated freeze-related failures despite preventive measures warrant expert assessment to identify underlying causes.
Promptly involving a plumber can prevent further structural damage and costly emergency repairs.
Visible Pipe Damage
Significant dents, deep corrosion, cracked fittings, or bulging sections of pipe reliably indicate structural failure that requires professional assessment.
Visible damage often precedes leaks or bursts; a qualified plumber can evaluate pressure, wall integrity, and joint stability.
Immediate action minimizes water damage and prevents unsafe temporary repairs.
Homeowners should document conditions and avoid DIY fixes when metal fatigue or compromised seals are present.
- Corroded copper or steel with pitting
- Cracks or splits at soldered joints
- Bulges indicating internal freeze/pressure
- Loose or fractured fittings and connections
Timely professional inspection and replacement decisions are essential.
Repeated Freeze Problems
When repeated freezing events occur despite repairs or insulation upgrades, calling a professional plumber becomes necessary to diagnose underlying causes and prevent future failures. A plumber assesses systemic issues: poor pipe routing, inadequate slope, hidden leaks, or compromised insulation effectiveness.
They perform pressure testing, thermal imaging, and inspect exterior penetrations and valves. Professional solutions may include rerouting, adding heat tape, replacing old piping with freeze-resistant materials, or improving building envelope sealing.
Timely intervention reduces risk of bursts, water damage, and costly emergency repairs. Homeowners should document incidents and provide access for thorough evaluation to guarantee lasting protection against recurrent freezes.
Conclusion
When winter’s bite comes, the homeowner pictured a frozen garden hose snapping like a brittle twig — a small break that flooded a basement. That one anecdote underscores the lesson: preemptive, low-cost steps avert costly repairs. With exposed pipes identified, vulnerable spots insulated, and a thawing plan ready, risk drops dramatically (insulation can cut heat loss by up to 30%). Acting early keeps water flowing and avoids emergency plumbing calls.