How to Insulate Pipes for Winter: Easy DIY Steps & Tips
To effectively insulate your pipes for winter, start by identifying exposed and unheated sections. Clean and dry the pipes before measuring their lengths. Use closed-cell foam sleeves or elastomeric wrap, sealing seams with foil or butyl tape. Secure the insulation every 12–24 inches, and use preformed pieces to insulate valves and bends. For outdoor or low-flow lines, apply heat tape according to the manufacturer’s instructions and add weatherproof jacketing. Remember to inspect your insulation annually and repair any damaged areas. Continue reading for more practical materials, sizing tips, and safety advice.
Quick Winter Fix: Stop Pipes Freezing in 5 Steps
Prepare early to prevent frozen pipes with a short, focused routine that requires minimal tools and time.
One: locate vulnerable pipes in unheated areas and mark them.
Two: close exterior shutoffs and drain outdoor lines.
Three: open cabinet doors and allow faucets to drip during extreme cold to keep water moving.
Four: apply temporary heat — a hair dryer or portable heater used safely at a distance — to warm suspicious sections until permanent measures are in place.
Five: monitor indoor thermostat and check pipes periodically; if temperatures drop sharply, repeat steps and call a professional when signs of freezing or damage appear.
Why Pipe Insulation Prevents Winter Freezes
After the quick winter fixes that keep water moving, insulating pipes offers a longer-term barrier against freezing by reducing heat loss to cold air. Insulation adds resistance to conductive and convective heat transfer, slowing the rate at which warm water and pipe material lose energy. That delay maintains internal temperatures above freezing longer during cold spells and temporary heating interruptions.
Foam sleeves, wrap, or tape create pockets of trapped air and material layers that impede cold penetration. Properly fitted insulation minimizes thermal bridging at joints and valves. Overall, reduced heat loss lowers freeze risk, decreases condensation, and improves system efficiency throughout winter.
When to Insulate Pipes Before Freezing Weather
Timing insulation before freezing weather hinges on local climate patterns and the thermal vulnerability of specific pipes. Preparation should begin well ahead of predicted cold snaps: assess exposed and unheated areas, review past freeze dates, and allow time for material procurement and installation.
For most temperate regions, start in autumn; in colder climates, insulate by early fall. Emergency short-notice freezes require rapid action but are less effective than planned work. Regularly inspect insulation annually and replace degraded sections before winter.
- Check historical first-freeze dates for the region
- Prioritize exposed and unheated locations
- Allow time to buy and fit materials
- Schedule annual pre-winter inspections
Which Pipes Freeze First and Why
Having identified when to insulate, attention turns to which pipes are most likely to freeze first and the reasons behind their vulnerability.
Exterior and unheated-area pipes top the list: hose bibs, irrigation lines, garage and basement pipes, and those in attic or crawl spaces.
Long runs of copper or metal pipe chilled by wind or contact with cold masonry freeze faster than insulated plastic.
Narrow-diameter lines and dead-end branches with stagnant water are also prone.
Pipes near poorly insulated walls, windows, or vents lose heat quickly.
Understanding location, material, exposure, and flow patterns explains which lines need priority protection.
Inspecting Pipes for Freeze Risk: 6 Signs
The inspector notes exposed outdoor pipes as a primary risk factor, since direct contact with freezing air accelerates heat loss.
Attention is also given to areas of the home that routinely register low indoor temperatures, such as unheated basements, crawlspaces, and attics. Together, these conditions help prioritize which runs to insulate before cold weather sets in.
Exposed Outdoor Pipes
When exposed to cold air and wind, outdoor pipes become especially vulnerable to freezing; identifying early warning signs helps prioritize which runs need immediate protection.
A detached inspection notes exposed lengths, inadequate hangers, visible cracks, and frost accumulation.
Attention should focus on sections near eaves, uninsulated valves, and meters.
Immediate actions include temporary heat tape, foam insulation, and sealing gaps where piping exits structures.
Regular checks during cold snaps reduce burst risk and costly repairs.
- Visible frost or ice on pipe surfaces
- Sections located in wind-exposed areas
- Uninsulated valves, joints, or meters
- Sagging or unsecured pipe runs
Low Indoor Temperatures
Indoor environments can pose their own freeze risks even after addressing exposed outdoor runs; lower-than-normal indoor temperatures allow cold to reach interior pipe cavities and poorly insulated walls. Inspectors look for six signs indicating freeze risk: cold drafts near pipe routes, unheated basement or attic spaces, frosty walls, inconsistent water flow, condensation on pipes, and visible insulation gaps. Mitigation includes sealing drafts, adding insulation, relocating pipes, or using heat tape. A concise checklist:
| Sign | Location | Action |
|---|---|---|
| Cold drafts | Around conduits | Seal gaps |
| Frosty walls | Exterior-facing rooms | Add insulation |
| Condensation | Pipe surfaces | Improve ventilation |
| Low flow | Fixtures | Check heat sources |
Tools and Materials for DIY Pipe Insulation
The next section lists the basic tools required and the common materials suitable for insulating residential pipes.
It specifies hand tools, fasteners, and safety items alongside insulation types such as foam sleeves, fiberglass wrap, and heat tape.
Readers are guided to match material choice to pipe location and temperature exposure.
Tools Needed
Gathering the right tools guarantees a smooth DIY pipe-insulation job and reduces mistakes that can cause heat loss or leaks.
A concise toolset speeds work, assures clean cuts, and allows secure fastening without damaging pipes or insulation.
Safety items protect against debris and cold surfaces.
Selection depends on pipe location and accessibility; choose compact or extendable tools for tight spaces.
Proper measuring and finishing tools improve fit and appearance, preventing gaps that compromise performance.
Inspect tools for wear before starting to avoid delays or poor results.
- Utility knife with sharp blades
- Tape measure and marker
- Adjustable wrench or pliers
- Safety gloves and goggles
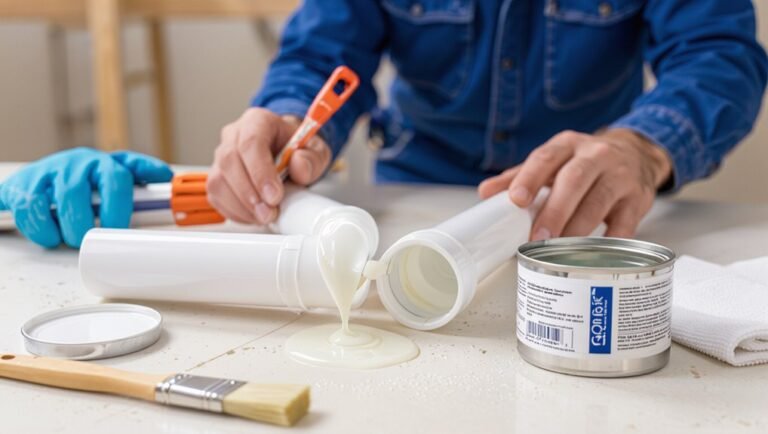
Materials Needed
For a successful DIY pipe-insulation job, select materials that match pipe type, location, and temperature requirements: closed-cell foam sleeves or elastomeric insulation for most water lines, pipe sealant or heat-resistant tape for joints, insulating wrap or fiberglass for irregular runs, and corrosion-inhibiting tape for metal pipes.
Additional essentials include weatherproof jacketing for outdoor runs, pipe insulation hangers or straps, and foam sealant for gaps around penetrations. Recommended fasteners are stainless steel or plastic ties. For heat-traced systems, use compatible insulation and thermal-adhesive compounds. Safety items—gloves, goggles, and a respirator when cutting fiberglass—complete the material list.
Types of Pipe Insulation and Best Uses
When choosing pipe insulation for winter, homeowners and professionals must weigh material properties, installation method, and the pipe’s location to match performance with need.
Common options include fiberglass for stationary, high-temperature lines; polyethylene foam for straightforward indoor runs; fiberglass-faced products for exposed areas needing vapor control; and mineral wool for fire resistance and irregular shapes.
Selection depends on temperature range, moisture exposure, accessibility, and budget.
Properly matched insulation prevents freezing, condensation, and heat loss.
Consider ease of cutting, fitting around fittings, and required vapor barrier.
Professional-grade wraps suit exterior or buried pipes; basic sleeves suffice for protected interiors.
- Fiberglass for hot or stationary lines
- Polyethylene foam for indoor runs
- Fiberglass-faced for exposed, damp areas
- Mineral wool for fire resistance and odd shapes
Foam Sleeve vs Rubber Pipe Insulation: Which to Pick
Compared side-by-side, foam sleeve and rubber pipe insulation differ most in flexibility, thermal performance, and durability: foam sleeves (typically polyethylene) are lightweight, easy to cut and install for indoor, dry runs, while elastomeric rubber offers superior moisture resistance, higher R‑value per inch, and better long‑term resilience for exposed, humid, or outdoor applications.
Selection depends on location and priorities: choose foam for low-cost, simple indoor insulation where mechanical damage risk is low; choose rubber where condensation, sunlight, or temperature extremes threaten performance.
Consider pipe diameter, available space, and budget; properly sealed seams and fittings improve effectiveness regardless of material choice.
Fiberglass Wrap and Foil Tape: When to Use Each
Having chosen between foam sleeve and rubber insulation, attention turns to finishing and sealing materials that affect longevity and moisture control.
Fiberglass wrap offers thermal resistance for irregular shapes and works well where vapor diffusion is less critical; it requires a vapor barrier or foil jacket in damp areas.
Foil tape provides a durable, moisture-resistant seam and seals joints, but adheres poorly to dirty or wet surfaces.
Selection depends on location, exposure, and pipe geometry.
Properly applied combinations extend service life.
- Use fiberglass wrap for odd shapes and bends
- Use foil tape to seal seams and penetrations
- Clean surfaces before taping
- Add a vapor barrier in high-humidity spots
Heat Tape and Heat Cable: Safe Use and Limits
Install heat tape or heat cable only where manufacturer guidelines and local codes permit, because they introduce electrical heat that requires correct placement, power supply, and protection.
Heat products prevent freezing on sections vulnerable to cold, but they are not a substitute for proper thermal insulation.
Choose self-regulating cable for variable temperatures or constant-wattage tape where appropriate, matching length and amperage to circuit capacity.
Keep connections dry, avoid overlapping tape, and secure with recommended fasteners.
Inspect yearly for wear, replace damaged sections, and follow grounding and GFCI requirements.
Do not install heat tape inside enclosed wall cavities.
Rigid Insulation for Outdoor Pipes
After addressing electrical heat options, attention turns to rigid insulation as a passive, long-lasting method for protecting outdoor piping from freezing.
Rigid foam boards and pre-formed sections resist moisture, compressive damage, and rodents better than soft covers.
Installation requires careful sealing at joints and around supports to prevent air gaps.
External weatherproof cladding adds UV and impact protection.
Rigid systems suit exposed lines, shallow burial, and utility runs where durability matters.
- Choose closed-cell foam for low water absorption.
- Cut sections to fit snugly around fittings.
- Seal seams with compatible tape or sealant.
- Add mechanical fasteners at intervals.
Choosing Insulation Thickness by Pipe Diameter
Guidance on insulation thickness begins with matching the jacket to the pipe diameter so larger pipes receive proportionally greater thermal resistance.
The decision also accounts for flow temperature and whether the pipe is exposed to wind, sun, or buried conditions.
A practical table or chart typically follows to specify thicknesses for common diameter ranges and exposure scenarios.
Match Thickness To Diameter
Because heat loss rates and condensation risk vary with pipe diameter, selecting insulation thickness should be done by matching the insulation to the pipe’s size rather than applying a one-size-fits-all rule.
Smaller pipes often need proportionally thicker insulation to reduce relative heat loss; larger pipes may require added layers but benefit less from each incremental thickness.
Manufacturers provide charts correlating diameter to recommended thickness; consult those for accuracy.
Properly matched insulation minimizes freeze risk and saves material costs.
Install snug, continuous coverage and seal joints to preserve performance.
- Use manufacturer charts for guidance
- Prioritize snug fit around curves
- Add vapor barriers where condensation is possible
- Inspect and replace damaged sections
Consider Flow And Exposure
When selecting insulation thickness by pipe diameter, flow rate and exposure conditions determine how much thermal protection is required: higher flow temperatures and continuous flow reduce freeze risk, while intermittent or stagnant flow increases the need for thicker insulation on the same diameter.
The installer evaluates pipe diameter alongside expected water velocity, seasonal lows, and whether the run is indoors, in a basement, or exposed to wind and drafts.
Larger pipes retain heat better but can still freeze if flow stops. For exposed, low-flow, or outdoor runs choose thicker insulation or add heat tracing; for warm, high-flow lines thinner insulation may suffice.
Measure Pipe Length and Fittings Accurately
To guarantee insulation fits correctly and functions as planned, measure each exposed run of pipe from end to end and note the locations and types of fittings (elbows, tees, valves) that change length or require special pieces. Use a tape measure and record straight lengths, center-to-center distances for fittings, and offsets where pipes change elevation. Measure twice and mark measurements on a diagram or the pipe itself. Account for gaps at supports and planned access points.
- Record total linear feet per run
- Note fitting types and angles
- Measure distance between supports and fittings
- Include allowance for overlap and endcaps
Preparing Pipes Before Insulation
Before applying insulation, the pipes should be clean and completely dry to guarantee proper adhesion and prevent mold.
A careful inspection for leaks and corrosion follows, with any faults repaired prior to wrapping.
Addressing these steps first reduces the risk of trapped moisture and future damage.
Clean And Dry Pipes
With surfaces free of dust, oil, and moisture, insulation adheres properly and performs as designed.
Pipes are wiped with a clean cloth, degreased where needed, and allowed to dry completely.
Remove loose corrosion or flaking paint with a brush; avoid deep scraping that could damage fittings.
For damp areas, use a hair dryer or heat gun at low setting, keeping nozzle moving and maintaining safe distance.
After cleaning, inspect visually for residue and make certain temperature is stable before applying insulation.
- Wipe with lint-free cloth
- Use mild detergent or degreaser
- Dry thoroughly before insulating
- Remove loose corrosion or paint
Check For Leaks
Regularly inspecting pipes for leaks is a critical preparatory step before adding insulation. The inspector examines joints, valves, and visible runs for drips, corrosion, or dampness.
Small leaks should be marked and tightened or sealed with appropriate fittings, tape, or epoxy. Larger damage requires replacement or professional repair prior to insulation to prevent trapped moisture and mold.
After repairs, the system is pressurized and rechecked to confirm dryness. Documented repairs and a final dry-check guarantee insulation will not conceal active leaks. This prevents wasted effort and protects insulation materials and surrounding structures from water damage.
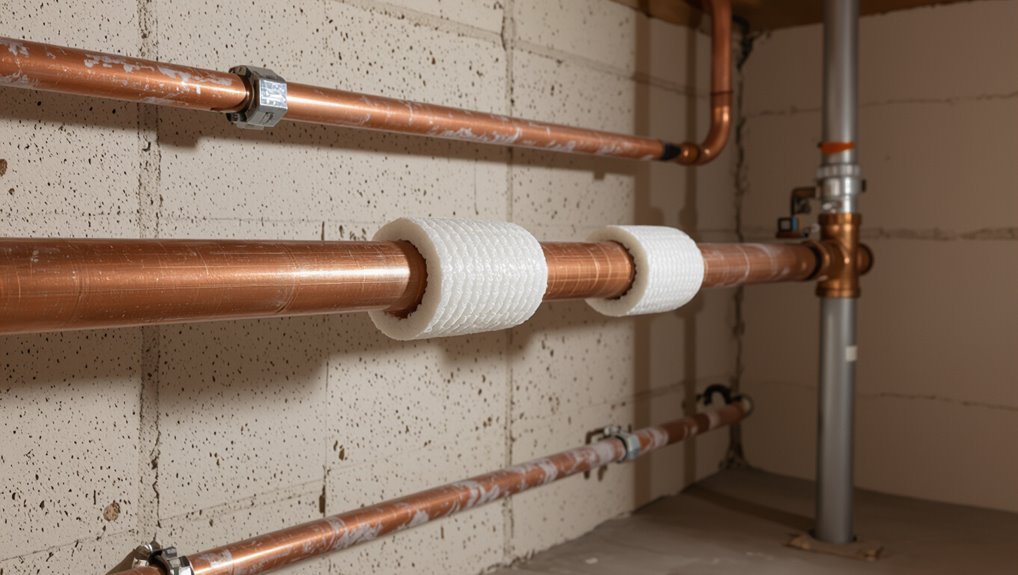
Install Foam Sleeve Insulation Step‑by‑Step
Begin by measuring each exposed pipe run and cutting closed-cell foam sleeves to length so seams align over joints and valves; this guarantees a snug fit that minimizes heat loss and prevents moisture infiltration.
Next, slit sleeves along their seam, open gently, and slip them over pipes without stretching.
Make certain tight contact at elbows and around clamps; use short sleeve sections for bends.
Seal sleeve seams and ends with appropriate waterproof tape or compatible adhesive, and secure at intervals with zip ties or pipe straps.
Inspect installed insulation for gaps and compressions, correcting them to maintain continuous thermal protection.
- Measure carefully before cutting
- Slit then slide sleeves on
- Seal seams and ends
- Secure at regular intervals
Wrap Pipes With Fiberglass: Step‑by‑Step
When preparing to wrap exposed pipes with fiberglass insulation, make sure the surface is clean and dry and wear gloves and a dust mask to prevent irritation. The installer measures pipe length, cuts fiberglass batt or roll to size, and wraps it snugly with the paper or foil facing outward. Overlap seams by about one inch and secure with aluminum foil tape or plastic ties. Leave valves and joints accessible, insulating around supports without compressing the fiberglass. Finish by checking for gaps and adding an outer vapor barrier if needed.
| Step | Detail |
|---|---|
| Measure | Record pipe length |
| Cut | Size insulation pieces |
| Wrap | Overlap seams |
| Secure | Tape or ties |
Apply Heat Tape Safely on Metal Pipes
When addressing metal pipes, the appropriate heat tape must be chosen for pipe material and location to guarantee compatibility and adequate wattage.
The manufacturer’s instructions should be followed precisely for installation, spacing, and electrical requirements to guarantee compatibility and adequate wattage to prevent hazards.
After the tape is applied, it must be fastened securely and covered with suitable insulation to retain heat and protect the tape.
Choose Proper Heat Tape
Selecting the correct heat tape for metal pipes requires matching the tape’s type, temperature rating, and installation method to the pipe material and location. The reader should favor self-regulating tapes for variable heat needs and ambient conditions; constant-wattage tapes suit uniform warming when matched to pipe diameter. Consider insulation compatibility, outdoor exposure, and wet environments when choosing a jacketed or water-resistant model. Verify voltage and amperage match home circuits and choose tapes rated for metal contact.
Use corrosion-resistant adhesive or clips rather than corrosive fasteners, and plan routing to avoid overlapping heating elements.
- Self-regulating vs constant-wattage
- Voltage and amperage match
- Outdoor/wet rating
- Attachment method
Follow Manufacturer Instructions
Before applying heat tape to metal pipes, the installer must read and follow the manufacturer’s instructions exactly, because those guidelines specify heat-tape type, maximum operating temperatures, approved attachment methods, and required clearances that guarantee safe, effective operation. The technician selects the proper tape, verifies amperage and thermostat settings, and confirms compatibility with pipe material. Labels and diagrams are consulted for routing and overlap limits. Any damaged tape is discarded. Documentation is retained for inspections. Typical note: never use nonlisted tape on insulated joints.
| Tape Type | Max Temp | Attachment |
|---|---|---|
| Self-reg. | 150°F | Clips |
| Constant | 200°F | Ties |
Secure And Insulate Over Tape
For a secure and code-compliant installation, the heat tape must be fastened to the metal pipe with manufacturer-approved clips or ties at the recommended spacing, routed without kinks or overlaps beyond specified limits, and then covered with appropriate thermal insulation rated for use over powered tape; this prevents heat loss, minimizes moisture condensation, and protects the tape from mechanical damage while preserving thermostat and maximum-temperature clearances.
The installer should verify power is off, follow product wiring and grounding rules, maintain clearances at fittings and unions, and test operation before final enclosure. Proper labeling and periodic inspection guarantee long-term safety.
- Use only approved clips or ties
- Cover with insulation rated for heat tape
- Maintain clearance at valves and joints
- Label and inspect periodically
Insulate Joints, Valves, and Bends Correctly
Around joints, valves, and bends, heat loss and freezing risk increase because geometry and fittings create thin spots in insulation and gaps where covers meet. Attention to these areas prevents leaks and burst pipes.
Use preformed pieces or cut insulation to fit curves and T-fittings closely. For valves, insulate around stems without restricting operation; removable wraps help access. Layer insulation where pieces meet, overlapping seams to avoid voids.
For irregular shapes, use foam, fiberglass with vapor barrier, or pipe-specific wrap shaped to maintain continuous coverage. Inspect fittings after installation to verify snug contact and no exposed metal surfaces remain.
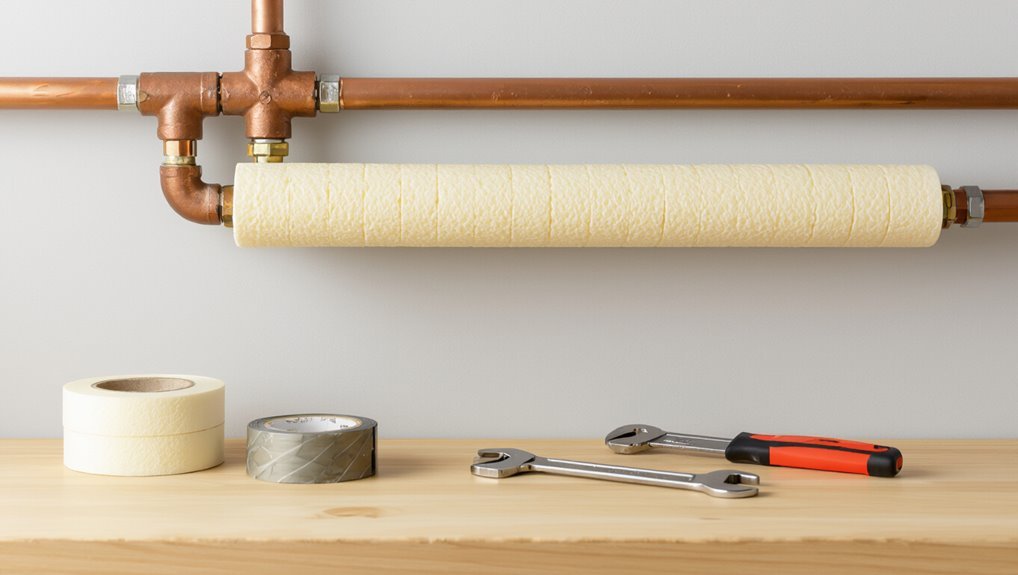
Seal and Secure Insulation With Tape and Clamps
Attention to seam sealing and fastening completes an effective insulation job.
Proper tape prevents air and moisture from entering seams.
Sturdy clamps hold insulation tightly in place to maintain coverage and position.
Tape For Seam Sealing
Several types of tape and clamps guarantee insulation seams remain tight and weatherproof during winter. For tape-focused sealing, choices prioritize adhesion, elasticity, and temperature resistance. Proper tape prevents moisture ingress and wind-driven loosening.
Installers clean surfaces, overlap seams, and smooth tape to avoid gaps. Use tape suited to the insulation material—foil tape for foam and fiberglass-compatible butyl or acrylic tapes for other wraps. Avoid over-tensioning, which can compress insulation and reduce R-value. Regular inspections reveal lifting or degradation so tape can be replaced before failure.
- Choose tape rated for outdoor temperature extremes
- Match tape adhesive to insulation type
- Overlap seams by at least one inch
- Press firmly to eliminate air pockets
Clamps For Secure Fit
Clamps and straps provide the mechanical backbone that holds pipe insulation snugly against the pipe, preventing gaps and slippage that tape alone may not resist in windy or wet conditions.
Metal or plastic clamps secure foam or fiberglass sleeves at intervals, near fittings and along runs.
Use corrosion‑resistant materials outdoors; adjustable, cushioned straps indoors to avoid crushing insulation.
Place clamps every 12–24 inches, tighter near joints and bends.
Make sure clamps compress insulation evenly without creating cold spots.
Combine with tape at seams for weatherproofing.
Periodically inspect and retighten as temperature cycles cause settling or material changes.
Insulating Pipes in Crawl Spaces and Basements
In crawl spaces and basements, insulating pipes reduces heat loss, prevents freezing, and minimizes condensation that can cause mold and corrosion.
A practical approach starts with inspecting pipe runs for gaps, joints, and dampness. Choose closed-cell foam, fiberglass with vapor barrier, or rubber insulation suited to location and temperature. Secure insulation with tape or clamps, sealing seams and fittings. Maintain access to valves and traps.
- Measure runs and elbows before purchasing material
- Elevate pipes slightly off cold surfaces when possible
- Use vapor barrier where moisture accumulates
- Check insulation annually for damage or compression
Insulate Pipes in Unheated Garages and Sheds
When exposed to colder air and limited heat sources, pipes in unheated garages and sheds require insulation strategies tailored to larger temperature swings and possible drafts.
Pipes should be wrapped with closed-cell foam or fiberglass with a vapor barrier, sealing seams with compatible tape.
Elevating lines off cold concrete and routing them away from exterior walls reduces chill.
Consider heat trace cables with thermostat control for very cold zones, following manufacturer instructions and local codes.
Insulate exposed fittings, valves, and backflow preventers.
Regularly inspect insulation for damage and rodents; replace compromised sections before sustained freezing temperatures arrive.
Protect Exposed Outdoor Faucets and Hose Bibs
Exposed outdoor faucets and hose bibs are vulnerable to freezing and should be protected before temperatures drop.
Use insulated faucet covers, shut off and drain exterior lines, and disconnect and store hoses to prevent trapped water from expanding.
Make certain any accessible shutoff valves are secured and tested so they function when needed.
Insulate With Faucet Covers
Protecting outdoor faucets and hose bibs with insulated covers prevents freezing and reduces the risk of burst pipes during cold weather.
A simple foam or insulated fabric cover fits over the spout and valve, trapping warmth and blocking wind.
Installation is quick: remove hoses, slip on the cover, secure straps or ties, and check seals.
Covers are inexpensive, reusable, and suitable for most standard hose bibs.
- Choose a cover rated for the local minimum temperatures
- Remove connected hoses before covering
- Inspect covers for tears each season
- Store covers indoors when warm months return
Drain And Shut Off
After fitting insulated covers, homeowners should also shut off and drain outdoor faucets to further reduce freeze risk.
Locate the indoor shutoff valve serving the exterior tap, turn it off fully, then open the outdoor spigot to release trapped water.
Leave the spigot open or slightly ajar to allow any remaining moisture to expand without pressure.
If no indoor shutoff exists, isolate the supply at the main valve and consider professional installation of a dedicated exterior shutoff.
Verify that drain passages are clear and that no hoses remain attached.
Label the shutoff for winter use and test again after cold snaps.
Secure Hoses And Valves
Before the first hard freeze, homeowners should remove and store garden hoses and cover hose bibs to prevent trapped water from freezing and damaging valves. Properly securing hoses and valves reduces burst pipes and costly repairs.
Disconnect hoses, drain remaining water, and store them indoors. Install insulated faucet covers or foam bib protectors over exposed hose bibs.
Shutoff valves for exterior lines should be tested and packed with insulation or heat tape where appropriate. Check for leaks and replace washers if needed.
Winterize backflow preventers per manufacturer instructions to avoid cracking from ice expansion.
- Disconnect and drain hoses
- Use insulated faucet covers
- Insulate exterior shutoff valves
- Inspect and repair leaks
Winterize Irrigation and Sprinkler Pipes
When temperatures drop below freezing, irrigation and sprinkler systems require specific steps to prevent pipe bursts and damaged valves.
The homeowner shuts off the main irrigation supply and drains exposed lines using drain valves or by opening low points.
Automatic systems are manually set to off and controllers disconnected or battery-removed.
Backflow preventers are insulated or removed and stored indoors.
For underground lines, compressed-air blowout is performed by a qualified person to expel water safely.
Aboveground exposed components receive foam covers and tape.
Documentation of system winterization helps streamline spring commissioning and avoids overlooked components.
Insulate Hot Water Heater and Supply Lines
In colder months, insulating the water heater and its supply lines reduces standby heat loss, lowers energy bills, and helps prevent freezing in unheated spaces.
Install an insulating blanket on older tanks, follow manufacturer guidelines for modern units, and seal gaps around lids and vents.
Add foam pipe sleeves on hot and cold supply lines, securing with tape or zip ties.
Insulate first few feet of piping from the tank where heat loss is greatest.
Monitor temperature settings, keeping the thermostat at an efficient level.
Check insulation periodically for compression, moisture, or damage and replace as needed.
- Use a rated tank blanket
- Fit foam sleeves snugly
- Tape seams and joints
- Inspect annually
Insulating Hidden or Hard‑to‑Reach Pipes
When pipes run inside walls, ceilings, or tight crawlspaces, locating and accessing those concealed runs becomes the first challenge.
Practical techniques—such as using flexible foam sleeves, split tubing, or adhesive-backed insulation tape—allow installers to work around bends and confined openings.
Planning access points and choosing pliable materials reduces labor and improves the effectiveness of the thermal barrier.
Accessing Concealed Pipe Runs
Behind walls and beneath floors, concealed pipe runs present unique insulation challenges because limited access restricts standard-wrap methods and requires alternative materials or installation techniques.
Inspect accessible entry points, trace runs, and locate shutoffs.
Small inspection holes reveal pipe size and obstructions; seal after work.
Use foam-in-place, thin self-adhesive sleeves, or pipe-specific spray foam where gaps are narrow.
Consider temporary access panels for longer sections.
Prioritize thermal continuity across joints and supports.
Verify local codes before altering structural elements.
After insulation, restore finishes neatly and test for leaks or cold spots.
- Map routes and mark access points
- Choose low-expansion materials
- Maintain service clearances
- Patch openings properly
Flexible Insulation Techniques
Following inspection and targeted access, attention shifts to flexible insulation techniques suited for hidden or hard-to-reach pipe runs. Foam tubing with slit seams slips over irregular layouts; secure with adhesive tape or cable ties.
For bends and joints, use compressible fiberglass sleeves or wrap-around sections that conform without gaps. Expandable spray foam fills voids around pipes in cavities but must be used sparingly to avoid pressure on fittings.
Reflective foil or closed-cell rubber tape adds moisture resistance in damp spaces. Maintain 1/2-inch clearance from heat sources, label insulated sections, and periodically inspect for compression, moisture, or pest damage to guarantee long-term effectiveness.
Temporary Fixes for Sudden Cold Snaps
How can homeowners quickly protect exposed plumbing during an unexpected freeze? Immediate, temporary measures reduce freezing risk until permanent insulation is applied. Prioritize rapid, safe actions that limit heat loss and prevent bursts.
- Wrap pipes with towels or rags and secure with tape to trap residual warmth.
- Apply heat from a hair dryer or portable heater intermittently, keeping devices away from moisture and combustible materials.
- Open cabinet doors and run a slow trickle of water to maintain flow and temperature.
- Use foam pipe sleeves or rubber hoses as quick covers where available, fastening securely to prevent slippage.
Test Insulation Effectiveness Before Freeze Season
Before the freeze season, a systematic check for cold spots along insulated runs helps identify gaps or compressed material that reduce performance.
A simple flow test — opening faucets and observing steady warm-water delivery after a short run — verifies that insulation and heat are maintaining adequate pipe temperature.
These quick checks allow targeted repairs before prolonged cold sets in.
Check For Cold Spots
Regularly inspect pipe runs and surrounding surfaces for cold spots to verify insulation is performing as designed. A handheld infrared thermometer or thermal camera quickly reveals temperature differentials along pipes and at joints. Check during the coldest part of the day and compare readings to ambient room temperature. Note any sections colder than expected; these indicate compressed, missing, or damaged insulation. Address identified spots promptly to prevent freeze risk.
- Scan entire runs, focusing on bends, tees, and fittings
- Record temperatures and locations for follow-up
- Repair or add insulation where readings are low
- Recheck after repairs to confirm improvement
Perform A Flow Test
Initiate a flow test to confirm that pipe insulation maintains sufficient water movement and prevents localized cooling under winter conditions.
The homeowner opens taps at several fixtures simultaneously — cold and hot — while noting pressure and temperature consistency. A steady, strong flow indicates insulation isn’t obstructing pipes or trapping air; weak or fluctuating flow suggests trapped air pockets, pinched insulation, or partial freeze risk.
Inspect exposed runs during the test for cold spots with a hand or infrared thermometer.
Record results and repeat after adjustments: rewrap, add foam, or improve ventilation.
Repeat tests periodically before and during the cold season.
Common Mistakes That Still Let Pipes Freeze
Often, homeowners underestimate how small oversights can allow pipes to freeze; common mistakes include leaving exterior faucets exposed, failing to insulate vulnerable crawlspaces and attics, and relying solely on intermittent heating rather than maintaining a minimum indoor temperature.
Small gaps around service lines, uninsulated valve boxes, and overlooking short runs in closets create weak points.
Misjudging insulation R-value or installing it loosely reduces effectiveness.
Regular inspection and targeted upgrades prevent most failures without wholesale replacement.
- Ignoring pipe runs through unheated garages
- Using thin foam on extremely cold sections
- Forgetting to seal wall penetrations
- Assuming short water flow prevents freezing
What to Do If a Pipe Freezes
If a pipe freezes, the homeowner should act quickly but calmly: shut off the main water supply to prevent pressure buildup and potential bursts, open nearby faucets to relieve trapped pressure and allow melting water to escape, and locate the frozen section by feeling along exposed runs or checking for frost or bulging.
Next, assess access and risks: note pipe material, nearby combustibles, and electrical sources.
If a leak or bulge appears, keep the supply off and call a licensed plumber immediately. Document damage with photos for insurance.
Once safe, plan repairs or replacement and improve insulation and heat sources to prevent recurrence.
How to Thaw Frozen Pipes Safely
The writer explains that thawing begins by locating the pipe’s freeze point, looking for sections that are cold to the touch or where condensation forms.
They recommend applying safe heat sources—such as a hair dryer, heat lamp, or wrapped heating tape—while avoiding open flames and electrical hazards.
Finally, the piece emphasizes restoring insulation and adding preventive measures to reduce the risk of future freezing.
Locate The Freeze Point
When winter temperatures drop, homeowners should first identify where a pipe is frozen before attempting to thaw it. A careful assessment minimizes damage and directs safe thawing.
Signs include no water flow at fixtures, frost on exposed piping, bulging pipe sections, and unusually cold wall or ceiling areas. Tracing from the fixture toward the main line helps find the coldest point.
If multiple sections are involved, note each location. If a burst is suspected, shut off the main and call a professional.
Never assume the freeze point; confirm visually and by touch before proceeding.
- No water at fixture
- Frost on pipe
- Bulging pipe
- Cold wall/ceiling
Apply Safe Heat Sources
Choosing appropriate, controlled heat sources is the next critical step in thawing frozen pipes safely. A space heater, hair dryer, heat lamp, or electric heating pad applied gradually and monitored prevents thermal shock.
Begin closest to the faucet, working toward the freeze, and never use open flames or torches. Insulate surrounding combustible materials and keep electrical devices dry.
If thawing a hidden pipe, warm the area gently and check for leaks as ice melts. If heat fails to restore flow within a reasonable time or if pipes are bulging, shut off water and contact a professional to avoid bursts and water damage.
Prevent Future Freezing
Taking preventive measures after thawing frozen pipes reduces the risk of repeat freezes and costly damage.
The homeowner should inspect for cracks, tighten fittings, and replace compromised insulation.
Maintain consistent indoor temperatures and open cabinet doors to circulate warm air around vulnerable plumbing.
Install pipe insulation, heat tape, or thermostatically controlled cables where needed.
Seal gaps in exterior walls, around vents, and near pipe entries to prevent cold drafts.
- Check joints and valves for leaks after thawing.
- Keep a slow drip during extreme cold to prevent re-freezing.
- Add foam insulation or wrap to exposed pipes.
- Monitor weather and act before temperatures drop.
Signs of Pipe Damage After Thawing : When to Call a Pro
After frozen pipes thaw, homeowners should inspect for clear signs of damage rather than assume all is well. Visible leaks, discolored water, low pressure, or strange noises indicate possible cracks or joint failure. Rapid response reduces water damage; some issues need a licensed plumber for pressure testing and repair. If drywall is swollen, mold appears, or multiple fixtures are affected, call a pro. Small, isolated drips may be temporarily managed, but documented damage warrants professional evaluation.
| Sign | Action |
|---|---|
| Visible leak | Shut off water, call plumber |
| Discolored water | Do not drink, test lines |
| Low pressure | Check valves, call pro |
| Mold/swelling | Document, hire professional |
Energy Savings From Insulating Pipes: Realistic Numbers
Energy savings from insulating water pipes are measurable and depend mainly on pipe location, water temperature, and insulation quality. Insulation reduces heat loss from hot-water lines and prevents cold infiltration on supply lines, lowering water-heater cycling and pump runtime.
Typical reductions in heat loss range from 10–30% for accessible hot pipes; greater benefits occur in unheated spaces. Savings translate to modest energy cost cuts annually but improve comfort and response time.
Quantifying gains requires pipe length, surface area, temperature differential, and R-value. Use the following quick-reference points:
- Typical hot-line loss reduction: 10–30%
- Unheated spaces yield higher savings
- Short runs give smaller gains
- R-value impacts performance
Cost: DIY Materials vs Professional Installation
With realistic savings established, the next consideration is cost: comparing DIY materials to hiring a professional. DIY pipe insulation materials—foam sleeves, tape, sealant, and basic tools—typically range from $20 to $100 for a small home project. Time investment and skill level factor into true cost; errors reduce savings.
Professional installation often costs $150–$600 depending on linear feet, pipe complexity, and access. Pros provide warranty, correct fittings, and faster completion. Homeowners should weigh material expense plus personal labor against contractor guarantees and higher upfront fees to choose the most cost-effective approach.
Local Codes and Safety Tips for Pipe Insulation
In many jurisdictions, pipe insulation must meet local building codes and safety standards that specify materials, thicknesses, and clearances to prevent fire hazards and maintain heat-trapping performance.
Compliance guarantees acceptable R-values, approved vapor barriers, and safe distances from heat sources or electrical wiring.
Installers should verify permits for significant work and follow manufacturer instructions.
When in doubt, consult local building departments to avoid violations or insurance issues.
- Use code-approved, non-combustible materials near furnaces and flues.
- Maintain required clearances from electrical junctions.
- Label insulated lines and access points for valves.
- Keep documentation of permits and product specs.
How Often to Inspect and Replace Insulation
Regularly scheduled inspections help guarantee pipe insulation continues to perform as meant and prevent heat loss, moisture damage, or safety hazards. Inspections every six months are recommended for exposed or vulnerable pipes; annually is acceptable for protected, interior runs. Replace insulation when it shows compression, mold, tears, or water saturation. After severe weather or plumbing work, recheck affected sections. Proper records of inspection dates and conditions support timely replacements and budget planning. Quick visual checks and occasional tactile or moisture tests suffice for most homeowners. Prioritize prompt replacement of damaged segments to maintain thermal efficiency and prevent freeze-related failures.
| Inspection Interval | Action Needed |
|---|---|
| Every 6 months | Visual + tactile check |
| Annually | Full review and records |
Eco‑Friendly Pipe Insulation Options
Many homeowners and builders now prefer eco-friendly pipe insulation that reduces energy loss while minimizing environmental impact. Options emphasize renewable materials, low embodied energy, and recyclability while still preventing freezing and heat loss.
Selection depends on pipe location, temperature range, and moisture exposure. Proper installation maintains performance; attention to seams and supports avoids thermal bridging. Consider lifecycle impacts rather than initial cost alone.
- Sheep’s wool: natural, breathable, resists mold, effective in varied climates.
- Cork: renewable, durable, moisture-resistant for exposed pipes.
- Cellulose-based wraps: recycled fibers, good thermal performance.
- Recycled denim: non-toxic, flexible, easy to install.
Product Recommendations and Where to Buy
For straightforward selection, prioritize insulation types that match pipe location, temperature exposure, and moisture conditions.
Recommended products include closed-cell foam sleeves for indoor, dry pipes; rubber or EPDM for areas with movement or higher temperatures; and foil-faced fiberglass for exterior or crawlspace runs.
For freeze-prone outdoor lines, choose thick, UV-resistant foam with taped seams.
Buy at big-box stores, plumbing supply houses, or reputable online retailers; compare R-values, sleeve diameters, and temperature ratings.
Purchase compatible tape, zip ties, and sealant at the same source.
Read user reviews and manufacturer specs to confirm fit and installation guidance before buying.
Combine Methods for Maximum Winter Protection
During the cold months, combining insulation, heat tracing, and simple preventive measures creates layered protection that greatly reduces freeze risk.
One approach pairs foam or fiberglass insulation with self-regulating heat tape; another adds pipe wraps and sealed access to minimize drafts.
Proper installation, attention to joints and valves, and periodic checks guarantee reliability. This combination balances energy use and effectiveness, suited to different pipe locations and budgets.
- Use closed-cell foam on accessible runs and heat tape on vulnerable spots.
- Seal gaps where cold air enters.
- Insulate fittings and valves separately.
- Monitor periodically and replace worn materials.
Conclusion
Preparedness proves essential: insulating pipes for winter protects homes like a well‑fitted coat shields from a biting wind. By following simple steps—identifying vulnerable runs, applying appropriate insulation, sealing gaps, and combining methods where needed—homeowners can prevent costly freezes and bursts. Regular inspection and timely replacement keep defenses effective, while eco‑friendly options and recommended products make the task accessible. Consistent attention converts seasonal risk into dependable, long‑term protection.