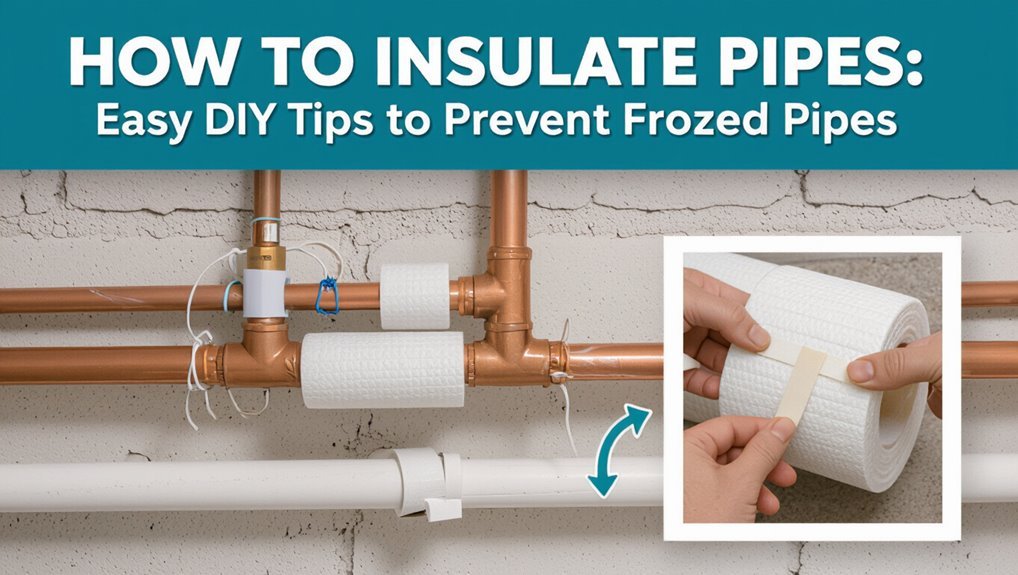
How to Insulate Pipes: Easy DIY Tips to Prevent Frozen Pipes
To effectively insulate pipes and prevent freezing, start by identifying exposed pipes in vulnerable areas like exterior walls, crawlspaces, attics, and basements. Use split foam sleeves for straight runs, preformed pieces for elbows and valves, and seal any seams with foil tape or caulk. For additional warmth, apply heat tape according to the manufacturer’s instructions and consider letting a trickle of warm water flow during extreme cold. This comprehensive approach reduces heat loss, prevents condensation, and significantly lowers the risk of pipes freezing and bursting.
What Pipe Insulation Solves
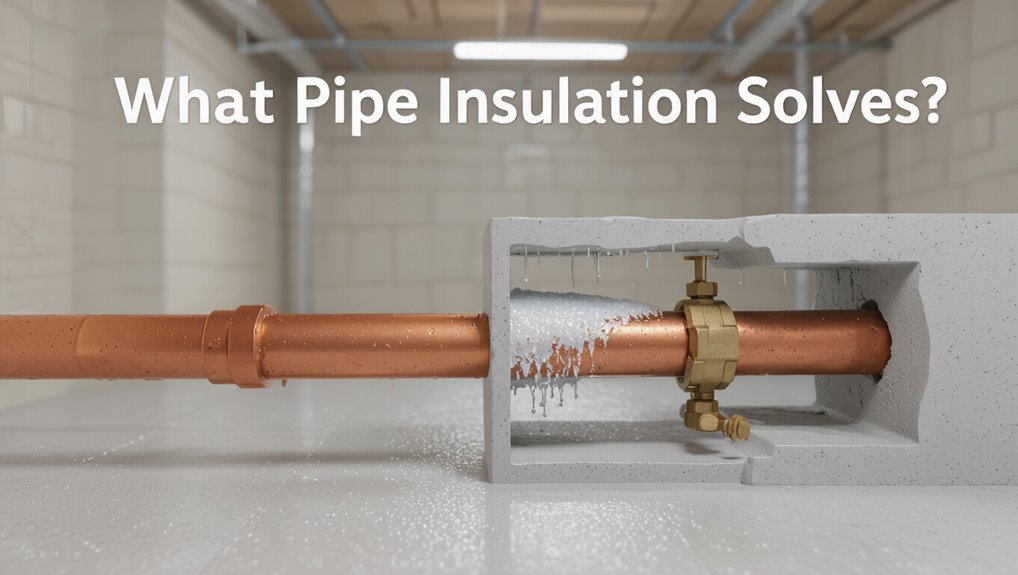
In homes and buildings, pipe insulation reduces heat loss from hot-water lines and prevents condensation on cold-water pipes, improving energy efficiency and lowering utility bills.
It limits temperature fluctuation, maintaining delivery heat and reducing boiler or water-heater cycling.
Insulation also minimizes freeze risk by slowing conductive heat loss in unheated spaces, offers modest noise dampening from water flow, and protects pipes from external damage and corrosion by controlling moisture contact.
Properly insulated systems distribute heat more evenly, reduce energy waste, and extend equipment life.
These benefits cumulate in lower maintenance needs and improved system reliability without altering plumbing layouts.
Quick Steps to Stop Pipes Freezing Now
The guide recommends first wrapping any exposed pipes with foam or insulation tape to reduce heat loss.
It also advises maintaining a slow flow of warm water through vulnerable lines during extreme cold to prevent freezing.
These immediate actions provide simple, practical protection while longer-term insulation is installed.
Wrap Exposed Pipes
For immediate protection against freezing, wrap exposed pipes with high-quality insulation such as foam sleeves or fiberglass wrap that fits snugly and resists moisture.
Measure pipe length and diameter, cut insulation to size, then slide or spiral-wrap without gaps; secure seams with waterproof tape or zip ties.
Insulate valves and fittings with preformed pieces or extra wrap.
Pay attention to joints and bends where heat loss is greatest.
Label insulated sections for future inspection.
Check periodically for compression, tears, or moisture and replace damaged sections promptly.
Properly wrapped pipes reduce freeze risk and simplify winter maintenance.
Keep Warm Water Flow
Several simple actions can keep warm water moving through vulnerable pipes to prevent freezing: open a trickle of hot and cold taps, run faucets furthest from the main supply intermittently, and circulate water by alternating between nearby fixtures.
Maintaining a thin, continuous flow reduces standing water that can freeze. During cold snaps, run hot water for several minutes every few hours and use a programmable timer or smart valve for consistency.
Prioritize lines in unheated areas and those with long runs. Monitor water temperature and adjust flow to conserve energy.
Combine flow management with insulation for best protection against frozen pipes.
Which Pipes Are Most Likely to Freeze
Near exterior walls and in unheated spaces, pipes face the greatest risk of freezing because they are exposed to lower ambient temperatures and drafts.
Galvanized steel, copper, and PEX supplying outdoor faucets, hose bibs, and garage sinks often freeze first due to proximity to cold.
Supply lines in crawlspaces, attics, basements, and along foundation walls are vulnerable, especially where insulation is thin or absent.
Long, narrow runs with limited water flow and pipes near poorly sealed doors or windows also present higher risk.
Older homes with minimal insulation and uninsulated service lines to external meters or sprinkler systems require particular attention.
How to Inspect Pipes and Identify Freeze Risk
When preparing to inspect plumbing for freeze risk, a systematic visual and tactile survey focuses attention on locations, materials, and environmental conditions that most influence vulnerability.
The inspector notes exposed runs in unheated spaces, near exterior walls, and around foundation penetrations. Metal, narrow-diameter, and older corroded pipes receive higher scrutiny. Feel for cold spots along pipe length and check for drafts, gaps, and inadequate insulation nearby.
Verify pipe routing relative to vents, chimneys, and HVAC ducts that alter temperatures. Look for previous freeze damage: bulges, hairline splits, or mineral stains. Log findings and rank sections by urgency for mitigation.
Tools and Materials for DIY Pipe Insulation
For a reliable DIY pipe-insulation job, a concise kit of basic tools and a few material choices covers most situations: a utility knife, tape measure, marker, heat-resistant tape or foil tape, cable ties or clamps, and optionally a caulk gun for sealant.
Also useful are work gloves, safety glasses, a pry bar for access panels, and a heat gun for shrink tubing or adhesive activation.
Common materials include pipe wrap (fiberglass or mineral wool), vapor-barrier tape, adhesive sealant or silicone caulk, and insulation supports.
Fasteners and weatherproofing materials suit exterior runs. Select materials rated for pipe temperature and moisture conditions.
Choosing Foam Pipe Sleeves and When to Use Them
After gathering basic tools and materials, attention turns to foam pipe sleeves as a simple, effective option for many residential and light commercial runs.
Foam sleeves deliver thermal resistance, ease of installation, and moisture resistance suitable for exposed indoor pipes, basements, and crawlspaces.
Selection depends on pipe diameter, wall thickness (R-value), temperature range, and UV exposure; closed-cell polyethylene resists moisture better than open-cell foam.
Flexible split sleeves speed retrofit work, while seamless tubing suits new installs.
Avoid sleeves for high-temperature or outdoor exposed lines unless rated accordingly.
Proper sizing and material choice guarantee reliable freeze protection and energy savings.
Installing Foam Sleeves Without Gaps
The installer measures the pipe diameter precisely to select a sleeve that fits snugly without compression or gaps.
Next, split sleeves are positioned so the seam sits along the pipe’s underside and the halves align evenly.
All joints and seams are sealed with appropriate tape or adhesive to prevent heat loss and moisture infiltration.
Measure Pipe Diameter Precisely
When preparing foam sleeves, accurate pipe diameter measurement determines whether joints seal without gaps; a snug fit prevents heat loss and condensation.
Technicians or homeowners should clean pipe surfaces, remove insulation remnants, and measure external diameter with calipers or a flexible tape for irregular runs.
Record measurements at multiple points to detect ovality or corrosion.
Select sleeve internal diameter matching the largest measured value, accounting for sleeve compression and wall thickness.
For copper, PVC, or PEX, consult manufacturer sizing charts rather than nominal pipe labels.
Precise measurement reduces cutting errors, avoids stretched sleeves, and guarantees continuous thermal protection along the run.
Split Sleeve Placement
With careful alignment along the pipe’s length, split foam sleeves should be seated so their factory seams meet over the pipe’s crown, creating a continuous insulating layer without gaps.
Install sections snugly end-to-end, matching diameter and orientation to maintain uniform thickness.
Trim sleeve ends squarely for flush contact at bends and fittings, using a sharp blade and guide.
Support long runs with spaced brackets or tape to prevent sagging that can open gaps.
Inspect visually and by touch to confirm full contact along the pipe, correcting any misalignments before proceeding to the next insulation step.
Seal Joints And Seams
After aligning and seating split sleeves, attention shifts to sealing their joints and seams to eliminate air gaps and thermal bridges.
The installer applies weatherproof tape or foil-backed adhesive over every longitudinal seam and end-to-end joint, pressing firmly to guarantee continuous contact. For irregular fittings, flexible foam tape or canned insulation foam fills gaps, trimmed flush once cured. Overlaps should be staggered and taped to create a seamless barrier.
All seals are inspected for pinholes or loose edges and retaped as needed. Proper sealing preserves R-value, prevents condensation, and minimizes heat loss, reducing freeze risk along the entire pipe run.
Fiberglass Wrap: Advantages and Step‑by‑Step Install
Although less conspicuous than foam sleeves, fiberglass wrap provides a durable, high-temperature insulation option for exposed pipes, combining good thermal performance with fire resistance and flexibility for irregular runs. It suits hot-water lines, chimneys, and outdoor valves where heat tolerance matters.
Installation begins by measuring pipe length and cutting wrap with overlap. Wrap tightly from one end, maintaining 1–2 inch overlap and covering fittings. Secure seams with aluminum foil tape or stainless steel wire ties.
Inspect for gaps, compress wrap slightly around flanges, and seal ends. Periodically check for moisture and replace damaged sections to preserve R-value.
Rubber Pipe Insulation: Best Uses and Tips
Rubber pipe insulation combines closed-cell neoprene or EPDM foam with flexible, weather-resistant properties that make it well suited for chilled-water systems, refrigeration lines, and outdoor plumbing where condensation control and durability are priorities. It resists moisture, resists tearing, and maintains R-value when exposed to UV or temperature swings. Ideal for exposed runs and roof-mounted systems, it is simple to cut and fits snugly around bends. Seams should be sealed with compatible adhesive or tape. Maintenance is minimal: inspect for cracks and replace sections as needed.
| Feature | Benefit | Typical Use |
|---|---|---|
| Closed-cell | Low moisture uptake | Refrigeration |
| Flexible | Easy installation | Outdoor piping |
| UV-resistant | Long service life | Roof runs |
How to Install Heat Tape Safely
Typically, installers begin by reading the manufacturer’s instructions and confirming the heat tape model matches the pipe material and environment to guarantee safe operation and warranty compliance.
They inspect the pipe for damage, clean and dry surfaces, then lay the tape straight along the pipe or spiral it per directions, avoiding overlap.
Connections and thermostat sensors are positioned as specified.
Heat tape is secured with manufacturer-approved fasteners, leaving room for expansion.
After installation, circuits are grounded and protected by a GFCI.
Finally, installers test the system, document placement, and schedule periodic inspections to assure ongoing safety and performance.
Use Weatherproof Tape for Temporary Pipe Lagging
After installing and testing heat tape, attention often shifts to short-term protection for exposed runs before permanent insulation is fitted.
Weatherproof tape serves as a temporary lagging solution: it resists moisture, adheres to metal and plastic, and holds loose wrap in place.
Application is straightforward but must avoid covering heat-tape controls or creating heat traps.
Remove tape promptly when installing proper insulation to prevent adhesive residue and corrosion.
Regular inspections guarantee seals remain intact during storms or temperature swings.
- Clean surface and dry thoroughly.
- Overlap tape by half its width.
- Avoid covering thermostats or junctions.
- Replace with permanent insulation within days.
Insulating Copper, PVC, and PEX: What Differs
Different pipe materials require tailored insulation approaches because thermal conductivity, expansion behavior, and susceptibility to condensation vary between copper, PVC, and PEX. Copper conducts heat rapidly and benefits from closed-cell foam to prevent condensation; PVC is rigid and likes snug-fit sleeve insulation to avoid gaps; PEX expands and contracts, so flexible wrap or foam that accommodates movement is preferred. Install methods change: adhesive-backed wraps suit copper, slit foam works for PVC, and elastic tapes match PEX. Consider moisture barriers for copper, rigid support for PVC runs, and allowance for PEX movement to maintain long-term protection.
| Material | Feeling | Action |
|---|---|---|
| Copper | urgent | seal moisture |
| PVC | steady | fit tightly |
| PEX | forgiving | allow movement |
| All | reassured | inspect regularly |
How Thick Should Pipe Insulation Be in Cold Climates?
Recommended insulation thickness varies by pipe size and severity of cold, with common guidance ranging from 1/2 inch for mild winters to 1–2 inches or more in subfreezing regions.
Climate-based charts and local building codes help determine exact thickness required to prevent freezing and reduce heat loss.
Installers must also allow for clearance, fittings, and vapor barriers so the chosen insulation performs effectively.
Recommended Insulation Thickness
In cold climates, pipe insulation thickness should be chosen to prevent freezing and minimize heat loss while fitting available space and budget.
Recommended thickness balances thermal performance, pipe diameter, and installation constraints.
Thicker insulation reduces heat loss and extends protection time during outages, but returns diminish past practical limits.
Consider ease of fitting, support brackets, and access points.
Use continuous coverage and seal joints to maintain effectiveness.
Professional guidance is advised for critical systems.
- Measure pipe diameter and available clearance before selecting thickness.
- Prioritize continuous, sealed coverage over marginally thicker material.
- Balance R-value versus space and cost.
- Inspect and maintain insulation annually.
Climate-Based Thickness Guidelines
For cold climates, insulation thickness should be selected based on outdoor temperature, pipe temperature, and the duration of protection required so that the chosen thickness limits heat loss enough to prevent freezing and reduce energy waste.
Guidance typically ties thickness to minimum ambient temperatures: milder cold (above -10°C/14°F) may need 13–19 mm (1/2–3/4 in), harsher zones (-10 to -30°C/14 to -22°F) often require 25–38 mm (1–1½ in), and extreme cold below -30°C (-22°F) benefits from 50 mm (2 in) or more.
Consider pipe material and whether heat tracing or sheltering supplements insulation.
Installation And Clearance Considerations
Following the climate-based thickness guidance, the practicalities of installing that thickness must be checked against available clearance, fittings, and support spacing so the insulation can be applied without gaps or compression that would reduce its R-value.
Installers should measure pipe runs, valves, elbows, and hangers to select insulation profiles and adhesives that fit.
Where space is tight, consider thin high-R materials or composite wraps.
Make certain supports prevent sagging and maintain continuous coverage.
Seal joints and penetrations with appropriate tape or caulk.
Inspect after installation to confirm full contact and no crushed sections.
- Measure clearances and profiles
- Choose compatible insulation types
- Maintain support spacing
- Seal joints and penetrations
Where to Buy Affordable Pipe Insulation Supplies
When shopping for affordable pipe insulation supplies, homeowners and DIYers can compare options across big-box stores, local plumbing suppliers, and online marketplaces to balance price and quality. Comparison shopping highlights foam sleeves, fiberglass wraps, and self-sealing options; coupon deals and bulk packs reduce cost. Local suppliers may offer specialty sizes and advice; big-box chains provide consistent low prices and returns; online sellers supply wide selection and reviews. Consider warranty, R-value, and ease of installation. Small purchases at multiple sources allow testing before committing to bulk. Use seasonal sales and loyalty programs to further lower expenses.
| Source | Typical Offerings | Buying Tip |
|---|---|---|
| Big-box stores | Foam, tape, kits | Watch for sales |
| Local suppliers | Specialty sizes, advice | Ask for remnants |
| Online marketplaces | Wide range, reviews | Check seller ratings |
Measure Pipe Length and Diameter for Materials
Before ordering insulation, the installer measures the total run of exposed pipe to determine how much material is required.
Next, the installer records the pipe diameter to select the correct insulation size and thickness.
Accurate length and diameter measurements prevent waste and guarantee a proper fit.
Measure Pipe Length
To prepare for purchasing insulation, the installer measures the total run of exposed piping and records each segment’s length and outside diameter. The installer walks the route, noting straight runs, bends and fixtures. Measurements are taken with a tape measure, marked on a sketch, and totaled. Short segments and offsets are added separately to avoid waste.
- Measure each straight run from fitting to fitting.
- Include lengths of elbows and tees as separate entries.
- Note inaccessible sections and estimate added length for routing.
- Sum all segments and add contingency (typically 5–10%) for cuts and errors.
Determine Pipe Diameter
With the run lengths recorded, the installer next determines each pipe’s outside diameter so insulation can be sized correctly. Using calipers or a tape measure, the technician measures several locations to confirm uniformity, noting fittings and bends separately.
For concealed runs, wall thickness charts and nominal pipe sizes can estimate diameter when direct measurement is impractical. Measurements are recorded alongside lengths and labeled per section.
The installer selects insulation with an internal diameter matching the largest measured value, allowing for snug fit or loose-fit types as appropriate. Accurate diameter data prevents gaps, compression, and thermal bridging, ensuring effective freeze protection.
Cutting and Fitting Insulation for a Tight Fit
Measure each pipe run and mark insulation pieces precisely, allowing a few millimeters for expansion and seams; accurate measuring prevents gaps that undermine performance.
A sharp utility knife and straightedge produce clean cuts.
Split-tube foam should be opened along its factory slit and aligned with the pipe; wrap fiberglass or rubber sleeves tightly and avoid compressing material.
For long runs, butt ends together squarely; stagger seams where possible.
Test fit before securing.
Trim excess at fixture clearances and support points.
Work methodically to maintain insulation thickness and continuous coverage for consistent thermal protection.
- Use precise measurements and mark cuts.
- Cut cleanly with a sharp knife.
- Align and fit without compressing.
- Trim for clearances and support.
Sealing Pipe Joints, Elbows, and Valves Correctly
Attention to sealing at joints, elbows, and valves is essential to maintain insulation performance and prevent heat loss.
The correct use of sealant, tape, and shaped insulation pieces guarantees continuous coverage and accommodates movement.
Special fittings or removable covers are recommended for valves to allow maintenance without compromising the seal.
Proper Joint Sealing Techniques
When sealing pipe joints, elbows, and valves correctly, the installer must prioritize creating continuous, durable seals that prevent heat loss and moisture intrusion.
Proper joint sealing uses compatible sealants, correct gap filling, and secure mechanical connections.
Surfaces require cleaning and drying before application.
Flexible sealants accommodate thermal movement; rigid compounds suit static joints.
Overlap and smooth changes reduce air pockets.
Fastenings must be torque-controlled to avoid compression failure.
Periodic inspection guarantees integrity and addresses wear.
Attention to compatibility with insulation materials prevents chemical degradation and maintains thermal performance.
- Clean and dry surfaces
- Choose compatible sealant
- Fill gaps fully, smooth changes
- Torque fittings correctly
Insulating Valves and Elbows
Insulating valves and elbows requires tailored wraps and close-fitting sections that maintain continuous thermal protection while allowing for movement and service access.
Attention focuses on irregular shapes: use pre-formed elbow insulation, foam or fiberglass for valves, and flexible wrap-around sleeves for tight spots.
Cut pieces to fit snugly, sealing seams with foil tape or approved adhesive to prevent cold air entry.
Leave removable covers or access points for maintenance, marking them clearly.
Secure insulation with nylon ties or stainless steel bands without compressing the material.
Verify coverage continuity from pipe to fitting, prioritizing areas exposed to drafts or extreme temperatures.
Insulating Pipes in Unheated Crawl Spaces and Basements
In unheated crawl spaces and basements, pipe insulation reduces freezing risk and heat loss while also limiting condensation that can cause mold and corrosion.
Install foam sleeves or fiberglass wrap tightly, sealing seams with foil tape or zip ties.
Maintain a small clearance from combustibles and avoid compressing insulation around pipes.
Consider adding vapor barriers where moisture is present and insulating exposed joints and fittings.
Routinely inspect for dampness, pests, or damage and replace compromised sections promptly.
- Measure pipe runs precisely.
- Choose appropriate insulation type.
- Seal all seams and joints.
- Schedule seasonal inspections.
Protect Outdoor Spigots and Hose Bibs From Freezing
Outdoor spigots and hose bibs require targeted protection to prevent freezing and pipe damage.
Recommended steps include insulating spigot valves, installing frost‑proof spigots where feasible, and always draining and covering hoses before cold weather.
These measures reduce the risk of freeze-related leaks and costly repairs.
Insulate Spigot Valves
When temperatures drop near freezing, homeowners should protect spigot valves and hose bibs to prevent costly pipe bursts and water loss. The simplest approach wraps the valve with foam covers or weatherproof insulation tape, sealing gaps where cold air enters.
For better protection, add an insulated spigot cover or build a small wooden box lined with foam, ensuring easy access for occasional use. Drain outdoor lines and close interior shutoffs before insulating. Check covers periodically for moisture or damage and replace when compressed or torn to maintain R-value and prevent ice buildup.
- Use foam covers or tape
- Add insulated spigot covers
- Build lined protective box
- Drain and close interior shutoff
Use Frost-Proof Spigots
A frost-proof spigot is a long-shank valve designed to locate the water seat well inside the heated wall cavity, preventing standing water in the exposed portion of the pipe and greatly reducing the risk of freezing and burst pipes.
These spigots replace standard hose bibs, extending the valve stem so water drains back into the warmer interior when closed.
Installation requires cutting back to the interior wall depth and securing the longer body with proper slope toward the house.
Choose durable materials and frost-rated models sized to existing plumbing.
Regular inspection for leaks and insulation at wall penetrations completes reliable outdoor protection.
Drain And Cover Hoses
Disconnect and drain any garden hoses attached to spigots before the first hard freeze to guarantee trapped water from expanding and damaging the valve or connected piping.
After removing hoses, close interior shutoffs and open outdoor faucets to clear residual water.
Insulating covers protect hose bibs from cold air and wind-driven ice.
Foam covers, insulated bags, or thermal tape reduce freezing risk and are simple to install.
Regular inspection guarantees covers remain secure through storms and temperature swings.
- Remove and drain hoses completely.
- Shut interior stop valves; open exterior taps.
- Fit insulated spigot covers snugly.
- Check and replace damaged insulation.
Insulating Pipes Inside Exterior Walls Without Drywall Access
Without opening drywall, insulating pipes within exterior walls requires targeted methods that minimize disruption while improving thermal performance. A contractor or careful DIYer can drill small access holes at stud bays, use foam backer rods, and insert low-expansion spray foam or pipe insulation kits via holes. Alternatives include insulating from the exterior during siding work or applying heat tape accessible at fixtures. Ventilation and moisture control remain important. Consider professional assessment for gas lines or complex plumbing.
| Method | Benefit |
|---|---|
| Drill access holes | Minimal drywall repair |
| Spray foam injection | Air seal and insulate |
| Pipe sleeves | Removable maintenance |
| Exterior insulation | No interior work |
| Heat tape | Active freeze prevention |
Insulating Attic and Roof‑Space Pipes Safely
When exposed to extreme temperatures and fluctuating humidity in attic and roof spaces, pipes require insulation strategies that balance thermal protection, ventilation, and fire safety; installers should choose materials and installation methods rated for attic conditions, maintain required clearances from heat sources, and make certain vapor control to prevent condensation and mold.
Insulation should be fitted tightly, sealed at joints, and kept from blocking soffit or ridge vents.
Combustible materials must stay clear of flues and recessed lighting.
Regular inspection for compression, moisture, and animal damage preserves performance.
- Use attic‑rated closed‑cell foam or mineral wool.
- Maintain clearances from heat sources.
- Seal vapor gaps and joints.
- Inspect seasonally for moisture and damage.
Emergency Insulation Hacks for Freeze Protection
When pipes face an acute freeze risk, quick temporary wraps and improvised heat sources can bridge the gap until permanent insulation is installed.
Simple materials such as foam, towels, or plastic-wrapped cloth applied snugly around exposed sections provide immediate barrier protection. Placing a hot water bottle or sealed heat pack against vulnerable joints supplies localized warmth to help prevent freezing.
Quick Temporary Wraps
For rapid protection against an unexpected freeze, quick temporary wraps offer an immediate, low-cost barrier that slows heat loss and shields pipes from ice formation.
They suit short-term emergency use, are easy to apply, and can be removed once temperatures rise.
Selection prioritizes materials that trap air and resist moisture; secure wraps with tape or zip ties to maintain contact.
Inspect for gaps and rewrap as needed.
These are stopgap measures, not permanent insulation.
- Towels or rags secured with tape
- Bubble wrap plus waterproof tape
- Old socks stuffed with insulation
- Foam pipe sleeves fastened temporarily
Hot Water Bottle Method
Using a hot water bottle pressed along a pipe provides a quick, localized source of warmth that can delay freezing in short-term emergencies.
The bottle should be filled with hot (not boiling) water, sealed, and wrapped with a towel to protect pipe surfaces and retain heat.
Placed directly against exposed sections, it raises local temperature and buys time until a permanent solution is applied.
Periodically replace the bottle as it cools, checking seals to avoid leaks.
This method suits accessible indoor pipes only; it is not a substitute for proper insulation, heat tape, or professional repairs in prolonged cold.
Combine Insulation and Heat for Stubborn Freeze‑Prone Pipes
As temperatures plunge and simple insulation proves inadequate, combining well-fitted pipe insulation with a targeted heat source offers a reliable solution for stubborn freeze‑prone pipes.
The approach pairs closed‑cell foam, fiberglass wraps, or foam tape with electric heat tape or low‑wattage cable, applied per manufacturer instructions. Monitor thermostats and avoid overlapping heat tape. Use weatherproof junctions where needed and maintain access for inspection. Assess power availability and safety codes before installation; consult a professional if unsure.
- Select compatible insulation and heat tape.
- Follow manufacturer spacing and overlap rules.
- Protect connections from moisture.
- Test system before cold snap.
Prevent Condensation After Insulating Cold‑Water Lines
After addressing freeze risk with insulation and heat, attention turns to preventing condensation on cold‑water lines, which can lead to moisture damage, corrosion, and mold. The installer guarantees insulation covers pipe seams, uses vapor‑retardant jacketed foam or adds a separate vapor barrier, and keeps surrounding air warmer where possible. Drainage and ventilation reduce trapped moisture. Monitor for damp spots and replace compressed or wet insulation promptly. Visual cues help prioritize action:
| Visual cue | Likely issue |
|---|---|
| Beads of water | Missing or damaged vapor barrier |
| Wet insulation | Trapped moisture |
| Surface rust | Prolonged condensation |
| Mold stains | Persistent humidity |
Keep Shutoff Valves and Drain Access After Insulating
Leave access points clear: insulation should be fitted so that shutoff valves, drain cocks, and test ports remain reachable without tearing or disassembling the covering.
The installer secures fast access for emergency shutoff, routine maintenance, and winter draining while preserving insulation performance.
Use removable sections, access panels, or zippered covers at strategic locations.
Label exposed valves and drains for quick identification.
- Plan placement before insulating: map valves and drains.
- Use removable insulation collars or taped seams.
- Mark and label access points visibly.
- Test accessibility after installation and adjust removable pieces as needed.
Inspecting and Replacing Degraded Pipe Insulation
The inspector visually examines pipe insulation for tears, compression, mold, or moisture stains that indicate deterioration.
They measure insulation thickness at several points to confirm it still meets recommended R-value and local code.
When material is thin, brittle, or contaminated, it is removed and replaced with appropriately rated insulation specified for the pipe type and location.
Check For Visible Damage
Inspectors should visually examine pipe insulation along accessible runs, looking for tears, crushed sections, gaps at joints, water stains, mold, or areas where insulation has separated from the pipe.
They note locations needing repair or replacement, documenting length and severity.
Damaged sections that trap moisture or expose metal should be removed and replaced; contaminated insulation requires disposal.
Surfaces beneath wet spots should be dried and inspected for corrosion before new insulation is applied.
Priority goes to exterior walls, crawlspaces, and unheated basements where freeze risk is highest.
- Record damaged areas and severity
- Remove compromised insulation
- Dry and inspect exposed pipe
- Replace with suitable material
Measure Insulation Thickness
After damaged sections have been removed and pipes verified dry, attention turns to measuring remaining insulation thickness to determine adequacy and whether replacement is required.
A ruler or caliper measures from pipe exterior to insulation surface; subtract pipe diameter to obtain insulation thickness.
Compare readings to recommended thickness for pipe location and climate—typically 1/2 to 1 inch for indoor, more for unheated spaces.
Note compressed, brittle, or uneven areas that reduce effective insulation.
Record measurements and locations for planning.
Accurate thickness assessment informs whether patching, layering, or full replacement is necessary and helps estimate materials and labor before proceeding.
Replace With Proper Material
When ready to replace degraded insulation, the inspector selects materials matched to pipe type, temperature range, and location—closed-cell foam, fibrous wrap, or pre-formed elastomeric sleeves are common choices.
The inspector removes damaged material, inspects the pipe for corrosion or leaks, and cleans the surface.
Replacement focuses on continuous coverage, sealed joints, and proper thickness for local climate.
Fasteners and adhesive tape designed for insulation secure edges.
Special attention goes to valves, fittings, and bends where custom-cut pieces or mastic prevent gaps.
- Assess pipe material and exposure
- Remove and inspect thoroughly
- Fit material, seal seams
- Verify coverage and fastenings
How Pipe Insulation Affects Water Temperature and Flow
Although often overlooked, pipe insulation plays a direct role in maintaining water temperature and stabilizing flow by reducing heat exchange between the fluid and surrounding air. Insulation slows conductive and convective losses, keeping hot water hotter longer and delaying cooling of supply lines during cold spells.
For cold-water lines, insulation reduces warming from adjacent warm spaces, preserving desired temperatures. By minimizing temperature gradients, insulation decreases the risk of localized freezing that restricts flow and causes pressure imbalances.
Properly fitted insulation also dampens thermal expansion and contraction cycles, reducing stress-related leaks and maintaining consistent flow characteristics over time.
Expected Energy Savings From Insulating Pipes
Insulating exposed pipes reduces heat loss by slowing the transfer of thermal energy from hot water to the surrounding air.
This reduction in wasted heat typically lowers energy consumption for water heating and can translate into measurable decreases in utility bills.
Homeowners can compare insulation costs to annual savings to estimate a simple payback period and determine the investment’s value.
Reduced Heat Loss
A properly insulated hot-water pipe can cut standby heat loss by a significant margin, typically reducing thermal losses by 20–45% depending on pipe size, insulation thickness, and water temperature.
Insulation limits conductive and convective transfer, stabilizing water temperature along runs and reducing reheating frequency.
Benefits scale with surface area exposed, colder ambient conditions, and higher delta-T between water and surroundings.
Properly sealed joints and correct insulation thickness maximize effectiveness.
Measurement of temperature drop over distance quantifies performance and guides upgrades.
- Reduce heat flux along pipe length
- Maintain delivery temperature
- Minimize heat exchange with surroundings
- Optimize insulation thickness and sealing
Lower Energy Bills
Several studies indicate that pipe insulation typically reduces household water heating energy use enough to lower utility bills by roughly 4–12% for homes with uninsulated or poorly insulated hot-water lines. Insulation minimizes heat loss along distribution piping, decreasing the volume of reheated water and frequency of heater cycles. Savings scale with pipe length, insulation quality, water temperature settings and household usage patterns.
In multi-bath or long-run systems, gains are more pronounced; in compact, well-insulated systems, savings are smaller. Combining pipe insulation with efficient fixtures and proper thermostat settings maximizes bill reductions without altering daily routines or compromising hot-water availability.
Payback Period
How long until the upfront cost is recovered through lower bills? A typical DIY pipe insulation project recoups costs quickly. Savings depend on fuel type, insulation quality, and local climate. Simple foam sleeves pay back within months in cold regions; milder areas see year-plus returns. Long-term savings accrue from reduced heat loss and less need for supplemental heating.
- Initial cost: foam sleeves or tape, low per-foot expense.
- Estimated savings: often 5–15% on water-heating energy for insulated runs.
- Payback timeframe: months to a few years, variable by usage.
- Track bills before/after for accuracy.
Common DIY Mistakes That Leave Pipes Vulnerable
Why risk preventable damage by cutting corners on pipe insulation? Common DIY mistakes leave pipes exposed: using undersized or compressed foam that loses R-value, failing to seal seams and joints, and ignoring exposed fittings and valves.
Skipping vapor barriers in damp areas invites condensation and corrosion. Relying solely on loose fiberglass without proper jackets or protection allows settling and gaps.
Installing insulation over existing leaks or wet surfaces traps moisture. Overlooking outdoor shutoff points and poorly secured insulation that shifts with temperature changes also creates vulnerabilities.
Correct materials, meticulous sealing, and inspection prevent these frequent, avoidable errors.
Safety Rules for Heat Tape and Electrical Products
The section reviews key safety rules for heat tape and related electrical products. It covers choosing the proper power source, ensuring correct tape installation, and establishing a regular inspection schedule.
Emphasis is placed on following manufacturer instructions and local electrical codes to prevent hazards.
Proper Power Source
When installing heat tape or any electrical product on pipes, power must come from a properly rated, protected circuit that matches the device’s specifications and local electrical codes.
The installer verifies voltage, amperage, and grounding; uses GFCI protection where required; avoids shared circuits with heavy appliances; and confirms wiring and breakers are sized for continuous load.
Circuit labeling and accessible disconnects improve safety.
Periodic inspection for overheating, degradation, or tripping prevents failures.
Manufacturer instructions govern acceptable power sources and connection methods.
Electrical work that exceeds basic knowledge should be performed or inspected by a licensed electrician.
- Verify voltage and amperage match
- Use GFCI or required protection
- Avoid overloaded or shared circuits
- Label and provide accessible disconnect
Correct Tape Installation
Begin by inspecting the heat tape for damage and confirming the product matches the pipe material and local electrical codes; proper installation requires undamaged tape, correct length, and manufacturer-approved spacing and overlap rules.
The installer should secure tape along the pipe using only manufacturer-recommended fasteners or approved fiberglass tape, avoiding metal clamps that can pierce insulation or tape.
Maintain consistent contact without gaps, follow specified wrap patterns (spiral or straight-run) and keep thermostat sensors positioned per instructions.
Do not cover inline controllers or plugs with insulation.
Ground-fault protection must remain intact and all electrical connections stay accessible for service.
Regular Inspection Schedule
Regularly inspect heat tape and associated electrical components on a fixed schedule to detect wear, damage, or degradation before failures occur. A routine minimizes risk and guarantees reliable performance; inspections focus on visible fraying, adhesive failure, connector condition, and proper thermostat operation. Documentation records dates, findings, and corrective actions. Trained personnel follow lockout/tagout and avoid repairs while energized.
- Check for frayed or exposed wiring and damaged tape insulation.
- Verify connectors, plugs, and junctions are tight and corrosion-free.
- Test thermostat and temperature sensors for accurate operation.
- Record inspection date, findings, and any repairs performed.
Protect Insulated Pipes From Pests and Rodents
In basements, crawlspaces, and exterior runs, insulated pipes are vulnerable to chewing, nesting, and contamination from pests and rodents, which can damage insulation, compromise thermal performance, and introduce health risks.
To protect installations, select rodent-resistant materials like metal jacketing or dense foam with pest-repellent additives. Seal entry points, gaps, and conduit penetrations with steel wool and caulk. Keep surrounding areas clear of debris, cardboard, and vegetation that attract wildlife. Use traps or professional removal for active infestations.
Inspect insulation regularly for chew marks, droppings, and moisture; replace compromised sections promptly to restore effectiveness and hygiene.
Seasonal Checklist to Keep Insulated Pipes Safe
Seasonally, homeowners should follow a concise checklist to keep insulated pipes safe through temperature swings and weather events: inspect jackets and seams for damage, check for moisture or mold, verify insulation remains securely fastened around fittings and valves, clear surrounding debris and vegetation that could hold moisture or invite pests, test heat-trace systems and exposed valves before cold snaps, and note any areas needing repair or replacement so work can be scheduled promptly.
- Check insulation integrity and seal gaps.
- Dry and treat any wet or moldy sections.
- Make certain mechanical fasteners and supports are secure.
- Schedule repairs and retest systems after maintenance.
Cost Estimate: DIY Pipe Insulation vs Hiring Pros
Compare costs carefully when deciding between DIY pipe insulation and hiring a professional: DIY materials and tools typically cost markedly less upfront—foam sleeves, tape, and sealant can run from $0.50 to $5 per linear foot depending on type and thickness—while professional installation adds labor, travel, and markup, often doubling or tripling total expense but providing warranties, code compliance, and faster completion.
Homeowners should tally linear feet, fitting complexity, and required vapor barriers. For simple accessible runs, DIY yields clear savings; for extensive, hard-to-reach, or insulated-heating lines, professional bids clarify scope and prevent costly mistakes.
When to Call a Plumber Instead of DIY
After weighing cost and complexity, homeowners should also recognize situations where a professional plumber is the safer, smarter choice rather than attempting DIY pipe insulation.
A plumber is advised when pipes are inaccessible, show corrosion or leaks, require rerouting, or when local codes and warranties demand certified work.
Complex systems—boiler loops, radiant heating, or mixed-material assemblies—benefit from professional assessment to prevent damage and guarantee proper insulation methods.
Emergency scenarios, such as recurring freezing despite DIY attempts, warrant immediate professional intervention to avoid burst pipes.
Prioritizing safety and system integrity often outweighs short-term savings.
- Inaccessible or hidden piping
- Active leaks or corrosion
- Complex heating systems
- Recurrent freezing after DIY
Fast Winter‑Proofing Routines for Renters and Homeowners
Start quick winter‑proofing by targeting the most vulnerable pipes and entry points with simple, low‑cost measures that work for both renters and homeowners.
Inspect exposed pipes in basements, crawlspaces, attics, and under sinks; apply foam pipe insulation, heat tape where allowed, or wrap with towels secured by tape for temporary protection.
Seal gaps around pipes with caulk or foam to reduce cold drafts.
Let faucets drip slowly during extreme cold and open cabinet doors to circulate warm air.
Keep thermostat consistent overnight.
Prepare a small emergency kit: flashlight, insulated gloves, and a hairdryer or portable heater for safe, short‑term thawing.
Document Insulated Pipes: Checklist, Photos, and Map
When documenting insulated pipes, a concise, consistent record guarantees faster repairs and clearer communication with landlords or contractors.
A checklist notes location, insulation type, thickness, and date applied. Photographs capture close-ups of joins, clamps, and labels; wide shots show routes and adjacent heat sources.
A simple map links photos to pipe segments and access points, annotated with room names and risk areas. Store records digitally and back them up; share copies with relevant parties.
Periodic reviews update wear or damage. Clear documentation speeds assessment, budgeting, and targeted maintenance without guessing or unnecessary disruption.
- Checklist: location, type, thickness, date
- Photos: close-ups and wide shots
- Map: annotated routes linked to images
- Storage: digital backup and shared copies
Upgrading Insulation During Renovations or Re‑Piping
During renovations or re-piping projects, upgrading pipe insulation presents a cost-effective opportunity to improve energy efficiency and reduce future maintenance. Contractors and homeowners should evaluate pipe locations, material compatibility, and local building codes before selecting insulation types.
Choosing higher R-value materials, continuous coverage, and proper thickness around hot-water and exposed cold-water lines minimizes heat loss and condensation. Seams need secure sealing and mechanical fastenings where appropriate.
When accessible, insulating valves, flanges, and fittings avoids thermal bridges. Documenting changes and updating plans guarantees future work accounts for insulation.
Professional consultation is advisable for complex systems or where code compliance is uncertain.
Real‑Life Scenarios: Common Problems and Fixes
Upgrading insulation during renovations often exposes weak spots and common installation errors that later show up in everyday use. Observations from field work identify recurring issues and practical fixes that prevent heat loss and condensation without extensive work.
- Leaky joints: replace damaged tape, refit insulation, and seal seams with appropriate adhesive.
- Compressed insulation: add correct-thickness sleeves, restore coverage, and avoid tight clamps.
- Uninsulated valves and fittings: install removable insulation blankets or custom-cut foam covers.
- Outdoor exposure: use weatherproof insulation and secure UV-resistant jacketing to prevent degradation.
Troubleshooting Frozen Pipes After Insulation
Noting a sudden loss of water flow or visible frost on exposed sections, homeowners should treat frozen pipes after insulation as a time‑sensitive issue that requires immediate assessment.
Inspect insulated runs for gaps, compressed or wet insulation, and cold spots where heat transfer occurs.
Open faucets to relieve pressure and identify affected fixtures.
Apply safe thawing: use a hair dryer, heat gun on low, or electric heat tape; avoid open flames.
If thawing fails, shut off the main water supply and call a plumber.
After resolution, replace compromised insulation, seal drafts, and monitor vulnerable areas during cold snaps to prevent recurrence.
Conclusion
To summarize, the homeowner learns that insulating pipes prevents costly bursts and eases winter worry. As the adage goes, “an ounce of prevention is worth a pound of cure,” so simple steps—wrap exposed lines, add heat tape, and seal drafts—save trouble later. With inspection, documentation, and targeted upgrades during renovations, vulnerable runs are protected. Consistent upkeep and swift fixes keep water flowing and avoid the cold‑weather headaches every property owner wants to prevent.