How to Get a Stuck Sink Stopper Unstuck Fast: Simple Fixes for Any Type of Stopper
If you’re dealing with a stuck sink stopper, you can often free it quickly with a few simple steps. First, ensure the water is turned off and clear the surrounding area. Put on safety gloves and eye protection. Try gently wiggling the stopper or using protected pliers. Running hot water while toggling the stopper may help, and applying penetrating lubricant can address any mineral buildup. If these methods don’t work, access the pivot rod or remove the cap to clean the springs, O-rings, and any debris underneath. Following these steps should restore the stopper’s function. For more detailed methods and troubleshooting, continue reading below.
How to Quickly Unstick a Sink Stopper Immediate Fixes You Can Try Now
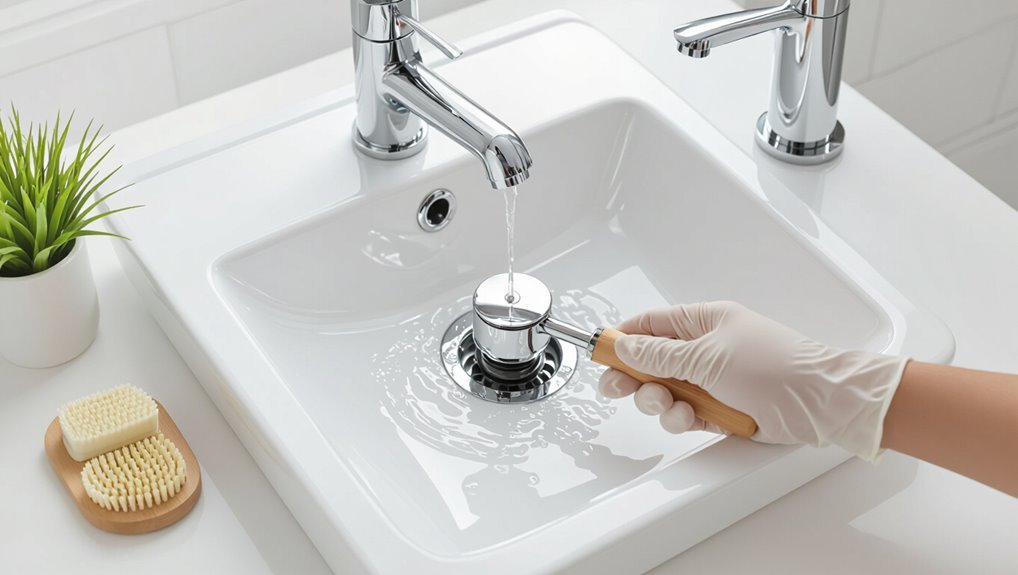
Before attempting fixes, the person should perform quick safety checks and gather basic tools and materials like gloves, pliers, and a cloth.
For fast unstick methods, they can try manually wiggling and pulling the stopper, using pliers with a cloth for extra grip, or rinsing and flushing away debris with running water.
Each method is simple and designed as an immediate, low-effort solution before moving to more involved repairs.
Quick safety checks before you start
A few simple safety checks reduce risk and speed the fix: verify the water supply is off, clear the immediate area of electronics and small items, and put on gloves and eye protection.
Before attempting how to get sink stopper unstuck, inspect for sharp edges, secure loose plumbing connections, and guarantee good lighting.
If unsure, stop and consult a professional.
Tools and materials to have on hand
Essential tools and materials make a quick, safe unsticking of a sink stopper far more likely to succeed.
A small wrench, needle-nose pliers, flathead screwdriver, flashlight, bucket, gloves, towels and a pair of adjustable pliers cover most needs.
Include penetrating lubricant, plumber’s grease, a coat hanger or flexible pick, and replacement stoppers or seals.
Keep parts organized in a tray.
Fast method 1 Manually wiggling and pulling the stopper
With tools and lubricants ready, the quickest approach is often to try manual wiggling and pulling.
The person inserts fingers into the drain, feels for the stopper stem, and alternates gentle upward pulls with side-to-side wiggling to break minor corrosion or debris bonds.
If resistance eases, repeat until the stopper lifts free.
Stop and reassess if heavy binding persists.
Fast method 2 Using pliers or a cloth for grip
Grasping the stopper with a cloth or pliers provides immediate extra traction when fingers alone won’t budge it.
Protect the stopper with a soft cloth to prevent scratching, then use slip-joint pliers for steady, controlled turns.
Apply gentle, increasing pressure while attempting to rotate or pull.
If resistance persists, stop to avoid damage and try an alternative method or inspect the linkage.
Fast method 3 Rinsing and flushing debris with water
If pliers or a cloth failed to free the stopper, trying a force-free rinse can dislodge trapped grime that blocks movement.
Direct a steady stream of hot water into the drain while toggling the stopper gently. Use a cup or nozzle to increase pressure briefly.
Repeat with cold water to flush loosened debris. Test movement; repeat until smooth.
Step-by-Step Methods for Different Stopper Types
The article now turns to specific, step-by-step methods tailored to common stopper types, covering pop-up linkages and release points, lift-and-turn opening, push-button (toe-touch) traps and removal, rubber plug and chain cleaning, and basket drain extraction.
Each subsection will outline the tools and precise actions required for safe removal. Readers will get concise guidance matched to the mechanical differences of each stopper.
Pop-up stoppers: identifying the linkage and release points
Identify the type of pop-up stopper and trace its linkage before attempting release: common designs include rod-and-clip systems, lift-and-turn stoppers, and push-pop mechanisms, each with a distinct connection under the sink—rod/clevis pin, threaded post, or spring clip—so locating that connection point determines which release method and tools are required.
Inspect under-sink: follow pivot rod to clevis, check for retaining clip, or locate threaded post and retaining nut.
Lift-and-turn stoppers: how to unlock and remove
Begin by confirming the stopper is a lift-and-turn model—characterized by a round cap that twists up to lift and down to seal—because its threaded post and retaining nut require a different approach than rod-style pop-ups.
Grip the cap, twist counterclockwise to expose the visible slot or set screw, loosen the retaining nut beneath, then unscrew the stopper and lift out.
Clean and reassemble.
Push-button (toe-touch) stoppers: common traps and removal steps
Push-button (toe-touch) stoppers snap down to seal and spring up with a press, but their concealed mechanisms and corrosion-prone seals make them prone to sticking. Knowing the common failure points—blocked drain holes, mineral buildup around the flange, damaged springs or O-rings, and seized retention clips—helps pinpoint whether a simple cleaning, spring replacement, or full disassembly is needed before attempting removal.
To remove: depress, twist counterclockwise if threaded, or pry up the top cap to access and release the spring clip; clean deposits, lubricate O-rings, replace corroded springs and reassemble, testing operation.
Rubber plug and chain stoppers: simple removal and cleaning
Rubber plug and chain stoppers are the simplest sink closure—just a tapered rubber disc attached to a short chain—making removal and basic cleaning straightforward for most homeowners.
To remove, lift plug and unhook chain from overflow or ring; inspect the seal, wipe away hair and debris, soak in warm soapy water or vinegar for buildup, rinse, dry, and reattach, replacing cracked plugs.
Basket (drain) stoppers: tools and technique for extraction
Remove a stuck basket stopper by matching the extraction method to its mounting style and having the right tools on hand: a pair of pliers or a stopper-removal tool for lift-and-turn types, a hex key for threaded stems, and a screwdriver for pop-up assemblies.
Secure grip, turn counterclockwise for threaded parts, pry carefully for snap-fit rings, and clear debris before reinstalling or replacing the stopper.
How to Access the Stopper Mechanism from Under the Sink
The underside of the sink provides access to the stopper mechanism by locating and loosening the pivot rod assembly where it meets the drain tailpiece.
Careful disconnection of the lift linkage and clip prevents damage to small parts and keeps alignment intact.
After cleaning, the pivot rod and linkage must be reassembled to their original positions and tested for smooth operation.
Locating and loosening the pivot rod assembly
Locate the pivot rod assembly beneath the sink by crouching and looking up behind the tailpiece; it is the horizontal rod that connects the stopper to the lift arm and inserts into the drain body via a small coupling nut.
Inspect for corrosion, mineral buildup, or a retaining clip.
Use pliers to hold the coupling nut steady and an adjustable wrench to turn counterclockwise to loosen gently.
Disconnecting linkage without causing damage
Accessing the stopper linkage from beneath the sink requires steady hands and a clear plan to avoid bending or breaking the small components.
The pivot rod clip should be pried straight out with needle-nose pliers while supporting the rod. Loosen the retaining nut one turn, slide the rod free, and gently separate the clevis from the lift rod.
Keep parts organized to prevent loss.
Reassembling the mechanism correctly after cleaning
Begin reassembly by laying out cleaned parts in the order they were removed and inspecting each for wear or damage.
Reconnect pivot rod, retaining nut, and clevis in sequence, aligning holes for smooth travel.
Reattach horizontal linkage, adjusting length to center stopper movement.
Tighten fittings snugly but not overtight.
Test operation from above, make fine adjustments, then check for leaks and retighten if necessary.
Cleaning and Repair Techniques After Removal
After removal, the stopper and surrounding parts should be cleaned to remove hair, grease, and mineral deposits using appropriate scrubbing and soaking methods.
Mild acids like vinegar or baking soda solutions work for common mineral buildup while tougher grime may require a commercial cleaner used according to label instructions.
Finally, seals, springs, O-rings, and the pivot ball should be inspected for wear and replaced as needed to restore proper function.
Removing hair, gunk, and mineral buildup effectively
Once the stopper and visible debris have been removed, focus on dissolving and loosening remaining hair, soap scum, and mineral deposits with targeted cleaners and mechanical agitation.
Use tools and methods that avoid damage and guarantee thorough rinsing.
- Scrape gently with a plastic pick or old toothbrush.
- Flush with hot water while brushing.
- Wipe and inspect with a flashlight for residue.
When to use vinegar, baking soda, or commercial cleaners
Knowing which cleaner to use depends on the type of residue, the sink material, and safety considerations.
Vinegar works well on light mineral deposits and is safe on stainless steel and porcelain.
Baking soda plus vinegar loosens organic gunk without harsh chemicals.
Use enzyme-based cleaners for persistent organic buildup.
Reserve caustic commercial products for severe clogs, avoiding plastic or delicate finishes and following label precautions.
Inspecting seals, springs, and gaskets for wear
With the stopper removed and residues addressed, attention shifts to the smaller components that determine a seal’s effectiveness: seals, springs, and gaskets.
Each part is inspected for cracks, flattening, corrosion, or hardening. Compression tests reveal loss of elasticity; visual checks show nicks or buildup.
Documenting findings guides whether cleaning suffices or replacement is required before reassembly and testing for leaks.
Minor repairs: replacing springs, O-rings, or the pivot ball
Begin by laying out clean work towels and a small parts tray to organize the components removed from the drain assembly.
Inspect springs, O-rings, and the pivot ball for corrosion, deformation, or flattening.
Replace worn parts with exact-size replacements, lubricate O-rings with plumber’s grease, reassemble in reverse order, and test operation for smooth, leak-free movement before reinstalling decorative components.
When to Stop DIY and Call a Plumber
If the stopper mechanism or surrounding plumbing shows cracks, persistent leaks, or parts that won’t reassemble, professional intervention is advisable.
The homeowner should be prepared to describe the problem, what was tried, and note any visible damage so the plumber can give a realistic estimate.
While waiting for help, temporary measures such as shutting off the shutoff valves, placing a bucket under leaks, and using plumber’s tape or a rag to slow drips can reduce water damage.
Signs of damage or complex failures that need pro help
Several clear signs indicate a stuck sink stopper requires professional attention rather than more DIY attempts.
Visible corrosion, cracked or shattered components, stripped linkage, recurring leaks, or sewer odor denote serious failure.
If the stopper assembly detaches internally, the drainpipe is damaged, or multiple fixes fail, a plumber’s inspection is warranted to prevent worsening damage, water intrusion, or health hazards.
Estimated costs and what to tell the plumber
After recognizing signs that professional help is needed, homeowners should also prepare for the likely costs and the information a plumber will need.
Typical service calls range $75–$150 plus labor ($50–$120/hour); repairs or parts can raise total to $150–$400.
Provide plumber with stopper type, observed symptoms, any previous repairs, and photos.
Request estimate, warranty, and timeline before work begins.
Temporary measures to prevent leaks before help arrives
When a sink stopper issue threatens a leak, homeowners can take a few short-term steps to minimize water damage while waiting for a plumber.
Turn off the water supply under the sink, place a bucket beneath the P-trap, and blot minor drips with towels.
Seal gaps temporarily with plumber’s putty or waterproof tape.
Avoid dismantling complex parts to prevent worsening the problem.
Preventing Future Stuck Stoppers
Preventing recurring stopper jams begins with a simple routine cleaning schedule using mild cleaners and a toothbrush to remove hair and grime before buildup sets in.
Choosing low-maintenance stopper designs—such as pop-up or lift-and-turn mechanisms with fewer crevices and corrosion-resistant finishes—reduces the chance of sticking.
Small upgrades or replacements, like silicone gaskets, smoother linkage parts, or a new cartridge, can further minimize maintenance and extend reliable operation.
Routine cleaning schedule and methods
A simple, consistent cleaning routine keeps a sink stopper operating smoothly and reduces the need for repairs.
Inspect monthly, remove debris, and lubricate moving parts with plumber-approved silicone grease. Flush with hot water after use.
- Monthly: remove and clean stopper parts.
- Weekly: wipe visible surfaces and clear hair.
- Quarterly: lubricate pivot rods and check linkage.
Best stopper types for low-maintenance sinks
Several sink stopper designs minimize maintenance by reducing crevices, friction points, and exposed linkages that trap debris.
Pop-up units with sealed stems, simple lift-and-turn models, and push-button (click-clack) stoppers offer fewer moving parts and easier wipe-downs.
Rubber or silicone seals resist buildup and compress evenly.
Choosing durable materials and straightforward mechanisms lowers clogging risk and simplifies periodic inspection.
Small upgrades and replacements that reduce sticking
To further cut down on sticking, consider targeted upgrades and simple replacements that reduce friction, gaps, and corrosion.
Swap worn rubber seals, replace corroded pivot rods, and install silicone gaskets or teflon tape on threaded connections.
Upgrade to smooth-plug or click-clack stoppers and stainless hardware.
Regularly apply plumber’s grease to moving parts.
Small parts changes prevent future jams and extend lifespan.
Troubleshooting Common Problems and Mistakes
The troubleshooting section outlines common pitfalls that can worsen a stuck stopper, such as aggressive plunging or using harsh chemicals that can push debris farther into the drain or damage seals.
It also covers immediate steps to take if the stopper breaks during removal to prevent further damage or loss of parts.
Finally, it explains how to avoid cross-threading or misaligning the linkage when reassembling to guarantee smooth operation.
Why plunging or harsh chemicals can make things worse
Plunging or pouring strong drain chemicals often seems like a quick fix, but these methods can exacerbate a stuck sink stopper by dislodging debris further down the drain, corroding metal parts, or damaging seals and finish.
Aggressive plunging may force trapped items into tighter jams; chemical cleaners can eat rubber gaskets, weaken metal linkages, and create hazardous fumes, complicating repair.
What to do if the stopper breaks during removal
When removal methods fail or damage occurs, a stopper can break off inside the drain, creating a different set of challenges.
First, inspect with a flashlight to judge depth.
Try needle-nose pliers, a bent wire hook, or a magnet if parts are ferrous.
If inaccessible, shut off water, cover overflow, and call a plumber to avoid pushing debris further or damaging the trap.
How to avoid cross-threading or misaligning linkage
Work carefully to line up threads and linkage before tightening to prevent cross-threading or misalignment.
Inspect threads for debris or damage, clean with a brush, and hand-start nuts to guarantee correct engagement.
Use proper tools gently, avoid forcing angled fittings, and check alignment visually and by feel before final tightening.
Test operation; adjust if binding or uneven movement occurs.
Quick Reference: Tools and Parts Checklist
A concise checklist helps guarantee the job proceeds smoothly and prevents mid-repair trips to the hardware store. The list focuses on essentials: basic tools, replacement parts, and safety items so the repair finishes quickly and correctly.
| Tools | Parts |
|---|---|
| Adjustable wrench | Replacement stopper |
| Pliers | O-rings/gaskets |
| Screwdrivers | Pivot rod |
| Flashlight | Plumber’s grease |
Conclusion
With a few simple tools and a bit of patience, anyone can free a stubborn sink stopper and restore smooth drainage. The outlined steps—identifying the stopper type, accessing the mechanism, cleaning or repairing parts, and knowing when to call a pro—turn a frustrating chore into a quick win. Follow prevention tips to avoid repeats; the right fix can feel like performing plumbing magic, saving time, money, and future headaches.