How to Clear a Slow Draining Toilet Fast: DIY Fixes That Actually Work
If your toilet is draining slowly, it’s likely due to a partial clog, vent blockage, mineral buildup, or low tank flow. Start by checking the water level in the tank and the flapper’s operation. If the issue persists, use a flange plunger for firm plunges or try a toilet auger or hand snake for deeper clogs. Avoid harsh chemicals; instead, opt for enzymatic cleaners for routine maintenance. If multiple fixtures are affected, inspect the vent stack and sewer cleanout. Follow the steps below for effective DIY fixes and know when to call a professional.
What Causes a Toilet to Drain Slowly
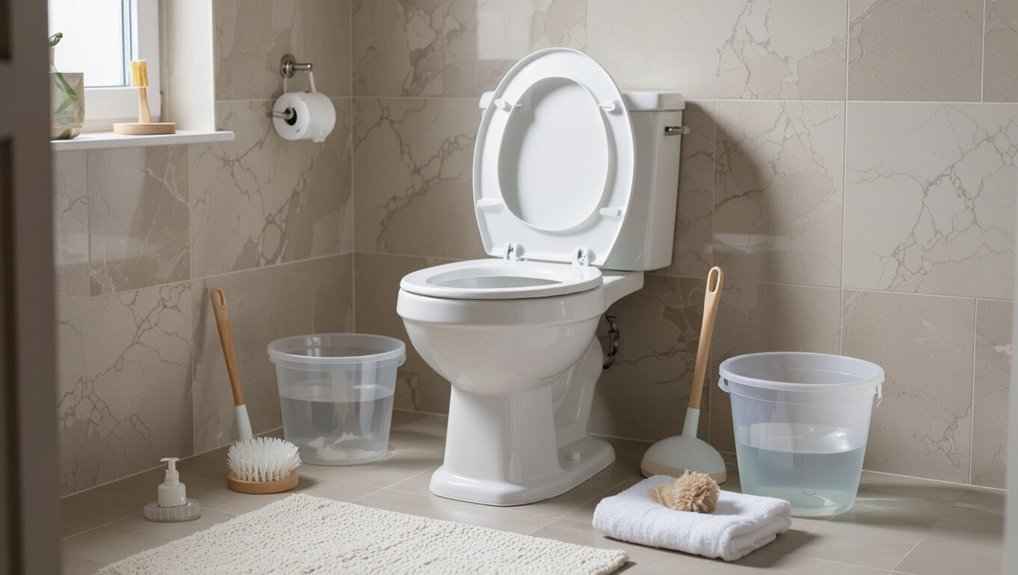
A slow-draining toilet often stems from a few distinct issues that affect flow.
Inside the trap, common blockages or mineral buildup can restrict passage, while partial clogs in the sewer line or venting problems impede overall drainage.
Alternatively, low water flow or malfunctioning flush mechanisms and fill valves can prevent a full, forceful flush.
Common blockages inside the toilet trap
Blockages within the toilet trap are a frequent cause of slow drainage, occurring when debris, waste, or foreign objects constrict the curved passage that leads to the sewer.
Common culprits include toilet paper buildup, sanitary products, hair, small toys, and mineral deposits.
Identifying trap obstructions is central to understanding how to clear a slow draining toilet quickly and safely with basic tools.
Partial clogs in the sewer line or venting issues
Investigate beyond the bowl when slow drainage persists, since partial clogs in the sewer line or problems with the venting system often impede flow despite a clear trap.
Roots, grease, or accumulated debris can restrict the main line, causing sluggish backups.
Likewise, a blocked vent stack prevents proper air exchange, slowing drainage and creating gurgling.
Professional inspection with a camera or vent clearing may be required.
Mineral buildup and low water flow problems
When sewer line restrictions and venting faults have been ruled out, attention turns to factors within the toilet itself: mineral buildup and insufficient water flow.
Hard water deposits narrow jets, siphon holes, and trapways, slowing flush velocity. Deposits can be dissolved or scrubbed; hard-to-reach buildup may require soaking with vinegar or a descaler.
Guarantee full bowl refill for adequate flush volume.
Faulty flush mechanism or fill valve problems
A malfunctioning flush mechanism or a failing fill valve can reduce the water force and volume needed for an effective flush, causing slow drainage despite a clear trap and sewer.
Worn flappers, misaligned chains, weak refill valves, or sediment-clogged fill ports prevent full tank discharge.
Inspect, adjust chain length, replace defective flappers or fill valves, and clean ports to restore proper flush performance.
Quick Actions You Can Take Right Now to Restore Normal Drainage
A brief checklist outlines immediate safety and preparation steps before attempting any fixes, such as wearing gloves and turning off the water supply.
It then summarizes practical techniques—proper plunging, when to employ a toilet auger, and quick temporary remedies like hot water with dish soap or a measured baking soda and vinegar treatment.
Each item focuses on clear, safe actions that can restore normal drainage quickly or indicate when professional help is needed.
Immediate safety and preparation steps
Before attempting any fixes, guarantee the area is safe and contained: turn off any nearby electrical devices, keep children and pets away, and place towels or a shallow pan around the toilet to catch spills.
Put on gloves and eye protection, open a window for ventilation, have a bucket and adjustable wrench ready, and locate the shutoff valve to stop water flow if needed.
How to use a plunger effectively
Begin by selecting a flange plunger (with a rubber flap) rather than a cup plunger.
Then position it to form a tight seal over the toilet drain.
Use steady, forceful pushes and pulls without breaking the seal.
Repeat 10–15 times, then test flush.
If slow persists, repeat once more.
- Seal firmly
- Pump rhythmically
- Control splash
- Test flush
When and how to use a toilet auger (snake)
If plunging fails to restore normal flow, a toilet auger (snake) is the next practical tool to reach clogs beyond the trap.
Insert the curved end into the bowl, crank the handle clockwise until resistance is felt, then push gently to break or hook the obstruction.
Retract slowly, flushing to confirm clearance. Use gloves and eye protection.
- Inspect
- Insert
- Crank
- Retract
Fast temporary fixes: hot water and dish soap method
A simple, quick remedy for a slow-draining toilet is the hot water and dish soap method, which uses heat and lubrication to dissolve or loosen mild clogs and built-up residue.
Pour a generous squirt of dish soap into the bowl, then carefully add a bucket of hot (not boiling) water from waist height.
Wait 10–20 minutes, then flush; repeat if needed.
Using baking soda and vinegar safely
Several household items—baking soda and white vinegar—can be combined safely to help break up light clogs and freshen the bowl without harsh chemicals.
Sprinkle one cup baking soda into the bowl, add one cup white vinegar, wait 10–15 minutes for fizzing, then pour a kettle of hot (not boiling) water.
Repeat once if needed; avoid mixing with commercial cleaners.
Tools and Materials to Keep Handy for Toilet Clogs
A small kit of reliable tools and supplies can turn a slow drain into a quick fix. Recommendations include the right plunger shape and size, when to use a toilet auger or general drain snake, and the pros and cons of chemical cleaners versus enzymatic alternatives.
Basic protective gear and cleanup materials should also be kept on hand to handle clogs safely and hygienically.
Recommended plungers and how to choose one
Different plungers suit different toilet designs and clog types, so selecting the right one improves clearing efficiency and reduces effort.
A cup plunger fits flat surfaces; a flange plunger seals bowl traps; a accordion plunger delivers strong force for stubborn clogs; a soft-rubber plunger protects porcelain and works for gentle clears.
Consider handle length, seal quality, and durable material when choosing.
Toilet augers vs. drain snakes: selection and uses
After choosing the right plunger, attention turns to tools for deeper or more stubborn clogs: toilet augers and drain snakes serve distinct roles. Augers protect porcelain and hook waste in traps; snakes reach farther and handle pipe blockages. Choose based on location and severity.
| Tool | Best for | Notes |
|---|---|---|
| Toilet auger | Trap clogs | Protects bowl |
| Hand snake | Deeper pipes | Flexible reach |
| Power snake | Serious blockages | Use with care |
Chemical cleaners and enzymatic alternatives when to use them
Consider chemical drain cleaners and enzymatic alternatives as targeted options for clogs that resist plunging or manual tools.
Chemical cleaners act fast on organic blockages but can damage seals, porcelain, and septic systems if misused.
Enzymatic products work slower, breaking down organic matter safely for regular maintenance and septic safety.
Choose based on urgency, pipe material, and septic considerations.
Protective gear and cleanup supplies
A few basic items—gloves, eye protection, disposable bags, and absorbent cloths—make cleanup safer and faster when dealing with a clogged toilet.
Protective gear prevents contamination; disinfectants and spill kits restore hygiene. Proper tools reduce mess and speed recovery.
- Nitrile gloves
- Safety glasses
- Heavy-duty trash bags
- Disposable towels and disinfectant
More Thorough DIY Methods for Stubborn Slow Draining Toilets
For particularly stubborn slow drains, more thorough DIY methods may be required, including disassembling and inspecting the toilet trap and bowl to locate trapped debris.
The homeowner can also access and clear the sewer line cleanout, check and clear the roof plumbing vent with proper safety precautions, and address mineral buildup by descaling the toilet and pipes.
Each step carries specific tools and safety considerations and should be attempted in a systematic order.
Disassembling and inspecting the toilet trap and bowl
Begin by turning off the water supply and draining the bowl to minimize mess before removing the tank-to-bowl bolts and unseating the toilet; this allows access to the trap and interior surfaces for direct inspection and cleaning.
Inspect the trap for mineral buildup, hair, or debris, using a flashlight and flexible brush. Remove deposits, check gasket and flange condition, and reassemble with new seals as needed.
Clearing a clog in the sewer line access
Accessing the sewer cleanout provides a direct route to the main line for tackling stubborn clogs that won’t clear from the fixture alone.
A capped cleanout is located outside or in a basement; loosening the cap releases pressure and allows inspection.
A plumber’s snake or hydro-jet equipment can be fed into the main to break or remove blockages.
Use gloves and eye protection.
Checking and clearing the plumbing vent on the roof (safety notes)
Inspect the roof vent when slow drainage persists despite clearing traps and the main line, because a blocked vent can trap sewer gases and prevent proper airflow needed for efficient flushing.
Use steady footwear, a secure ladder and a partner; avoid wet or icy roofs.
Remove visible debris with a gloved hand or plumber’s snake, then flush with water.
If unsure, hire a pro.
Descaling and removing mineral deposits from the toilet and pipes
When mineral buildup or hard-water scale resists plunging and snaking, targeted descaling of the bowl, trap, and accessible pipework becomes the next practical step.
Apply a commercial descaler or vinegar-based solution, soak per instructions, then scrub with a toilet brush and narrow bottle brush.
Flush, repeat if needed, and run water through cleaned traps and nearby pipes.
Use gloves and ventilation.
Diagnosing When the Problem Is Not a Simple Clog
If plunging and a snake do not restore normal flow, the issue may lie beyond a simple bowl clog. Signs such as multiple slow drains, sewage odors, or wet patches can indicate sewer line damage or backup, while gurgling noises and slow venting suggest a vent problem that can be tested by temporarily opening nearby roof vents or observing airflow during flushing.
Low water flow from the tank often points to a faulty fill valve or flapper and should be checked by inspecting fill rates, water level, and flapper seal.
Signs of sewer line backup or damaged pipes
How can a slow toilet reveal a problem beyond a simple clog?
Persistent sluggish draining, multiple fixtures backing up when one is used, gurgling sounds, sewage odors, wet spots or sinkholes in the yard, and sewage seeping from cleanouts indicate sewer line backup or damaged pipes.
Prompt inspection is advised; these signs suggest mainline blockages, tree root intrusion, collapsed sections, or severe corrosion requiring professional repair.
How to test for venting problems
Signs of sewer line trouble can coincide with venting failures, but vent problems produce distinct cues that point away from a mainline blockage.
To test vents, listen for gurgling during flushing, run other fixtures to observe simultaneous air noises, and smell sewer odor near roof vents.
Temporarily block and unblock the vent on the roof (briefly) to note pressure changes; persistent gurgling suggests obstruction.
Low water flow from the tank: diagnosing fill valve and flapper issues
Inspect the tank’s water delivery and sealing components when a toilet drains slowly but the trap and drain appear clear; low refill rates or a weak flush often stem from a failing fill valve, a misadjusted float, or a worn flapper rather than a mainline clog.
Check fill valve flow, clean or replace debris-clogged inlet, set float height for proper fill, and inspect flapper for warping or seat leaks, replacing if needed.
When to Call a Professional Plumber
If slow draining persists after basic plunging and augering, or if there is sewage backup, recurring clogs, gurgling drains, or multiple fixtures affected, a professional should be called.
A plumber will inspect the trap, sewer line, venting, and toilet flange and may perform snaking, hydro-jetting, camera inspection, or recommend repairs or replacement of damaged pipes or the toilet.
Costs vary by service—simple snaking is generally cheapest while camera work, hydro-jetting, or major repairs cost more—affected by local rates, access difficulty, and required parts.
Red flags that require professional attention
Several situations clearly exceed DIY remedies and warrant calling a licensed plumber promptly.
Persistent backups, sewage odors, or slow drainage in multiple fixtures indicate mainline issues.
Recurrent clogs after professional snaking, visible pipe leaks, or standing water around the toilet base require expert assessment to prevent damage and health risks.
- Multiple fixtures affected
- Sewage smell
- Recurrent clogs
- Visible leaks
What a plumber will inspect and possible repairs or replacements
When a homeowner calls a professional plumber for a slow-draining toilet, the technician conducts a systematic assessment of both visible components and hidden plumbing to pinpoint the cause and scope of the problem.
- Inspect tank components, flapper, fill valve, and flush mechanism.
- Check trapway and bowl for obstructions or mineral buildup.
- Assess drain line and venting for clogs or sewer issues.
- Recommend repairs: seal replacement, augering, or component/supply line replacement.
Typical cost ranges and what affects pricing
Typical repair bills for a slow-draining toilet can range widely depending on the problem’s source and the service required. Costs vary by labor, parts, severity, and location. Simple unclogs cost less; sewer-line issues or replacement cost more. Warranties and emergency calls increase price.
| Issue | Typical Cost | Notes |
|---|---|---|
| Plumber visit | $75–$150 | Service call fee |
| Unclog | $50–$200 | Depends on method |
| Parts | $10–$200 | Flappers, seals, snakes |
| Replacement | $200–$800+ | Bowl and installation |
Preventive Measures to Keep Your Toilet Draining Smoothly
Preventive steps can markedly reduce slow drains by promoting simple daily habits such as limiting flushable items and using enough water per flush.
A regular maintenance schedule — including checking the flapper, tank components, and bowl rim jets — helps identify wear and early buildup before it obstructs flow.
Periodic use of descalers or enzyme treatments and appropriate cleaners can minimize mineral deposits and keep passages clear.
Daily habits that prevent clogs
Although often overlooked, daily habits play an essential role in keeping a toilet draining smoothly; consistent, simple actions reduce the chance of buildup and blockages over time.
- Flush only waste and toilet paper, avoiding wipes or sanitary products.
- Use a small amount of plumbing-safe cleaner weekly.
- Encourage proper use—no excessive paper per flush.
- Inspect for slow drains promptly and address odors or gurgles early.
Regular maintenance schedule and what to check
When kept on a simple, regular schedule, routine checks and minor upkeep prevent most slow drains and costly repairs.
Inspect flapper and fill valve monthly for wear, test flush performance, and listen for phantom running.
Clear visible debris from bowl and rim holes, verify chain length, and check tank-to-bowl seal.
Record issues and schedule repairs promptly to avoid escalation.
Products and treatments to reduce mineral buildup
After establishing a maintenance rhythm and noting worn parts, attention turns to products and treatments that limit mineral deposits inside the bowl, trapway, and tank.
Owners should choose descalers (acidic or enzymatic), water-softening devices, and tank tablets formulated for toilets.
Periodic application prevents buildup on surfaces and valves, preserves flush capacity, and reduces corrosion; follow label instructions to protect seals and finishes.
Troubleshooting Checklist: Step-by-Step Flowchart for a Slow Draining Toilet
A concise troubleshooting flowchart guides the user from quick inspections to more involved repairs, helping identify the simplest solution first.
It separates actions into time-based tiers so a homeowner can choose what fits their skill and schedule. The checklist culminates with clear advanced steps to try before deciding to call a professional.
- Quick checks (under 5 minutes)
- Intermediate fixes (10 to 30 minutes)
- Advanced steps before calling a pro
- When to stop and seek professional help
Quick checks (under 5 minutes)
How quickly can a homeowner identify obvious causes of a slow drain?
In under five minutes one can check for visible obstructions in the bowl, confirm the water level in the tank, guarantee the flapper lifts fully, and inspect the overflow tube and shutoff valve for proper position.
Note any unusual noises or slow refill—record findings before attempting further fixes.
Intermediate fixes (10 to 30 minutes)
Begin by isolating the most likely mid-level causes—partial blockages, venting issues, or trap alignment—and move methodically through a short checklist that targets each in turn.
Use a toilet auger to clear reachable clogs, check and clear the vent stack from roof access if safe, inspect and realign the trapway with a flashlight, and test multiple flushes.
Document results and repeat targeted steps as needed.
Advanced steps before calling a pro
When mid-level fixes fail, proceed through a concise, prioritized flowchart that guides systematic advanced troubleshooting before summoning professional help:
Inspect the trap and flange for visible damage;
test sewer line flow with a snake past the trap;
check vent pipe for blockages (roof access or camera);
attempt enzyme treatment if biological buildup suspected;
document findings and only then contact a plumber with specifics and photos.
Common Mistakes to Avoid When Trying to Unclog a Toilet
Many homeowners reach for chemical drain cleaners without realizing the corrosive formulas can damage porcelain, seals, and pipe interiors.
Using tools incorrectly—such as forcing an auger or using metal objects—risks scratching the bowl or clogging deeper sections of the plumbing.
Attempting risky roof or vent access and advanced repairs beyond basic DIY can create safety hazards and make problems worse, so professionals should be called when work exceeds simple plunging or snaking.
Why chemical drain cleaners can cause more harm
Avoid using chemical drain cleaners to fix a slow toilet; they often worsen the problem. Harsh caustics can corrode seals, joints, and older pipes, leading to leaks and costly repairs.
Residues may solidify, creating tougher blockages. Chemical reactions can produce toxic fumes and damage porcelain glazes.
Safer mechanical methods or enzyme treatments are recommended before resorting to harsh chemicals.
Improper use of tools that can damage the bowl or pipes
After chemical options are ruled out, misuse of household tools becomes the next common culprit in worsening toilet problems.
Individuals may force wire hangers, metal rods, or abrasive scrubbers into the trap, scratching porcelain, dislodging seals, or puncturing pipes.
Appropriate tools—flexible toilet augers, rubber plungers—should be used correctly; otherwise professional assessment prevents costly, avoidable damage.
Unsafe roof/vent access and DIY plumbing limits
When homeowners tackle persistent drain or vent issues themselves, attempting roof access to clear a toilet vent can introduce serious hazards and often exceeds typical DIY capabilities.
Climbing risks, fragile roofing, and misdiagnosing vent vs. sewer issues can worsen problems.
Professional plumbers have safe equipment, training, and codes knowledge; calling one avoids injury, roof damage, improper vent repairs, and costly downstream failures.
Useful References and Resources
The article points readers to concise video tutorials and reputable how-to guides for step-by-step demonstrations and tool selection.
It also notes when checking local plumbing codes and permit requirements is necessary, especially for structural or drainage alterations.
These resources help distinguish simple fixes from jobs that require professional involvement.
Video tutorials and reliable how-to guides
Because practical demonstration accelerates comprehension, curated video tutorials and concise how-to guides offer users step-by-step methods for clearing a slow-draining toilet.
These methods range from basic plunging techniques to more advanced auger use and trap-cleaning procedures.
Reliable sources emphasize safety, tool selection, and common mistakes to avoid.
Recommended resources include:
- Manufacturer how-to videos
- Independent plumbing channels
- Step-by-step photo guides
- Community forums with verified answers
When to consult local plumbing codes and permits
Why consult local plumbing codes and permits before attempting repairs? Local codes determine allowable fixes, required materials, and when a licensed plumber must perform work.
Permits protect homeowners and buyers, guarantee inspections, and prevent fines.
For significant modifications—replacing drain lines, altering venting, or relocating fixtures—verify jurisdictional rules and obtain permits to confirm safety, compliance, and insurance validity.
Conclusion
In the grand theater of household crises, a sluggish toilet performs its valedictory act—slow, stubborn, and oddly dignified. After plungers, wire snakes, and the occasional chemical apology, the problem either yields or reveals itself as something loftier than DIY pride can fix. One can celebrate temporary victory, or humbly summon a plumber. Either way, the lesson clings: modern plumbing rewards patience, preparation, and the occasional surrender to expertise.