How to Fix a Float Switch on a Sump Pump: Step-by-Step Troubleshooting and Repair
To fix a faulty sump pump float switch, start by cutting off the power and inspecting the float and tether for any debris or corrosion. Manually cycle the float to ensure it moves smoothly and activates the switch. Clean any pivot points using a mild vinegar solution, then test the continuity with a multimeter. Tighten or replace any loose wiring or damaged components. If the switch is still erratic, it may need replacement. To prevent future issues, conduct regular quarterly checks and follow a detailed step-by-step repair plan for effective fixes and parts guidance.
What a Sump Pump Float Switch Is and Why It Fails
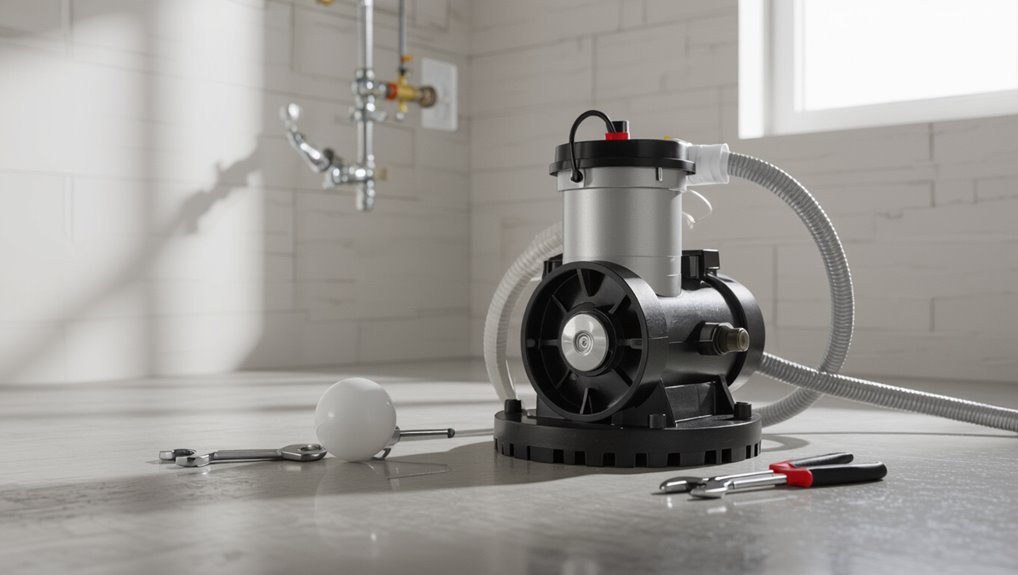
A sump pump float switch is a mechanical or electronic sensor that detects rising water and triggers the pump to run.
Common causes of float switch failure include stuck or obstructed floats, electrical faults, and wear from corrosion or debris.
Warning signs of a malfunctioning float switch are the pump running continuously, failing to start, or starting erratically.
How a float switch works inside a sump pump
Understand how a float switch controls a sump pump: it senses rising water and mechanically or electronically triggers the pump to start and stops it when water falls.
Inside the basin, a tethered or vertical float moves with water level, closing or opening a circuit to activate the motor.
Knowledge of this operation guides troubleshooting and how to fix float on sump pump issues efficiently.
Common causes of float switch failure
Many float switches fail due to simple mechanical wear, electrical faults, or environmental interference.
Corrosion, mineral buildup, and debris restrict movement. Wiring degradation, loose connections, or short circuits impair electrical continuity.
Stuck or misaligned floats from sediment or improper installation prevent proper cycling.
Extreme temperatures and chemical exposure accelerate component breakdown, shortening switch lifespan and compromising reliable operation.
Signs your float switch is malfunctioning
Detecting a failing float switch often starts with observable changes in pump behavior: the sump pump may run continuously, refuse to start, cycle erratically, or activate at inappropriate water levels.
Other signs include unusual noises, inconsistent water removal, visible corrosion or debris on the float, intermittent electrical faults, tripped breakers, and dampness or minor flooding near the basin indicating delayed or failed activation.
Safety Precautions Before You Start
Before beginning any work on a sump pump’s float switch, power should be disconnected at the breaker and the cord unplugged to eliminate electrical hazards.
The worker should wear appropriate PPE—insulated gloves, eye protection, and waterproof boots—and clear and dry the workspace to prevent slips and contact with live parts.
If wiring is complex, damage is extensive, or uncertainty exists about electrical safety, a licensed electrician or pump professional should be called.
Power and electrical safety steps
Always verify that the sump pump is completely disconnected from its power source before touching the float switch or any wiring.
Confirm by switching off the dedicated circuit breaker and unplugging the unit if accessible.
Use a noncontact voltage tester to guarantee no live voltage at the pump or switch leads.
Treat all conductors as live until proven de-energized and label the breaker for others.
Personal protective equipment and workspace preparation
Gather appropriate personal protective equipment and prepare the workspace to minimize hazards before handling the float switch.
Wear insulated gloves, safety glasses, and non-slip footwear.
Confirm good lighting and clear drainage paths; remove trip hazards.
Use a grounded, dry work surface and keep a dry towel nearby.
Verify a locked-out power source and place a warning sign to prevent accidental re-energization.
When to call a professional instead of DIY
When should a homeowner call a professional instead of attempting a DIY float-switch repair?
If electrical wiring is corroded, the pump repeatedly fails, water damage is extensive, or the homeowner lacks tools and experience, a licensed plumber or electrician should be contacted.
Professionals are also advised for complex chamber configurations, inaccessible sump pits, or when warranty/insurance requirements mandate certified repairs.
Tools and Parts Needed
A concise list of tools and parts streamlines diagnosis and repair of a sump pump float switch.
Essential hand tools (screwdrivers, pliers, multimeter), common replacement parts (float, switch assembly, gaskets, wiring connectors), and suggested brands/specifications appropriate for residential pumps should be noted.
Having these items on hand prevents delays and guarantees compatible, reliable repairs.
Basic tools for inspection and repair
Proper inspection and basic repair of a sump pump float switch requires a small set of reliable tools and replacement parts to diagnose electrical and mechanical issues efficiently.
Essential tools include a multimeter for continuity and voltage checks, insulated screwdrivers, needle-nose pliers, wire strippers, a flashlight, and small wrenches.
A clean cloth and contact cleaner aid inspection without replacement.
Replacement parts to have on hand
Preparedness improves repair speed and prevents emergency trips to a hardware store.
The technician should keep spare float switches, seal kits, O-rings, gaskets, and impeller clips.
Include replacement wiring, wire nuts, heat-shrink tubing, and a small waterproof junction box.
Also store silicone lubricant, marine-grade cable ties, and a multimeter battery.
Parts cover common failures and reduce downtime.
Recommended brands and specifications
Keeping spare parts organized naturally leads to selecting reliable brands and correct specifications to minimize failures and guarantee compatibility.
Recommended choices include OEM float switches, stainless steel hardware, and rated electrical connectors. Match voltage, amperage, and float type (rod, tether, or electronic) to the pump model. Verify IP rating for wet environments and warranty coverage.
- OEM or factory-equivalent floats
- Stainless steel brackets
- 120/240V rated connectors
- IP67 or higher seals
- Manufacturer warranty verified
Step-by-Step Troubleshooting Process
A systematic troubleshooting loop begins with a careful visual inspection of the pump and float to spot obvious damage, obstructions, or misalignment.
Next steps include manually testing the float action, using a multimeter to check electrical continuity, and inspecting and cleaning the switch, stem, and pivot.
After maintenance, the pump should be tested to confirm proper operation.
Initial visual inspection of the pump and float
Before any disassembly, the technician conducts a focused visual inspection of the sump pump and float to spot obvious signs of damage, misalignment, or debris that could impair operation.
The assessment includes checking for cracks, corrosion, frayed wiring, loose mounts, obstructing sediment, and entangled cords.
Photographs and notes document findings and determine whether cleaning, realignment, or component replacement is warranted.
Testing the float action manually
Begin by manually actuating the float to observe its travel and switch response: lift the float slowly through its full range while watching for smooth movement, abrupt catches, or binding, and listen for the pump motor or audible switch clicks indicating activation and deactivation points.
Note any wobble, rubbing against the pit, or friction on its stem. Record the exact engagement and release positions for adjustment.
Checking electrical continuity with a multimeter
Proceed to verify the float switch’s electrical continuity with a multimeter to confirm the switch contacts operate as the float moves.
Disconnect power and isolate the switch connectors.
Set the multimeter to continuity or low-ohms, probe the switch terminals while lifting and lowering the float.
Note open/closed changes matching float positions.
Replace the switch if readings are inconsistent or stuck.
Inspecting and cleaning the switch, stem, and pivot
Inspect the float switch assembly for debris, corrosion, or mineral buildup that can impede movement or electrical contact.
Remove power, detach the float if needed, and wipe components with a soft brush and mild vinegar solution to dissolve deposits.
Clear the stem and pivot of grit, inspect for worn or bent parts, and apply light dielectric grease to contacts and pivot points if corrosion is minimal.
Testing the pump operation after cleaning
With the float switch and related components cleaned and reassembled, verify pump operation systematically to validate the repair and prevent unexpected failures.
Refill the sump to switch activation level, observe float movement and audible motor start, and confirm discharge flow and check valve function.
Cycle several times to ascertain consistent activation and shutoff, monitor for leaks, unusual noises, or overheating, and restore normal power settings.
How to Repair Common Float Switch Problems
Common float switch problems range from mechanical obstructions that trap the float to failed internal switches and damaged arms or stems that prevent proper movement.
Repair options include freeing or replacing the float or arm, swapping the internal switch, converting between tethered and vertical styles with attention to their trade-offs, and addressing wiring by splicing or replacing leads safely.
The following section outlines concise, practical steps and safety precautions for each of these fixes.
Freeing a stuck float (mechanical obstructions)
Begin by identifying the source of the obstruction that is preventing the float from moving freely; common causes include debris clinging to the float, mineral buildup on the shaft or guide, or a jammed linkage.
Power should be disconnected, the pump removed if needed, and visible debris cleared with a soft brush.
Rinse away deposits, free the guide, and verify smooth float travel before reinstalling.
Repairing or replacing a damaged float arm or stem
Inspect the float arm or stem for bends, cracks, corrosion, or broken mounting points that prevent proper pivoting or buoyancy.
If minor bends exist, carefully straighten with pliers; replace arms with corrosion or fractures.
Confirm mounting hardware and bushings are intact; replace worn clips or pins.
After repair or replacement, test float travel and pump activation across the normal water range before reinstalling.
Replacing a failed internal float switch
Replace a failed internal float switch when the external float arm and related components are intact but the pump fails to respond to rising water or shows erratic cycling.
Disconnect power, remove pump housing, and inspect the internal switch assembly for corrosion, burned contacts, or broken wires.
Replace the module with a manufacturer-approved part, reassemble seals and gaskets, reconnect power, and test operation under controlled water rise.
Converting between tethered and vertical float styles pros and cons
Many homeowners and technicians weigh the choice between tethered and vertical float switches when modifying a sump pump, since each style has distinct installation requirements, performance characteristics, and maintenance implications. Tethered floats offer simplicity and adjustable trip points; vertical floats save space and resist tangling. Consider pump well size, debris, and desired reliability before converting styles.
| Tethered | Vertical |
|---|---|
| Adjustable | Compact |
| Prone to tangles | Stable |
| Easier retrofit | Fixed trip |
| Better for large wells | Good for tight wells |
| Higher maintenance | Lower maintenance |
How to splice or replace float switch wiring safely
Begin by cutting power to the sump pump at the breaker and confirming it is dead with a non-contact voltage tester; working on live float switch wiring risks shock and equipment damage.
Inspect cable and connectors, cut back to solid insulation, strip appropriately, and use marine-grade heat-shrink butt connectors or wire nuts inside a waterproof junction box.
Secure strain relief, test operation, and restore power.
Reinstalling and Testing the Sump Pump
The pump is lowered back into the pit with the float switch positioned to move freely without rubbing the basin or pump.
Wiring is secured and routed to prevent snagging or chafing that could cause future interference.
A full operational test is performed, and any failure is diagnosed and corrected before finishing the job.
Proper repositioning of the float switch
Repositioning the float switch requires careful alignment to guarantee reliable activation and to prevent chattering or failure.
The technician centers the float free from obstructions, sets its travel path perpendicular to pump inlet, and adjusts height stops to match desired on/off levels.
After securing the float bracket, he cycles water manually to verify smooth, repeatable operation without binding or premature shutoff.
Securing wiring and preventing future interference
Secure all electrical connections and fasten the float switch cable to prevent snagging or abrasion during pump operation.
Route wiring away from moving parts, use cable ties and conduit clips, and secure strain relief at the pump and control box.
Trim excess slack but allow gentle movement.
Inspect for chafing, replace damaged insulation, and verify that float travel remains unobstructed before restoring power.
Full functional test and troubleshooting failed tests
Begin by reinstalling the sump pump and float switch according to the manufacturer’s alignment and mounting guidelines. Then reconnect power and capillary or control leads securely.
Fill the basin, observe float travel, and verify automatic activation and shutoff. If it fails, check wiring, continuity, switch contacts, and obstruction.
Test with manual lift and multimeter; replace switch or relay if readings are out of specification.
Preventive Maintenance to Extend Float Switch Life
A concise preventive maintenance plan helps prolong float switch life by combining scheduled inspections, targeted cleaning, and minor environmental improvements.
Technicians should follow a simple checklist for routine checks and remove debris or buildup that can impede float movement.
Small adjustments such as installing a pit liner or a fitted cover can reduce wear and minimize the need for repairs.
Routine inspection schedule and checklist
Regular inspections every three months, with additional checks after heavy storms or power outages, help catch early signs of wear on a sump pump float switch.
Inspectors should record observations, test operation, and schedule repairs promptly.
- Verify float movement and alignment
- Check electrical connections for corrosion
- Test pump activation and shutoff points
- Confirm secure mounting and cable condition
- Log date, findings, and corrective actions
Cleaning tips to prevent debris buildup
Keep debris away from the float switch by establishing a simple cleaning routine that targets sediment, grit, and organic matter before they accumulate.
Schedule monthly inspections, remove visible particles with a soft brush and vacuum, rinse with clean water, and dry components.
Use mild detergent for sticky residue, avoid harsh chemicals, and document each cleaning to track recurring contamination sources and effectiveness.
Environmental adjustments to reduce wear (pit lining, covers)
Several straightforward environmental modifications can considerably reduce wear on a sump pump float switch and extend its service life.
Installing a smooth pit lining prevents abrasion and snagging of the float. A fitted cover minimizes debris and rodents while reducing turbulence.
Guarantee proper drainage slope, secure wiring, and avoid chemical exposure.
Periodic inspections verify integrity and reveal needed touch-ups to maintain ideal conditions.
Troubleshooting Persistent or Intermittent Issues
When problems recur or occur sporadically, systematic troubleshooting is required to separate float-switch faults from other causes.
Technicians should check for intermittent electrical connections and control wiring, observe for rapid cycling that indicates short-cycling, and verify whether motor or plumbing issues are producing symptoms similar to a failing float.
Clear, stepwise tests and logging of conditions help pinpoint the true source before replacing components.
Diagnosing intermittent electrical faults
Diagnosing intermittent electrical faults requires a methodical approach that isolates variables and reproduces the condition reliably.
Inspect wiring, connectors, and the float switch for corrosion, looseness, or insulation damage. Use a multimeter to monitor voltage and continuity during operation, and record events or replicate load conditions.
Swap suspect components, test under varying water levels, and document findings before replacing parts.
Dealing with rapid cycling or short-cycling
Address rapid cycling by first confirming whether short, frequent on/off cycles originate from the float switch, the pump, or the control circuitry.
Inspect float movement for binding, debris, or incorrect travel. Test switch continuity while moving the float.
Verify wiring and secure connections. If external controls or timers exist, confirm settings and relay operation.
Replace a faulty float switch or control component as needed.
When pump performance issues mimic float problems
Inspecting pump behavior is essential when symptoms that resemble float switch faults persist intermittently.
Technicians should verify impeller condition, check for partial clogs, confirm discharge check valve operation, and assess motor amperage and voltage consistency.
Intermittent cavitation, worn bearings, or reduced head can mimic stuck or failing floats.
Systematic testing isolates float function from pump mechanical or electrical failures.
Cost Estimates and When Replacement Is Best
Typical repair parts such as replacement floats, switches, and mounting hardware generally range from $15 to $75, while professional service calls and labor can add $100–$300.
If repeated failures occur, the pump is old (typically over 7–10 years), or corrosion and motor issues are present, total replacement—often $300–$800 for a new unit plus installation—may be more cost-effective.
The discussion will compare short-term repair costs against long-term reliability and potential water damage risk to determine when replacement is the prudent choice.
Typical costs for parts and common repairs
When a float switch begins to fail, repair choices hinge on the specific fault and the age of the sump pump; minor parts like float arms, clips, or wiring connectors often cost between $10 and $40, while replacement floats or sealed switch assemblies typically run $30 to $80. Typical repairs and approximate costs:
| Part/Repair | Typical Cost |
|---|---|
| Float arm/clip | $10–$25 |
| Wiring/connectors | $10–$40 |
| Replacement float | $30–$60 |
| Sealed switch assembly | $40–$80 |
Signs that a full sump pump replacement is more cost-effective
Minor repairs can often restore a malfunctioning float switch for relatively low cost, but there are clear indicators that replacing the entire sump pump is more economical and reliable.
Frequent failures, extensive corrosion, repeated motor overheating, discontinuous availability of parts, or repair costs exceeding 50–60% of a new unit suggest replacement.
Upgrading to a higher-capacity, energy-efficient pump can lower long-term risk and expense.
Helpful Upgrades and Accessories
Beyond basic repairs, homeowners can improve reliability with backup float switches or dual-switch systems that keep water moving if the primary unit fails.
Alarm systems and smart monitors provide early warning of float failure or high water conditions.
For longer service life, corrosion-resistant and heavy-duty floats are recommended in harsh or debris-prone basins.
Backup float switches and dual-switch systems
Install a backup float switch or a dual-switch system to add redundancy and reduce the risk of pump failure during critical high-water events.
These setups pair a primary and secondary float or separate high-level and normal-level switches, ensuring operation if one fails.
Proper wiring, compatible mounting, and periodic testing keep redundancy reliable without relying solely on a single float device.
Alarm systems and smart monitors for float failure
While mechanical redundancy reduces pump failure risk, alarm systems and smart monitors provide immediate notification of float malfunction or abnormal sump conditions.
These devices include water-level alarms, float-position sensors, and Wi-Fi-enabled monitors that send alerts via app, text, or email.
Installation is typically noninvasive, offering remote status, event logs, and integration with home automation for proactive maintenance and rapid response to failures.
Corrosion-resistant and heavy-duty float options
A robust float assembly greatly extends sump pump reliability in corrosive or heavy-use environments.
Stainless steel stems, brass fittings, and sealed polymer floats resist corrosion and chemical exposure. Heavy-duty ball or vertical floats withstand repeated cycles and debris.
Users should match float type to basin size and liquid characteristics.
Professional-grade mounts and reinforced cables reduce failure risk and simplify future maintenance.
Quick Reference: Step-by-Step Repair Checklist
Begin by confirming power is disconnected and the sump pump is inaccessible for operation; safety checks precede any repair.
A concise checklist guides the technician through inspection, testing, adjustment, cleaning, and replacement to restore reliable float switch function.
- Verify power and lockout
- Inspect float for damage or blockage
- Test continuity and switch action
- Clean contacts and mechanism
- Replace or secure float and retest
Conclusion
To sum up, the homeowner reviewed the float switch repair steps with the calm precision of a watchmaker consulting a sundial, recognizing that many failures stem from simple debris, misalignment, or wiring faults. After following safety checks, diagnostic tests, and targeted fixes—or opting for replacement when costs rose—confidence returned. Routine inspection and modest upgrades reduced recurrence, ensuring the sump pump resumed reliable duty guarding the basement against seasonal waters and unexpected ambient floods.