How to Fix Condensation in Dryer: 7 Proven Fixes to Stop Moisture and Improve Performance
To fix condensation in your dryer, start by addressing restricted airflow, damaged seals, or improper venting that can trap humid air. Begin with a thorough check of the vent and lint trap to clear any blockages. Ensure the exterior hood opens freely and inspect for worn door seals. Repair any crushed or excessively long ducts and make sure there’s adequate ventilation in the room. For persistent issues, consider professional duct cleaning or upgrading to a condenser or heat-pump dryer. Below, you’ll find step-by-step fixes, diagnostics, and cost estimates to fully resolve the problem.
Why Your Dryer Is Producing Condensation and Moisture
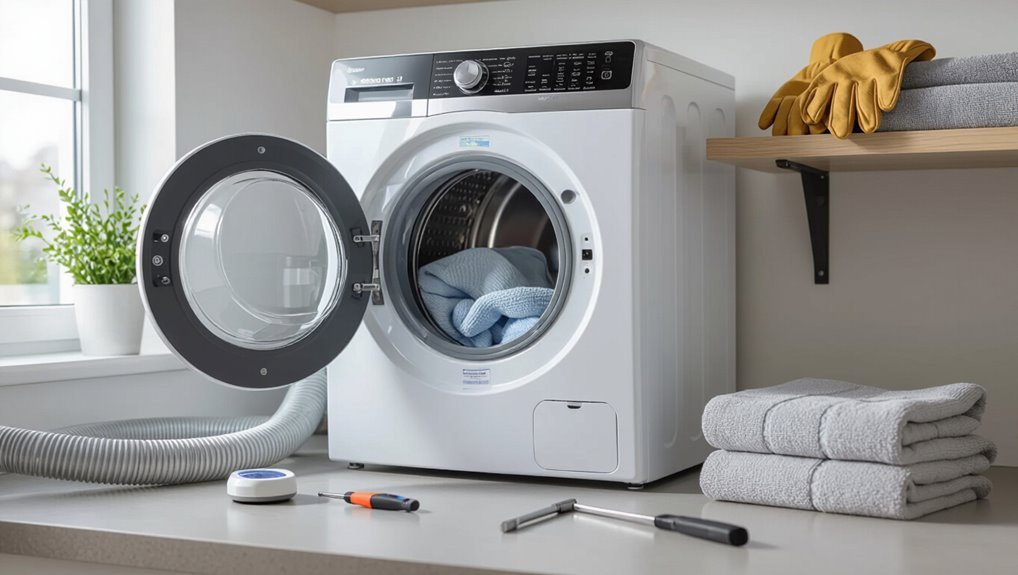
A dryer produces moisture as warm air lifts water from clothes during tumbling and carries it out through the vent. When that humid air cools or cannot vent properly, condensation forms.
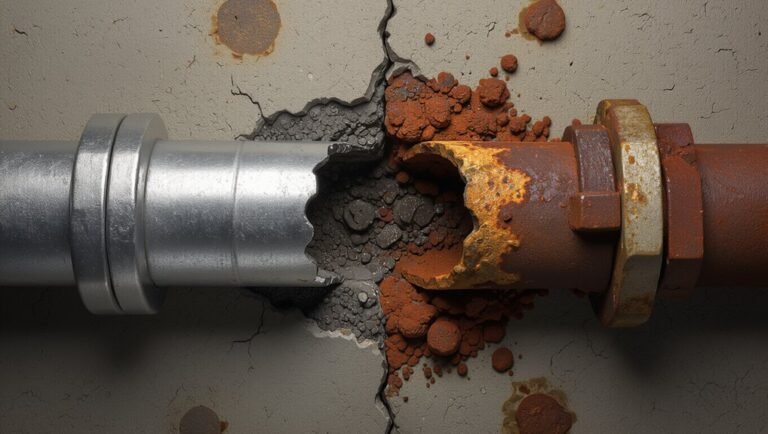
Signs of a condensation problem include fogged surfaces, persistently damp laundry, and developing rust on the appliance.
Left unchecked, chronic condensation can promote mold growth, damage the dryer, and reduce drying efficiency.
How dryers generate moisture: basic mechanics of tumbling and venting
Dryers generate moisture primarily by extracting water from wet fabrics through heat and tumbling, then expelling that humid air through a vent.
When any part of this cycle is impeded—poor airflow, blocked vents, or cool exhaust pathways—moisture can condense inside the machine or nearby spaces.
Understanding drum rotation, heated air flow, lint traps, and vent runs informs how to fix condensation in dryer effectively.
Common signs of condensation problems (fogging, damp laundry, rust)
When airflow or heat delivery is compromised, signs of condensation begin to appear on and around the machine.
Visible fogging on the door or window, persistently damp or cool laundry after a full cycle, water pooling in the drum or on the floor, and rust or corrosion on metal parts indicate inadequate venting or heating.
Timely inspection and corrective action are warranted.
Risks of persistent dryer condensation (mold, appliance damage, efficiency loss)
If condensation persists inside a dryer, it creates conditions that quickly escalate from minor nuisance to serious hazards.
Persistent moisture fosters mold and mildew growth, endangering indoor air quality and fabrics.
Corrosion and electrical failures shorten appliance lifespan and raise fire risk.
Clogged vents and inefficient heat transfer increase energy use and cycle times, driving higher bills and more frequent repairs.
Quick Diagnostic Checklist to Confirm a Condensation Issue
A quick diagnostic checklist helps pinpoint whether moisture comes from airflow, seals, ambient conditions, or the dryer’s design.
Inspect the vent path and exterior exhaust, check door seals, lint trap, and drum condition, and test for proper airflow and backpressure.
Measure ambient humidity and room ventilation, then determine if the issue is specific to vented, condenser, or heat-pump models.
Inspect the vent path and exterior exhaust
Begin by tracing the dryer’s entire vent route from the drum outlet to the exterior hood, checking for kinks, crushed sections, and excessive length that restrict airflow.
Verify all joints and clamps are secure, remove accumulated lint or blockages, and confirm the exterior flap opens freely.
Measure vent run length and guarantee proper diameter; replace damaged ducting to restore efficient exhaust and reduce indoor moisture.
Check door seals, lint trap, and drum condition
With the vent path confirmed clear, attention shifts to the dryer’s immediate seals and internal components to rule out sources of internal moisture buildup.
Inspect door gasket for cracks, gaps, or compression loss; replace if compromised.
Empty and clean the lint trap and housing; remove trapped moisture.
Examine drum for dents, rust, or loose baffles that retain water or impede tumbling; repair as needed.
Test for proper airflow and backpressure
Confirm airflow and measure backpressure to determine whether restricted exhaust or pressure buildup is causing condensation rather than a mechanical leak.
Inspect vent path, clean lint and obstructions, then run the dryer while measuring static pressure near the duct outlet with a manometer or gauge.
Compare readings to manufacturer specs; elevated backpressure or weak airflow indicates vent restriction, requiring cleaning, repair, or shortening the duct.
Measure ambient humidity and room ventilation
How much moisture is already in the room can make the difference between normal exhaust condensation and a ventilation problem.
Measure ambient relative humidity with a hygrometer during and after a drying cycle.
Note ventilation: window, door, or mechanical exchange rates and any obstructions.
Record readings, compare to 40–60% ideal range, and use results to guide ventilation improvements or further diagnostics.
Determine if problem is vented, condenser, or heat-pump dryer specific
Why does condensation persist despite normal operation? Identify dryer type first: vented, condenser, or heat-pump.
Inspect vented models for blocked ducts and external exhaust; check condenser dryers for clogged heat exchanger or full water tank; verify heat-pump units for refrigerant faults or fan issues.
Match symptoms to type to prioritize targeted repairs or component replacement and avoid unnecessary interventions.
Seven Proven Fixes to Stop Dryer Condensation
The following fixes address the common mechanical and ventilation causes of dryer condensation and aim to restore efficient, dry exhaust. Each remedy targets a specific failure point: vent blockages, poor duct design, exterior termination issues, inadequate room airflow, or worn seals and parts.
Implementing these measures in sequence typically eliminates moisture buildup and recurrent problems.
- A technician cleaning lint, debris, and bird nests from the full venting run
- Short, straight, insulated ducts replacing long, sagging, uninsulated runs
- A properly installed exterior vent with a functioning flap and no backdrafts
- Improved laundry room ventilation—exhaust fans, passive vents, and open airflow
- Repaired or replaced seals, gaskets, and internal components to stop leaks
1. Clean and clear the entire venting system
A thorough venting-system clean is the first defense against dryer condensation and includes the lint trap, interior ductwork, and exterior hood.
The article will outline step‑by‑step lint removal techniques for each area and list recommended tools such as brushes, vacuum attachments, and a vent cleaning kit.
Basic safety steps—power disconnection, protective gloves, and ladder precautions—will be emphasized before work begins.
How to remove lint buildup from lint trap, duct, and exterior hood
Begin by clearing lint from the trap, duct, and exterior hood to restore airflow and prevent moisture buildup; accumulated lint restricts venting, causes longer dry cycles, and turns exhaust into condensation inside the ductwork.
Remove the trap screen, vacuum accessible lint, detach and brush the duct, and clean the exterior hood flap.
Inspect for blockages and reassemble, ensuring seals are tight.
Recommended tools and safety steps
After clearing lint from the trap, duct, and exterior hood, attention shifts to the tools and safety steps needed to clean the entire venting system properly.
Recommended tools include a vacuum with crevice and brush attachments, flexible vent brushes, screwdrivers, pliers, and a flashlight.
Safety steps: unplug the dryer, shut off gas if applicable, wear gloves and eye protection, and verify vent integrity before reassembly.
2. Shorten, straighten, and insulate ductwork
Reducing duct length and eliminating bends improves airflow and keeps moist exhaust moving efficiently, with recommended maximum lengths varying by dryer type and number of elbows.
Rigid or semi‑rigid metal ducts outperform flexible foil or plastic in airflow and durability, and should replace flexible runs when long runs or multiple turns are present.
Insulating exterior or unheated duct sections minimizes temperature drop and condensation by keeping exhaust above its dew point.
Optimal duct length, materials, and why insulation reduces condensation
While dryer performance depends on several factors, duct length, material choice, and insulation most directly determine how much moisture reaches the vent and whether it condenses inside the run.
Shorter, straighter runs reduce residence time and cooling. Smooth, rigid metal ducts resist lint buildup and conduct heat.
Insulation keeps exhaust above dew point, preventing internal condensation and improving airflow and energy efficiency.
When to replace flexible duct with rigid or semi-rigid
Evaluate the duct type whenever persistent condensation, frequent lint buildup, or diminished drying performance occurs; these signs indicate the flexible foil or plastic duct may be restricting flow, cooling exhaust too quickly, or trapping moisture.
Replace with rigid or semi‑rigid metal when runs exceed short, straight limits, when kinks exist, or when lint accumulation is chronic.
Metal ducts maintain smoother airflow, reduce condensation, and improve safety.
3. Ensure correct exterior vent termination and flap operation
Proper exterior vent termination—placed away from obstructions and high-traffic air flows—prevents exhaust backflow and reduces indoor condensation.
Protective screens or bird/insect guards keep the flap moving freely while preserving airflow.
A simple visual and airflow test can identify a stuck or damaged hood, which should be repaired or replaced to restore proper venting.
Ideal placement, backflow prevention, and bird/insect guards
Several factors determine where an exterior dryer vent should terminate and how its flap and guards are configured to prevent backflow and block birds or insects.
Ideal placement keeps the outlet above ground, clear of roof valleys, and away from intake vents.
Backflow prevention uses gravity flaps or spring-loaded dampers; bird/insect guards employ coarse screens or hooded hoods that maintain airflow while excluding pests.
How to test and repair a stuck or damaged vent hood
After confirming the vent terminates in the correct location and uses appropriate backflow and pest guards, attention turns to the vent hood itself: a stuck or damaged flap can trap moist air and cause condensation buildup.
Inspect flap for debris, corrosion, or broken springs. Manually open/close to test movement.
Clean, lubricate hinges with silicone spray, replace damaged flaps or springs, and reseal around the hood.
4. Improve laundry room ventilation and ambient airflow
Improving laundry room ventilation and ambient airflow reduces the moisture load that leads to dryer condensation.
Strategies include installing or using exhaust fans, adding passive vents, and managing doors or windows to promote cross-ventilation.
Reducing indoor humidity during drying cycles—through dehumidifiers, venting, or timed ventilation—further minimizes condensation risk.
Use of exhaust fans, passive vents, and doors/windows strategies
Enhancing airflow through targeted use of exhaust fans, passive vents, and strategic door and window positioning reduces indoor humidity that causes dryer condensation.
Install a dedicated exhaust fan vented outdoors, add passive vents to balance pressure, and position doors or crack windows to promote cross‑ventilation.
Confirm vents are unobstructed and dampers functional.
Regularly inspect seals and clear lint to maintain efficient airflow.
How to reduce indoor humidity during drying cycles
Several practical steps can meaningfully cut indoor humidity during dryer cycles and prevent condensation buildup.
Install or upgrade an exhaust fan vented outdoors, seal gaps around ducts, and run the dryer with the laundry room door closed to direct airflow.
Use a portable dehumidifier, open adjacent windows briefly if weather permits, and space loads to reduce moisture output per cycle.
Monitor humidity and adjust practices.
5. Repair or replace faulty seals, gaskets, and internal components
Persistent damp spots on clothes, a musty smell, visible gaps in the door seal, or a noisy, wobbling drum can indicate seals or bearings are trapping moisture.
Simple gasket replacements and drum bearing lubrications are often manageable as DIY projects with basic tools and the correct parts.
Complex bearing failure, warped drums, or unclear fault diagnosis warrant a technician to avoid further damage and guarantee proper alignment.
Signs a door seal or drum bearing is causing moisture retention
A failing door seal or worn drum bearing often shows specific, detectable signs that point to trapped moisture rather than venting or lint issues; identifying these indicators quickly helps isolate repairs to seals, gaskets, or internal bearings before condensation causes mold or rust.
Look for water beads inside the drum, damp clothes after full cycles, musty odors, visible seal gaps, abnormal drum wobble or scraping noises, and uneven drum rotation.
When to call a technician vs. DIY seal replacement
When should a homeowner tackle a dryer seal replacement and when is professional help warranted?
A homeowner may replace accessible seals or gaskets with basic tools if confident about disassembly, using correct parts and torque.
Call a technician for complex models, rusted fasteners, electronic controls, unclear leak sources, persistent condensation after repair, or safety concerns; professionals diagnose hidden faults and guarantee proper reassembly.
6. Optimize dryer settings and load practices
Proper load size, appropriate cycle selection, and thorough spin-drying before tumble all reduce moisture release and lower the chance of condensation.
Adjusting settings for fabric type and using higher spin speeds on the washer can shorten dryer time and improve airflow.
Seasonal differences—longer warm cycles and ventilation in winter versus quicker, cooler drying in summer—also affect condensation risk and should guide routine practices.
Proper load size, cycle choices, and spin-dry before tumble
Optimize load size, cycle selection, and pre-tumble spin to reduce moisture left in the drum that causes condensation.
Use balanced, not overpacked loads to allow airflow; choose high-heat or extended tumble for heavy fabrics and sensor-dry modes when available.
Run a full spin cycle in the washer to extract excess water before transferring.
Smaller, appropriate loads shorten drying time and cut residual moisture.
Seasonal tips (winter vs. summer drying differences)
How does seasonality affect dryer condensation risks?
In winter, cold incoming air and higher indoor humidity raise condensation risk; use longer, higher-heat cycles, guarantee good ventilation, and avoid overloading.
In summer, warm humid air can reduce condenser efficiency; prefer shorter cycles, increase airflow, and run dehumidifier or air-conditioning when possible.
Adjust settings and ventilation seasonally to minimize moisture buildup.
7. Service or upgrade to the right dryer type (condenser vs. vented vs. heat-pump)
Different dryer technologies manage moisture in distinct ways: condenser units collect water in a tank, heat-pump models recycle warm air and extract moisture more efficiently, while vented dryers expel humidity outdoors.
Choosing the appropriate type can eliminate recurring condensation problems caused by inadequate moisture removal or improper venting.
Professional servicing or an upgrade is recommended when persistent dampness continues despite correct use and maintenance.
How condenser and heat-pump dryers handle moisture differently
Condenser and heat-pump dryers remove moisture from clothes using distinct internal processes that affect where and how condensation forms.
Condenser models condense warm, humid air onto a heat exchanger and collect water in a tank or drain, often producing residual humidity around the appliance.
Heat-pump dryers recycle low-temperature air, minimizing exhaust and lowering overall moisture output while requiring regular filter and coil maintenance.
When upgrading resolves chronic condensation issues
Consider upgrading the dryer when recurring condensation persists despite proper venting and maintenance; choosing the appropriate technology—vented, condenser, or heat-pump—can eliminate indoor moisture problems by matching appliance design to the home’s layout and climate.
A targeted replacement resolves chronic issues: vented units suit direct exhaust, condensers fit sealed spaces, and heat-pump models reduce exhaust moisture while improving efficiency and lowering operating costs.
Troubleshooting Scenarios and Targeted Solutions
The troubleshooting section presents common symptom-to-fix scenarios so readers can match what they see with the most likely cause.
Each scenario is paired with targeted checks and remedies to restore proper drying performance and prevent moisture buildup.
The following images and situations illustrate typical signs to look for during inspection.
- Clear exterior vent but clothes remain damp after a cycle
- Visible condensation forming on the drum interior after every use
- Water pooling at the base of the machine or on the floor beneath it
- Excess moisture appearing only during cold months or in unheated spaces
- Frost or ice forming on vent or ductwork in winter conditions
Scenario: Exterior venting is clear but laundry still damp
When exterior venting is confirmed clear yet loads remain damp, attention shifts to internal airflow, heating, and moisture-removal mechanisms that can fail independently of the vent path.
Inspect blower wheel, lint screen, ducting inside the cabinet, and the air intake.
Verify heating element or gas burner operation, thermostat continuity, and moisture sensor function.
Check for restricted drum seals or overloaded cycles reducing tumbling efficiency.
Scenario: Visible condensation inside drum after every cycle
One common sign that a dryer is failing to remove moisture effectively is visible condensation collecting on the drum after every cycle, indicating excess humidity inside the cabinet rather than merely damp clothing.
Possible causes include obstructed internal airflow, failed moisture sensor or thermostat, clogged lint pathways, or broken heater elements.
Inspect internal vents, sensors, heating components, and seals; repair or replace faulty parts.
Scenario: Water pooling near base or under machine
Visible condensation inside the drum can sometimes signal deeper moisture-management failures that also lead to water pooling at the base or beneath the machine.
Inspect drain pans, internal condensate trays, and drain hoses for cracks, clogs or misalignment. Check pump operation and door seals.
Level the dryer and verify vent condensate traps and floor drains are clear. Repair or replace faulty components promptly.
Scenario: Condensation only in cold months
Although dryer condensation can occur year-round, moisture that appears only during cold months typically stems from temperature differentials and reduced ventilation efficiency. Colder outside air cools exhaust and indoor surfaces, causing steam to condense before it clears the venting path.
Solutions include insulating exhaust ducts, routing vents to minimize exposure to cold air, sealing drafts around the dryer, and improving indoor ventilation or using a heat-recovery vent.
Step-by-Step DIY Checks and Repairs (Action Plan)
A concise action plan guides the homeowner through practical checks and repairs to reduce dryer condensation.
It begins with safety and moves through lint removal, duct cleaning, seal inspection, and final performance testing. Each step is designed for clear, observable results and manageable DIY effort.
- Wear gloves and disconnect power before working on the dryer.
- Remove lint and inspect the trap, then run a quick airflow test.
- Access the duct from outside and clear any blockages.
- Check door seals and duct joints for leaks and replace damaged parts.
- Run the dryer and measure temperature and airflow improvements.
Safety checklist before any maintenance
Before any inspection or repair begins, the user should power off and unplug the dryer, shut off gas supply if applicable, and disconnect venting to prevent accidental startup, leaks, or fire hazards.
Wear eye and hand protection, guarantee adequate lighting and ventilation, keep a fire extinguisher nearby, verify dry surroundings, use insulated tools, and consult the manual for model-specific warnings before proceeding.
Step 1: Remove lint, inspect trap, run airflow test
With safety measures completed and power and gas disconnected, the first hands-on step is to clear and inspect the lint pathway and measure airflow.
The user should remove the lint trap, vacuum the pocket, inspect for tears or blockages, and check the drum seal area.
Use an anemometer at the dryer outlet to record CFM; compare to manufacturer specs to confirm adequate exhaust flow.
Step 2: Access and clean ductwork from outside
Proceed to the exterior vent to access and clean the ductwork, since most obstructions and condensation issues originate between the dryer and the wall cap.
Remove the vent cover, inspect for debris, use a long brush and flexible rod to dislodge lint and nests, then vacuum thoroughly.
Verify unobstructed airflow by running the dryer and checking the exterior exhaust.
Reattach cover securely.
Step 3: Inspect seals, check for leaks, and replace parts
Begin by visually inspecting all accessible seals, gaskets, and connections on the dryer and its venting system for cracks, gaps, or loose fittings that could allow moist air to escape and condense.
Tighten clamps, reseal joints with HVAC tape or silicone, and replace worn door or lint-trap seals.
Check the drum glide and bulkhead for wear; replace failing parts to prevent leaks and airflow loss.
Step 4: Test machine operation and measure improvement
Start the dryer on a standard cycle and observe its operation through a full drying period, noting drum rotation, airflow at the vent outlet, and any unusual noises or intermittent stops.
Record cycle time, humidity reduction, and lint accumulation.
Compare pre- and post-repair performance: shorter dry times, stronger vent airflow, lower residual moisture.
Repeat one additional cycle to confirm consistent improvement.
When to escalate to professional service
If basic troubleshooting and the previous steps fail to restore normal drying performance or if symptoms recur, escalation to a professional technician is warranted.
A technician should be called for persistent condensation, electrical faults, refrigerant leaks in heat-pump models, damaged seals, blocked internal vents, or complex control and sensor failures.
Request diagnostic fees, parts estimates, and warranty coverage before authorizing repairs.
Cost Estimates and Timeframes for Common Fixes
A brief comparison of likely costs and timeframes helps readers choose between quick fixes and larger investments when addressing dryer condensation. Below is a compact emotional prompt showing typical cost and time ranges for common remedies to aid decision-making.
| Fix | Cost & Time |
|---|---|
| Duct cleaning | $75–$250; 1–3 hours |
| Vent replacement | $100–$500; 1–4 hours |
| Seal repair | $50–$200; 0.5–2 hours |
| Professional service or replacement | $150–$1,500+; 1–8+ hours/days |
Cost and time comparison: duct cleaning, vent replacement, seal repair, professional service, dryer replacement
Repair choices for dryer condensation vary widely in cost and duration, so comparing duct cleaning, vent replacement, seal repair, professional service, and full dryer replacement helps prioritize options based on budget and urgency.
Duct cleaning: $100–$300, 1–3 hours.
Vent replacement: $150–$600, 2–6 hours.
Seal repair: $50–$200, 30–90 minutes.
Professional diagnostic/service: $80–$250.
Dryer replacement: $400–$1,500+, half–full day delivery/installation.
Preventive Maintenance Checklist to Avoid Future Condensation
A concise preventive maintenance checklist helps prevent recurring condensation by scheduling inspections and using the right components. The checklist covers monthly, quarterly, and annual tasks, recommends suitable filters and vent materials and placements, and highlights warning signs that signal repeating problems.
Following these steps reduces moisture buildup and extends dryer life.
- Monthly: clean lint trap, inspect vent hose and connections for kinks or debris
- Quarterly: check exterior vent flap, vacuum interior ducting, replace disposable filters if needed
- Annual: professional duct inspection, full vent run cleaning, verify dryer exhaust flow with an anemometer
- Recommended parts: rigid or semi-rigid metal vents, high-efficiency reusable lint filters, sealed foil tape for joints
- Warning signs: longer drying cycles, water pooling near exhaust, visible mold or persistent musty odors
Monthly, quarterly, and annual maintenance tasks
Establishing a regular maintenance schedule prevents most dryer condensation issues before they start.
Monthly:
- empty lint trap,
- inspect drum and seals,
- check exhaust airflow.
Quarterly:
- clean vent hose exterior and interior access points,
- inspect thermostat and moisture sensors,
- verify dryer sits level.
Annual:
- deep-clean entire vent system to outdoors,
- test exhaust fan and replace worn seals or belts,
- schedule professional inspection if needed.
Best filters, vent materials, and placement recommendations
Choosing the right filters, vent materials, and placement can greatly reduce moisture buildup and improve dryer efficiency.
Use high-efficiency lint screens and replace or clean them regularly.
Opt for smooth, rigid metal ducts (aluminum or stainless steel) with minimal bends.
Position vents with short, straight runs exiting outdoors, clear of obstructions, and spaced from intake openings.
Guarantee proper slope for drainage and secure seals.
Signs to watch for that indicate repeating issues
How can recurring condensation be detected early? Signs include persistent damp clothes, visible moisture inside drum or door seal, repeated water pooling in lint trap or vent, musty odors after cycles, longer drying times, and frost or ice on vent exits in cold weather.
Track frequency and note patterns after maintenance; recurring symptoms suggest vent blockage, poor insulation, or failing moisture sensors requiring prompt inspection.
Environmental and Safety Considerations
Clogged vents and persistent condensation increase fire risk by trapping lint and restricting airflow, so addressing moisture sources is critical for safety.
Left unchecked, damp conditions also promote mold growth and degrade indoor air quality, requiring prompt remediation and ventilation improvements.
Fixing condensation improves dryer efficiency and reduces energy use, lowering operating costs and environmental impact.
Fire risk from clogged vents and how condensation factors in
When dryer vents become restricted, airflow is reduced and heat and lint accumulate in the ductwork, increasing the likelihood of ignition.
Added condensation from poor ventilation can exacerbate this by causing lint to clump and adhere to hot surfaces, creating a combustible layer that retains heat.
Regular vent cleaning, ensuring proper vent length and slope, and repairing leaks reduce fire risk and overheating.
Mold prevention and indoor air quality tips
Excess moisture from a dryer—whether from vent leaks, inadequate exhaust, or high indoor humidity—creates conditions favorable to mold growth and can degrade indoor air quality.
Regularly inspect and clean vents, guarantee proper venting to the outdoors, run exhaust fans during laundry, maintain indoor humidity below 50%, promptly dry spills, and clean visible mold with appropriate cleaners.
Consider a dehumidifier for persistent dampness.
Energy savings and efficiency impacts of fixing condensation
Fixing dryer condensation yields measurable energy and safety benefits by restoring proper airflow and reducing heat loss during operation.
Improved venting decreases cycle times and electricity consumption, lowering utility bills.
Reduced moisture prevents repeated heating, extending component life and maintaining insulation effectiveness.
Fewer clogs and leaks also cut fire risk.
Overall efficiency gains translate into tangible environmental and cost savings for households.
Resources for Parts, Tools, and Professional Help
Practical repair begins with the right resources: common diagnostic tools (multimeter, moisture meter) and condenser/vent cleaning kits can identify and address many condensation causes.
When parts or expertise are required, homeowners should look for licensed local dryer technicians with verified reviews, clear estimates, and proper insurance.
Manufacturer manuals, model-specific service guides, and official support lines provide parts diagrams, troubleshooting steps, and warranty information.
Recommended diagnostic tools and cleaning kits
Several basic tools and a few specialty kits make diagnosing and resolving dryer condensation problems faster and more reliable.
Recommended items include a multimeter for electrical checks, an infrared thermometer for temperature gradients, and a smoke pencil or airflow meter to locate leaks.
Add a vent cleaning kit with brush and flexible rods, lint trap cleaner, and replacement hose clamps for straightforward repairs.
How to find and vet local dryer technicians
Where should one turn when a dryer condensation issue exceeds DIY skills?
Local technician selection should prioritize licensed HVAC or appliance repair specialists with dryer experience.
Verify certifications, insured status, and recent customer reviews.
Request written estimates, warranty terms, and parts sourcing policies.
Prefer technicians who diagnose on-site and explain causes clearly.
Compare two or three candidates before scheduling repairs.
Useful manuals, model-specific guides, and manufacturer support
Consult manufacturer manuals and model-specific guides first, since they provide the correct parts lists, wiring diagrams, and troubleshooting steps tailored to a dryer’s exact make and model.
Official websites, downloadable PDFs, and OEM parts diagrams reduce errors.
Contact manufacturer support for warranty, diagnostic codes, and approved replacement parts.
Use authorized service centers or certified technicians when complex repairs or safety risks arise.
Conclusion
Like a damp cloak peeled from a shoulders, resolving dryer condensation restores efficiency and safety. Following the diagnostic checklist and targeted fixes—vent cleaning, duct sealing, lint trap maintenance, vent hood repair, proper venting, and occasional component replacement—eliminates moisture and improves performance. Routine inspections and prompt repairs prevent recurrence, while professional help can be sought for complex issues. With simple maintenance and timely interventions, a dryer will run drier, faster, and longer, delivering reliable results.