How to Fix a Leaking Instant Hot Water Dispenser: Step-by-Step Troubleshooting and Repair Guide
If your instant hot water dispenser is leaking, the problem is likely due to worn seals, loose fittings, corroded connectors, a faulty pressure relief valve, or tank failure. To fix it, start by turning off the power and water supply. Dry the fittings, then operate the faucet to pinpoint the leak’s source. Check and tighten hoses, O-rings, gaskets, or valves as needed; descale the unit and inspect for cracks. Always use model-specific parts and food-grade grease. For detailed diagnostics, part recommendations, and guidance on when to seek professional help, follow the outlined steps.
What Causes an Instant Hot Water Dispenser to Leak
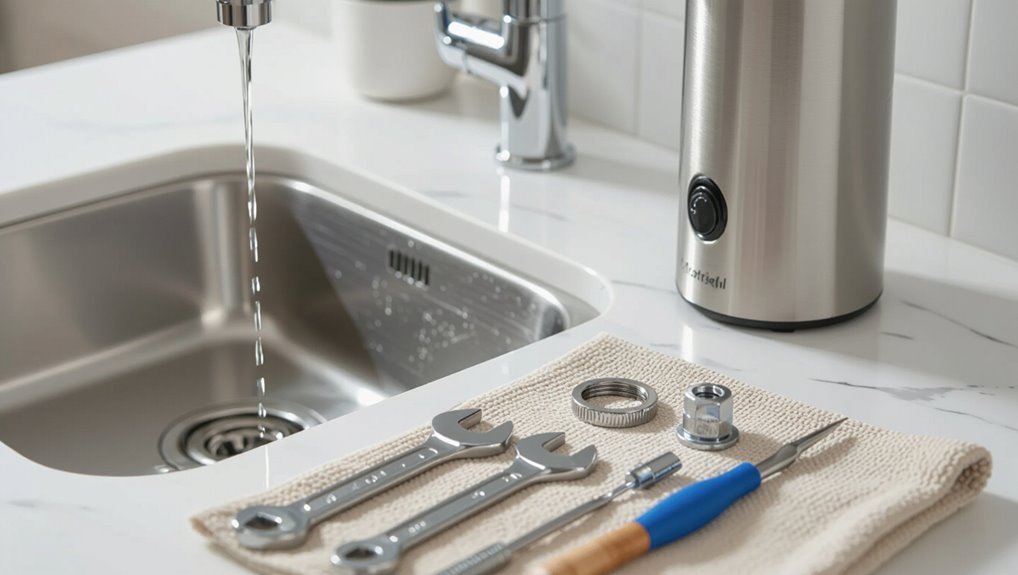
Leaks typically originate at the tank, faucet, pipe connections, valves, or inline filters.
Wear, mineral scale buildup, and excessive system pressure accelerate seal and component failure.
Observable signs—drips, pooling, reduced flow, or sudden bursts—help gauge severity and urgency for repair.
Common leak locations (tank, faucet, connections, valves, filters)
An instant hot water dispenser can develop leaks in several predictable areas—most commonly the storage tank, the faucet assembly, threaded connections, pressure or safety valves, and inline filters—each location reflecting different causes such as corrosion, worn seals, loose fittings, thermal stress, or clogged cartridges.
Technicians evaluating how to fix a leaking instant hot water dispenser inspect these spots: tank seams, faucet base, hose fittings, valve housings, and filter cartridges for visible damage.
How wear, scale, and pressure contribute to leaks
Over time, mechanical wear, mineral scale buildup, and elevated pressure each weaken components of an instant hot water dispenser in distinct but often overlapping ways.
Seals and gaskets dry, crack, or compress from repeated thermal cycles; scale adheres to heating elements and valves, impeding seals and causing misalignment.
Sustained high water pressure stresses fittings and solder joints, accelerating fatigue and creating failure points.
Signs that indicate severity and urgency
Several clear indicators help determine how serious a leak is and how urgently it needs attention:
Steady dripping from the dispenser head usually signals a worn seal requiring prompt replacement, while pooling under the tank or persistent wetness around fittings suggests a compromised connection or cracked tank that may demand immediate shutoff and repair.
Additional signs: rapid water loss, unusual noises, discolored water, or electrical issues indicating higher risk.
Quick Diagnostic Checklist Before You Start
Before beginning work, the technician confirms safety measures: power is off, the water supply is shut, and caution is taken for hot surfaces and boiling risk.
A basic toolkit and common replacement parts—wrenches, screwdrivers, replacement gaskets or valves, and plumber’s tape—are gathered.
The source of the leak is isolated by drying fittings, running brief tests with controlled supply, and observing whether drips originate from the tank, dispenser head, or connections.
Safety precautions (power, water, boiling risk)
A quick diagnostic checklist confirms safety before any work on an instant hot water dispenser: disconnect power, shut off the water supply, and allow the tank to cool and depressurize to minimize burn risk.
Wear heat-resistant gloves and eye protection, verify power is isolated with a tester, drain residual hot water via a safe spout, and make sure work area is dry to prevent electrical hazards.
Tools and parts to have on hand
Essential tools and replacement parts should be assembled and checked against the checklist to avoid delays and repeated trips once work begins.
A concise kit speeds diagnosis and limits interruptions. Typical items include:
- Adjustable wrench, pliers, and screwdriver set.
- Replacement O-rings, seals, and inlet/outlet fittings.
- Teflon tape and silicone sealant.
- Small bucket, towels, and flashlight.
How to isolate the leak for testing
Several quick checks help narrow the source of a leak before disassembly: visually inspect the dispenser head, tubing connections, and tank area; feel for moisture along joints while the system is idle; and run the unit briefly to observe where water first appears.
Isolate sections by shutting valves, disconnecting flexible lines, and placing paper towels to localize dampness. Note pressure-related leaks and repeat tests after adjustments.
Step-by-Step Inspection Process
The technician begins a systematic inspection, starting with the faucet head and spout and moving to under-sink connections and supply lines.
Attention then shifts to the tank and drain fittings while testing the pressure relief valve and thermostat for proper operation.
Throughout, the inspector looks for corrosion, cracks, or mineral build-up that could indicate the leak source.
Inspecting the faucet head and spout
Begin by turning off the dispenser and clearing the area around the sink to allow unobstructed access to the faucet head and spout.
Visually inspect for mineral buildup, cracks, or loose components.
Operate the lever while observing for dripping from the spout base or aerator.
Remove and clean the aerator, tighten fittings, and replace worn seals or damaged spout components as needed.
Checking under-sink connections and supply lines
One should shut off power and water to the dispenser before crouching under the sink to inspect the connections and supply lines.
Visually examine tubing, compression fittings, and quick-connects for cracks, corrosion, or loose nuts.
Tighten fittings gently, replace damaged hoses, and guarantee clamps are secure.
Check for drips after restoring water, noting any persistent wetness for further repair.
Examining the tank and drain fittings
Power and water should remain off while the technician inspects the dispenser tank and its drain fittings to pinpoint leaks and failed seals.
The technician visually examines tank seams, mounting points, and drain connections for corrosion, cracks, or loose fittings.
Cloth and flashlight reveal seepage paths; tighten or replace worn gaskets, clamps, or threaded connectors.
Document findings and prepare replacement parts if needed.
Testing the pressure relief valve and thermostat
Inspect the pressure relief valve and thermostat systematically to verify they operate within safe parameters and are not contributing to leaks or overheating.
Verify valve seating and manual trip function; ascertain it reseats without continuous discharge.
Test thermostat continuity with a multimeter at specified temperature settings and confirm accurate cut-in/cut-out behavior.
Replace any component failing functional checks to restore safe, leak-free operation.
Looking for corrosion, cracks, or mineral build-up
Before disassembling any further, visually and tactilely examine external and accessible internal surfaces for corrosion, hairline cracks, or mineral deposits that could indicate compromised seals or flow restrictions.
Note pitting, green or white deposits, and brittle or flaking metal. Use a flashlight and magnifier, gently probe suspect areas with a plastic pick, and photograph damage for parts replacement or warranty claims.
Repair Steps by Leak Location
The following section outlines targeted repair steps organized by where the leak appears: faucet spout or head, supply lines and compression fittings, tank-to-faucet connectors, the tank or pressure-relief valve, and issues caused by mineral scale or clogs.
Each subsection explains common causes, inspection tips, and specific fixes or parts to replace. Readers can use these focused procedures to diagnose and resolve leaks efficiently.
Fixing leaks at the faucet spout or head
When water drips from the faucet spout or head, worn O-rings and seals are often the cause and should be removed and replaced with matching parts.
After new seals are installed, the faucet must be carefully reassembled in the correct order to restore proper compression and alignment.
A final leak test under normal pressure confirms the repair or indicates if further tightening or part replacement is needed.
Replacing O-rings and seals
Start by shutting off the dispenser’s water supply and relieving pressure by running the tap briefly.
Remove the spout assembly and inspect O-rings and seals for cracks, flattening, or mineral buildup.
Match replacements by size and material.
Lubricate new O-rings with food-grade silicone grease, seat them correctly, and reassemble hardware.
Verify fittings are snug; do not overtighten.
Reassembling and leak-testing the faucet
After O-rings and seals are replaced and the spout assembly reinstalled, attention moves to reassembling the faucet and performing a leak test at the spout or head.
Reinstall handle, escutcheon, and retaining nuts, tightening to manufacturer torque. Restore water supply slowly, check for drips under normal and pressurized flow, operate valve cycles, and observe for leaks.
Tighten or reseal connections if necessary.
Repairing leaks at supply lines and compression fittings
Attention should turn next to leaks at supply lines and compression fittings, where a simple tighten may stop minor seepage but a worn ferrule or damaged threads require replacement.
The guide will distinguish when to snug fittings versus when to replace the fitting or the entire supply tubing to guarantee a reliable seal.
Guidance will also note signs—corrosion, kinks, or brittle tubing—that indicate new supply tubing is the safer choice.
Tightening vs replacing fittings
When a leak is traced to the supply lines or compression fittings, the decision is whether a simple tightening will stop the drip or the fitting needs replacement. This choice depends on the leak’s source, the condition of the ferrule and nut, and signs of corrosion or damage.
Tighten gently first; if leakage persists, deformity, scoring, or corroded threads indicate replacing the ferrule, nut, or fitting to guarantee a reliable seal.
When to use new supply tubing
Decide to install new supply tubing if tightening fittings fails to stop a leak, if the tubing shows kinks, splits, discoloration, or brittleness, or if the lines are over a decade old or exposed to corrosion.
Replacement restores proper seal, prevents future leaks, and avoids water damage.
Select compatible, rated tubing, cut squarely, deburr ends, and reassemble with fresh compression ferrules and nuts.
Repairing tank-to-faucet connector leaks
When leaks occur at the tank-to-faucet connector, attention turns to replacing worn connectors and adapters with compatible parts.
The repair should include inspecting threads and seals, applying appropriate thread sealant or tape, and confirming correct torque on fittings.
Proper installation and torque prevent future leaks and guarantee a reliable connection.
Replacing connectors and adapters
Begin by shutting off water and power to the instant hot system. Then drain any remaining hot water from the tank to prevent scalding and accidental leaks. This creates a safe, dry workspace for removing and replacing the tank-to-faucet connectors and adapters.
Inspect fittings for corrosion or damage. Select compatible replacement connectors/adapters. Disconnect old parts and install new pieces with appropriate washers. Finally, test for leaks.
Ensuring proper torque and sealing
After replacing the connectors and adapters and reattaching the lines, attention must turn to achieving correct torque and sealing at each connection to prevent persistent leaks.
Use a torque wrench to tighten fittings to manufacturer specifications, avoid overtightening, and seat compression ferrules properly.
Apply appropriate thread sealant or PTFE tape where specified, then perform a pressure test and inspect for weeps before finalizing reassembly.
Addressing leaks from the tank or pressure relief valve
Leaks at the tank or its pressure relief valve often indicate a specific component failure rather than a simple connection issue.
Technicians first assess and, if needed, replace a faulty relief valve to stop immediate leaking.
If the tank itself shows corrosion, cracks, or persistent seepage, replacement of the tank is recommended instead of repair.
Replacing a faulty pressure relief valve
To replace a faulty pressure relief valve, the technician first confirms the source of the leak and shuts off power and the water supply to the dispenser.
The valve is drained, disconnected, and removed using appropriate fittings. A manufacturer-specified replacement is installed, torqued to spec, and sealed with thread tape.
After reassembly, water and power are restored and the unit is tested for leaks.
Repair vs replace: when the tank is compromised
Assess whether the tank can be repaired or must be replaced by locating the leak, evaluating its size and origin, and inspecting the surrounding metal and welds for corrosion or stress fractures.
Small, localized pinholes or loose fittings may accept patching, epoxy, or replacement fittings.
Major corrosion, seam failure, or internal scaling necessitates tank replacement to guarantee safety, reliability, and warranty compliance.
Fixing leaks caused by mineral scale or clogs
Mineral buildup and clogged lines can cause slow leaks or drips in instant hot water dispensers and require targeted cleaning or part replacement.
The technician should describe descaling procedures for the tank and supply lines, including safe use of vinegar or commercial descalers and proper rinsing.
Guidance should also cover when filters or cartridges are no longer effective and must be replaced to prevent recurring blockages.
Descaling procedures for tank and lines
Begin by isolating the dispenser and shutting off its water supply.
Then drain the tank and lines to expose scale buildup; this prevents diluted descaling solution from being forced into fittings or the faucet.
Use manufacturer-approved descaler, circulate per instructions, scrub accessible surfaces with a nonabrasive brush, rinse thoroughly until no residue remains.
Reassemble fittings, refill, and test for leaks and proper flow.
When to replace filters or cartridges
After descaling and flushing the system, attention should turn to the dispenser’s filters and cartridges, since hardened deposits or trapped debris can continue to restrict flow or cause leaks even when the tank and lines are clean.
Replace filters if flow remains reduced, if cartridges show visible scale or damage, or if the manufacturer’s replacement interval has passed.
Always test after installing new parts.
Parts, Replacement Components, and Compatibility
Common replacement parts include spouts, seals, valves, tanks, and solenoids, often listed with manufacturer part numbers for easy ordering.
Model-specific compatibility is verified by matching the dispenser model number, serial number, and OEM part codes or consulting the manufacturer’s parts list.
Typical DIY part costs range from $10–$80 depending on the component, while professional service and labor commonly add $75–$200.
Common replacement parts and part numbers
When diagnosing a leaking instant hot water dispenser, identifying the correct replacement parts and their compatible part numbers is essential for a reliable repair.
Common items include faucets, seals, valves, and tanks; examples follow:
- Faucet assembly — P/N FA-1002
- Spout O-ring/seal — P/N OR-204
- Solenoid valve — P/N SV-310
- Mini-tank element/gasket — P/N MT-450
How to verify model-specific compatibility
Identifying part numbers is only the first step; confirming that those parts match the dispenser’s exact model prevents installation problems and further leaks.
Check model and serial labels under the sink or on the tank, consult the manufacturer’s compatibility chart, and compare connector types, dimensions, and voltage.
Cross-reference OEM part codes and verified third-party equivalents before ordering to guarantee fit and function.
Cost estimates for DIY parts vs professional service
Several factors determine whether a DIY repair or hiring a professional is more economical: the cost of parts (valves, gaskets, connectors, and possibly a tank), tool availability, the dispenser’s model complexity, and local labor rates. DIY parts often range $10–$150; professional service $75–$300+. Consider warranty, time, and risk.
| Item | Typical Cost |
|---|---|
| Gasket | $10–$25 |
| Valve | $20–$80 |
| Connector | $5–$20 |
| Tank | $50–$150 |
| Labor | $75–$300 |
When to Call a Professional
When troubleshooting risks to personal safety or potential voiding of a warranty arise, a professional should be consulted.
Complex failures such as internal tank leaks, electrical faults, or inaccessible fittings typically require a licensed technician.
Homeowners should be prepared to describe observed symptoms, when the leak started, any recent repairs, and provide model and serial numbers to streamline service.
Safety and warranty considerations
Risk and warranty issues should guide the decision to call a professional: electrical hazards, pressurized components, and potential damage to sealed units can escalate beyond simple DIY fixes.
Check warranty terms before attempting repairs; unauthorized work may void coverage.
Prioritize certified service when safety risks, unclear failure causes, or manufacturer-required parts and procedures are involved.
Keep records of service and approvals for claims.
Complex issues that require a technician
Call a professional if the problem involves pressurized components, electrical faults, or failures beyond simple seals and leaks that can be isolated.
A technician handles internal tank cracks, faulty thermostats, compromised heating elements, complex valve assemblies, or diagnostic testing requiring meters and disassembly.
They guarantee safe pressure testing, wiring repairs, and parts replacement, and can advise on warranty coverage and long‑term reliability.
How to describe the problem to service professionals
After deciding a technician is required for issues beyond simple seals or visible leaks, the homeowner should prepare a concise, factual description to help the service professional diagnose and prioritize the repair.
Include model and age, exact leak location, onset and frequency, recent repairs or changes, water pressure notes, temperatures involved, and any noises or error indicators.
Offer photos or short videos if available.
Preventive Maintenance to Avoid Future Leaks
A simple preventive maintenance routine can greatly reduce the risk of future leaks.
This includes a regular inspection schedule, timely descaling and filter replacement, and attention to winterizing and pressure management.
Following these steps helps detect wear early and maintain reliable operation.
Regular inspection schedule
A simple calendar reminder helps guarantee the instant hot water dispenser receives routine checks at predictable intervals.
Inspection tasks should be brief, focused, and consistent to catch wear before leaks start.
- Check faucet and connections for drips.
- Inspect tank and valves for corrosion.
- Verify mounting and seals are secure.
- Log findings and schedule repairs as needed.
Descaling and filter replacement intervals
Regular descaling and timely filter replacement are essential to prevent mineral buildup and maintain seal integrity in instant hot water dispensers.
Manufacturers typically recommend descaling every 3–6 months depending on water hardness; filters usually require replacement every 6–12 months.
Adhering to these intervals reduces clogging, preserves valve and gasket lifespan, and minimizes leak risk.
Record service dates and adjust frequency for local conditions.
Proper winterizing and pressure management tips
When temperatures drop below freezing, proper winterizing and pressure management become critical to prevent pipe bursts, valve failures, and seal damage in instant hot water dispensers.
Drain external lines, insulate exposed pipes and the dispenser housing, and shut off and relieve system pressure if unused.
Install a pressure-reducing valve or expansion tank, monitor gauge readings, and schedule inspections to catch leaks early.
Troubleshooting Log and Step Record Template
A concise troubleshooting log and step record template helps track tests, repairs, and parts replaced for each incident.
The template should include date, observed symptoms, actions taken, parts installed, test results, and next steps.
Example entries for common leak scenarios illustrate typical sequences and expected outcomes for faster resolution.
How to track tests, repairs, and part changes
Maintaining a concise troubleshooting log helps technicians and homeowners track tests, repairs, and part changes for an instant hot water dispenser.
Record date, symptom, action taken, and result. Include part numbers, costs, and photos.
Keep entries chronological and brief for pattern recognition.
- Date and time
- Symptom observed
- Action/part changed
- Outcome and next steps
Example entries for common leak scenarios
With a concise troubleshooting log established, sample entries illustrate how to record common leak scenarios for an instant hot water dispenser.
Entry 1: drips from valve — observed, timestamped, valve tightened, leak persisted, replaced valve cartridge, retest no leak.
Entry 2: base puddle — noted, supply shutoff, fittings tightened, rubber seal replaced, monitored 24 hours, dry.
Record parts, dates, outcomes.
Common Mistakes and How to Avoid Them
Common errors include over-tightening fittings, which can strip threads or crack components, and installing incorrect replacement parts that fail to seal properly.
Small drips are often ignored until they become larger leaks and cause more damage. Addressing these issues early and using the correct parts prevents needless repairs and leaks from worsening.
Over-tightening fittings
Over-tightening fittings can strip threads, deform seals, and create new leak points even as it seems to fix an existing dribble.
Technicians should tighten to manufacturer torque specs or hand-tight plus a quarter turn with a wrench. Inspect threads and seals before reassembly, replace damaged components, and test under pressure.
Excess force often causes more leaks than it prevents.
Using incorrect replacement parts
Select replacement parts that match the dispenser’s model and specifications to prevent leaks and premature failure.
Using incorrect valves, seals, or tubing can cause misfits, stress, and seal degradation.
Verify part numbers, manufacturer compatibility, and pressure/temperature ratings.
Prefer OEM or certified equivalents, check return policies, and test fittings before final assembly to guarantee a reliable, leak-free repair.
Ignoring small drips until they worsen
Even with correct parts installed, a slow drip can signal a developing failure that will only worsen if left unchecked.
The technician notes small leaks often precede seal, valve, or tank failure. Prompt inspection limits corrosion, water damage, and larger repairs.
Recommend immediate assessment, tightenments, or component replacement, plus routine checks to catch recurrence before a minor leak becomes an expensive emergency.
Conclusion
With calm efficiency, the guide closes like a quiet kitchen drawer, its careful instructions nudging the restless drip into polite retirement. Small seals and fittings—once murmuring dissent—are gently persuaded back to dutiful silence; worn valves are escorted to deserved rest and replaced with steadier companions. Routine attention, like a considerate neighbor, keeps the system congenial. In this way, an earlier nuisance is transformed into unobtrusive reliability, and household harmony is quietly restored.