How to Fix a Ball Valve Leak: Step-by-Step Repair Guide for Homeowners
To fix a ball valve leak, homeowners should first isolate and depressurize the line. Disassemble the valve to inspect the stem packing, seats, and seals for any wear or debris. Clean and polish the ball lightly, replace any damaged O-rings or seats with matching parts, and reassemble the valve with proper lubrication and torque. Conduct a gradual pressure test to ensure the repair is successful. For minor stem drips, tightening the packing nut may suffice, while severe corrosion or stripped threads may require full replacement or professional assistance. Follow these steps for a thorough repair.
What a Ball Valve Is and Why It Leaks
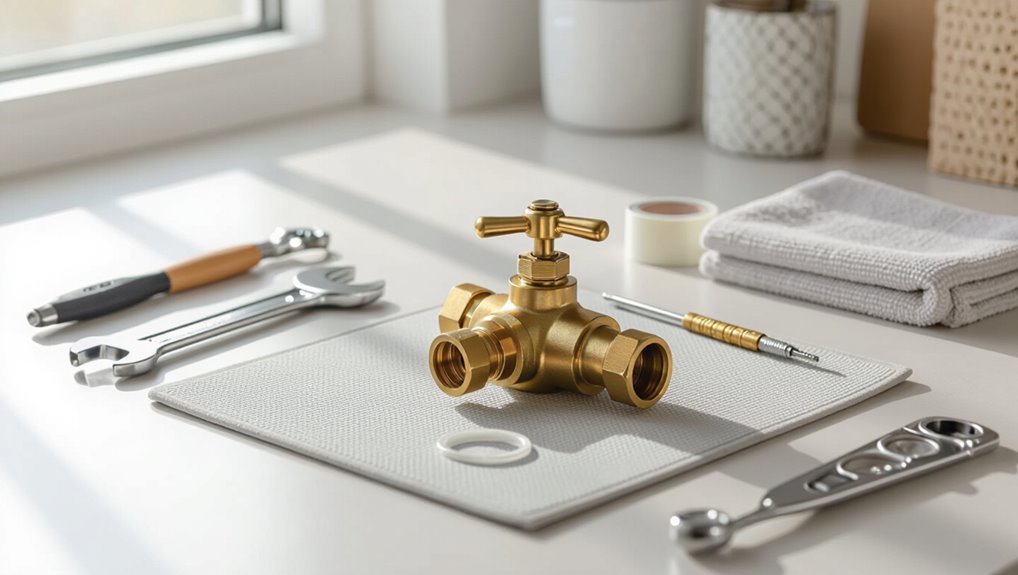
A ball valve uses a polished sphere with a drilled hole, a stem, seals, and a body to control flow by aligning or blocking the bore.
Leaks typically result from worn or damaged seats and seals, trapped debris, improper installation, or corrosion attacking the body and components.
Inspectors can usually pinpoint leaks to the stem packing, valve body, or pipe connections by observing drips, pressure loss, or visible deterioration.
How a ball valve works (components and operation)
Ball valves are quarter-turn valves that use a rotating, perforated sphere to start or stop flow; their simple geometry and few moving parts make them reliable and easy to service.
Operation relies on the ball, stem, seats, body and seals: turning the stem rotates the ball to align or block the port.
Understanding these components aids homeowners learning how to fix a ball valve leak effectively.
Common causes of ball valve leaks (wear, debris, improper installation, corrosion)
Having reviewed how the stem, seats, seals and body interact to control flow, attention shifts to why those parts fail and cause leaks.
Common causes include mechanical wear of seats and seals, particulate debris abrading sealing surfaces, improper installation or overtightening stressing threads and seals, and corrosion weakening metal components or producing pitting that prevents a tight seal.
Regular inspection mitigates these risks.
How to identify where a valve is leaking (stem, body, connections)
Where is the fluid escaping? Inspect visually and feel for moisture: wetness around the handle indicates a stem leak; dripping from the valve body center or along seams shows body failure or cracked housing.
Leaks at pipe joints or threaded ends point to connection issues—loose fittings, damaged seals, or improper thread tape. Use tissue or paper to trace the source precisely.
Quick Safety Checks Before Repair
Before any repair begins, the main supply should be shut off and system pressure relieved to prevent unexpected discharge.
The affected line must be isolated and checked for residual flow before work proceeds.
Appropriate safety gear and a cleared, well-lit workspace should be in place to reduce risk.
Shutting off water and relieving system pressure
Turn off the water supply to the affected line and drain residual pressure to prevent sudden sprays or injury.
The homeowner locates the shutoff valve or main, closes it fully, then opens a downstream faucet to bleed remaining water.
If present, relieve pressure from nearby fixtures and appliances.
Confirm flow has stopped and pressure is released before beginning valve disassembly or repairs.
Isolating the affected line and testing for residual flow
Isolate the affected branch by closing any local shutoffs and tagging or marking valves that remain open to prevent accidental reactivation; then check for residual flow by opening a downstream drain or bleeder briefly to confirm no water emerges.
Verify isolation at multiple points, watch for slow seepage, and repeat bleeding until dry.
Document valve positions and notify household members before proceeding with repair.
Required safety gear and workspace preparation
A hard hat, eye protection, gloves, and slip-resistant footwear should be prepared and inspected for damage before anyone starts work on a leaking ball valve; additionally, a respirator is recommended if mold, chemical odors, or confined-space conditions are present.
Workspace lighting, ventilation, and spill containment must be verified. Tools should be organized, valves tagged, and an emergency shutoff and first-aid kit readily accessible.
Tools and Replacement Parts You’ll Need
A concise toolkit and spare parts are essential before beginning any ball valve repair. Recommended tools include wrenches, screwdrivers, pliers, a torque wrench, and cleaning supplies.
Replacement items to have on hand are seats, seals, stem packing, and PTFE tape.
When a full valve replacement is necessary, the correct choice is based on pipe size, compatible materials, and the system’s pressure and temperature ratings.
Tools list
Several basic hand tools and a few replacement parts are typically required to repair a leaking ball valve. The homeowner should gather items that enable disassembly, inspection, and safe reconnection.
Essential tools include:
- Adjustable wrench
- Screwdrivers (flat and Phillips)
- Needle-nose pliers
- Utility knife
- Flashlight
Spare fasteners and a rag complete the minimal kit.
Parts to have on hand (seats, seals, stem packing, PTFE tape)
Essential spare parts for a ball valve repair include replacement seats, seals (O-rings), stem packing, and PTFE tape, each chosen to match the valve size and material to guarantee a reliable seal.
Also keep a spare handle screw, bonnet gasket, and compatible lubricating grease.
Store parts in labeled bags with vendor and part numbers for quick identification during repair.
How to choose the correct replacement ball valve (size, material, pressure rating)
Select a replacement ball valve by matching its size, material, and pressure rating to the system requirements and service conditions.
Measure pipe diameter and thread type (NPT, BSP, solder) or flange specs.
Choose body material (brass, stainless steel, PVC) based on fluid and temperature.
Verify pressure rating (PSI or bar) exceeds system maximum.
Confirm valve end connections and actuation style match existing installation.
Step-by-Step Repair: Fixing a Leaking Valve Stem
The technician begins by inspecting the valve stem and packing nut for wear, corrosion, or visible gaps.
If leakage appears minor, the packing nut is safely tightened to compress the packing; if damage is evident or tightening fails, the stem packing or O-rings are removed, measured, and replaced with matching parts.
After reassembly, the valve is pressurized and checked for leaks before returning to service.
Inspecting the stem and packing nut
Begin by closely examining the valve stem and packing nut for visible signs of wear, corrosion, or moisture that indicate a leak path.
Note scoring, pitting, or deformed threads. Inspect packing material for compression set, cracking, or displacement.
Verify stem alignment and freedom of movement without binding. Record observations and photograph defects to determine whether replacement or packing service is required.
Tightening the packing nut safely
With visible wear or minor seepage identified at the stem and packing nut, tightening the packing nut is the immediate corrective action to stop leaks without replacing components.
The procedure: isolate and depressurize the line, apply penetrating lubricant if stiff, use an appropriately sized wrench, turn the packing nut incrementally (¼ turn), test for leaks, and avoid over‑tightening to prevent stem binding.
Replacing stem packing or O-rings (removal, sizing, installation)
Remove the packing nut and extract the old packing or O-rings carefully to assess wear and measure replacement parts.
Clean the stem and bore, noting groove dimensions and material (PTFE, rubber).
Select matching-size rings or packing.
Lubricate new seals with compatible grease, slide into position evenly, rebuild the gland and tighten the packing nut to manufacturer torque.
Reassemble valve components.
Testing for leaks after stem repair
After reassembly, verify the stem repair by conducting controlled leak tests that check for seepage at operating pressure and during actuation.
Apply system pressure slowly, inspect stem base and packing for dampness, then cycle the valve several times while observing.
Use soapy water or a suitable leak detector, monitor for bubbles or pressure drop, and retighten or replace components if any leakage appears.
Step-by-Step Repair: Fixing a Leaking Valve Body or Seat
The procedure begins by draining the line and removing the valve for a safe, dry workspace.
The valve is then disassembled to inspect the ball and seats, which are cleaned or reconditioned as needed and whose seats and seals may be replaced if worn.
Finally, the valve is reassembled and reinstalled, followed by a pressure test to confirm the repair.
Draining and removing the valve from the line
Begin by shutting off supply valves and relieving system pressure so fluid cannot enter the line while the ball valve is serviced.
Drain residual fluid from the pipeline using downstream drains or bleeds.
Loosen pipe connections or unions, support piping to prevent stress, then remove fasteners securing the valve.
Extract the valve carefully, cap or plug open ends, and collect drained fluid for proper disposal.
Disassembling the valve and inspecting the ball and seats
Proceed to a clean, well-lit workspace and place the valve on a soft, nonabrasive surface to prevent damage.
Using appropriate tools, remove handle, stem nut and retainer sequentially.
Extract the ball and note orientation.
Inspect ball for scratches, pits or corrosion and examine seats for cuts, deformation or hardening.
Check seals, springs and body bore for wear or foreign material before deciding on repair or replacement.
Cleaning and reconditioning the ball and seats
Carefully clean the ball and seats using a lint-free cloth and a suitable solvent, removing scale, grease, and debris without scratching surfaces.
Inspect for pitting or scratches under good light and magnification.
Lightly polish minor surface imperfections with a non-abrasive pad and solvent.
Rinse, dry thoroughly, and apply a compatible lubricant sparingly.
Reinspect to confirm smooth, uniform sealing surfaces before reassembly.
Replacing seats and seals
With the ball and seats cleaned and inspected, attention turns to replacing worn seats and seals to restore leak-free operation.
Remove old seats, O-rings, and gland packing; match replacements to valve model.
Lightly lubricate new seals with compatible grease, position seats evenly, and guarantee O-rings sit in their grooves without twisting.
Verify correct orientation and tension before proceeding.
Reassembling the valve and reinstalling into the line
Begin reassembly by aligning the ball, seats, and stem in their correct positions to guarantee seals compress evenly and the ball rotates freely.
Install the body cap, tighten fasteners in a star pattern to specified torque, and reattach actuator or handle.
Replace any gaskets, reconnect pipe fittings or unions, and support the valve to prevent stress on the line before restoring service.
Pressure testing and leak verification
Pressure testing verifies the integrity of the reassembled valve and confirms that repairs have eliminated leaks.
The technician gradually pressurizes the line to recommended operating pressure, inspects all joints, stem, and seat areas for seepage, and monitors pressure gauges for drops.
A successful test shows stable pressure and no visible leakage; otherwise, repeat disassembly, replace faulty components, and retest.
When to Replace the Entire Ball Valve
If corrosion has compromised the body, threads are stripped, or leaks persist after attempted repairs, replacement of the entire ball valve is usually warranted.
Selection of a new valve should consider compatible materials (brass, stainless steel, PVC) and the proper configuration for pressure, temperature, and media.
Removal and installation methods vary by connection type—threaded, soldered, or flanged—and must follow correct procedures to guarantee a leak-free fit.
Signs that repair is not feasible (severe corrosion, damaged threads, persistent leaks)
When a ball valve shows signs of severe corrosion, stripped or damaged threads, or recurring leaks despite repeated repairs, replacement is the most practical and reliable option.
Indicators include pitting or flaking metal, thread deformation preventing secure fittings, persistent seepage after seal and seat replacement, and internal ball scoring.
Continued failure risks water damage and unsafe operation, signaling end-of-life for the valve.
Choosing a replacement: materials and configurations
Selecting a replacement ball valve requires matching material and configuration to the application: choose brass, stainless steel, or PVC based on fluid type and corrosion resistance; pick the correct connection style (threaded, soldered, compression, flanged, or push-fit) and the appropriate bore (full or reduced) and pressure/temperature ratings to guarantee compatibility and longevity.
- Match chemical compatibility and corrosion resistance
- Verify pressure and temperature ratings
- Choose full bore for minimal flow loss
- Select compatible connection type for existing piping
- Consider handle style and access for operation
Proper removal and installation of a new valve (threaded, soldered, flanged)
Begin by isolating the line and relieving system pressure before removing an old ball valve.
Then follow specific procedures for threaded, soldered, or flanged connections to prevent damage and guarantee a leak-free installation.
Threaded valves: apply pipe dope or PTFE tape, wrench gently.
Soldered: cut, clean, flux, sweat new valve.
Flanged: unbolt, replace gasket, torque evenly to spec.
Special Situations and Materials
Material type, service conditions, and installation environment change both repair options and required precautions.
Plastic (PVC/CPVC) valves often need different seals and solvents than brass or stainless components, while high-pressure, high-temperature, or aggressive chemical service can necessitate specialized materials or full replacement.
Outdoor or freeze-prone locations call for weatherproofing, insulation, or winterization to prevent recurrence.
Repairing plastic (PVC/CPVC) ball valves vs. brass/metal valves
When addressing leaks, plastic (PVC/CPVC) ball valves and brass/metal valves demand different techniques due to their distinct physical properties and failure modes.
Plastic valves often crack or deform; replacements and gentle torque with plastic-specific fittings are advised.
Brass valves tolerate higher torque and can be disassembled for seat or stem replacement.
Use compatible seals, avoid over-tightening plastic, and match repair parts to material.
High-pressure, high-temperature, and chemical service considerations
Considerations for high-pressure, high-temperature, or chemically aggressive service require selecting valves, seals, and installation practices that withstand the specific stresses involved; mismatched materials or standard repairs can cause rapid failure, safety hazards, or regulatory noncompliance.
Specify pressure and temperature ratings, choose chemically compatible body and seat materials (e.g., stainless, PTFE variants), use appropriate bolting/gaskets, and follow qualified replacement or upgrade procedures rather than DIY fixes.
Outdoor and freeze-prone installations
Outdoor and freeze-prone installations demand valves and components engineered to resist freezing, UV exposure, and moisture-driven corrosion while remaining serviceable in cold conditions.
Selection favors insulated, heat-trace-compatible, frost-proof ball valves with corrosion-resistant materials (bronze, stainless, or plastic).
Install with proper drainage, angled mounting, weatherproof enclosures, and accessible isolation for winter maintenance; use freeze protection and regular inspections to prevent burst or leak failures.
Common Mistakes and How to Avoid Them
Common failures often stem from over-tightening fittings and packing, which can damage seats and cause continued leakage.
Using incorrect seal materials or incompatible lubricants can degrade components and negate repairs.
Failing to perform proper pressure testing or reassembling incorrectly allows undetected leaks and unsafe operation.
Over-tightening fittings and packing
Over-tightening fittings and packing often causes more problems than it solves, stripping threads, deforming seals, and distorting valve stems so leaks persist or worsen.
Proper torque prevents damage: tighten to manufacturer specs, use a calibrated wrench, and apply incremental turns.
Inspect threads and replace damaged components rather than forcing fittings.
Gentle, measured assembly preserves seal integrity and simplifies future repairs.
Using wrong seal materials or incompatible lubricants
Select seal materials and lubricants that match the valve’s construction and the fluid being handled to prevent premature failure.
Using incompatible elastomers or petroleum-based lubricants on rubber seals causes swelling, hardening, or chemical degradation.
Choose compatible PTFE, Buna-N, EPDM, or Viton per service conditions, and use manufacturer-recommended lubricants.
Verify chemical compatibility charts before installation to extend seal life and prevent leaks.
Skipping pressure testing or improper reassembly
After choosing compatible seals and lubricants, technicians must not skip pressure testing or rush reassembly, as both steps verify the integrity of repairs and correct component alignment.
Failure to pressure test can hide leaks; improper reassembly causes misalignment, seal extrusion, or valve binding.
Follow manufacturer torque specs, cycle the valve under pressure, inspect all joints, and correct issues before returning the system to service.
Preventive Maintenance to Stop Future Leaks
A regular inspection schedule helps identify wear before it causes a leak.
Routine lubrication and exercising of ball valves preserves seals and prevents sticking.
Attention to water quality and debris prevention—such as filters and strainers—reduces corrosion and particulate damage.
Routine inspection schedule
One systematic inspection every quarter establishes a baseline for valve condition and captures early signs of wear before they develop into leaks.
The homeowner should document findings, compare trends, and schedule repairs promptly.
- Check for external drips or moisture
- Verify handle operation and alignment
- Inspect seals and packing visually
- Note corrosion or mineral buildup
- Record date, observations, and actions
Lubrication and exercising valves
Exercise and lubricate ball valves regularly to maintain smooth operation and prevent seals from drying, cracking, or seizing—common precursors to leaks.
Use manufacturer-approved lubricant, apply sparingly to the stem and ball, cycle the valve through full open and closed positions several times, and wipe away excess.
Perform this every six months or after long inactivity to preserve seal flexibility and reliable function.
Water quality and debris prevention tips
Maintaining valve movement through periodic lubrication naturally leads to attention on what flows through the system: water quality and debris control greatly affect ball valve longevity.
Regularly flush lines, install strainers or sediment filters, and monitor for corrosion or mineral buildup.
Softening hard water and scheduling inspections reduce abrasive wear and seal damage.
Promptly clear visible debris and replace compromised filters to prevent future leaks.
Troubleshooting Checklist and Quick Reference
A concise troubleshooting checklist begins with a leak source identification flowchart to quickly narrow whether the issue is seat, stem, packing, or body-related.
The guide separates fast fixes—such as tightening, replacing packing, or cleaning debris—from situations that indicate professional service, like corroded bodies, stripped threads, or inaccessible piping.
This quick reference helps prioritize actions and decide when to stop and call an expert.
Leak source identification flowchart
Users begin the leak source identification flowchart by confirming system pressure is isolated and the valve is in a known position; this guarantees subsequent steps target the actual leak path rather than transient conditions. The flowchart guides visual, tactile, and dye tests, narrowing to seat, stem, or body leaks with clear pass/fail branches.
| Check | Emotion |
|---|---|
| Visual | Concern |
| Tactile | Focused |
| Dye test | Relief |
| Tightness | Caution |
| Record | Confidence |
Fast fixes vs. professional service indicators
After identifying whether the leak originates at the seat, stem, or body, the troubleshooting checklist separates quick, on‑the‑spot remedies from issues that demand a professional service call.
Quick fixes: tighten packing nut, replace O‑rings, clear debris, or swap a worn valve handle.
Call a pro for corrosion, threaded cracks, persistent high‑pressure leaks, compromised pipe connections, or inaccessible shutoffs requiring system isolation.
Tools and Parts Suppliers, When to Call a Professional
A homeowner should assess whether the leak is minor and repairable with basic tools or if signs of corrosion, persistent dripping, water pressure loss, or inaccessible piping indicate a need for a licensed plumber.
When contacting a professional, providing the valve type, pipe material and size, location of the leak, and any prior repairs will speed diagnosis and parts sourcing.
Local hardware stores and specialty plumbing suppliers can be listed as sources for replacement seats, stems, and seals if a DIY approach is appropriate.
How to determine if you need a plumber
When uncertainty exists about the scope of a ball valve leak, evaluating available tools, replacement parts, and personal skill level helps determine whether a plumber is necessary.
Consider leak severity, access difficulty, water pressure, and whether parts match. Minor drips or visible cartridge wear may be DIY; hidden leaks, corroded fittings, soldered joints, or potential structural water damage warrant professional assessment to avoid costly mistakes.
What information to provide a professional for faster service
Several key details will speed repair: the valve type (full-port vs. standard), material (brass, stainless, PVC), visible markings or model numbers, pipe size and connection type (threaded, compression, soldered), a clear description of the leak location and behavior (drip, spray, intermittent), water pressure if known, any prior repairs or parts replaced, and photos showing the valve and surrounding access.
- Exact location and access constraints
- Measured pipe diameter
- Connection type and fittings present
- Symptoms timeline and frequency
- Any replacement parts on hand
Conclusion
Approximately 30% of household water leaks originate at valves, underscoring the impact of timely action. To sum up, a leaky ball valve need not prompt panic: with basic safety checks, the correct tools, and patience, many stem or seat leaks can be repaired by a homeowner. Yet recognizing when corrosion, damaged bodies, or complex plumbing require professional help preserves safety and prevents costly damage. Regular inspection and simple maintenance greatly reduce recurrence.