How to Do Sink Plumbing: Step-by-Step DIY Guide for Repairing, Installing, and Preventing Leaks
To effectively handle sink plumbing, you need to diagnose leaks, clear clogs, and repair or replace components such as drains, P-traps, supply lines, shutoff valves, and faucets. Begin with a visual inspection and shut off the water supply. Gather essential tools like wrenches, a basin wrench, plumber’s tape, a bucket, and a snake, while also checking local plumbing codes. Tighten connections, replace worn washers or cartridges, and conduct a pressure test after repairs. Regularly inspect and clean drains to prevent future issues. This guide provides detailed step-by-step procedures, the necessary tools, and troubleshooting tips to ensure successful plumbing tasks.
What sink plumbing repair and installation entail
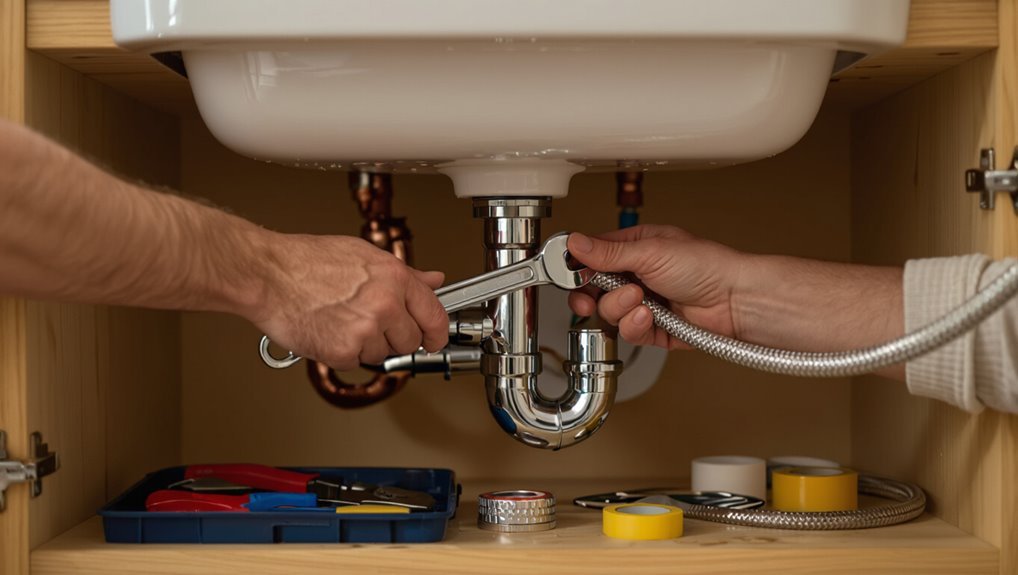
Common sink issues that homeowners often address themselves include clogged drains, running faucets, and leaking P-traps.
Guidance is needed to distinguish straightforward DIY tasks from jobs that require a licensed plumber, such as major pipe replacement or work involving building codes and permits.
Basic safety precautions, proper tools, and awareness of local permit requirements are essential before starting any repair or installation.
Common situations that require DIY sink plumbing
When a sink leaks, clogs, or fails to drain properly, homeowners often tackle the problem themselves to save time and expense.
Common DIY situations include replacing faucets, tightening or swapping P-traps, clearing stubborn blockages, resealing sink flanges, and installing new supply lines.
Basic how to do sink plumbing tasks focus on diagnosis, parts replacement, and simple seal or connection repairs to restore function.
When to hire a professional vs. DIY
How should a homeowner decide between tackling sink plumbing themselves or calling a professional?
Evaluate complexity, required tools, and confidence: simple tasks like replacing faucets, tightening connections, or clearing minor clogs suit DIYers.
Hire a licensed plumber for persistent leaks, hidden pipe damage, gas-related fixtures, major installations, code compliance, or when diagnostics exceed basic skills.
Prioritize long-term reliability and cost-effectiveness.
Safety precautions and necessary permits
Assess safety risks and permit needs before starting any sink plumbing work.
Workers should shut off water and power, wear gloves and eye protection, and ventilate enclosed spaces.
Confirm building codes, local permit requirements, and whether inspections are required for drain, supply, or fixture changes.
Obtain permits when necessary and schedule inspections.
Document work and keep manufacturer instructions for installed components.
Tools and materials checklist before you begin
Before starting any sink work, the practitioner should confirm they have the right tools and parts to prevent delays or mistakes.
A basic checklist usually includes:
- Adjustable wrench and basin wrench
- Plumber’s putty, Teflon tape, replacement washers and tailpieces
- Bucket and plumber’s snake
- Optional: torque wrench, pressure gauge, and leak detector
Preparation reduces surprises and speeds a correct, safe repair or installation.
Essential tools for most sink jobs
A compact set of reliable tools and materials streamlines most sink jobs and reduces the chance of delays or damage.
Essential items include adjustable wrenches, basin wrench, slip-joint pliers, pipe wrench, plumber’s tape, plumber’s putty or silicone, tube cutter, hacksaw, drain snake, bucket, shop cloths, flashlight, and safety gloves.
These cover most common repair and installation tasks efficiently.
Consumables and replacement parts to have on hand
Several small consumables and common replacement parts should be gathered before work begins to prevent interruptions and guarantee proper repairs.
Include plumber’s tape, pipe joint compound, wax or rubber sink rings, replacement O-rings and gaskets, slip joint washers, spare tailpieces and trap adapters, compression and slip nuts, pipe dope, drain strainers, and silicone sealant.
Keep assorted screws and mounting clips.
Optional tools for efficiency and testing
Many homeowners and professionals find a handful of optional tools speeds work and improves diagnostic accuracy.
Useful additions include a leak detector spray, inspection camera, pressure gauge, multimeter for garbage disposal circuits, and a wet/dry vacuum.
Thread sealant tape, basin wrench extensions, tubing cutters, and rubber test plugs also save time and reduce trial-and-error when locating leaks or verifying repairs.
Understanding sink plumbing components and configurations
The section outlines the basic anatomy of a sink—faucet, drain, trap, supply lines and shutoffs—and highlights how kitchen and bathroom configurations differ in scale and layout.
It also identifies common valve and fitting types encountered on projects, including compression, PEX, threaded and slip-joint connections.
Readers will gain a clear reference for recognizing parts and selecting compatible fittings.
Anatomy of a sink: faucet, drain, trap, supply lines, shutoffs
A sink’s basic assembly consists of a faucet, drain, trap, supply lines, and shutoff valves, each serving a distinct function in water delivery and waste removal.
The faucet controls flow and temperature; the drain channels wastewater; the P-trap prevents sewer gas and captures debris; supply lines bring hot and cold water; shutoffs isolate the fixture for repairs.
Connections and seals guarantee leak-free operation.
Differences between kitchen and bathroom sink setups
Although both serve the same basic purposes, kitchen and bathroom sink setups differ in scale, function, and component arrangement to meet distinct usage demands.
Kitchens use larger basins, stronger faucets, garbage disposals, and additional drain fittings for dishwashing and food waste.
Bathrooms favor compact basins, lower-flow faucets, pop-up drains, and simpler trap configurations.
Installation clearances and supply capacities also vary.
Common valve and fitting types (compression, PEX, threaded, slip-joint)
Several common valve and fitting types—compression, PEX, threaded, and slip-joint—form the backbone of sink plumbing, each offering distinct connection methods, materials, and trade-offs in durability, ease of installation, and repairability.
Compression fittings suit copper/soft copper lines; PEX offers flexible, fast connections with crimp or clamp rings. Threaded metal fittings provide strong, reusable joints; slip-joint traps allow quick disassembly for cleaning.
Diagnosing the problem: How to identify leak sources and failures
A visual inspection first targets obvious sources such as supply lines, the faucet base, and drain connections.
Hidden leaks are then checked by looking for under-sink moisture, stains or mold and by using a water meter test to confirm continuous flow.
Finally, the technician assesses whether the fault lies in hardware, degraded seals, or the piping itself.
Inspecting visible leaks: supply lines, faucet base, drain connections
Multiple visible leak points around a sink—supply lines, the faucet base, and drain connections—should be examined systematically to determine the source.
Check supply hoses and compression fittings for drips, corrosion, or loose nuts.
Inspect the faucet base for pooled water, worn O-rings, or sealant gaps.
Examine tailpiece, slip nuts, and trap for finger-tightness, cracks, or degraded washers causing visible leakage.
Detecting hidden leaks: under-sink moisture, stains, mold, water meter test
Hidden leaks often reveal themselves through subtle signs—dampness on cabinet floors, dark stains, warped wood, or musty odors indicating mold growth—rather than obvious puddles.
Inspect under-sink areas, corners, and back panels; use a flashlight and probe with a dry paper towel.
Check the water meter: note reading, avoid water use, watch for movement.
Document findings and consider moisture meter readings.
Determining whether leak is caused by hardware, seals, or pipes
How can one tell whether water is seeping from a fitting, a worn seal, or a deteriorating pipe?
Inspect when dry, then run water and observe source: drips at joints indicate loose or corroded fittings; wetness around sinks, faucets, or rubber washers signifies seal failure; continuous soaking along a length or pinhole leaks suggests pipe corrosion or damage.
Use tissue, dye, and tighten-test to confirm.
Step-by-step: Repairing leaky sink drains and P-traps
The technician begins by preparing the work area and shutting off the water to prevent spills.
Next, the P-trap is removed, inspected, and cleaned before worn slip-joint washers and gaskets are replaced.
Finally, the trap is reinstalled and the assembly pressure-tested to confirm the leak has been resolved.
Preparing the area and shutting off water
Clear the cabinet and lay down a waterproof mat or towel to protect the floor and catch drips.
Then remove any items stored beneath the sink to provide unobstructed access.
Locate and turn off the local shutoff valves beneath the sink; if absent, shut off the main water supply.
Open faucet to relieve pressure, place a bucket under connections, and gather tools and gloves.
Removing and cleaning the P-trap
Begin by placing a bucket beneath the P-trap to catch water. Then loosen the slip nuts at each end with pliers or by hand if they are plastic.
Remove the trap, empty contents, and inspect for blockages, corrosion, or hair buildup.
Use a bottle brush and mild detergent to scrub interior surfaces, rinse thoroughly, and check alignment before reinstalling to guarantee proper flow and seal.
Replacing slip-joint washers and gaskets
Inspecting and replacing slip-joint washers and gaskets restores a watertight seal where the P-trap meets the tailpiece and drain fittings.
After removing the trap, discard hardened or flattened washers and any cracked gaskets.
Select matching-size replacements, seat rubber washers on the tailpiece, position gaskets in the slip nuts, and hand-tighten nuts evenly.
Verify parts align before final snugging; avoid overtightening.
Reinstalling trap and pressure-testing for leaks
Reinstall the P‑trap by aligning the tailpiece, trap arm, and slip nuts so rubber washers and gaskets seat evenly.
Then hand‑tighten each nut just until snug. Confirm alignment and clearance, then fill the sink and observe joints for drips.
Apply gentle pressure to connections with a towel and retighten slightly if needed.
For thoroughness, run water for several minutes and inspect again.
Step-by-step: Fixing leaking sink supply lines and shutoff valves
The procedure begins by isolating the supply and draining residual water to prevent spills.
Next steps cover tightening fittings, replacing worn flex lines, and when needed swapping shutoff valves using compression or sweat methods.
Finally, the work is pressure-tested and inspected for slow-drip leaks before restoring normal use.
Isolating the supply and draining residual water
Begin by shutting off the sink’s water supply at the local shutoff valves—usually located beneath the sink—then open the faucet to relieve pressure and let residual water run into a bucket or rag until flow stops; for fixtures without individual shutoffs, turn off the house main and drain downstream fixtures the same way before proceeding.
Inspect supply lines, place absorbent material, and remove trapped water from low points.
Tightening fittings and replacing worn flex lines
Start by confirming the water is fully shut off and any residual pressure has been released; then inspect supply fittings, shutoff valves, and flex lines for corrosion, kinks, or visible leaks.
Tighten loose nut connections with two wrenches to avoid twisting fittings.
Replace braided flex lines showing wear or slow seepage, using matching length and connector type.
Test by restoring water and checking for drips.
Replacing shutoff valves (compression and sweat installs)
Prepare to replace a leaking shutoff valve by confirming the water is fully shut off at the main and draining any residual pressure from the lines.
Remove the handle and packing nut.
For compression valves, loosen the compression nut and slide off tubing; install new ferrule and nut.
For sweat (solder) valves, cut back pipe, clean, flux, sweat on new valve.
Reconnect supply and restore water.
Pressure-testing and checking for slow-drip leaks
Once the new valve or supply line is installed, the system should be pressure-tested and inspected for slow drips before restoring full service.
The technician closes the drain, opens hot and cold valves, and slowly restores water to build normal household pressure.
All joints and connections are observed for at least five minutes; any micron-sized leaks are tightened, reseated, or replaced, then retested until dry.
Step-by-step: Repairing or replacing a leaky faucet
The section opens by identifying the faucet type—ball, cartridge, ceramic disk, or compression—to determine required parts and tools.
It then outlines safe disassembly steps and procedures for removing and replacing cartridges, O-rings, and seals.
Finally, it covers reassembly and testing to confirm the faucet operates without leaks.
Identifying faucet type (ball, cartridge, ceramic disk, compression)
How can one quickly determine which faucet type is installed beneath the sink?
Inspect the handle count and motion: single-handle swivels suggest ball or cartridge; ceramic disk often has a single flat lever and smooth rotation; compression uses separate hot/cold handles with visible stem threads.
Check mounting style and presence of a ball valve housing, ceramic disc cartridge, or removable stems to confirm.
Disassembling the faucet safely
After identifying the faucet type and its handle motion, proceed to disassemble the unit with safety and methodical care.
Turn off water, relieve pressure, and protect surfaces.
Gather tools and lay out parts in removal order.
Use penetrating spray for stubborn fasteners, avoid excessive force, and label components.
Photograph stages for reassembly.
Keep small parts secured and discard damaged pieces for replacement.
Replacing cartridges, O-rings, and seals
Begin by confirming the source of the leak—spout, handle, or base—so the correct component (cartridge, O-ring, or seal) is targeted for repair or replacement.
Remove retaining clips or nuts, extract the cartridge, note orientation, and inspect seals and O-rings for wear.
Replace with matching parts, lubricate O-rings with plumber’s grease, and verify seated components align before proceeding to reassembly steps.
Reassembling and testing for proper operation
Once the replacement parts are confirmed correct and lubricated, reassembly proceeds in the reverse order of disassembly, taking care to align cartridges and seals precisely to prevent leaks.
Tighten fasteners to specified torque, reinstall handles and trim, and reconnect supply lines.
Restore water, open valves slowly, inspect for drips, cycle hot and cold, and check drain operation.
Address any leaks immediately.
Step-by-step: Installing a new sink and faucet
The following steps guide the installation of a new sink and faucet, beginning with measuring the space and choosing compatible fixtures.
The process covers removing the old sink, preparing the countertop and cabinet, mounting the new sink and securing the faucet, and connecting the drain assembly and supply lines.
It concludes with sealing edges and performing a thorough leak test.
Measuring and selecting compatible sink and faucet
How far apart should the sink and faucet be to guarantee proper fit and function? Measure center-to-center distances: faucet hole spacing, sink basin center, and countertop clearance.
Confirm faucet reach covers basin without splashing. Check deck thickness and hole diameter against faucet specifications.
Verify drain and supply alignment with cabinet plumbing. Choose components with compatible dimensions and mounting types for straightforward installation.
Removing the old sink and preparing countertop/cabinet
Begin by turning off the water supply and disconnecting lines to prevent leaks. Then remove the plumbing trap and supply hoses to free the sink assembly.
Cut any old sealant around the rim, unfasten clips or mounting hardware, and lift the basin out.
Inspect and repair countertop damage, clear debris, and measure the opening.
Clean and dry surfaces; reinforce cabinet supports as needed before installation.
Mounting the new sink and securing the faucet
With the countertop cleared and cabinet supports reinforced, attention turns to positioning the new sink and attaching the faucet.
The sink is lowered into the cutout, leveled, and clamps or mounting clips are tightened evenly. A bead of silicone sealant is applied around the rim.
The faucet is installed from above, secured with its mounting nut, and checked for alignment before proceeding.
Connecting drain assembly and supply lines
Once the sink and faucet are secured, the installer connects the drain assembly and water supply lines, ensuring watertight seals and proper alignment.
The tailpiece, gasket, and slip nut are tightened to manufacturer torque; trap and trap adapter are fitted to wall stub.
Flexible supply hoses attach to faucet shanks and shutoff valves, then connections are hand-tightened and given a quarter turn with a wrench.
Sealing edges and performing leak test
Finish the exterior of the installation by applying a continuous bead of plumber’s-grade silicone or sealant around the sink rim and any gaps between the sink and countertop.
Smooth it with a damp finger or a tooling tool to guarantee full contact and neat coverage.
Allow cure time, then run water, operate faucet, and inspect beneath for drips.
Tighten fittings as needed; re-seal if leaks persist.
Replacing or upgrading drain and venting components
Attention to drain and venting components guarantees reliable sink performance and fewer leaks.
The section covers selecting the correct trap adapter and tailpiece, plus repairing or replacing the sink flange and tailpiece seal for a watertight connection.
It also explains basic venting problems and how persistent slow drainage can indicate a vent issue.
Choosing the right trap adapter and tailpiece
Selecting the correct trap adapter and tailpiece guarantees a secure, code-compliant connection between the sink outlet and the P-trap while preventing leaks and sewer gas entry.
Choose materials compatible with existing plumbing (PVC, ABS, brass), match diameters (commonly 1¼” or 1½”), verify proper slip nut and washer types, and allow for correct height and alignment to maintain trap seal and ease future maintenance.
Repairing or replacing the sink flange and tailpiece seal
Begin by inspecting the flange and tailpiece seal for corrosion, mineral buildup, or deformation, since these failures are the most common causes of persistent leaks and odors at the sink drain.
Remove the drain assembly, clean mating surfaces, and replace brittle gaskets or plumber’s putty.
Install a new flange with proper sealant and tighten the locknut evenly.
Test for leaks and adjust as needed.
Basics of venting issues and when slow drainage signals a vent problem
When sink water drains slowly despite a clear trap and unobstructed tailpiece, the problem often lies in the venting system rather than the drain line itself.
Airlock or blocked vent stacks cause gurgling, slow drainage, and siphoning of traps. Inspect roof vents, vent connectors, and AAVs for obstructions or failures.
Repair, clear, or upgrade venting to restore proper airflow and prevent recurrent backups.
Preventive maintenance to avoid future leaks
Preventive maintenance focuses on simple routines that catch small problems before they become leaks.
- monthly visual inspections,
- basic functional checks (faucet operation, drain flow),
- user habits to prevent buildup,
- scheduled part replacements.
Following these practices and recommended replacement intervals keeps systems reliable and reduces unexpected repairs.
Regular inspections and simple monthly checks
How often should a sink be checked to reduce the risk of leaks?
Monthly inspections identify drips, loose fittings, and seal deterioration early.
Check beneath the cabinet for moisture, examine P-trap and supply lines for corrosion or movement, test shutoff valves for smooth operation, and wipe joints to reveal slow seepage.
Document findings and schedule repairs before damage escalates.
Proper use practices to reduce wear and blockages
A few simple habits greatly reduce sink wear and blockages: avoid pouring grease or coffee grounds down the drain, use strainers to catch hair and food particles, run cold water while the disposal is active, and flush drains periodically with hot water.
Routine gentle cleaning, prompt removal of visible debris, avoiding chemical drain cleaners, and educating household members about proper disposal extend component life and prevent clogs.
Recommended replacement intervals for common parts
Having established routine habits that limit wear and blockages, attention now shifts to scheduled part replacements that prevent leaks before they start.
Replace flexible supply lines every 5–7 years, faucet cartridges or O-rings every 3–5 years, and P-traps or tailpieces when corrosion or deformation appears, typically 10–15 years.
Inspect seals annually and replace silicone or plumber’s putty at first signs of failure.
Troubleshooting persistent or unusual problems
When leaks reappear after repairs, the source may be a hidden fault, incorrect fitting, or water pressure issue requiring systematic checks.
Low or irregular flow often points to aerator blockages, supply-valve restrictions, or municipal pressure fluctuations that merit measurement and isolation.
Persistent odors and slow drains despite clear traps suggest venting problems, sewer line buildup, or bacterial film in the lines and should be investigated beyond the visible fittings.
Handling recurring leaks after repairs
Diagnose recurring leaks by systematically isolating the failure points and verifying each repair against common causes such as incorrect gasket seating, overtightened fittings, degraded seals, or hidden corrosion.
Document what was replaced, recheck connections under normal water pressure, and recreate operating conditions that reveal intermittent issues so the precise source can be identified rather than repeatedly patching symptoms.
If leaks persist, replace suspect components, inspect adjacent plumbing, and test over time.
Dealing with low water pressure and irregular flow
Low water pressure and irregular flow often stem from a few identifiable sources—clogged aerators and cartridges, partially closed valves, mineral buildup in supply lines, damaged pressure regulators, or municipal supply issues—and troubleshooting should proceed from the simplest, most accessible checks to more involved diagnostics.
Inspect and clean aerators, verify shutoff valves, test hot and cold separately, flush supply lines, check regulator settings, and consult the water utility if widespread.
Addressing foul odors and slow drains despite clear traps
Although the P-trap may appear clear, persistent foul odors and slow drainage often indicate issues farther down the line or within venting and vent-connected traps.
Common causes include partial sewer line blockages, biofilm buildup in drain pipes, dry or misrouted vents, cracked trap seals, or intermittent backflow from municipal systems.
Technicians inspect venting, snake main lines, clean biofilm with enzymatic treatments, and test for sewer gas leaks.
Cost, time, and difficulty estimates for common sink projects
A concise overview of typical sink projects helps readers plan by comparing time, cost, and required skills. The following quick reference contrasts common tasks by estimated DIY time, parts cost ranges, and necessary tools or skill level. Use it to set realistic expectations before starting work.
| Task | Quick summary |
|---|---|
| Replace pop-up drain | 1–2 hours; $10–40; basic tools, beginner |
| Replace faucet | 1–3 hours; $50–200; adjustable wrench, moderate |
| Fix leaking supply line | 0.5–1.5 hours; $5–30; pliers, beginner |
| Install garbage disposal | 1–3 hours; $80–400; electrical/basic plumbing, intermediate |
Typical DIY time per task
How long will each sink task actually take for a competent DIYer?
Typical times:
- faucet replacement 45–90 minutes;
- P-trap repair 20–45 minutes;
- drain unclogging 30–90 minutes;
- sink installation (drop-in) 2–4 hours;
- undermount/complex install 4–8 hours;
- garbage disposal swap 45–120 minutes;
- supply line replacement 30–60 minutes.
Allow extra time for unexpected complications and testing.
Estimated parts and materials cost ranges
When planning sink projects, estimating parts and materials costs helps set realistic budgets and compare DIY versus professional options.
Typical ranges:
- replacement faucets $30–$300
- P-traps and tailpieces $10–$60
- supply lines $5–$25
- sink mounts and gaskets $10–$80
- cartridge or seal kits $8–$70
- drain assemblies $15–$150.
Allow 10–20% extra for unexpected fittings and sealants.
Skill level and tools required per task
Several common sink projects vary widely in required skills and tools, so matching task complexity to experience helps prevent mistakes and unnecessary costs.
Simple tasks (tightening connections, replacing pop-up assemblies) suit beginners, requiring basic wrenches, plumber’s tape, and 30–60 minutes.
Moderate jobs (P-trap replacement, faucet swap) need intermediate tools, 1–3 hours.
Complex installs or rerouting drains demand advanced skills, specialty tools, and professional help.
Quick-reference checklist for a successful sink plumbing job
A concise checklist frames the tasks required for a successful sink plumbing job.
Consider these core stages in sequence:
- Pre-work readiness checklist
- Step-by-step execution checklist
- Final inspection and cleanup checklist
- Tools and safety confirmations
Each stage is reviewed to guarantee nothing is overlooked before, during, and after the work.
Pre-work readiness checklist
Preparation outlines the essential steps and checks that guarantee a sink plumbing job proceeds without interruption:
Verify water shutoff access and functionality, gather required tools and replacement parts, confirm correct fittings and sealants, inspect workspace lighting and ventilation, protect cabinets and flooring with drop cloths, have a bucket and towels ready, and review safety gear and permit needs before starting.
Step-by-step execution checklist
One concise checklist directs each step of the sink plumbing job so tasks proceed logically, from shutting off water and testing valves to removing old components, installing new fittings, sealing joints, and verifying leak-free operation.
Follow sequential tasks: isolate supply, drain lines, disconnect trap, replace faucet/drain parts, apply sealant or tape, tighten connections to spec, restore water, test under load for steady, dry fittings.
Final inspection and cleanup checklist
Complete the job by working through a compact final inspection and cleanup checklist that confirms all plumbing functions correctly, surfaces are clean, and the workspace is restored.
Verify no leaks under full hot/cold flow, test drain speed, guarantee trap and valve tightness, check faucet alignment and operation, reinstall splashguards, wipe surfaces, remove debris, dispose of materials properly, and return tools to storage.
Conclusion
In closing, the guide leaves readers equipped to tackle sink plumbing tasks with confidence, from diagnosis to preventive care. Could a small twist of a wrench and a bead of plumber’s tape be the difference between a drippy nuisance and a smoothly flowing basin? By following clear steps, using the right tools, and recognizing when to call a pro, one can prevent leaks, save money, and extend the life of sink systems with predictable, steady results.