How to Insulate PEX Pipe Underground: Methods, Materials, and Step-by-Step Guide
To effectively insulate PEX pipe underground, use methods like closed-cell foam sleeves, rigid foam board, and protective conduits (PVC or HDPE) to prevent freezing and reduce heat loss. It’s essential to follow local codes for depth and conduit specifications. Additional measures such as sand or pea-gravel bedding and optional heat trace for extremely cold climates can enhance protection. Ensure seams are sealed, allow for expansion, and backfill with thermal-grade material. Regular inspections and timely repairs will help maintain optimal performance. Continue reading for a detailed step-by-step guide on materials, tools, and best practices.
What Underground PEX Pipe Insulation Is and Why It Matters
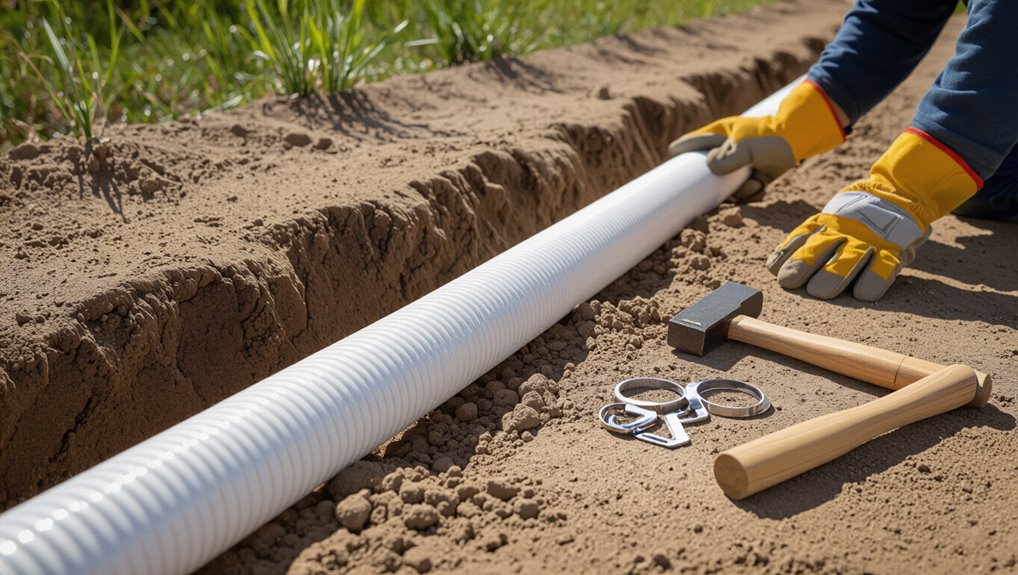
Underground PEX insulation refers to the materials and installation practices used to protect buried piping from soil temperature, moisture, and shifting conditions that can affect performance.
Proper insulation prevents freezing, reduces condensation-related issues, and improves energy efficiency for heated or chilled lines.
Insulating is essential in frost-prone or shallow installations, advisable for energy-sensitive runs, and optional where burial depth and local climate already provide sufficient protection.
How underground conditions affect PEX piping performance
Because soil temperature, moisture, and composition directly influence heat transfer and mechanical stress, conditions below grade play a central role in PEX pipe performance.
Soil acidity, corrosive minerals, and shifting layers affect long-term material integrity and joint stability.
Proper trenching, bedding, and guidance on how to insulate PEX pipe underground mitigate abrasion, UV exposure during installation, and root intrusion risks.
Benefits of insulating PEX underground (freeze prevention, condensation control, energy efficiency)
Soil conditions that affect PEX performance also determine how and why insulation is applied around buried runs.
Insulation reduces freeze risk by retaining soil warmth, limits condensation that can promote corrosion or microbial growth, and improves thermal efficiency to lower heat loss from hot water lines and reduce pumping energy.
Proper material and installation extend service life and maintain system reliability.
When insulation is necessary vs. optional
When is insulation around buried PEX essential rather than merely advisable?
Insulation is essential when lines run through frost-prone zones, shallow trenches, or unheated spaces; for potable hot-water runs where heat loss causes inefficiency; and where local codes or warranty terms require it.
Optional insulation suits deep, consistently temperate soil, well-protected distribution mains, or short, easily drained service stubs.
Types of PEX Pipes and Compatibility with Underground Insulation
Different PEX formulations—PEX-A, PEX-B, and PEX-C—have varying flexibility and kink resistance that affect handling and protection requirements when buried.
The presence or absence of an oxygen barrier changes suitability for closed-loop systems and may influence insulation and sleeve choices.
Recommended burial depths and local code requirements further determine whether additional insulation, conduit, or warning tape is necessary.
PEX-A, PEX-B, PEX-C differences relevant to burial and insulation
PEX-A, PEX-B, and PEX-C differ in manufacturing processes and material properties that affect their behavior when buried and insulated.
PEX-A (crosslinked by peroxide) is most flexible and kink-resistant, easing installation and reducing stress.
PEX-B (silane) is stiffer but durable.
PEX-C (electron beam) is less flexible and slightly more brittle; all require proper bedding, separation from sharp objects, and compatible insulation materials.
Oxygen-barrier PEX considerations
Many installations of PEX pipe underground use oxygen-barrier types to limit oxygen diffusion into water systems, which helps protect metal components like boilers and radiators from corrosion.
Oxygen-barrier PEX requires compatible fittings and joints; the barrier may be compromised by certain fittings or abrasion.
Insulation materials should not chemically degrade the barrier.
Verify manufacturer compatibility and maintain barrier integrity during installation and backfill.
Recommended burial depths and local code interactions
After addressing oxygen-barrier considerations, attention shifts to burial depths and how local codes govern PEX pipe placement and compatible insulation.
Requirements vary: frost line depth, minimum cover for potable versus nonpotable lines, conduit use, and separation from sewage or electrical.
Inspect municipal codes and utility locates.
Follow manufacturer recommendations, permit conditions, and inspector guidance to guarantee compliance and long-term protection.
Overview of Insulation Methods for Underground PEX
Several practical approaches exist for protecting underground PEX, each balancing thermal performance, installation complexity, and cost.
Options include direct burial with rigid or closed-cell foam, running pipe inside conduit or corrugated sleeve, and using thoughtful trench backfill with thermal layers to reduce frost penetration.
In very cold locations, these methods are often paired with electric heat trace for reliable freeze protection.
Direct burial with thermal insulation (rigid foam, closed-cell)
Direct burial of PEX with closed-cell rigid foam provides a straightforward way to protect pipes from temperature extremes and ground moisture while keeping the assembly compact.
The method uses continuous foam jackets or custom-fit sections sealed at joints with tape or compatible adhesive.
Install on stable trench bedding, maintain required cover depth, and inspect for sharp objects.
This yields durable thermal performance and moisture resistance.
Conduit or sleeve method (PVC conduit, corrugated drainage tubing)
Use a conduit or sleeve to create a protective channel that isolates PEX from soil, mechanical damage, and direct moisture while allowing for circulation or additional insulation.
Rigid PVC, HDPE, or corrugated drainage tubing provides a smooth bore for pipe installation and replacement. Advantages include physical protection, easier repairs, and optional venting.
Confirm proper diameter, UV-resistant material at exposed ends, and secure end seals.
Trench backfill and thermal protection layering
Layering appropriate backfill and thermal barriers around underground PEX minimizes heat loss, prevents freeze risk, and protects the pipe from settling or mechanical stress.
Use clean sand or pea gravel directly around the pipe for bedding, then place a thermal layer—insulation boards or foam sleeves—above it.
Finish with native soil compacted in lifts. Guarantee drainage control and avoid sharp rocks or organic-rich fill.
Heat trace combinations for extreme climates
After establishing proper bedding and thermal barriers in the trench, attention shifts to active heating strategies for extreme climates where passive insulation alone may be insufficient.
Heat trace combinations pair self-regulating electric cables with foam or closed-cell tube insulation, sometimes supplemented by thermostatic controls and backup constant-watt lines.
Designs prioritize redundancy, moisture-resistant connections, and power management to prevent freezing while minimizing energy use and maintenance.
Materials and Tools Needed
A clear inventory of materials and tools sets the foundation for insulating PEX pipe underground.
Recommended insulation choices include closed-cell foam pipe insulation, rigid foam board, and compatible spray-foam systems, while conduit and sleeving options range from smooth PVC and HDPE pipe to corrugated protective tubing.
Necessary backfill choices (sand, pea gravel, or thermal sand) and basic tools—shovel, heat gun, tape, clamps, pipe connectors, and marking paint—should be gathered before starting.
Insulation materials (closed-cell foam pipe insulation, foam board, spray foam options)
Choosing the right insulation material determines how effectively PEX pipe resists heat loss and moisture when buried.
Closed-cell foam pipe insulation provides continuous, moisture-resistant coverage and resists compression.
Rigid foam board adds R-value for shallow trenches and can be cut to size.
Spray polyurethane foam seals irregular gaps and bonds to pipe, but requires careful application to avoid overspray and to maintain burial durability.
Conduit and protective sleeving options (PVC, HDPE, corrugated)
Several common conduit and sleeving options—rigid PVC, HDPE pipe, and flexible corrugated conduit—serve to protect buried PEX from mechanical damage, UV exposure at junctions, and ground movement.
Rigid PVC offers easy fittings and solvent-weld joints; HDPE provides flexibility and abrasion resistance for directional runs; corrugated conduit simplifies installation around obstacles.
Select diameter for slip fit and include sealed end fittings where needed.
Backfill materials and thermal additives (sand, pea gravel, thermal sand)
Proper selection of backfill and thermal additives directly affects buried PEX performance by controlling mechanical support, drainage, and heat transfer.
Recommended materials include clean sand for uniform bedding and thermal contact, pea gravel for drainage zones and load distribution, and engineered thermal sand mixes where frost protection is required.
Avoid organic soil, sharp stones, and debris that can abrade or compress insulation.
Tools and supplies (shovel, heat gun, tape, clamps, pipe connectors, marking paint)
Gather the right tools and supplies before digging to guarantee efficient, safe installation and reliable joins.
Essential items include a sturdy shovel, trenching tools, heat gun for shrinkable insulation, waterproof tape, stainless clamps, compatible PEX connectors and fittings, and marking paint for utility lines and run layout.
Gloves, a utility knife, measuring tape, and a level complete the kit for accurate, durable work.
Step-by-Step Guide: Insulating PEX Pipe Underground
First, the route is mapped, local codes are verified, and utility lines are located before any digging begins.
Next, the trench is excavated to the required depth and slope, a suitable bedding and thermal base of sand or thermal backfill is laid, and the PEX is fitted with insulation—cut to length, seams sealed, and expansion allowances accounted for.
Finally, the insulated pipe is placed in a properly sized conduit or protective sleeve with sealed ends before backfilling.
Planning and preparing the route (mapping, code check, call before you dig)
Before any digging or insulation work begins, the route for the PEX run should be mapped out, verified against local codes, and checked for underground utilities.
The planner confirms permitted depths, setback requirements, and protective measures. Utility locates are requested via the national call-before-you-dig service.
Route planning also identifies access points, valve locations, and future maintenance clearances to minimize conflicts and compliance issues.
Excavation best practices (trench depth, slope, bedding layer)
Excavation for PEX should create a stable, code-compliant trench that protects the pipe from loads, frost, and shifting soil.
Determine depth per local code and frost line; maintain consistent slope for drainage away from buildings.
Minimize disturbance to surrounding soil, remove large rocks or roots, and bench or shore sides where unstable.
Keep spoil clear and limit trench width to necessary working space.
Laying bedding and thermal base layer (sand or thermal backfill)
Place a uniform bedding layer of fine, compactable material—typically clean sand or a certified thermal backfill—along the trench floor to cradle the PEX and provide consistent support and insulation.
Spread 2–4 inches initially, level and compact lightly, then after pipe placement add additional thermal base to achieve required cover depth.
Remove sharp debris and maintain consistent density for even thermal performance.
Applying insulation to the pipe (cutting, fitting, sealing seams)
Begin by measuring the exposed PEX run and cutting insulation lengths to match, ensuring joints fall over pipe supports or mid-span as needed.
Fit closed-cell foam or foam-sleeve insulation snugly around the pipe, trimming for valves and fittings.
Butt seams tightly, seal with compatible tape or adhesive, and overlap seams where recommended.
Inspect for gaps, compressions, or abrasions before backfilling.
Installing conduit or protective sleeve (sizing, end seals, expansion allowance)
Several key considerations determine the appropriate conduit or protective sleeve for underground PEX: internal diameter relative to pipe plus insulation, wall thickness for load and bite resistance, and allowance for thermal expansion and movement.
Select rigid or flexible sleeve sized for slip-in clearance, protect ends with watertight seals or booted fittings, provide expansion loops or slack, and secure sleeve ends to prevent soil intrusion and abrasion.
Joining insulated pipe sections and protecting joints (heat-shrink, tapes, mechanical connectors)
Join insulated PEX runs carefully at accessible intervals using methods that restore the insulation envelope and protect the joint from moisture, soil, and mechanical damage.
Use heat-shrink boots with internal adhesive for sealed connections, self-fusing silicone or butyl tapes for overlapping seams, and mechanical connectors sized for PEX with corrosion-resistant couplings.
Confirm adhesive cures, verify watertightness, and provide local abrasion protection.
Backfilling correctly for thermal performance and pipe protection
Carefully backfilling around insulated PEX guarantees both thermal performance and mechanical protection by eliminating voids, minimizing soil contact, and maintaining the integrity of the insulation envelope.
Use clean, granular bedding, tamp in layers to avoid point loads, protect with a warning tape above the zone, and restore native fill compactly without sharp rocks.
Verify alignment and insulation continuity before final compaction.
Surface restoration and marking buried lines
Finish by restoring the surface and clearly marking the buried line to protect the installation and inform future work.
Replace topsoil, compact gently to avoid crushing insulation, and replant turf or reseed as needed.
Lay warning tape 12–18 inches above the pipe and install permanent markers at access points.
Record depth and route on property plans and notify utility maps for future excavations.
Comparison of Common Insulation Approaches
A brief comparison of common insulation approaches highlights trade-offs in performance, cost, durability, and installation difficulty to help select the right method for specific climates and use-cases. The table below summarizes typical options and their best applications. Readers can use these criteria to match insulation type to project priorities.
| Insulation Method | Best Climates / Use-Cases |
|---|---|
| Closed-cell foam sleeves | Cold climates, frost-prone shallow runs |
| Sand or pea gravel backfill | Budget projects, temperate areas |
| Rigid foam board | Long runs with mechanical protection needed |
| Burying at greater depth | Very cold zones or intermittent flow situations |
Performance, cost, durability, installation difficulty
Compare common insulation methods for underground PEX by weighing four practical metrics: thermal performance, upfront and lifecycle cost, material durability in buried conditions, and installation difficulty.
Closed-cell foam offers high R-value and low cost but requires careful sealing.
Foam sleeve is easy to install but less durable.
Cellular concrete and rigid boards provide durability and longevity with higher costs and greater labor intensity.
Best climates and use-cases for each method
When is each underground PEX insulation method most appropriate depends on climate extremes, soil conditions, and project goals.
In cold, freeze-prone regions, thick foam plus protective conduit suits long runs.
Moderate climates benefit from simple foam sleeves with shallow burial.
Wet or rocky soils require rigid conduit or concrete encasement.
Short service lines or temporary installations can use inexpensive wrap-and-tape solutions.
Safety, Code Compliance, and Inspection Considerations
Attention to local building code checkpoints and permit requirements is essential before beginning underground PEX insulation work.
Consideration must also be given to electrical bonding, grounding, and any heat-trace regulations that apply to the installation.
A clear inspection checklist—covering trench depth, bedding, insulation placement, and required markings—should be completed and approved prior to backfilling.
Local building code checkpoints and permits
Permits and local code checkpoints determine allowable materials, burial depths, and proximity to other utilities for underground PEX installations. Homeowners and contractors should verify requirements with the local building department before excavation begins.
Required documentation, inspection schedules, and licensed installer rules vary by jurisdiction. Applicants must confirm setback distances, conduit or sleeve mandates, backfill materials, and approved joint methods to guarantee compliance and pass inspection.
Electrical bonding, grounding, and heat-trace regulations
Having confirmed local permitting and setback requirements, attention must turn to electrical considerations that affect underground PEX installations: bonding, grounding, and any required heat-trace systems.
Verify local electrical code for conductor sizing, bonding jumpers across dielectric fittings, and grounding electrode interactions.
Heat-trace circuits must be GFCI-protected, rated for buried use, installed per manufacturer instructions, and inspected prior to energizing to guarantee safe, code-compliant operation.
Inspection checklist before backfilling
Before backfilling, a concise inspection checklist confirms underground PEX installations meet safety and code requirements and helps identify defects that could be costly or hazardous once covered.
Inspect routing, depth, and slope; confirm separation from electrical and sewer lines; verify bedding and protective conduit; check fittings, clamps, and freeze protection; guarantee tracer wire continuity and labeling; document photos, measurements, and approvals before backfill.
Troubleshooting and Common Installation Mistakes
Common indicators of inadequate insulation or poor installation include uneven pipe temperature, frost buildup, and damp soil near joints.
Remedies address cold spots, leaks, and thermal bridging by adding or repositioning insulation, repairing seals, and installing continuous vapor barriers.
Attention to material compatibility and clean work practices prevents contamination and chemical reactions that can degrade PEX or insulants.
Signs of inadequate insulation or poor installation
Several visible and performance-related indicators can reveal inadequate insulation or poor PEX pipe installation.
Frosted or damp soil above lines, frequent temperature fluctuations at fixtures, and reduced flow or pressure hint heat loss or blockages.
Exposed or crushed insulation, uneven burial depth, separated joints, and visible condensation on fittings indicate installation faults.
Increased energy use or recurring freeze-related outages further signal problems.
How to fix cold spots, leaks, and thermal bridging
Addressing cold spots, leaks, and thermal bridging requires targeted diagnosis and corrective measures that prioritize pipe integrity and consistent insulation coverage.
Inspect for gaps, compressions, or conduit contact; add continuous closed-cell foam or wrap-around insulation and seal seams with waterproof tape or heat-shrink sleeves.
Repair leaks with approved PEX fittings or clamps, re-bury with protective conduit, and eliminate metal contact to prevent thermal bridges.
Avoiding contamination and chemical incompatibilities
Prevent contamination and chemical incompatibilities by selecting compatible materials, maintaining clean work areas, and preventing cross-contact between PEX and incompatible compounds (e.g., certain petroleum-based sealants, solvents, or treated soils).
Inspect insulation, fittings, and joints for residue, avoid asphaltic or oil-based coatings, use approved adhesives and barriers, and confirm chemical compatibility with manufacturers.
Flush lines before backfill and document materials used.
Maintenance and Longevity
Routine inspections should focus on checking insulation integrity, signs of moisture or compression, and any temperature or pressure anomalies.
When damage is found, guidance on localized repairs, section replacement, and proper reconnection of insulation and protective conduit can minimize future failures.
Expected material lifespans under common soil conditions, including factors like acidity, moisture, and freeze–thaw cycles, help determine replacement intervals and monitoring frequency.
Routine checks and signs to monitor over time
How often should buried PEX be inspected to guarantee long-term performance? Inspections annually and after extreme weather events are recommended.
Check for soil settling, visible thermal insulation compression, moisture pooling, and frost heave evidence.
Monitor transient pressure drops, unusual temperature changes at access points, and corrosion on fittings.
Document findings, note trends, and schedule proactive maintenance when anomalies persist.
Repair and replacement strategies for buried insulated PEX
After regular inspections identify anomalies such as persistent pressure loss, insulation compression, or moisture accumulation, a clear repair and replacement strategy for buried insulated PEX is required.
Technicians isolate affected segments, excavate minimally, and assess PEX integrity. Damaged insulation is removed, compromised fittings or pipe sections are replaced with compatible PEX components, and restored trenches are backfilled with protective bedding and marking tape.
Expected lifespans for materials in typical soil conditions
Because soil chemistry, moisture, and mechanical stresses vary widely, expected lifespans for buried PEX, insulation, fittings, and protective components are best expressed as ranges tied to specific conditions rather than single values.
Typical PEX tubing endures 25–50+ years; closed-cell foam or polyethylene insulation 10–30 years depending on abrasion and UV exposure during handling; corrosion-prone metal fittings 10–30 years unless cathodically protected.
Cost Estimates and Decision Factors
A clear cost breakdown helps clarify material and labor expenses for typical PEX insulation projects.
Guidance on when a homeowner can reasonably DIY versus hiring a professional prevents common mistakes and hidden costs.
Consideration of factors such as energy savings, freeze risk, and expected lifespan informs ROI and long-term savings.
Breakdown of material and labor costs for typical projects
Cost clarity helps homeowners and contractors weigh insulation choices for underground PEX installations by presenting typical material and labor expenses, variations by climate and soil conditions, and factors that drive price differences.
Typical materials—foam sleeves, conduit, gravel, wrap—range $1–$8 per linear foot; labor adds $10–$30 per foot depending on trenching difficulty, depth, and regional rates.
Permit and disposal fees may increase totals.
When to DIY vs. hire a professional
Having reviewed typical material and labor expenses, the decision to DIY versus hire a professional hinges on project complexity, local regulations, and the homeowner’s skill level.
Simple, shallow runs with accessible fittings and basic insulation often suit competent DIYers.
Deep trenches, pressurized systems, code-required inspections, or uncertain soil conditions warrant professional hiring.
Consider time availability, warranty needs, and liability when deciding.
Factors that influence ROI and long-term savings
Because upfront expenses and ongoing energy savings interact, estimating ROI for insulated underground PEX requires examining installation costs, insulation performance, local energy prices, and expected system lifespan.
Other factors include climate severity, soil thermal conductivity, maintenance needs, repair frequency, and insulation degradation.
Accurate ROI models compare projected energy savings, replacement costs, and discount rates to justify material choice, installation quality, and service decisions.
Real-World Examples and Installation Scenarios
Real-world installations illustrate how choices in materials and methods vary by use case and climate.
Typical scenarios include:
- Residential water service line insulated in cold climate
- Irrigation line protection in seasonal freeze regions
- Hot-water recirculation loop with heat trace and insulation
- Site-specific soil and burial-depth considerations
Each example highlights different insulation, drainage, and maintenance priorities.
Residential water service line insulated in cold climate
Several common approaches demonstrate how a residential PEX water service line can be insulated for reliable performance in cold climates: burying the pipe below frost depth with continuous foam sleeve or cellular concrete encasement, using heat-trace cable combined with closed-cell insulation inside a shallow trench, and placing the PEX inside a larger insulated and sealed carrier pipe with dry backfill.
Typical practice includes tracer marking, protective conduit at crossings, and pressure testing.
Irrigation line protection in seasonal freeze regions
Protecting irrigation lines in regions with seasonal freezing brings different priorities than insulating a year-round residential service: irrigation runs are often shallow, intermittent in use, and exposed to mechanical damage during maintenance or winterizing.
Practical measures include deeper burial where feasible, granular backfill, short lengths of foam sleeve at valve boxes, frost-proof irrigation valves, and clear labeling to prevent accidental digging during off-season work.
Hot-water recirculation loop with heat trace and insulation
Installations of hot-water recirculation loops that pair electric heat trace with foam or closed-cell pipe insulation demonstrate practical strategies for maintaining potable temperatures, minimizing standby energy loss, and preventing freeze-related damage.
Examples include buried PEX with self-regulating trace taped along the pipe, continuous foam sleeves, and moisture-resistant jacketing.
Proper sensor placement, electrical protection, and accessible junction boxes enable reliable performance and simplified maintenance.
Practical Tips for Best Results
Seasonal timing and weather should guide scheduling to avoid freezing conditions and guarantee proper soil compaction during backfill.
Material choices favor UV-resistant, high-density foam or closed-cell insulation and corrosion-resistant fittings to maximize longevity and performance.
A concise pre-backfill checklist—covering slope, insulation continuity, pipe depth, fittings, and pressure testing—helps verify a successful insulated underground PEX installation.
Seasonal timing and weather considerations for installation
Timing plays an essential role in underground PEX insulation, since soil temperature, moisture, and freeze-thaw cycles directly affect both material performance and installation ease.
Install during temperate, dry periods to guarantee proper backfill compaction and adhesive curing. Avoid frozen ground and heavy rains.
Monitor forecasts, schedule tasks to minimize exposure, and allow time for soil settling before system commissioning to reduce risk of future damage.
Material selection shortcuts for longevity and performance
After planning work around favorable soil and weather conditions, attention turns to selecting materials that maximize underground PEX longevity and performance.
Choose closed-cell foam or high-density polyethylene sleeves for moisture resistance. Use UV-stable, crushed-stone-compatible conduit where needed. Prefer oxygen-barrier PEX and corrosion-resistant fittings.
Prioritize proven manufacturers, appropriate insulation thickness for local frost depth, and durable mechanical protection to reduce maintenance.
Quick checklist to verify a successful insulated underground PEX installation
When inspecting an insulated underground PEX run, a simple checklist helps confirm that materials, clearances, and protections meet performance and longevity goals.
Verify PEX type and UV-resistant jacket, continuous insulation with sealed seams, proper burial depth, gravel bedding and conduit where required, intact moisture barrier, corrosion-free fittings with dielectric protection, secure expansion loops, and documented pressure test results plus labeling for future access and maintenance.
Conclusion
Proper underground PEX insulation protects pipes, saves energy, and prevents costly freeze damage—a practical investment despite perceived upfront effort. Skeptics worried about complexity should note that straightforward materials and clear steps make installation accessible to homeowners and contractors alike, turning apprehension into confidence. With routine checks and quality components, insulated PEX delivers dependable performance and peace of mind, safeguarding winter comfort and household budgets through simple, durable measures.