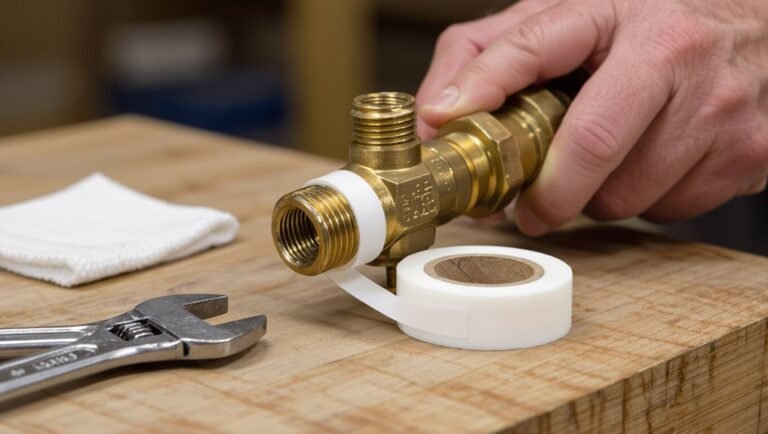
How to Clean Chrome Bathroom Fixtures: Step-by-Step Guide for a Spotless Shine
To clean chrome bathroom fixtures effectively, start with mild dish soap and warm water to tackle light grime. Rinse the fixtures and buff them dry with a microfiber cloth for a spotless shine. For tougher mineral deposits, use white vinegar or a baking soda paste, gently scrubbing with a soft brush before rinsing thoroughly. Always avoid abrasives and harsh acids to protect the chrome from scratches and corrosion. Following these steps will help maintain the shine and longevity of your fixtures.
What Gives Chrome Bathroom Fixtures Their Shine and Why They Tarnish
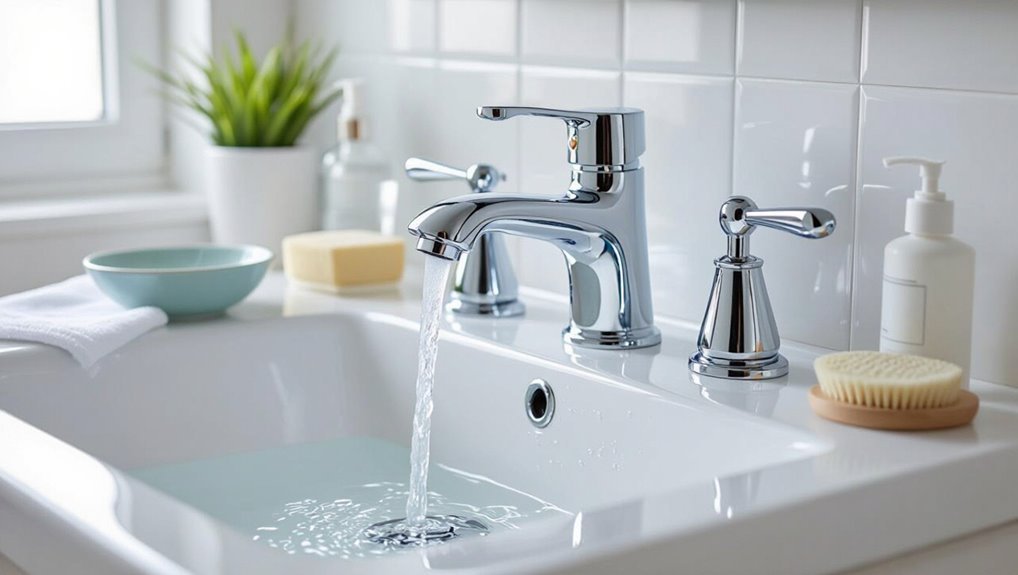
Chrome fixtures owe their mirror-like luster to a thin layer of chromium plated over metal that efficiently reflects light.
Over time that sheen is dulled by water spots, mineral deposits, and corrosion, which cling differently depending on whether the surface is polished, brushed, or sealed with lacquer.
Identifying the finish before cleaning helps choose methods that restore shine without damaging plating or protective coatings.
How chrome plating is made and how it reflects light
Shiny bathroom fixtures owe their mirror-like appearance to a thin layer of electroplated chromium deposited over a base metal—typically brass, nickel, or steel—creating a smooth, highly reflective surface.
The plating process involves electrolysis, polishing, and rinsing to produce uniformity. Chrome’s high refractive index and specular finish reflect light sharply.
Knowing this aids owners learning how to clean chrome bathroom fixtures effectively.
Common causes of dullness, water spots, mineral buildup, and corrosion
Many bathroom fixtures lose their mirror-like finish over time due to a few predictable causes: mineral-rich hard water leaves white spots and cloudy films; soap scum and body oils form sticky residues that scatter light; abrasive cleaners and scrubbing create micro-scratches that dull chrome; prolonged moisture and chloride exposure initiate corrosion and pitting; neglect allows deposits to harden, making removal more difficult.
Surface types and finishes to identify before cleaning (polished, brushed, lacquered)
After noting how deposits, soaps, and abrasion degrade fixtures, attention turns to the surface type and finish, since what lies beneath the grime determines both appearance and cleaning approach.
Polished chrome is mirror-bright and tolerates mild cleaners; brushed chrome hides scratches and needs nonabrasive wipes; lacquered finishes have a protective coating—use pH-neutral solutions to avoid stripping lacquer and exposing base metal.
Quick Checklist: What You Need Before You Start
Before beginning, the preparer should assemble tools, cleaners, and protection to guarantee an efficient, safe cleaning session.
The checklist groups essentials by function so nothing important is missed. Items range from simple household ingredients to optional specialty products for stubborn buildup.
- Microfiber cloths, soft-bristle brush, toothbrush
- Mild dish soap, white vinegar, baking soda, rubbing alcohol
- Chrome polish, lime remover, non-abrasive cream cleaner (optional)
- Gloves, eye protection, and coverings for nearby surfaces
Essential tools (microfiber cloths, soft-bristle brush, toothbrush)
Gather the right tools to make chrome fixtures shine without scratching or streaking: several microfiber cloths for drying and polishing, a soft-bristle brush for loosening grime in crevices, and a clean toothbrush for detailed areas like around faucet bases and aerators.
Additional useful items include lint-free cloths for final buffing, rubber gloves for protection, and a small bowl for rinsing brushes and mixing gentle solutions.
Safe cleaners to have (mild dish soap, white vinegar, baking soda, rubbing alcohol)
Stock a small selection of gentle, effective cleaners to tackle soap scum, mineral deposits, and fingerprints on chrome without damaging the finish:
- mild dish soap for everyday grime,
- white vinegar diluted for mineral buildup,
- baking soda as a gentle abrasive paste for stubborn spots,
- and rubbing alcohol for disinfecting and removing oily residues.
Measure and test on a hidden area first.
Household items and optional commercial products (chrome polish, lime remover, non-abrasive cream cleaner)
A concise toolkit makes chrome cleaning faster and safer: common household items—mild dish soap, white vinegar, baking soda, rubbing alcohol—cover most needs, while a small selection of optional commercial products (chrome polish, lime remover, non-abrasive cream cleaner) handles tough mineral deposits and restores shine.
Include soft microfiber cloths, cotton swabs, a soft-bristled brush, and a spray bottle for solutions; small containers aid mixing.
Safety gear and protection for surrounding surfaces
Before starting, guarantee protective gear and surface coverings are in place to prevent injury and accidental damage: nitrile or latex gloves protect hands from cleaners, safety glasses shield eyes from splashes, and a simple face mask helps with inhaling fumes when using stronger products.
Lay down towels or plastic sheeting to protect countertops and floors, tape delicate seals, and ventilate the area to disperse fumes.
Fast Method to Remove Light Water Spots and Fingerprints (Under 10 Minutes)
A quick routine can remove light water spots and fingerprints in under ten minutes.
First, a soap-and-water wipe-down loosens grime, followed by a brief vinegar spray to break down mineral streaks.
The fixture is finished with thorough drying and buffing to restore immediate shine.
Step-by-step: soap-and-water wipe-down
Begin by mixing a few drops of mild dish soap into warm water and dampening a soft microfiber cloth—this quick solution removes light water spots and fingerprints without harsh chemicals.
Wipe fixtures gently, following contours and crevices. Rinse the cloth, remove soap residue, then buff with a dry microfiber square to restore shine.
Repeat for persistent streaks until surfaces look uniform.
Step-by-step: vinegar spray for quick demineralization
Mist a 1:1 solution of distilled white vinegar and water onto chrome fixtures to dissolve light mineral buildup and lift fingerprints without scrubbing.
Let the solution sit 2–4 minutes, then wipe with a soft microfiber or cotton cloth, rinsing periodically.
For crevices, apply with a cotton swab.
Repeat if necessary.
Avoid prolonged exposure on sealed edges or non-chrome components.
Drying and buffing for immediate shine
Grab a clean microfiber cloth and a dry cotton swab to complete the quick shine routine.
The person wipes fixtures following curves, removing residual moisture and streaks. For crevices, the cotton swab lifts deposits and fingerprints.
Final buffing with a dry section of the microfiber produces an immediate mirror finish. This method restores shine in under ten minutes without chemicals.
Deep Cleaning Process for Heavy Mineral Buildup and Tarnish
For heavy mineral buildup and tarnish, the process begins with preparing the area and protecting surrounding grout and finishes.
A targeted vinegar or commercial descaler is applied safely, followed by a baking soda paste and gentle mechanical action with soft brushes or nylon pads on stubborn spots.
The procedure concludes with thorough rinsing, neutralizing any residue, and complete drying to prevent recurrence.
Preparing the area and protecting fixtures and grout
Before any abrasive cleaners or tools are brought out, the surrounding area should be cleared of toiletries, towels, and rugs, and water sources turned off to prevent splashes.
Protect nearby grout and delicate surfaces by applying painter’s tape along seams and laying down absorbent towels or a plastic drop cloth to catch runoff.
Ventilate the room, don gloves and eye protection, and remove loose debris from fixtures.
Applying a targeted vinegar or descaling solution safely
Apply a gently acidic solution to dissolve mineral deposits and loosen tarnish without harming chrome: mix equal parts white vinegar and water or use a commercial descaler diluted per label instructions.
Test on an inconspicuous area first, apply with a soft cloth or spray bottle, let sit 2–5 minutes, then gently wipe.
Rinse thoroughly and dry to prevent residue or re‑etching.
Using baking soda paste for stubborn spots
Scrub a thick paste of baking soda and water onto stubborn mineral deposits and tarnished spots to provide gentle abrasion without scratching chrome.
Allow it to sit five to ten minutes to loosen grime.
Wipe with a damp microfiber cloth in circular motions, rinsing frequently.
Rinse thoroughly and dry immediately to prevent new water spots.
Repeat only if residue persists.
Gentle mechanical removal with soft brushes and nylon pads
Use soft-bristled brushes and fine nylon pads to mechanically loosen heavy mineral buildup and light tarnish without damaging chrome’s finish.
Work gently in circular motions, applying minimal pressure to avoid scratching. Target crevices and joints where deposits concentrate.
Periodically brush away loosened debris to assess progress. Repeat sparingly until surface appearance improves, then proceed to the next cleaning stage.
Rinsing, neutralizing, and thorough drying
Rinse the fixture thoroughly with clean water to remove loosened mineral particles and residual cleaning agents.
Then neutralize any remaining acidic residues with a mild baking soda solution (one tablespoon per quart of water) before a final water rinse and complete drying to prevent new spotting or corrosion.
Use soft microfiber towels and air-free crevice drying; inspect seams and re-rinse stubborn areas until no residue remains.
Applying chrome polish or protective wax for long-lasting shine
After rinsing and neutralizing, the fixture should be fully dry before any polish is applied; residual moisture or cleaners will interfere with adhesion and cause spotting.
Apply a thin, even layer of chrome polish or nonabrasive protective wax with a soft microfiber cloth, following product directions.
Buff gently to a mirror finish, remove excess, and allow cure time.
Reapply periodically for durable protection against water spots and mineral buildup.
Removing Rust, Pitting, and Corrosion Safely
The section distinguishes surface rust, which affects only the finish, from structural corrosion and pitting that compromise the metal beneath.
It outlines non‑abrasive removal options such as mild acid solutions, chelating cleaners, and gentle polishing pads to preserve chrome plating.
Guidance is provided on signs that indicate professional refinishing or replacement is safer than DIY repair.
Identifying surface rust vs. structural corrosion
How can one tell whether discoloration is surface rust or deeper structural corrosion?
Inspect visually for flaky, powdery deposits that brush away easily—these indicate surface rust.
Tap and feel for firmness: solid metal with superficial staining differs from areas with softness, deep pitting, or cracked plating, which suggest structural corrosion.
Use magnification to check chipped chrome exposing dull, oxidized metal beneath.
Non-abrasive rust removal methods
With surface rust distinguished from deeper corrosion by brushing, tapping, and magnified inspection, attention shifts to methods that remove oxidation without harming chrome plating.
Apply mild acidic solutions—white vinegar or lemon juice—briefly, follow with baking soda paste to neutralize and lift residues.
Use soft nylon brushes or cotton cloths, rinse thoroughly, dry, and protect with a light coat of carnauba wax or silicone-free polish.
When to seek professional refinishing or replacement
When is it time to stop DIY repair and call a professional? Severe pitting, deep corrosion, structural weakness, or flaking chrome indicate professional refinishing or replacement.
A technician assesses substrate damage, recommends re-plating, powder coating, or full fixture replacement, and guarantees water-tight seals.
When repairs risk leaks or safety, prioritize expert intervention to restore appearance and function reliably.
Special Cases: Cleaning Specific Fixture Types
Different fixture types require targeted cleaning approaches to avoid damage while restoring function and shine.
Faucets and spouts need attention to aerators and internal parts. Showerheads benefit from descaling and unclogging methods. Towel bars, handles, and accessories must be cleaned without stressing mounting hardware.
Chrome-plated mirrors and trim call for especially gentle techniques to prevent scratching or haloing.
Faucets and spouts aerators and internal parts
Disassemble aerators and remove visible mineral buildup before cleaning internal faucet parts to guarantee water flow and prevent damage.
Inspect cartridges, O-rings, and seals for wear; soak removable parts in vinegar solution; rinse thoroughly and dry; replace damaged components.
Reassemble carefully, test for leaks, and polish exterior chrome for a uniform finish.
- Inspect parts
- Soak removable pieces
- Replace worn seals
- Test and polish
Showerheads descaling and unclogging methods
Soak and scrub showerheads to remove mineral deposits that restrict spray patterns and reduce water pressure.
- Remove showerhead if possible; soak in white vinegar for 1–3 hours.
- Use a soft brush or toothpick to clear nozzle holes gently.
- Rinse thoroughly, run water to flush loosened debris.
- Reinstall and test spray; repeat soaking if buildup persists.
Towel bars, handles, and accessories cleaning without damaging mounting hardware
Begin cleaning towel bars, handles, and other bathroom accessories with a plan that protects both finish and mounting hardware: use mild, nonabrasive cleaners and soft cloths, avoid saturating wall anchors or exposed screws, and test any solvent on an inconspicuous spot before full application.
Wipe fixtures dry to prevent water ingress, gently loosen grime with a soft brush, and tighten fittings if needed without overdriving screws.
Chrome-plated bathroom mirrors and trim gentle techniques
After handling towel bars and accessories, attention turns to chrome-plated bathroom mirrors and their trim, which demand extra care because moisture and abrasive action can quickly mar reflective surfaces and backing.
Use a microfiber cloth and mild, pH-neutral cleaner; avoid ammonia or bleach.
Lightly blot corrosion spots, rinse thoroughly, dry immediately, and inspect edges for delamination to prevent permanent damage.
Everyday Maintenance Routine to Keep Chrome Shiny
A concise routine keeps chrome fixtures bright and prevents buildup. It outlines daily wipe-downs and quick drying, a weekly checklist with product rotation, and monthly deep-care steps including inspections.
These simple stages minimize corrosion and maintain lasting shine.
Daily wipe-down habits and quick drying techniques
Wipe chrome fixtures daily with a soft microfiber cloth to remove water spots, soap residue, and fingerprints before they bond to the surface.
After wiping, dry crevices and joints with a cotton swab or small towel to prevent mineral buildup.
For fast results, use a squeegee on flat areas and finish with a quick buffing motion to restore immediate shine and prevent streaks.
Weekly cleaning checklist and product rotations
The weekly checklist outlines specific tasks and a simple product rotation to remove developing mineral deposits, soap scum, and fingerprints before they harden.
Once weekly: apply mild cleaner, rinse, and microfibre-dry.
Alternate with a vinegar solution every other week to tackle mineral buildup.
Inspect seals and aerators visually.
Replace sponges weekly and store cleaners safely.
Record date of each rotation for consistency.
Monthly deep-care steps and inspection points
Once each month, perform a focused deep-care routine that goes beyond weekly touch-ups to prevent corrosion and prolong finish life:
inspect seals, aerators, and joints for buildup or leaks;
remove mineral deposits with vinegar or a mild descaler;
polish with a nonabrasive chrome cleaner;
lubricate valve stems lightly;
tighten loose fittings;
replace worn washers or gaskets;
document issues and schedule repairs to maintain appearance and function.
Products to Avoid That Damage Chrome
Harsh chemicals and abrasive cleaners can etch or dull chrome surfaces and should be avoided.
Likewise, rough tools and homemade mixtures containing acids or abrasives risk scratching or stripping the plating.
The following guidance identifies specific products and practices to keep chrome intact.
Harsh chemicals and abrasive cleaners to steer clear of
Avoid using strong acids, bleach-based cleaners, or abrasive powders on chrome fixtures, as they can dull, pit, or strip the protective finish.
Harsh drain cleaners, oven degreasers, and concentrated detergents also risk corrosion or discoloration.
Commercial scrubbing pads and scouring powders abrade surfaces.
For preservation, choose mild, pH-neutral cleaners and follow manufacturer guidance to prevent long-term damage and maintain shine.
Improper tools and DIY mixtures that cause scratches or remove plating
Many common household tools and homemade cleaners can inadvertently scratch chrome or strip its thin plating, causing visible damage and accelerating corrosion.
Steel wool, scouring pads, abrasive powders, and metal brushes physically abrade finishes.
Acidic DIY mixes (undiluted vinegar, lemon juice with salt) and bleach-based solutions chemically attack plating.
Use soft microfiber, nonabrasive cleaners, and manufacturer-recommended products to preserve chrome.
Natural and Eco-Friendly Cleaning Recipes
Natural, eco-friendly formulas can clean, descale, and protect chrome without harsh chemicals.
The following practical recipes and tips provide measurements and application guidance for everyday cleaning, heavy-duty descaling, and simple polishing alternatives. They are safe for fixtures when used as directed.
- All-purpose mild cleaner recipe with measurements
- Heavy-duty descaler recipe and application tips
- Homemade protective polish alternatives
- Safety notes and surface-testing reminders
All-purpose mild cleaner recipe with measurements
A simple, all-purpose mild cleaner can be made with common kitchen ingredients and measured precisely for consistent results.
Combine 1 cup distilled water, 1 cup white vinegar, 1 tablespoon liquid castile soap, and 10 drops lemon essential oil.
Mix gently in a spray bottle. Shake before use.
Suitable for daily chrome wipe-downs; test an inconspicuous area first to verify compatibility.
Heavy-duty descaler recipe and application tips
For buildup that an all-purpose spray can’t remove, a heavier descaling solution is appropriate.
Mix 1 cup white vinegar, 1/2 cup water, and 1 tablespoon baking soda into a paste.
Apply to affected chrome, let sit 10–15 minutes, scrub gently with a soft brush, then rinse thoroughly and dry.
Test on an inconspicuous spot first; ventilate the area during use.
Homemade protective polish alternatives
Create simple, eco-friendly polishes using common household ingredients to protect chrome from water spots and fingerprints while avoiding harsh chemicals.
Mix equal parts white vinegar and distilled water with a few drops of mild dish soap for regular shine.
For deeper protection, combine olive oil with lemon juice (small ratio) and buff lightly.
Test inconspicuously first and apply sparingly to avoid buildup.
Troubleshooting Common Problems and How to Fix Them
After cleaning, common issues such as persistent water spots, a cloudy finish from vinegar, minor scratches and dull areas, or leaks and loose fittings may still appear.
The next section identifies typical causes for each problem and provides straightforward remedies to restore appearance and function.
Practical steps include spot treatments, gentle polishing techniques, and simple tightening or sealing fixes to address most concerns.
Persistent water spots after cleaning causes and fixes
Persistent water spots that remain after cleaning usually indicate mineral deposits, surface etching, or residual cleaner left to dry, and identifying the cause narrows the appropriate fix.
For mineral buildup, soak with diluted lemon juice or a commercial descaler, then rinse and buff.
For etching, restore by polishing with a nonabrasive chrome polish.
Remove residue by rinsing thoroughly and drying with a microfiber cloth.
Cloudy finish after using vinegar how to restore shine
If chrome develops a dull, cloudy haze after using vinegar, it usually signals mild surface etching or a residue of mineral salts left behind when the acidic solution evaporated.
Rinse thoroughly with distilled water, dry with a microfiber cloth, then polish gently using a chrome-safe metal polish or a paste of baking soda and water.
Repeat rinsing and buffing until shine returns.
Scratches and dull marks minor repair steps
Once rinse-and-polish steps fail to completely restore a chrome fixture’s look, small scratches and dull marks can often be improved with careful, nonabrasive repair.
Use a soft microfiber and a chrome-safe metal polish or a mild rubbing compound, applying light circular motions.
For deeper scratches, follow with ultra-fine automotive polish and finish by sealing with clear wax to protect shine.
Leaks and loose fittings discovered during cleaning quick fixes
Discovering leaks or loose fittings while cleaning chrome fixtures should prompt immediate, simple checks to prevent water damage and further deterioration.
The inspector tightens visible screws, hand-turns loose nuts, and tests connections with a towel. Minor seal failures get temporary plumber’s tape or silicone; persistent leaks require valve replacement or professional service.
Document location and monitor for recurrence.
Longevity Tips: Preventing Future Damage and Maintaining Value
Maintaining chrome fixtures begins with controlling the environment—stable humidity, good ventilation, and mindful fixture placement reduce corrosion and water spotting.
Selecting durable finishes or protective coatings during renovation can extend service life and simplify upkeep.
Assessment of corrosion, finish wear, and repair costs helps determine whether restoration or replacement is the more cost-effective option.
Environmental controls (humidity, ventilation) and fixture placement
Longevity of chrome fixtures depends as much on the surrounding environment as on cleaning technique: controlling humidity and ensuring adequate ventilation reduce corrosion and mineral buildup, while thoughtful fixture placement minimizes direct water exposure and mechanical abrasion.
Position taps and showerheads to limit splatter, allow airflow around fixtures, use exhaust fans during and after showers, and avoid cramped fittings that trap moisture or impede drying.
Choosing finishes and coatings when renovating
When renovating, selecting durable finishes and protective coatings is as important as choosing the fixture style because they directly influence corrosion resistance, ease of maintenance, and long-term value.
Choose electroplated chrome for affordability, PVD or brushed nickel for scratch resistance, and clear lacquer or ceramic coatings for added protection.
Match finish resilience to bathroom traffic and cleaning regimen to preserve appearance and resale value.
When to replace vs. restore chrome fixtures
After selecting finishes and protective coatings, owners must assess whether worn chrome fixtures merit restoration or full replacement based on condition, cost, and expected lifespan.
Minor pitting, surface tarnish, or loose fittings often respond to polishing, re-plating, or part replacement.
Deep corrosion, structural failure, or obsolete designs usually justify full replacement to guarantee reliability, warranty coverage, and long-term value.
Comparison of Best Commercial Chrome Cleaners
A concise comparison of top commercial chrome cleaners helps identify key features, weigh pros and cons, and match products to specific use cases. Below is a quick reference table to guide selection based on performance, safety, and best applications.
| Product | Strengths | Best Use Case |
|---|---|---|
| Cleaner A | Removes tarnish quickly | Heavy buildup restoration |
| Cleaner B | Gentle, non-abrasive | Regular maintenance and sealed finishes |
Key features, pros, cons, and recommended use cases
Choosing the right commercial chrome cleaner depends on formulation, abrasiveness, compatibility with fixture finishes, and ease of application. Recommended options balance gentle acids or nonabrasive surfactants, fast residue removal, and protective polymers. Pros: efficient limescale and fingerprint removal. Cons: potential dulling or residue on plated or delicate finishes. Use cases: heavy mineral deposits, routine polishing, or quick touch-ups.
| Feature | Pro | Con |
|---|---|---|
| Acid-based | Removes scale fast | Can etch delicate finishes |
| Nonabrasive | Safe on plating | Slower on heavy build-up |
Conclusion
Like a mirror catching sunlight, chrome bathroom fixtures reward gentle care with a lasting gleam. When limescale, rust, or fingerprints dim their shine, the right mix of quick touch-ups, deeper treatments, and preventive rituals restores brilliance and protects value. Thoughtful, regular maintenance—whether with eco-friendly pastes or commercial polish—lets fixtures age gracefully rather than suffer premature wear, keeping bathrooms bright, hygienic, and quietly elegant for years to come.