How to Check the Thermostat on a Hot Water Heater: Step-by-Step Troubleshooting Guide
To check the thermostat on a hot water heater, first ensure safety by cutting power (or gas) and confirming with a tester. Then, follow these steps: remove the access panels and insulation to expose the thermostats or gas control. Visually inspect the wiring and contacts. Next, use a multimeter to check for continuity and measure element resistance. Compare your readings to the specifications: low resistance indicates a functioning element, while an open circuit or short suggests failure. If you find faulty thermostats or elements, replace them, reassemble everything securely, and follow further detailed procedures and safety precautions as needed.
What to Expect When Checking a Hot Water Heater Thermostat
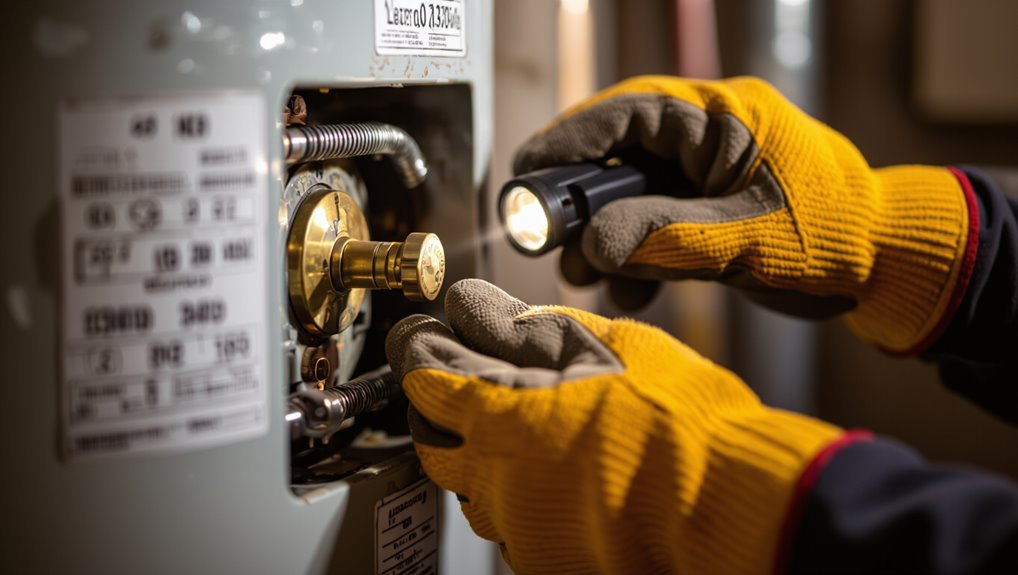
Expectations include locating thermostats behind access panels on electric units or near the gas control valve on gas models, noting that designs vary by manufacturer.
Typical signs of thermostat problems are inconsistent water temperature, excessive heating, or no hot water at all.
Before beginning any checks, power and gas supplies should be shut off and the area made safe to avoid electrical shock or burns.
Typical thermostat locations and designs on electric and gas water heaters
Thermostats on residential hot water heaters are typically mounted either under access panels on electric models or near the burner assembly on gas units, with each design reflecting the heater’s energy source and control needs.
Electric units feature dual thermostats and removable panels; gas units use a single thermostat integrated with the gas valve.
This orientation matters when learning how to check the thermostat on a hot water heater.
Common symptoms that indicate thermostat issues
Having established where thermostats are typically located and how they differ between electric and gas models, common symptoms that point to thermostat problems become easier to recognize.
Typical signs include inconsistent water temperature, water too hot or not hot enough, rapid temperature fluctuations, heating element cycling unusually, tripped breakers or pilot issues linked to control failure, and cold spots in tank despite power and intact heating components.
Safety precautions before starting any checks
Before beginning any checks, the individual should fully power down the water heater and verify the absence of electrical supply or gas flow to eliminate shock, burn, or explosion risks.
They must allow the tank to cool, wear insulated gloves and eye protection, use a noncontact voltage tester, follow lockout/tagout procedures, guarantee proper ventilation for gas units, and keep combustible materials clear.
Quick Checklist: Tools and Materials Needed
A concise checklist helps guarantee the thermostat inspection proceeds safely and efficiently.
Essential tools include a multimeter, screwdriver set, voltage tester, and nut driver, while optional aids may include an insulation blanket, a replacement thermostat, and the owner’s manual.
Personal protective equipment such as safety glasses, insulated gloves, and work boots should be on hand before beginning.
Essential tools (multimeter, screwdriver, voltage tester, nut driver)
Gathering the right tools assures the thermostat check proceeds safely and efficiently.
Recommended essentials: a digital multimeter for continuity and voltage readings; a flathead and Phillips screwdriver to remove access panels and adjust terminals; a non-contact voltage tester to verify power is off; and a nut driver set to loosen element or terminal nuts.
Each tool assures accurate diagnosis and safe handling.
Optional aids (insulation blanket, replacement thermostat, owner’s manual)
With the basic tools in place, consider a few optional aids that simplify testing and extend heater life: an insulation blanket to reduce standby heat loss and improve recovery time, a compatible replacement thermostat sized for the unit in case diagnostics indicate failure, and the owner’s manual for model-specific wiring diagrams and factory settings.
These items save time, clarify procedures, and enable immediate component replacement when faults are confirmed.
Personal protective equipment and safety gear
Several essential pieces of personal protective equipment (PPE) are required before working on a hot water heater to reduce risk from electricity, hot surfaces, and sharp edges.
Recommended items include insulated gloves, safety goggles, long-sleeve flame-resistant clothing, and steel-toe boots.
Additional gear: hearing protection for noisy environments, a face shield for splash hazards, and a respirator if rust, insulation fibers, or chemical fumes are present.
How to Prepare the Water Heater for Thermostat Inspection
Before inspecting the thermostat, the technician guarantees the heater is made safe by cutting power at the breaker for electric units and by shutting off the gas and following pilot-light procedures for gas models.
If work requires access to the tank interior or lower elements, the technician either drains the tank or isolates the water supply and relieves pressure.
Finally, access panels and insulation are removed carefully and set aside to expose the thermostat and related wiring.
Turning off power to electric models (breaker procedure)
One clear step in preparing an electric water heater for thermostat inspection is to shut off the circuit breaker that supplies the unit.
Confirm the correct breaker by labeling or tracing the panel, switch it fully to OFF, and lock or tag it if possible.
Verify power removal with a non-contact voltage tester at the heater’s access panel before proceeding.
Shutting off gas and pilot procedures for gas models
For gas-fired water heaters, preparing for thermostat inspection requires shutting off the gas supply and securing the pilot light to prevent accidental ignition.
Locate and turn the gas shutoff valve to OFF, then extinguish the pilot following the manufacturer’s instructions or gas control knob settings.
Allow combustion components to cool and ventilate the area.
Verify gas is off before accessing controls or removing panels.
Draining or isolating the tank if required
Begin by determining whether the thermostat inspection requires removing water from the tank or simply isolating it from the home’s plumbing.
If draining is necessary, attach a hose to the drain valve and direct discharge to a safe location. Open a hot faucet to relieve pressure, then open the valve slowly.
To isolate, close the cold-water inlet valve and drain minimal water from a nearby tap.
Removing access panels and insulation safely
Loosen the screws or clips securing the outer access panel and carefully pull it free to expose the thermostat area, taking care to support the panel so it does not fall or bend.
Remove any insulation covering the thermostat gently, folding or setting it aside without compressing.
Keep fasteners organized, avoid sharp edges, and wear gloves and eye protection to prevent cuts or insulation irritation.
Step-by-Step Guide to Testing an Electric Water Heater Thermostat
The technician begins with a visual inspection, noting corrosion, burned insulation, or loose wiring before applying power.
Next steps include measuring incoming voltage at the upper thermostat, checking continuity across thermostat terminals with a multimeter, and testing the lower thermostat and heating elements.
Finally, multimeter readings are interpreted to identify open circuits, shorted elements, or faulty thermostats as common failure indicators.
Visual inspection and what to look for
Before any electrical testing, a careful visual inspection identifies obvious issues that can explain thermostat problems without tools.
The inspector checks for burnt or discolored wiring, loose or corroded connections, melted insulation, water damage or rust on access panels, and tripped high-limit switches.
Panels and mounting hardware are examined for damage or improper reassembly that could affect thermostat operation.
Testing for incoming voltage at the upper thermostat
Having completed the visual inspection, attention shifts to verifying that power actually reaches the upper thermostat.
A qualified person de-energizes the unit, removes the access panel and insulation, then restores power to measure voltage at incoming L1 and L2 terminals with a properly rated multimeter.
Expected reading is roughly supply voltage; absence indicates upstream supply, breaker, or wiring issues needing investigation.
Verifying continuity on thermostat terminals with a multimeter
Proceed to check continuity across the thermostat terminals with a properly rated multimeter set to the ohms or continuity function, ensuring the heater is de-energized and access panels and insulation remain removed.
Probe the appropriate terminal pairs per wiring diagram; a closed thermostat registers near zero ohms when calling for heat, open when satisfied.
Record readings and compare to specifications; replace if readings deviate.
Testing the lower thermostat and elements
Start by confirming power is off and panels are removed.
Then focus on the lower thermostat and lower heating element as a combined system. Inspect wiring and element access screws for corrosion.
Remove element cover and test element terminals for continuity. Check thermostat connections and selector jumpers.
Reassemble securely after testing. If any component shows physical damage, replace before restoring power.
Interpreting multimeter readings and common failure signs
Interpreting multimeter readings requires understanding expected values and recognizing patterns that indicate specific failures: a functioning heating element should show low resistance (typically 5–30 ohms for common 3,000–4,500 W elements).
Thermostats should either show continuity or an open circuit depending on their set position.
A short to ground will register as near-zero resistance between an element terminal and the tank.
Readings indicating infinite resistance show open elements; very high but finite resistance suggests partial failure or corrosion.
Fluctuating or intermittent continuity points to faulty thermostat contacts; consistent short-to-ground requires element replacement.
When to adjust temperature settings vs replace thermostat
After checking element resistance and thermostat continuity, the next decision is whether the problem can be fixed by adjusting temperature settings or requires replacing the thermostat.
If settings are visibly incorrect or minor calibration drift is suspected, adjust and retest.
Replace the thermostat when readings show no continuity, rapid cycling, inconsistent temperature, burned contacts, or if adjustments fail to restore proper operation.
Step-by-Step Guide to Checking a Gas Water Heater Thermostat/Control
The section explains how the gas control valve and thermostat regulate burner operation and water temperature.
It outlines visual and odor checks for leaks or corrosion, procedures to observe pilot light behavior and thermocouple response, and steps to verify control operation including reading any diagnostic codes on digital models.
Guidance is provided on signs that require a licensed technician for safe gas control repair or replacement.
Understanding gas control valve and thermostat function
Begin by identifying the gas control valve and thermostat assembly, the combined unit that regulates pilot ignition, gas flow, and water temperature. Recognizing its components—temperature dial, pilot reset/ignition button, and safety shutoff—helps diagnose whether issues are electrical, mechanical, or user-set.
The thermostat senses tank temperature and commands the valve; the valve meters gas and includes safety thermostats/limit switches to prevent overheating.
Visual and smell checks for leaks or corrosion
Inspect the gas control and surrounding fittings visually and by scent to detect leaks, corrosion, or fuel odors that indicate a safety risk or failing components.
Look for oiliness, rust, white powder, loose connections, or wetness at joints and valves.
Note any hissing, bubbling from soapy-water tests, or persistent odors.
Record findings and isolate the appliance until a qualified technician evaluates and repairs it.
Testing pilot light behavior and thermocouple interaction
To evaluate pilot light behavior and thermocouple interaction, observe how the pilot ignites, steadies, and responds when the thermostat calls for heat. Note any flickering, sputtering, or extinguishing that may indicate weak gas flow or a failing thermocouple.
Record whether the pilot remains lit when the control knob returns from the pilot position and whether the main burner lights promptly and sustains flame.
Then, check thermocouple alignment, guarantee clean connections, and confirm that heat from the pilot keeps the thermocouple generating millivoltage sufficient to hold the gas valve open.
Replace the thermocouple if readings are low or intermittent.
Verifying gas control operation and diagnostic codes (if digital)
Several straightforward checks will confirm whether the gas control and any digital diagnostics are functioning correctly.
Inspect the control for visible damage, verify power to electronic modules, and confirm the thermostat setpoint responds when adjusted.
Observe LED or display codes, consult the manufacturer’s code chart, and record any fault numbers.
Cycle power to reset codes and note persistent or recurring errors for further action.
When to call a licensed technician for gas controls
When should a homeowner stop troubleshooting and call a licensed technician for gas control issues?
A professional is needed if there are persistent ignition failures, gas leaks (smell of gas), damaged or corroded control valves, unexplained error codes after resets, repeated pilot outage, or if required repairs involve gas line, valve replacement, or regulator work.
Permit or code-related tasks should always be handled by a licensed tech.
How to Replace a Faulty Thermostat or Control
Replacing a faulty thermostat or control begins with identifying a compatible replacement part and confirming fit and electrical ratings.
The procedure then progresses through safely removing the old unit, following manufacturer shutdown and lockout steps, and documenting wiring for later reconnection.
Reinstallation includes step-by-step wiring of the new control, reassembling insulation and access panels, restoring power or gas, and performing functional tests to verify proper operation.
Finding the correct replacement part and compatibility
Identify the exact thermostat or control model and note the heater’s make, model number, capacity, and power source before ordering parts.
Verify OEM part numbers, cross-reference aftermarket equivalents, and confirm voltage, amperage, mounting style, and sensor type.
Check connector pinouts and wiring diagrams.
Consult manufacturer compatibility charts and read user reviews for fitment issues.
Retain part return policy and warranty information.
Removing the old thermostat or control safely
With the correct replacement part on hand and compatibility confirmed, the technician prepares to remove the old thermostat or control safely.
Power is verified off at the breaker and confirmed with a non-contact tester. Protective gloves and eye protection are used.
Wiring is labeled and photographed. Mounting screws are removed, thermal insulation folded back, and the control assembly is extracted carefully to avoid damaging surrounding components.
Installing and wiring the new thermostat step-by-step
Begin by confirming power remains off at the breaker and the non-contact tester shows no voltage at the heater terminals; proceed only when the unit is electrically safe.
Mount the replacement thermostat per manufacturer orientation.
Connect wires to corresponding terminals (labelled T, R, 1/2, and ground) matching original positions.
Tighten screws, verify secure connections, and restore power briefly to test temperature control and proper operation before final checks.
Re-assembling insulation and access panels
Carefully replace the thermostat insulation and access panels after confirming the thermostat functions correctly and power is off.
Refit insulation snugly around the thermostat and wiring, ensuring no gaps or compression that could impair temperature sensing.
Secure the access panel with original screws or fasteners, align edges to prevent drafts, and verify wires remain tucked clear of panel edges and mounting hardware before restoring cover integrity.
Restoring power or gas and performing functional tests
Once power or gas supply has been safely restored and all covers are secured, the technician should proceed to verify that the replacement thermostat or control operates correctly by performing a series of functional tests.
They should restore power/gas, set desired temperature, confirm burner ignition or element cycling, observe pilot stability or heating element draw, check for proper temperature rise, and monitor for leaks or error codes.
Troubleshooting Related Components and Secondary Causes
Attention shifts to components and secondary causes that mimic thermostat failure: heating element tests and common signs that an element needs replacement, the condition of dip tubes and sediment buildup, and how wiring or tripped breakers can create intermittent heating.
The discussion will compare symptoms that point to thermostats versus tank, valve, or element problems to narrow diagnostics. Clear testing steps and replacement indicators help determine whether the thermostat, tank internals, or electrical supply is at fault.
Testing heating elements and element replacement signs
Begin by isolating power to the water heater and draining enough water to expose the lower heating element.
Use a multimeter set to ohms to test each element’s continuity; readings near manufacturer specs indicate function, infinite resistance means open.
Inspect for corrosion, blistering, or mineral encrustation as signs of failure.
Replace elements showing high resistance, leaks, or visible damage following safety protocols.
Role of dip tubes, thermostats, and sediment in inconsistent temperatures
Several common secondary issues can cause erratic hot water temperatures: a degraded dip tube, a misadjusted or failing thermostat, and accumulated sediment in the tank.
A broken dip tube mixes cold inlet water with hot supply, reducing recovery.
A thermostat that reads incorrectly causes improper cycling.
Sediment insulates heating elements and reduces capacity, causing uneven output and premature element failure.
When diagnostic problems are caused by wiring or breakers
When diagnostics point away from the tank and elements, wiring faults and tripped breakers are common culprits that can mimic thermostat or heating-element failures.
Inspecting supply wiring, junctions, and breaker status can reveal loose connections, corrosion, or a partially tripped breaker.
Verify voltage at the thermostat and elements with a multimeter, and restore or replace faulty breakers or damaged wiring before concluding thermostat replacement.
Identifying issues with thermostats vs tanks or valves
Differentiate thermostat failures from tank or valve problems by isolating symptoms and testing components in sequence.
Inspect for leaks, sediment buildup, unusual noises, and cold pockets indicating tank issues.
Check relief and inlet/outlet valves for flow or pressure anomalies.
Use a multimeter and temperature probe to confirm thermostat output.
If electrical signals are correct but heating fails, suspect tank or valve malfunction rather than thermostat.
Comparison: DIY Repair vs Hiring a Professional
When evaluating whether to attempt a thermostat check and repair, the homeowner should weigh simple, low-risk tasks against more complex, hazardous work that merits a professional. The table below summarizes common DIY-appropriate tasks, those better left to a licensed technician, and typical time and cost ranges for each approach. Choosing safely minimizes expense and prevents unnecessary damage.
| Task Category | Examples | Typical Time & Cost |
|---|---|---|
| DIY-Suitable | Replace thermostat dial, test with multimeter, adjust temperature settings | 30–90 min; $10–$50 (parts) |
| Professional-Recommended | Replace internal thermostat elements, gas valve work, suspected electrical faults | 1–3 hours; $150–$500+ |
| Risk Factors | Electric shock, gas leaks, code compliance | Variable; professional inspection often $75–$150 |
Tasks suitable for confident DIYers
Evaluating which thermostat tasks a confident DIYer can handle versus those that require a professional begins with evaluating the complexity and safety risks of the job.
Suitable tasks include inspecting wiring visually, testing thermostat continuity with a multimeter, adjusting temperature settings, replacing accessible thermostats or elements with power off, and cleaning contacts.
Documenting steps and turning off power are essential precautions.
Risks and tasks that require professional service
After outlining which thermostat tasks a confident DIYer can safely perform, it is important to recognize the limits of home repair and the specific risks that warrant professional service.
Complex issues—gas burner adjustments, pilot assembly repair, electrical control board faults, major leaks, sediment removal in sealed tanks, or suspected pressure-relief valve failure—carry safety, code, and warranty implications and should be handled by licensed technicians.
Typical cost and time estimates for DIY vs professional repair
A clear comparison of costs and time helps homeowners choose between DIY thermostat fixes and hiring a professional.
DIY: parts $10–$60, 30–90 minutes for diagnosis and replacement if skilled.
Professional: service call $75–$150 plus labor $100–$300, 1–3 hours total.
Complexity, access, and safety concerns can justify higher professional expense and faster, guaranteed completion.
Common Mistakes to Avoid When Checking or Replacing Thermostats
When inspecting or replacing a hot water heater thermostat, attention to common mistakes can prevent costly damage and safety hazards.
The most frequent errors include:
- Taking dangerous shortcuts that risk electric shock or gas leaks.
- Misreading multimeter results and misdiagnosing heating elements.
- Installing incorrect replacement parts or setting the wrong temperature.
Dangerous shortcuts that can cause electric shock or gas leaks
Skip quick fixes that bypass safety steps; they frequently lead to electric shock or gas leaks.
Technicians should never work on live circuits, remove panels without isolating power, or improvise with damaged wiring.
For gas units, do not skip shutting off the gas or test for leaks with open flame.
Avoid jury‑rigged connectors, unsecured thermostats, or ignoring manufacturer instructions.
Misreading multimeter results and misdiagnosing elements
Misinterpreting multimeter readings and wrongly attributing faults to heating elements are frequent sources of unnecessary repairs and continued downtime.
Technicians may misread open/closed circuits, ignore proper test points, or forget to isolate power, producing false element failures.
Accurate diagnosis requires correct meter settings, consistent reference points, and verifying continuity, resistance, and grounding before replacing parts to avoid costly, avoidable mistakes.
Using incorrect replacement parts or temperature settings
Choose replacements and temperature settings carefully to prevent performance issues, safety risks, and premature failures.
Using wrong thermostats, incompatible heating elements, or incorrect screws can void warranties and cause malfunction. Setting temperature too high increases scald risk and stress on components; too low invites bacterial growth.
Verify model compatibility, OEM specifications, and recommended temperature range before installing or adjusting parts.
Preventive Maintenance to Extend Thermostat and Heater Life
Routine preventive maintenance preserves thermostat accuracy and prolongs water heater life by catching issues early and reducing stress on components.
Recommended actions include simple periodic inspections and tests to verify settings and operation.
Key tasks to schedule are:
- Inspect every 6–12 months and perform basic function tests.
- Flush tank, check/replace anode rod, and manage sediment buildup.
- Add insulation and fine-tune thermostat calibration for efficiency.
Recommended inspection frequency and simple tests
Regularly inspecting the water heater and its thermostat helps catch small issues before they become failures.
Inspect visual components and wiring quarterly, testing thermostat response and temperature with a reliable thermometer.
Verify pilot or ignition operation and listen for abnormal sounds.
Perform a power-cycle and reset test biannually.
Document findings and schedule professional service if inconsistencies or safety concerns appear.
Flushing, anode rod checks, and sediment management
Flush sediment, inspect the anode rod, and manage mineral buildup to preserve both thermostat accuracy and overall heater function.
Regularly draining the tank removes grit that impairs heat transfer and causes thermostat cycling.
Check the anode annually for corrosion; replace if heavily depleted.
Use a soft-water regimen or periodic vinegar flushes in hard-water areas to reduce scale and prolong component life.
Proper insulation and thermostat calibration tips
Proper insulation and accurate thermostat calibration greatly reduce heat loss and prevent excessive cycling, extending both thermostat accuracy and tank longevity.
Insulate pipes and the tank with appropriate blankets, leaving clearances and access panels.
Verify thermostat setpoints with a reliable thermometer, adjust increments slowly, and test stability over several cycles.
Document settings and inspect insulation annually for wear or compression.
Signs It’s Time to Upgrade Your Water Heater Instead of Repairing
When a water heater is nearing the end of its expected lifespan, shows poor energy efficiency, or experiences repeated thermostat failures, replacement often makes more sense than repair.
Homeowners should weigh repair costs versus long-term savings from a newer, more efficient unit. Selecting a modern model with advanced controls and a strong warranty can reduce future maintenance and energy bills.
Age, energy efficiency, and recurrent thermostat failures
If a water heater is over a decade old, shows declining energy performance, or experiences repeated thermostat failures, replacement is often more cost-effective than repair.
Older units lose insulation, develop sediment buildup, and operate inefficiently.
Frequent thermostat faults indicate systemic wear or electrical degradation.
Upgrading restores consistent temperature control, reduces energy waste, and lowers the risk of future breakdowns from aging components.
Cost-benefit considerations for replacement
Several clear economic indicators help determine whether replacement outweighs repair for a failing hot water heater: total repair costs approaching half the price of a new unit, persistent efficiency losses that raise monthly energy bills, frequent component failures, or safety concerns such as corrosion and leaks.
Consider remaining service life, cumulative repair expense, and projected operating costs; replace when long-term savings and risk reduction exceed repair expenditure.
Selecting a modern unit with improved controls and warranties
Although the upfront cost is higher, choosing a modern water heater with advanced controls and an extended warranty can deliver clearer performance, easier maintenance, and lower lifetime operating costs.
Modern units offer digital thermostats, programmable settings, and leak-detection features that simplify diagnostics. Longer warranties reduce financial risk.
Homeowners should compare energy factors, control interfaces, and warranty terms to determine if replacement outweighs repair.
Conclusion
To summarize, the guide equips the reader with clear, practical steps to check a hot water heater thermostat, from preparation through testing for both electric and gas units. With the right tools and safety precautions, many issues can be diagnosed quickly, though some situations demand professional skill. Ignoring signs of failure is a recipe for endless cold showers, so it’s wiser to act early—either repair or replace—before small problems become catastrophes.