How to Turn On a Sump Pump Manually: Step-by-Step Guide for Emergencies
To manually turn on a sump pump during an emergency, first cut the power at the breaker and wear waterproof personal protective equipment (PPE). Open the sump pit, remove any debris, and locate the float, pull-chain, or manual override. Lift the float or manually activate it, or connect a GFCI-protected extension cord or battery to briefly run the motor. Keep an eye on the discharge and water levels, watch for any humming sounds or clogs, and ensure children stay away from the area. For detailed guidance, troubleshooting tips, and safe alternatives, continue reading.
What to Do Immediately When Your Sump Pump Fails During an Emergency
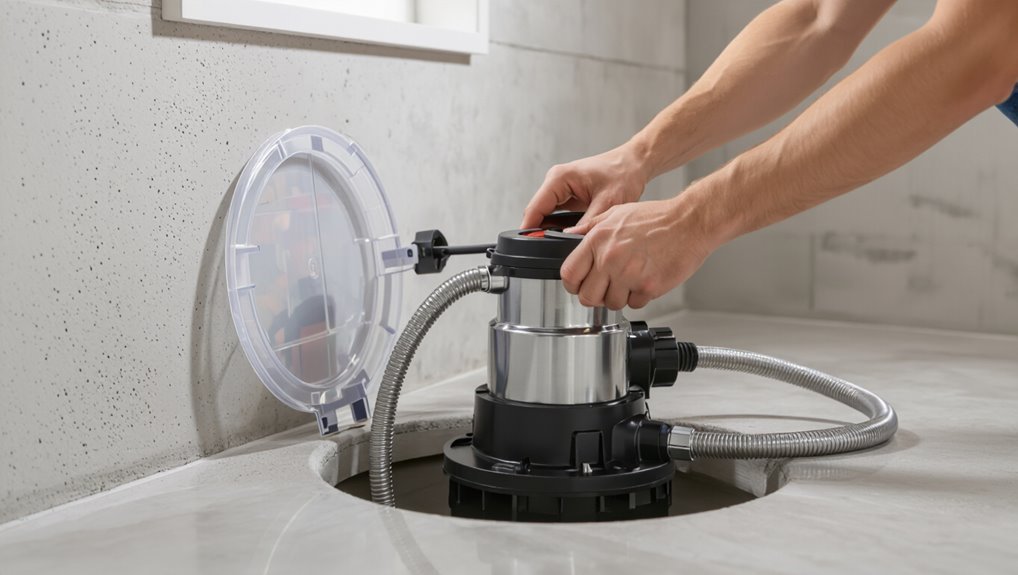
When a sump pump fails during an emergency, a concise safety checklist should be reviewed before any manual operation begins. This includes turning off power, wearing protective gear, and confirming stable footing.
Immediate signs that manual activation is required include rising water levels, audible motor silence, or visible mechanical damage.
The reader is advised to act quickly but safely, prioritizing personal safety and property protection.
Quick safety checklist before attempting manual operation
If power or the automatic mechanism fails during heavy water intrusion, prioritize personal safety and stop further water entry before attempting manual operation:
- confirm power is off at the breaker,
- wear waterproof PPE,
- guarantee dry footing and stable lighting,
- unplug damaged cords,
- keep children and pets away,
- shut valves to prevent backflow,
- and have a flashlight and phone ready.
Learn how to turn on sump pump manually.
Signs that manual activation is required now
Act swiftly upon detecting persistent water rise, unusual noises from the pump, or a non-responsive float switch—these are clear indicators that manual activation is required immediately.
Inspect for power loss, tripped breakers, or loose cords. Check backup battery status and visible blockages.
If safe, engage manual override or lift float to test discharge.
Call professional help if issues persist or water continues rising.
Tools and Supplies You Need to Manually Turn On a Sump Pump
A concise list of tools and supplies helps guarantee a safe, efficient manual startup. Essential items include gloves, waterproof boots, a flashlight, basic hand tools (wrench or pliers), and a battery or generator if power is out.
Optional items that can simplify the process are a length of hose, a bucket, and a multimeter for checking electrical connections.
Essential tools and protective gear
Several basic items are required to safely and effectively start a sump pump manually: a reliable flashlight, insulated gloves, safety goggles, a sturdy screwdriver or wrench set, and a grounded extension cord if power must be relocated.
The person should also have clear footwear and a charged phone for emergencies.
- Rubber-soled boots
- Heavy-duty work gloves
- Protective eyewear
Optional items that make the process easier
Once basic protective gear and the core tools are in place, a few optional items can simplify and speed the manual activation of a sump pump: a flashlight or headlamp for visibility, a waterproof clipboard with checklist, rubber knee pads, a battery-powered wet/dry vacuum for debris, extension cords rated for damp conditions, and a portable power bank for cordless tools or phone communication.
How a Sump Pump Works Basic Components to Know Quickly
A basic sump system includes the pump itself, a float switch that detects water level, a reliable power source, and a discharge line that carries water away.
Each component must function properly for automatic operation, and common failure points include a stuck or misadjusted float, power loss or tripped breaker, clogged or disconnected discharge piping, and a worn or seized pump.
Understanding these parts and failures helps determine whether manual activation is necessary and how to do it safely.
Pump, float switch, power source, and discharge line explained
The core components of a sump system—the pump, float switch, power source, and discharge line—work together to detect rising water and remove it from a basin.
The pump pressurizes and expels water, the float switch triggers operation at set levels, the power source (utility or backup) supplies electricity, and the discharge line conveys effluent away from the foundation to prevent basement flooding.
Common failure points that prevent automatic operation
Several common failure points can prevent a sump pump from switching to automatic operation, and recognizing them helps prioritize troubleshooting.
Float switches may jam, misalign, or become waterlogged.
Power interruptions, tripped breakers, or corroded connections stop activation.
Impeller clogs, motor failure, or damaged discharge lines and check valves prevent proper pumping.
Regular inspection and testing identify these issues early.
Step-by-Step Guide to Manually Activating a Sump Pump
The following steps guide a safe, systematic approach to activating a sump pump manually, beginning with accessing the sump pit and evaluating conditions.
They cover cutting power and visually inspecting the pump and pit, methods for triggering different float switch types, and protocols for directly powering the pump with a GFCI-protected extension or battery when necessary.
Finally, the procedure emphasizes monitoring pump operation and water level while the unit runs.
Step 1 Safely access the sump pit and assess conditions
Approach the sump area with caution and basic protective gear—gloves, eye protection, and non-slip footwear—before removing the cover to inspect the pit.
Verify stable footing and adequate lighting.
Look for standing water level, debris, floating objects, or visible damage to the pump or float.
Note unusual odors or oil sheen.
Keep bystanders clear and document observed issues for the next steps.
Step 2 Cut power and inspect visually (what to look for)
Power should be disconnected at the circuit breaker or unplugged before any closer inspection begins.
After power is removed, the pump and pit are examined for debris, mud, loose wiring, corrosion, cracks, or displaced hoses.
Check the float for entanglement and guarantee the discharge pipe is clear.
Note unusual odors, oil, or excessive rust and document visible damage before proceeding.
Step 3 Manually trigger the float switch (methods for different switch types)
With the pump safely de-energized and the pit inspected, attention shifts to manually activating the float switch to verify operation or clear a stuck mechanism.
For tethered floats, lift and lower the arm gently to confirm movement.
For vertical floats, slide the float along its guide.
For electronic or pressure sensors, consult manufacturer instructions and gently simulate activation without forcing components.
Step 4 Directly powering the pump with a GFCI-protected extension or battery (when and how)
At this stage, a technician may choose to supply electricity directly to the pump using a GFCI-protected extension or an appropriate battery when the house circuit is inaccessible or suspected to be faulty.
They confirm pump voltage and polarity, connect via a rated GFCI extension or secure battery leads, guarantee dry connections, fasten clamps, and test briefly.
Observe for abnormal noise or overheating.
Step 5 Monitor pump operation and water level while running
Start monitoring the pump and water level immediately after it is energized to verify proper operation and catch problems early.
Observe discharge flow, listen for unusual noises, and watch for cycling that is too rapid or too infrequent.
Ascertain float or sensor movement is unobstructed.
Check for leaks, clogged discharge, or overheating.
Maintain supervision until normal drainage resumes or permanent repairs are possible.
Step 6 Restore normal wiring and automatic controls after emergency
After confirming the sump pump has operated correctly and the immediate water threat is addressed, restore the original wiring and automatic controls to return the system to normal, safe operation.
Disconnect temporary manual switches, reattach float or pressure sensors, secure wiring connections, and reset circuit breakers if tripped.
Test the automatic cycle several times, verify alarms function, and document any repairs or anomalies for future reference.
Alternative Emergency Options When Manual Activation Isn’t Possible
If the sump pump cannot be started manually, a portable utility pump or wet/dry vacuum can remove standing water quickly.
A temporary gravity drainage solution, such as routing water away from the foundation with hoses or trenches, can reduce pressure until a permanent fix is made.
If flooding is severe or electrical issues are suspected, a professional should be contacted immediately.
Using a portable utility pump or wet/dry vacuum
When a sump pump cannot be activated manually, a portable utility pump or wet/dry vacuum provides a practical temporary method for removing standing water. These devices can be deployed quickly to transfer water away from the basement or into an exterior drain while awaiting professional repair or replacement.
Operators should prioritize safety, proper hose routing, and pump capacity.
- Use grounded extension cords and GFCI protection.
- Position intake above sediment.
- Direct discharge to a safe outlet.
Creating a temporary gravity drainage solution
If a portable pump or wet/dry vacuum cannot be used or has limited reach, a temporary gravity drainage solution can provide a low-tech way to move water out of a basement without power.
Position a clean, rigid hose or PVC pipe from the lowest floor point to an exterior downhill outlet. Elevate the inlet slightly above the sump to encourage flow, secure connections, and test for consistent drainage.
When to call a professional immediately
Under what circumstances should a professional be summoned immediately: situations involving rising water threatening structural elements, sewage backup, electrical hazards near the sump, or failed manual and gravity-drain attempts demand expert intervention.
A qualified plumber or pump technician assesses risk, isolates power, restores safe pumping or removes blockages, and advises on structural repairs or temporary relocation.
Prompt action minimizes damage and health hazards.
Troubleshooting Common Issues During Manual Activation
When a sump pump is activated manually but fails to clear water, several specific faults should be checked.
Common problems include a running pump that does not move water, a motor that hums or trips the breaker, a stuck or jammed float switch, and obstructions such as debris, clogs, or a frozen discharge line.
Each issue requires targeted inspection and corrective steps to restore proper operation.
Pump runs but doesn’t remove water
A sump pump that runs but fails to remove water signals a problem with flow, not power, and requires focused troubleshooting to locate the cause.
Inspect and clear inlet screen and impeller for debris, verify discharge pipe is unobstructed and not frozen or collapsed, confirm check valve operation, and guarantee pump is seated correctly in the basin.
Replace damaged components as needed.
Pump hums or trips breaker
Investigate humming or a tripped breaker as electrical or mechanical distress indicators rather than normal behavior during manual activation.
A humming motor often signals a seized impeller, worn bearings, or an electrical supply issue.
If the breaker trips, check for overload, short circuit, or damaged wiring.
Disconnect power, inspect connections and motor casing, then consult a qualified electrician or pump technician for repairs.
Float switch stuck or jammed
Check the float switch for physical obstructions or binding that prevent free movement, since a stuck or jammed float is a common cause of a sump pump failing to activate during manual testing.
Inspect the float, linkage, and surrounding pit for entanglement with cords, sediment, or warped components.
Gently free or realign the float and test operation; replace a damaged switch before relying on the pump.
Debris, clogs, or frozen discharge line
Climb into the basics of the discharge path: debris, clogs, or a frozen discharge line will prevent water from leaving the sump pit and can make the pump appear dead during manual activation.
Inspect the outlet, hose and check valve. Remove visible debris, flush with water, and clear kinks.
In freezing conditions, thaw the discharge line safely and restart the pump, monitoring flow.
Safety Precautions and Electrical Considerations
Before attempting manual activation, attention must be paid to electrical hazards around standing water to prevent electrocution.
The use of GFCI protection and properly rated extension cords should be confirmed to maintain safe temporary power.
If wiring appears damaged or the pump requires internal repairs, power should be shut off and a qualified electrician contacted.
Avoiding electrocution near standing water
Because water conducts electricity, anyone working around a flooded basement should treat all submerged or near-water electrical devices as live and dangerous.
Wear rubber-soled boots and insulated gloves, avoid touching cords or switches, and keep hands dry.
Shut off main power if reachable without stepping into water.
Use a flashlight for visibility and never operate electrical equipment when unsure of grounding or integrity.
Proper use of GFCI protection and extension cords
Guarantee all temporary power for a sump pump is routed through a GFCI-protected circuit and, if an extension cord is unavoidable, use a heavy-duty, outdoor-rated cord sized for the pump’s amperage and marked for continuous use; avoid cheater or indoor-only cords and never splice or bypass grounding.
Inspect cords and GFCI for damage, keep connections elevated and dry, and minimize cord length to reduce voltage drop.
When to shut power off and wait for an electrician
If any wiring smells of burning, sparks are visible, a GFCI trips repeatedly, or water has reached electrical panels, power should be shut off immediately and a licensed electrician contacted; these are clear signs of hazardous conditions that exceed safe DIY intervention and require professional diagnosis and repair.
Otherwise, shut power before touching pump wiring, document observations, avoid restoring power until inspected, and follow electrician guidance.
Preventive Maintenance to Reduce Future Emergencies
Preventive maintenance can greatly lower the risk of unexpected pump failure by using regular tests and a clear inspection checklist to catch wear, clogs, and electrical issues early.
Considering upgrades such as a battery or generator backup and a secondary pump provides redundancy when the primary system or power supply fails.
In colder climates, protecting and winterizing the discharge line prevents ice blockages that can render the pump ineffective.
Regular tests and inspection checklist
A concise, routine inspection schedule guarantees a sump pump will operate reliably when needed.
The checklist documents monthly and seasonal checks: visual condition, float movement, discharge clarity, and electrical connections. Record test run durations and alarm function. Immediate repairs are flagged; debris removal and lubrication are noted.
Consistent records reveal trends and prevent surprises.
- Inspect float and switch operation
- Run pump and time cycles
- Check discharge line and power connection
Upgrading to backup power or secondary pumps
Several homeowners find that adding backup power or a secondary pump greatly reduces flood risk by guaranteeing continuous operation during outages or primary pump failures.
Options include battery backup systems, generator hookups with automatic transfer switches, or a dedicated auxiliary sump pump on a separate float switch.
Professional assessment guarantees correct capacity, proper wiring, and reliable integration to maintain basement protection during power loss or primary unit malfunction.
Winterizing and protecting the discharge line
Inspecting and winterizing the sump pump discharge line before freezing weather arrives reduces the risk of clogs, ice backups, and indoor flooding.
The homeowner should insulate exposed piping, install heat tape where needed, slope the line for proper drainage, and add a solid outdoor termination above expected snow and ice levels.
Periodic checks and clearing debris prevent freeze-related failures and emergency activations.
Quick Reference: Emergency Manual Activation Checklist
Refer to this concise checklist when power fails or the automatic switch malfunctions: confirm safety (shut off nearby electrical sources and wear insulated gloves), clear the sump pit cover and visible debris, locate the manual override or pull-chain, verify the backup power source or hand-crank is ready, and assure the discharge line is unobstructed.
- Inspect pump and pit access
- Confirm backup power or tools
- Verify discharge path is clear
Comparison of Manual Activation Methods and Their Risks
Compare manual activation methods by weighing their effectiveness, required effort, and potential hazards. The article objectively contrasts pull-chain, float manipulation, portable pump, and bypass valve actions, highlighting success rates, time, physical demand, and safety concerns. Users should prefer low-risk options when possible and follow protective measures to mitigate electrical, drowning, and equipment-damage hazards.
| Method | Effort | Main Risk |
|---|---|---|
| Pull-chain | Low | Mechanical failure |
| Float lift | Medium | Misadjustment |
| Portable pump | High | Electrical shock |
| Bypass valve | Low | System damage |
Conclusion
When a sump pump fails in a crisis, rapid, informed action matters: 43% of basements experience flooding at least once over a 10‑year span, highlighting how common—and devastating—such failures can be. Following the checklist and safety steps here can stop most floods before they start. With basic tools, cautious manual activation or safe alternatives reduce damage and risk; regular maintenance dramatically lowers emergency likelihood and preserves homeowner peace of mind.