How to Remove a Stuck Hose Nozzle: Simple Fixes That Work Quickly
To quickly remove a stuck hose nozzle, first turn off the water and relieve any pressure by opening the tap or squeezing the trigger. Wear gloves and eye protection for safety. Check for issues like corrosion, mineral buildup, or cross-threading. Apply penetrating oil at the joint and let it soak. Then, try to twist the nozzle counterclockwise using a cloth for better grip. If needed, use channel-lock pliers on the nozzle and a wrench on the hose, applying steady pressure. If the nozzle remains stuck, you may need to cut and replace the hose end or consult a professional for assistance.
How to Quickly Remove a Stuck Hose Nozzle
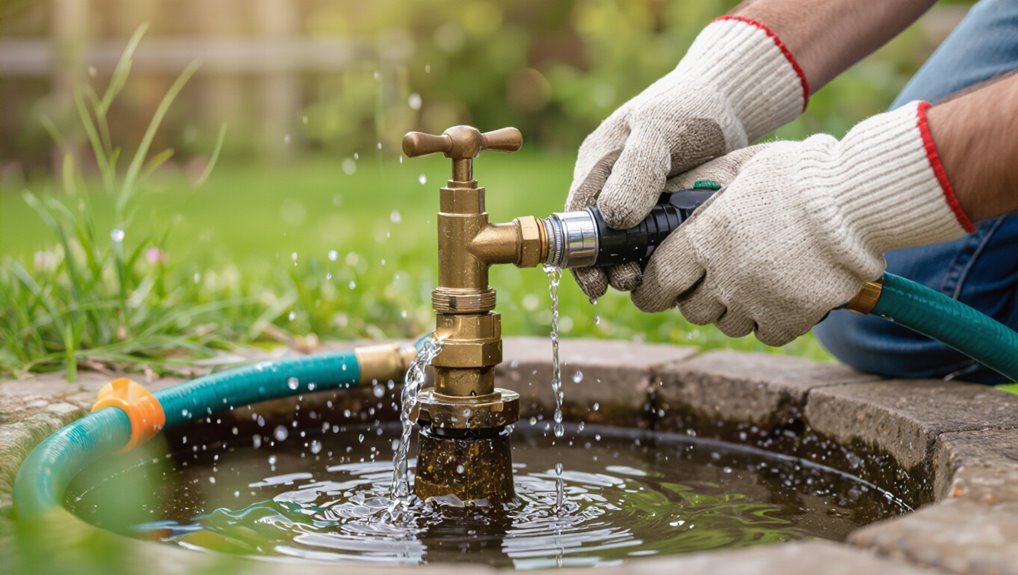
Before attempting a quick removal, the person checks for hazards such as slippery surfaces, nearby electrical equipment, and whether the nozzle or hose is hot.
They try a fast fix—gripping the nozzle with a cloth for leverage and turning counterclockwise while stabilizing the hose—stopping if excessive resistance is felt.
If resistance persists or a burst risk exists, they shut off the water supply and depressurize the hose before continuing.
Immediate safety checks before attempting removal
When approaching a stuck hose nozzle, the person should first guarantee the water supply is fully shut off and pressure is relieved by opening the tap briefly or squeezing the trigger until flow stops.
Next, they should wear gloves and eye protection, check surrounding area for electrical hazards, clear slippery surfaces, and inspect the nozzle and fittings for sharp damage.
These steps minimize injury while learning how to remove a stuck hose nozzle.
Quick method for a fast fix
After confirming the water is off, pressure relieved, and protective gear is in place, the quickest approach is to use leverage and lubrication to free the nozzle.
Apply penetrating oil at the joint, let it soak briefly, then use channel-lock pliers on the nozzle and a second wrench on the hose swivel to counteract.
Work with steady, even force until threads loosen.
When to turn off water supply and depressurize the hose
Safety dictates shutting off the water supply and relieving pressure before attempting to loosen a stuck hose nozzle.
The person should close the outdoor shutoff or faucet, then squeeze the nozzle trigger or open a downstream valve to bleed remaining pressure.
Waiting a minute guarantees no sudden sprays.
Only once flow stops should attempts to twist or apply tools proceed to avoid injury and damage.
Tools and materials you’ll need
A brief inventory of items helps prepare for removing a stuck hose nozzle. Common household supplies like penetrating oil, a pair of gloves, and adjustable pliers often suffice for light cases.
For stubborn, seized fittings, recommendable tools include a pipe wrench, vise grips, and a small torch or heat source used with caution.
Common household items that work
Gathering a few common household items can often free a stuck hose nozzle without specialty tools.
A simple kit includes items for lubrication, grip, and gentle force.
Try these:
- Vinegar or penetrating oil for loosening buildup.
- Rubber gloves or a jar opener for improved grip.
- Adjustable wrench or pliers wrapped in cloth to protect the nozzle.
Recommended tools for stubborn nozzles
Prepare a small set of reliable tools and materials to tackle a stubborn hose nozzle: penetrating oil or white vinegar to dissolve mineral deposits, a stiff-bristled brush or cloth to scrub loosened debris, rubber gloves or a jar gripper for enhanced hand traction, and an adjustable wrench or locking pliers with a cloth or rubber pad to protect the nozzle finish while applying steady torque.
- Wrench/pliers
- Penetrant/acid
- Grip/protection
Step-by-step removal techniques
The guide now outlines practical, ordered techniques for freeing a stuck hose nozzle, beginning with gentle twisting and hand methods.
It then covers using lubricants, safe application of heat to expand fittings, and careful use of pliers, wrenches, or vise grips to avoid damage.
If those fail, cutting the hose end and replacing the fitting is presented as the final option.
Gentle twisting and hand methods
Begin by evaluating how tight the nozzle is and which parts are metal or plastic to avoid damaging them.
With gloves on, grip the hose near the fitting and the nozzle firmly. Apply steady, alternating clockwise and counterclockwise twists while pulling outward.
If movement begins, continue gradual turns and gentle tension until the nozzle separates.
Inspect threads for damage afterward.
Using lubrication to loosen the connection
Apply a penetrating lubricant to the seam where the nozzle meets the hose fitting, allowing it to penetrate threads and any corrosion for several minutes.
Then work the nozzle back and forth with steady, moderate force using hand pressure or adjustable pliers with cloth protection. Reapply lubricant if resistance persists.
After loosening, spin the nozzle off smoothly, inspecting threads and cleaning residue before reinstalling or storing.
Applying heat safely to expand fittings
Heat can free a stuck hose nozzle by slightly expanding metal fittings to break corrosion or seal bind without damaging components when done carefully.
Use a heat gun or hair dryer on low, move evenly around the fitting for 1–2 minutes, then test rotation gently. Allow cooling between attempts.
Avoid open flame, plastic contact, and overheating nearby seals or paint.
Using pliers, wrench, or vice grips without damaging the nozzle
Grip the nozzle firmly with the appropriate tool—slip-joint pliers, an adjustable wrench, or vice grips—while protecting the nozzle finish and the hose fitting.
Wrap jaws with cloth or rubber, set a snug but not crushing grip, and apply steady, even torque.
Alternate slight loosening taps and gradual turning. Reposition tools to avoid round-off; stop if excessive resistance or deforming occurs.
Cutting and replacing the hose end when removal is impossible
If pliers, a wrench, or vice grips fail to free the nozzle without risk of damage, cutting off the hose end and installing a new fitting becomes the practical next step.
Measure and mark a straight cut past the corroded area, use a sharp utility knife or hose cutter, remove the damaged end, slide on a replacement ferrule and fitting, then clamp securely and test for leaks.
Preventing damage during removal
Careful protection of metal and plastic components is essential when using wrenches, pliers, or heat to loosen a stuck nozzle; wrapping jaws with cloth or using padded grips prevents scratches and deformation.
Visible signs of excessive force include bent fittings, stripped threads, cracking sounds, or sudden movement; at those signs the user should stop and switch to gentler methods such as penetrating oil, heat, or gradual tapping.
Emphasizing controlled, incremental application of torque reduces the risk of irreversible damage and preserves parts for repair or replacement.
How to protect metal and plastic parts while using tools
Protect surfaces and fittings by isolating contact points before applying force: wrap metal edges with thin cloth, use rubber pads or a piece of hose as a buffer, and place thin wooden or plastic shims between wrenches and plastic parts to distribute pressure and prevent marring.
Work patiently, use appropriately sized tools, and avoid slipping by securing grips. Inspect protective layers frequently and replace if compressed or torn.
Signs you’re applying too much force and what to do instead
After isolating contact points and cushioning surfaces, attention turns to the amount of force applied during removal; excessive force often causes stripped threads, cracked fittings, or bent components.
Indicators include sudden slipping, creaking noises, visible deformation, or stubborn resistance despite steady pressure.
Pause, reassess using penetrating lubricant, heat, or vibration, switch to leverage tools with padding, and progress incrementally to avoid damage.
Diagnosing why the nozzle is stuck
The first step is to determine why the nozzle will not budge, since causes like mineral buildup, rust, cross-threading, or simple overtightening demand different fixes.
Visual inspection and basic tests — tapping, wiggling, or applying penetrating oil — help distinguish corrosion or scale from mechanical problems such as stripped threads.
Identifying the specific symptom pattern directs the safest and most effective removal method.
Common causes: mineral buildup, rust, cross-threading, overtightening
When a hose nozzle refuses to budge, a quick inspection can distinguish between common culprits: mineral buildup will appear as white or chalky deposits around the threads or inside the fitting; rust creates reddish-brown corrosion and often fuses metal parts together; cross-threading will show misaligned or damaged thread peaks and an uneven seating; and overtightening typically leaves flattened or deformed threads and may indent the mating surface.
Mineral deposits restrict movement, rust binds parts, cross-threading prevents proper engagement, and overtightening physically distorts components, each requiring a different corrective approach.
How to identify the specific cause from symptoms
Identifying why a nozzle is stuck begins with a systematic visual and tactile inspection that narrows the possibilities outlined earlier.
Check for white crust (mineral buildup), reddish flakes or pitting (rust), misaligned threads or cross-thread gouges, and signs of excessive force or compression (overtightening).
Test rotation feel: gritty resistance suggests deposits, stiff binding suggests corrosion or cross-threading; slipping indicates stripped threads.
Cleaning and restoring the nozzle and hose connection
The nozzle and hose connection should be cleaned and restored methodically, starting with safe removal of mineral deposits and surface rust.
Threads and mating surfaces are then scrubbed, rinsed, and treated with a suitable anti-seize or plumber’s grease to prevent future galling.
After reassembly, the joint is tightened to spec and pressure-tested for leaks before regular use.
Removing mineral deposits and rust safely
Begin by evaluating visible buildup and corrosion at the nozzle and hose connection, noting white or green mineral crust, flaky rust, and stiff threads that indicate scale or oxidation.
Use a soft brush and lemon juice or white vinegar to dissolve minerals; apply a rust remover or baking soda paste for rusted areas.
Rinse thoroughly, dry completely, and inspect for damage before reassembly.
Cleaning threads and applying anti-seize treatments
Carefully clean threads on both the nozzle and hose coupling to remove remaining grit, old sealant, and microscopic corrosion that can prevent a tight, smooth connection.
Use a brass brush, solvent, and compressed air to clear debris. Inspect threads for damage; file burrs lightly.
Apply a suitable anti-seize compound or silicone-based lubricant sparingly to protect metal and ease future disassembly without affecting seals.
Reassembling and testing for leaks
Reassemble the nozzle onto the hose coupling using the cleaned threads and fresh sealant as needed, aligning threads by hand to avoid cross-threading and then tightening with the appropriate wrench until snug.
Inspect seals and replace any damaged O-rings. Gradually restore water pressure, observing connections for drips.
Tighten slightly if needed, then dry and recheck. Confirm no leaks under normal operating pressure.
When to replace parts instead of repairing
When evaluating a stuck hose nozzle, the decision to repair or replace should weigh the cost of a new nozzle, hose end, or adapter against the expected remaining service life.
Frequent leaks, severe corrosion, or damaged threads often make replacement more economical than repeated repairs.
When replacement is chosen, compatible parts—matching thread size, material, and pressure rating—should be selected to guarantee a reliable fit.
Cost vs. benefit: nozzle, hose end, and adapter replacements
Although a stubborn nozzle can sometimes be rescued with penetrating oil and patience, decisions about replacing the nozzle, hose end, or adapter should be driven by cost, time, and expected lifespan; small parts with visible corrosion, cracked plastic, or persistent leaks often cost less to replace than to repair, while higher-quality metal fittings may justify temporary fixes if replacement is expensive or supply is limited.
| Part | Typical Cost | Replace If |
|---|---|---|
| Plastic nozzle | Low | Cracked or leaking |
| Brass adapter | Mid | Severely corroded |
| Hose end | Low–mid | Threads damaged |
Choosing compatible replacement parts
Select replacement parts by matching thread type, diameter, and material to the existing hose and fittings to guarantee a leak-free, durable connection.
Inspect damaged components: replace when cracks, corrosion, stripped threads, or persistent leaks remain after cleaning.
Choose parts rated for designated pressure and UV exposure. Prefer OEM or reputable-brand brass, stainless, or reinforced polymer fittings.
Keep spare adapters and washers for quick swaps.
Tips to avoid a stuck nozzle in the future
To prevent future sticking, the article recommends consistent attachment and storage habits, such as hand-tightening only and keeping the nozzle off the ground.
A simple regular maintenance routine—flushing, lubrication of threads, and inspecting washers—keeps seals and fittings functioning.
Seasonal care like winter draining and indoor storage further reduces corrosion and freeze damage.
Proper attachment and storage habits
Establishing consistent attachment and storage habits prevents most instances of a stuck hose nozzle.
One should connect fittings straight, avoid over-tightening, and detach when not in use.
Store the hose and nozzle off the ground, sheltered from sun and freezing.
Simple routines reduce corrosion and warp.
- Tighten gently
- Detach after use
- Store protected
Regular maintenance routine and seasonal care
After adopting proper attachment and storage habits, a simple maintenance routine keeps fittings moving smoothly and prevents buildup that leads to stuck nozzles.
Regular checks, cleaning, lubrication, and seasonal prep reduce corrosion and freezing damage.
Recommended steps:
- Inspect and clear debris monthly.
- Apply silicone lubricant to threads quarterly.
- Drain and store indoors before freezing weather to prolong life and prevent seizing.
Troubleshooting uncommon problems
Occasional stubborn failures require different responses, such as repairing stripped threads or replacing cracked fittings to restore a secure connection.
If corrosion has effectively welded the nozzle to the hose, more aggressive methods or cutting may be needed while avoiding damage to the spigot.
A professional plumber should be called when structural damage, inaccessible fittings, or safety concerns exceed routine DIY repair.
Dealing with stripped threads or cracked fittings
When threads are stripped or fittings are cracked, repair requires careful assessment to determine whether the connection can be salvaged or must be replaced. The choice hinges on the extent of damage, material type, and the anticipated use (pressure, frequency, and exposure).
Minor thread damage can be chased or repaired with thread sealant or a helicoil. Severe stripping, hairline cracks, or brass fatigue warrant replacement to avoid leaks and failures.
What to do if the nozzle is welded by corrosion
If corrosion has effectively fused a nozzle to its hose fitting, the affected assembly requires patient, controlled separation rather than forceful twisting that risks further damage; loosening begins with penetrating lubricants and mechanical leverage applied carefully to avoid shearing soft metals.
Apply penetrating oil, let it sit hours, tap joints gently with a soft mallet, use adjustable wrenches with padding, and alternate lubricant and heat in short, controlled bursts.
When to call a professional plumber
Call a professional plumber when problems extend beyond basic tools or risk damaging the hose, fittings, or surrounding structure.
A plumber should handle seized fittings fused by heavy corrosion, internal valve damage, stripped threads, or leaks at joints after attempted removal.
Also seek help if hidden pipework, concrete anchors, or gas/water safety concerns are present.
Professional inspection prevents costly mistakes and guarantees reliable repair.
Conclusion
When a hose nozzle clings like a stubborn barnacle, patience and the right approach usually win. Using basic tools, gentle heat, lubrication, and steady twisting can free most fittings without harm. After removal, cleaning threads and replacing worn washers restores reliable flow; severely corroded or damaged parts should be replaced. Regular maintenance prevents future jams. With consistent care and cautious technique, a stuck nozzle becomes a brief nuisance rather than a lasting headache.