How to Purge Air From Water Lines Quickly and Safely: Step-By-Step Guide
To quickly and safely purge air from your water lines, follow these steps: Shut off the main water supply, open the lowest drain and then the highest faucet in your home. Slowly reopen the main supply to allow air to escape, then work your way through each fixture from top to bottom until water flows steadily. Always wear gloves and goggles, and isolate any pumps or tanks in the process. After purging, check for leaks and perform pressure tests to ensure everything is functioning properly.
What Causes Air in Water Lines and Why It Matters
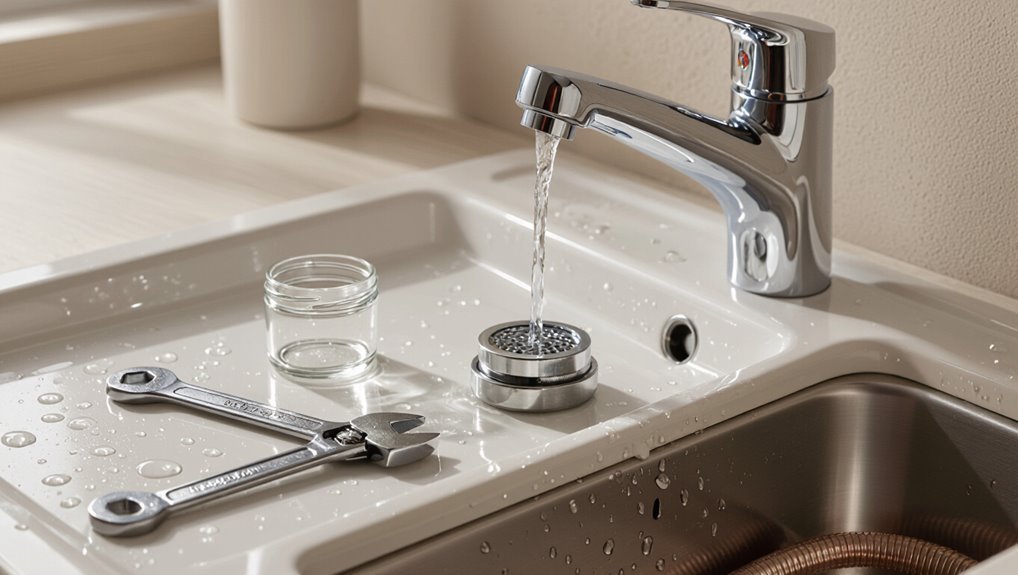
Air can enter water lines through routine maintenance, leaks, or municipal work that temporarily interrupts or introduces air into the system.
Indicators of trapped air include sputtering faucets, noisy or vibrating pipes, and reduced water flow.
If left unaddressed, air pockets can damage fixtures and cause pump cavitation, compromising system performance and longevity.
Common sources of air intrusion (maintenance, leaks, municipal work)
Gaps in seals, routine system work, and pressure fluctuations are typical entry points for unwanted pockets of gas into plumbing networks.
Maintenance tasks, burst or leaking pipes, and municipal main repairs introduce air that disrupts flow.
Understanding these sources helps homeowners and technicians prioritize responses and follow clear how to purge air from water lines procedures to restore steady, safe water delivery.
Signs you have air in the plumbing (sputtering faucets, noisy pipes, reduced flow)
A sudden change in water behavior often signals gas in the lines: faucets that sputter, pipes that clang or bang, and noticeably reduced or inconsistent flow are common indicators.
Other signs include brief bursts of air at fixtures, intermittent pressure drops when multiple taps run, and trapped-air noises after pump cycles or system work.
Prompt detection helps restore reliable service and guides purging steps.
Risks of leaving air in the lines (damage to fixtures, pump cavitation)
Entrapped gas in water lines poses more than nuisance-level problems: it can erode fixtures, accelerate valve wear, and cause pumps to cavitate, leading to reduced efficiency and premature failure.
Air pockets also cause water hammer, intermittent flow, and inaccurate pressure sensing.
Over time, repeated cavitation pits impellers, stresses seals, and increases maintenance costs; persistent air undermines system reliability and shortens equipment lifespan.
Quick Safety Precautions Before Starting Any Purge
Before beginning a purge, a checklist of tools and protective equipment—gloves, goggles, wrenches, and buckets—should be assembled.
The guide notes when to shut off power and water to appliances to prevent damage or shock.
It also outlines clear indicators for calling a professional rather than attempting a DIY purge.
Tools and protective equipment checklist
Personal protective equipment and the correct tools are essential to prevent injury and contamination during a water-line purge.
A compact checklist focuses on safety, functionality, and contamination control:
- Gloves (chemical-resistant) and safety glasses
- Adjustable wrench and pliers
- Bucket, towels, and tubing for controlled drainage
- Flashlight and non-contact voltage tester for visibility and electrical awareness
When to shut off power and water to appliances
Any time water-line work is planned, power and water to affected appliances should be shut off to eliminate shock risk and prevent uncontrolled flow.
Appliances with electrical elements—water heaters, washers, dishwashers, sump pumps—must be isolated at breakers and supply valves closed.
Drain residual water before disconnecting. Tag switches if needed and confirm status with a tester.
Restore services only after inspection and secure reconnection.
When to call a professional instead of DIY
When is professional help warranted: if the job involves complex plumbing, inaccessible valves, gas connections, significant corrosion, or unclear pipe layouts, a licensed plumber should be called.
A professional is also advised for persistent low pressure, recurring air pockets, contaminated water, or when local codes require certification.
Seeking expert assessment reduces risk, guarantees correct diagnosis, and prevents costly damage from improper DIY attempts.
Fast Step-by-Step Method to Purge Air from Household Water Lines
The following concise procedure outlines the fastest safe approach to purge air from household water lines.
It begins by preparing fixtures and notifying occupants, then locating and closing the main shutoff before opening the system’s lowest and highest points.
Reopening the main valve slowly allows trapped air to flush out, followed by a systematic sequence of opening faucets and fixtures to complete the purge.
Step 1 Prepare fixtures and notify household
Before starting, occupants should be informed and essential fixtures prepared: shut off irrigation and appliance supply valves, open a few faucets at the highest and lowest points of the house, and have towels or a bucket ready to catch water.
Check that exterior hose bibs are closed, label any isolated valves, and guarantee someone remains available to monitor flow and report unusual noises or leaks during the procedure.
Step 2 Locate and close main water shutoff
With fixtures prepared and occupants informed, attention turns to the home’s main shutoff valve.
The person locates it—common places include near the water meter, garage, basement, or exterior wall—and turns it clockwise to close.
Verify by running a faucet until flow stops. If the valve resists, use an appropriate wrench; do not force or damage the valve.
Step 3 Open lowest and highest points in the system
Open the lowest drain—typically a basement spigot or hose bib—and then open the highest faucet in the house, such as an upstairs shower or sink, to create a continuous flow path for trapped air to escape; this vertical pathway encourages air to rise and exit through the top while water drains from the bottom.
Confirm valves are fully open, check for steady trickle, and watch for sputtering.
Step 4 Slowly reopen main valve to flush air out
Turn the main shutoff valve slowly to the open position, allowing water pressure to rebuild gradually so trapped air can be pushed ahead of the flow and expelled through the open highest faucet while the lowest drain continues to discharge.
Monitor faucets and drains for sputtering; stop if pressure spikes or leaks appear.
Maintain a slow, steady opening until continuous, air-free flow is observed, then secure the valve.
Step 5 Systematic faucet and fixture purging sequence
Begin a top-to-bottom, outside-in sequence to purge remaining air from each fixture methodically.
Technician follows a set order to clear pockets efficiently.
- Open outdoor hose bibs fully to exhaust trapped air.
- Start at highest indoor fixture; open hot then cold.
- Progress downward, room-to-room, running until steady flow.
- Finish at lowest point; check for sputtering then close.
Step 6 Bleeding appliances (water heater, boiler, irrigation)
Proceed to bleed appliances next, addressing the water heater, boiler, and irrigation zones to remove trapped air that can cause noise, uneven heating, or flow interruption.
Isolate each appliance, shut off power/gas as required, open drain or bleed valves slowly until steady water flows, then close.
For irrigation, cycle zones to purge lines and vents.
Restore controls and monitor for leaks.
Step 7 Check for normalized flow and recheck fixtures
With appliances bled and controls restored, the next step is to verify that water flow has returned to normal and that no fixtures still trap air.
Inspect faucets, showers, and hose bibs for steady, sputter-free streams. Run each fixture briefly, check pressure consistency, and listen for gurgles.
If issues persist, re-bleed affected lines or consult a plumber for trapped pockets.
Alternative Rapid Methods for Specific Systems
Attention shifts to targeted rapid techniques for systems with unique requirements, including well pumps and pressure tanks.
Methods for quickly removing air from boilers and hydronic heating circuits are outlined with safety and system integrity in mind.
Procedures for flushing municipal service lines after utility work are described to restore clear, air-free flow.
Purging well systems and pressure tanks
For well systems and pressure tanks, rapid purging methods prioritize controlled depressurization and directed discharge to remove trapped air without compromising pump operation.
Technicians isolate the tank, relieve pressure slowly at a downstream faucet or hose, then cycle the pump to expel remaining air pockets.
Pressure switch settings are checked and adjusted as needed.
Safety valves and electrical isolation prevent damage and injury.
Handling boiler and hydronic heating lines
When dealing with boiler and hydronic heating lines, technicians must adapt rapid purging techniques to account for closed-loop pressures, thermostatic devices, and zone valves.
Isolate zones, depressurize per manufacturer instructions, and use proper air vents and hose fittings to force air toward automatic bleeders.
Cycle pumps slowly, monitor pressure and temperature, reintroduce makeup water via fill valves, and verify no air-induced noise or reduced flow.
Municipal service line air purge after utility work
Shifting focus from closed-loop hydronic systems to open municipal mains, crews must account for larger volumes, higher flow rates, and public safety considerations when purging air after utility work.
Procedures prioritize controlled depressurization, use of blow-off hydrants and vacuum shrouds, traffic and potable-water protection, bacteriological sampling, and coordinated valve sequencing with the utility.
Documentation and public notice complete the protocol.
Tools and Equipment for Faster, Safer Purging
A concise inventory of hand tools and compatible fittings sets the foundation for efficient purging.
The text then compares when to employ a garden hose, a vacuum pump, or dedicated air release valves based on system size and access.
Finally, guidance on using a pressure gauge explains the target readings and how departures indicate remaining air or leaks.
Recommended hand tools and fittings
Essential hand tools and fittings streamline purging, reduce risk, and speed completion: a pressure-rated purge hose, quick-connect fittings compatible with the system, a reliable pressure/flow gauge, isolation valves, and threaded adapters to match pipe materials and sizes.
Recommended toolkit includes:
- Adjustable wrench and channel-lock pliers.
- Teflon tape and thread sealant.
- Knife and tubing cutters.
- Spare O-rings and hose clamps.
When to use a hose, vacuum pump, or air release valves
Choose the right method based on pipe size, system pressure, access points, and the volume of entrained air:
Flexible purge hoses suit short runs and gravity-fed systems where a controlled bleed to a drain suffices;
Vacuum pumps are better for long mains, low-gradient sections, or when removing stubborn pockets from dead legs;
Automatic air release valves are ideal for continuous systems that trap small, recurring air pockets and require ongoing, maintenance-free venting.
Use hoses for quick flushes, pumps for deep extraction, and valves for hands-off, continuous venting; match fittings, safety, and waste handling to site constraints.
Using a pressure gauge and what readings indicate
Read a pressure gauge before, during, and after purging to verify system integrity and locate trapped air: rising, fluctuating, or slowly recovering pressures often signal air pockets, while steady pressure near expected operating levels indicates effective venting.
The technician monitors gauge trends, notes sudden drops (leaks or open vents), and confirms recovery to normal operating pressure before declaring the line purged.
How to Locate and Fix Common Underlying Causes
The next section outlines methods for locating and repairing the root causes of air in water lines.
It covers diagnosing leaks and loose fittings, checking and replacing faulty valves and air vents, and implementing a simple maintenance checklist to prevent recurrence.
Practical inspection tips and repair priorities are provided to guide efficient corrective action.
Diagnosing leaks and loose fittings
Inspecting visible pipe runs and fixtures provides the quickest clues when diagnosing leaks and loose fittings in a water system.
Technicians check joints, soldered seams, compression nuts and hose connections for moisture, corrosion or movement.
Pressure tests isolate sections; dye or tissue identifies seepage.
Tightening, resealing with appropriate thread tape or replacing damaged fittings resolves most issues.
Retest to confirm repair integrity.
Identifying faulty valves and air vents
Begin by tracing valves and air vents throughout the system to locate sources of trapped air or malfunction.
Inspect for corrosion, mineral buildup, loose connections, or stuck stems.
Test operation: open and close slowly to confirm proper sealing and venting.
Replace damaged seals, diaphragms, or spring mechanisms.
Document faulty components and their locations before restarting flow to verify resolution.
Preventing recurring air intrusion (maintenance checklist)
Establishing a routine maintenance checklist reduces the chance of air re-entering water lines by targeting common failure points—valves, vents, pump seals, and system high spots—and by setting regular inspection, cleaning, and replacement intervals.
- Inspect and tighten valves, replace worn seals.
- Clean and test air vents for proper operation.
- Bleed system high spots monthly.
- Monitor pump suction for cavitation and air leaks.
Signs Purge Was Successful and Follow-Up Checks
Successful purging is typically evident when faucets maintain steady flow and the characteristic sputtering or gurgling stops.
The technician then verifies appliances by confirming the water heater and pump operate normally without air-related noise or pressure fluctuations.
Finally, periodic checks over the following days guarantee bubbles do not reappear, indicating the underlying issue has been resolved.
Flow rate and sound checks
Once the purge is complete, verify results by observing steady flow rate and listening for consistent, water-only sounds; any sputtering, gurgling, or irregular pressure indicates remaining air.
Check multiple fixtures sequentially—kitchen, bathroom, outdoor spigots—confirming uniform pressure and continuous streams.
Note transient noises settling within a minute.
If irregularities persist, repeat bleeding at affected valves before concluding the purge successful.
Verifying appliance operation (water heater, pump)
Confirm operation of the water heater and any circulation pump by observing steady startup behavior, normal operating sounds, and expected temperature and pressure readings.
Verify no rapid cycling, unusual noises, leaks, or pressure spikes.
Check hot water delivery at fixtures for consistent temperature and flow.
Inspect pump wiring and mounts for vibration.
Record readings and restore panels or covers, noting any anomalies for service.
Monitoring for reappearance of air over time
Although initial flushing and checks may eliminate most trapped air, ongoing monitoring is necessary to guarantee it does not return.
Technicians should schedule periodic inspections of fixtures, valves, and air separators over the days and weeks following the purge.
They should note gurgling sounds, sputtering taps, pressure fluctuations, or slow flow.
Document findings, re-bleed affected sections promptly, and confirm stable pressure and smooth flow before closing the job.
Common Mistakes and How to Avoid Them
Common errors during a purge include opening fixtures in the wrong order, which can trap air pockets, and over-pressurizing lines or forcing valves, which risks damage.
Failure to protect appliances and sensitive fixtures can allow debris or pressure surges to cause malfunctions.
Addressing these specific mistakes with proper sequencing, gentle pressure control, and protective measures prevents most post-purge problems.
Opening fixtures in the wrong order
When fixtures are opened in the wrong sequence, trapped air can be forced deeper into the system or create pressure surges that prolong sputtering and slow bleeding.
Technicians should open lowest fixtures first, then work upward, and vent main shutoffs before isolated taps. Following a logical order minimizes backflow of air, shortens purge time, and prevents repeated cycles of noisy, intermittent flow.
Over-pressurizing lines or forcing valves
After opening fixtures in the proper sequence, care must be taken not to over-pressurize lines or force stubborn valves. Excessive pressure can stress joints, burst fittings, or damage regulators.
If a valve resists, stop and inspect for debris, corrosion, or damaged seals. Use gradual pressure adjustments, pressure relief valves, and proper tools.
When uncertain, consult a professional to prevent costly failures.
Neglecting to protect appliances and sensitive fixtures
Because pressure spikes and sudden flow changes can travel through the system, appliances and sensitive fixtures are at risk during air purging if they are not isolated or protected.
Failure to shut off or disconnect dishwashers, water heaters, filtration units, and pressure regulators can cause damage.
Use isolation valves, temporary bypasses, and slow-opening procedures to prevent stress, leaks, and costly repairs.
Cost, Time Estimates, and When to Hire a Pro
A typical home purge takes between 30 minutes and two hours depending on the system size and number of affected fixtures.
DIY costs are generally limited to basic supplies and minor parts, while hiring a professional can run substantially higher but includes diagnostics and guarantees.
Immediate professional help is recommended for persistent pressure loss, contaminated water, or suspected pipe damage.
Typical time to complete a home purge
For most single-family homes, a full purge of potable water lines typically takes between one and three hours when performed by an experienced homeowner or plumber, though factors like house size, number of fixtures, and the presence of whole-house filtration can push that range shorter or longer.
Simple one-bath homes often finish under an hour; larger houses or systems with dead legs may require multiple hours and staged flushing.
Approximate DIY costs vs. professional service
Several common DIY purges cost between $10 and $100 in supplies and usually take one to three hours, while hiring a licensed plumber typically runs $150–$400 for a straightforward purge and may take one to two hours plus travel time.
DIY suits homeowners comfortable with basic valves; professionals add labor, diagnostic tools, and warranty.
Choose a pro for complex plumbing, unfamiliar systems, or persistent issues.
Red flags that warrant immediate professional help
When unusual symptoms appear—such as continuous hissing from pipes, water spurting from faucets, muddy or discolored water, sudden pressure loss across multiple fixtures, or visible leaks and pooling—homeowners should stop DIY attempts and call a licensed plumber immediately.
These signs often indicate serious issues (ruptured pipes, backflow, contamination, or failing mains) that can rapidly increase repair costs and water damage if not professionally assessed.
Expect higher hourly rates, possible emergency fees, and same-day service timelines; budget for immediate diagnosis plus parts and repairs.
Useful Reference Tables and Quick Checklists
The article provides a concise quick purge checklist for homeowners, listing required tools, step-by-step actions, and safety reminders.
It also includes a compact troubleshooting guide for common flow problems that may persist after purging, with likely causes and targeted fixes.
Readers are directed to reference tables that summarize valve types, typical purge times, and pressure ranges for easy comparison.
Quick purge checklist for homeowners
A concise checklist helps a homeowner complete an air purge quickly and safely by listing required tools, step-by-step valve actions, pressure checks, and safety precautions. Follow items in order, wear protection, relieve pressure, open purge points, bleed air, confirm flow and normal pressure.
| Item | Action |
|---|---|
| Tools | Wrench, bucket, rags |
| Steps | Isolate, bleed, verify |
Troubleshooting flow problems after purging
After completing the quick purge checklist, homeowners may still notice reduced or uneven water flow.
This section outlines concise troubleshooting steps and reference tables to identify common causes and remedies.
Follow a short diagnostic sequence and consult tables for symptom–cause–fix pairs.
- Check individual fixtures for isolated blockages.
- Inspect supply valves and meter for partial closure.
- Verify pressure at main line.
- Refer to table for sediment, air, or equipment failure fixes.
Conclusion
They review the methodical steps and safety checks, weighing whether the common theory — that swift, forceful flushing always solves air-bound lines — holds true. Evidence shows rapid purges often relieve symptoms but can risk pressure spikes or dislodge debris. This tempered conclusion urges cautious confidence: quick purging can work when done correctly, yet skepticism and measured technique better protect plumbing and peace of mind than blind faith in speed alone.