How to Fix a Main Water Line: Step-by-Step Guide for Homeowners to Diagnose, Repair, and Prevent Future Breaks
To fix a main water line, start by identifying signs of a problem such as low water pressure, soggy areas in your yard, movement on your water meter, or discolored water. First, shut off the main water supply and cut power to avoid electrical hazards if there’s flooding. Protect your belongings from potential water damage.
Next, diagnose the issue using pressure tests, acoustic listening devices, or a camera inspection. For small leaks, you can apply temporary clamps or epoxy. If you find significant damage, replace the affected sections using compatible fittings and conduct a pressure test before backfilling. In cases of widespread corrosion, consider a full replacement and consult professionals for permits and licensed assistance.
For detailed step-by-step procedures, cost estimates, and prevention tips, continue reading.
What Causes Main Water Line Breaks and Leaks
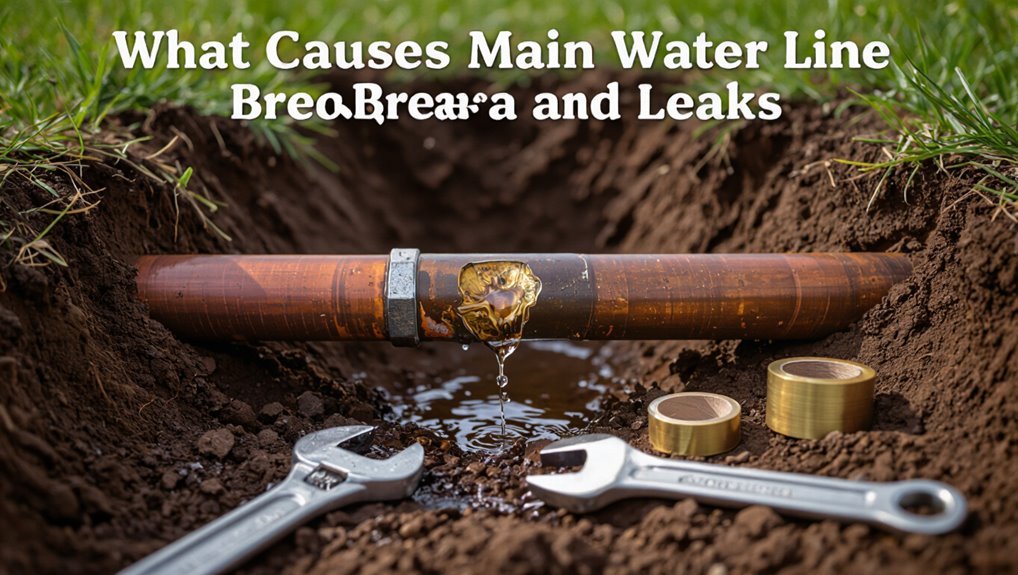
Main water line breaks and leaks most often stem from aging pipes, corrosion, invasive tree roots, freezing, or ground movement.
Typical signs include low water pressure, soggy or unusually green patches in the yard, erratic water meter activity, and discolored or muddy water.
Confirming the issue requires isolating the main by checking the meter and shutting off branch lines or fixtures to determine whether the problem persists at the service connection.
Common causes (age, corrosion, tree roots, freezing, ground movement)
Although often out of sight, water service lines are vulnerable to a handful of predictable forces: aging materials lose strength, corrosion eats away at metal or joins, invasive tree roots pry and crack pipes, freeze–thaw cycles cause fractures, and gradual ground movement stresses joints and fittings.
- Age: brittle pipes fail over time
- Corrosion: pinhole leaks weaken systems
- Roots: intrusion and displacement
- Freezing/soil shifts: rupture and joint separation
How to fix a main water line requires diagnosing which cause applies.
Signs your main water line is damaged (low pressure, soggy yard, water meter behavior, discolored water)
When a service line sustains damage, several telltale signs typically appear that allow homeowners or technicians to pinpoint the problem:
- Persistent low water pressure throughout the house despite closed fixtures.
- Localized soggy or sunken yard areas and unexpected pooling.
- Unusual water meter activity—running while all water is off.
- Discolored, rusty, or cloudy water indicating pipe corrosion or sediment intrusion.
How to confirm the problem is the main line versus a fixture or branch pipe
How can a homeowner distinguish a failing service line from a localized fixture or branch-pipe issue?
The homeowner isolates systems: shut off the main valve, observe the water meter for continued flow, then test individual fixtures.
Persistent meter movement or outdoor soggy areas after main shutoff indicate service-line failure.
If flow stops and only one fixture remains affected, the fault is likely a branch or fixture.
Immediate Safety and Damage-Reduction Steps
Attention focuses first on shutting off the main water at the meter or house shutoff to stop flow and limit damage.
Next, basic electrical and flooding precautions are noted, such as avoiding standing water near outlets and turning off power if flooding threatens wiring.
Finally, guidance distinguishes situations warranting an emergency plumber (major breaks, sewage contamination, or uncontrolled flooding) from those suitable for temporary DIY measures.
How to shut off the main water supply at the meter or house shutoff
Locate and close the main shutoff quickly to stop water flow and minimize further damage; the valve is typically at the water meter in a curb box near the street or on a pipe where the service enters the house.
Use a wrench or key, turning clockwise until snug. Confirm shutdown by opening an indoor faucet.
If stuck or leaking, contact the utility or a plumber immediately.
Electrical and flooding safety precautions
Before entering a flooded area, cut power to affected circuits and the main breaker if safe to do so, because water conducts electricity and live wiring greatly increases shock and fire risk.
Use insulated gloves and boots, avoid standing water near appliances, keep portable generators outdoors with GFCI protection, and ventilate to reduce gas buildup.
Label hazards and contact qualified electricians for any uncertain wiring.
When to call an emergency plumber versus DIY
After addressing electrical and flooding hazards, determining whether to call an emergency plumber or attempt a DIY repair hinges on the severity, location, and rate of the main-line leak.
Immediate professional help is required for uncontrollable flows, sewer contamination, basement flooding, or hidden leaks under slabs.
Homeowner repairs suit slow, visible, accessible leaks with shutoff capability and temporary containment measures.
Diagnosing the Location and Severity of a Main Line Break
A technician begins by assembling basic inspection tools—shovels, a pressure gauge, a handheld leak detector, and a camera—to evaluate the break site.
Systematic tests using the water meter and pressure readings help confirm active leaks and narrow their location before excavation.
For underground lines, techniques such as acoustic listening, tracer dye, hydrostatic testing, and camera inspection complement visual cues in soil and yard (soggy patches, sinkholes, displaced turf) to assess severity.
Tools and equipment for inspection (shovels, pressure gauge, leak detector, camera)
Many essential tools are used to inspect a suspected main line break: shovels and trenching tools to expose buried pipe, a pressure gauge to confirm drops and isolate affected sections, electronic leak detectors to pinpoint subsurface leaks, and a pipe camera to visually assess interior damage and blockages.
- Shovel/trencher for access
- Handheld pressure gauge (isolation use)
- Electronic/leak acoustic detector
- Push/pull pipe inspection camera
Using the water meter and pressure tests to pinpoint leaks
Several straightforward tests using the water meter and static/dynamic pressure checks can quickly narrow a leak’s location and indicate severity. The meter is observed with all fixtures off; continuous movement signals a leak.
Static pressure verifies supply baseline; dynamic pressure (with known draw) reveals drops indicating distance or size. Comparing upstream/downstream readings helps isolate the affected segment before excavation or advanced testing.
Locating underground leaks (listening, tracer dye, hydrostatic testing, camera inspection)
Following meter and pressure checks that narrow the affected segment, technicians move on to methods that pinpoint underground leaks without unnecessary digging.
Acoustic listening isolates sound signatures along pipes; tracer dye introduced at access points reveals flow paths; hydrostatic testing pressurizes sections to detect drops; and inline camera inspection confirms location, defect type, and severity, guiding targeted excavation or repair.
How to read common diagnostic signs in soil and yard
When a main line fails, visible changes in the yard and soil often provide the earliest clues: saturated, discolored patches of grass, depressions or bulging soil, unusually lush vegetation, pooled water, and persistent soft spots underfoot all indicate water migration and pressure patterns.
Noting their size, moisture gradient, and any nearby odor or temperature differences helps differentiate slow leaks from active breaks and narrows the search area for targeted excavation.
Technicians map anomalies, prioritize deeper probes where pooling and collapse risk coexist, and mark utilities before trenching.
Step-by-Step DIY Repair Options for Different Pipe Types
The section outlines practical, step-by-step DIY repairs tailored to common pipe materials, including fixing small leaks in above-ground galvanized or copper lines and handling PVC/CPVC both above and below grade.
It covers when to use repair clamps, epoxy putty, or rubber sleeve patches and when a full section replacement is required.
Guidance also includes excavation, cutting and coupling techniques, and replacing deteriorated joints and fittings.
Repairing small leaks in galvanized or copper lines above ground
Begin by isolating the affected section and shutting off water to the line to prevent further damage and guarantee a dry workspace.
For galvanized or copper, clean and dry the area, remove corrosion, then apply a proper-sized compression sleeve, pipe clamp, or epoxy putty per manufacturer instructions.
Tighten fittings gradually, pressure-test slowly, and recheck for drips.
Replace compromised segments if leakage persists.
Repairing PVC and CPVC main lines above and below ground
Identify the break, shut off service, and clear the work area before attempting repairs on PVC or CPVC main lines above or below ground.
Cut out damaged sections with a fine-toothed saw, deburr and clean pipe ends, dry thoroughly, and use solvent cement for PVC or manufacturer-recommended CPVC cement.
For buried lines, excavate to stable bedding, support restored joints, backfill in layers, and test under pressure.
Using repair clamps, epoxy putty, and rubber sleeve patches
After isolating the damaged section and clearing the workspace as previously described, homeowners can consider temporary or semi-permanent fixes using repair clamps, epoxy putty, or rubber sleeve patches.
These options suit small leaks, avoided excavation, and quick restores; select materials compatible with pipe type and pressure rating.
- Clean and dry area thoroughly
- Choose clamp/patch sized to pipe
- Follow cure times precisely
- Pressure-test before backfill
Replacing a damaged section: digging, cutting, and coupling techniques
When the leak or damage is too large for clamps or patching, the homeowner can replace the compromised section by excavating to expose a clean length of pipe, cutting out the defective portion, and joining new pipe with appropriate couplings or fittings.
Techniques differ by material—PVC, copper, PEX, and galvanized steel each require specific cutting methods, connector types, and pressure-tested joints—so select tools and fittings rated for the pipe material and local water pressure before proceeding.
Trench depth, pipe support, clean cuts, deburring, primer/solvent for PVC, soldering or compression for copper, crimping for PEX, and thread/adapter use for steel guarantee reliable, pressure-tested connections.
Replacing deteriorated pipe joints and fittings
Replacing a damaged section often exposes adjoining joints and fittings that have corroded, cracked, or loosened over time.
Repairing those connections can restore system integrity without replacing entire pipe runs. Assess material—copper, PVC, PEX, or galvanized—then select compatible fittings and seals.
Remove damaged components, deburr and clean ends, install new joints with proper connectors, torque or crimp to spec, pressure-test before backfill.
When and How to Replace an Entire Main Water Line
Clear signs that repair is insufficient—widespread corrosion, repeated failures, low pressure throughout the property, or contamination—indicate a full main replacement is needed.
The decision requires planning the route around easements and utilities, choosing between trenchless and open-trench methods, selecting appropriate materials (PEX, PVC, copper, HDPE) with their tradeoffs, and ensuring code compliance.
A typical replacement follows a sequence of locating utilities, permitting, excavation or bore installation, pipe installation and connections, pressure testing, backfill, and restoration.
Signs you need full replacement rather than repair
If recurring leaks, widespread corrosion, or frequent low-pressure complaints persist despite repeated repairs, a full main water line replacement should be considered.
Indicators include multiple failure points along the run, deteriorated pipe material (pinholes, flaking, severe pitting), chronic contamination or sediment problems, age beyond expected service life, and repair costs approaching or exceeding replacement.
A clear, documented failure pattern justifies replacement.
Planning the replacement route (easements, utilities, code requirements)
Because a main water line crosses public and private land, careful route planning must verify easements, locate underground utilities, and meet local plumbing and zoning codes before excavation begins.
A professional utility locate reduces strike risk. Confirm ownership boundaries, obtain permits, and coordinate with municipal authorities.
Specify depth, materials, and backfill standards per code. Document approvals and as-built locations for future reference.
Trenchless options vs open-trench replacement
When is a trenchless method preferable to open-trench replacement depends on site constraints, pipe condition, and budget. Trenchless suits limited access, minimal landscaping disruption, and continuous roadways; open-trench fits complex routing, severely collapsed pipes, or lower material costs. Contractors evaluate soil, obstacles, and permits before selecting method.
| Trenchless | Open-trench |
|---|---|
| Less surface damage | Lower equipment cost |
| Faster in some sites | Easier for complex repairs |
Typical materials for replacement (PEX, PVC, copper, HDPE) and pros/cons
Choosing between trenchless and open-trench methods often hinges on the existing site and pipe condition, but material selection for the replacement influences long-term performance, installation technique, and cost.
- PEX: flexible, corrosion-resistant, easier install; limited UV exposure tolerance.
- PVC: inexpensive, rigid, chemical-resistant; brittle in cold ground.
- Copper: durable, antimicrobial; costly, corrosive in acidic soils.
- HDPE: very durable, ideal for trenchless; requires fusion tools.
Step-by-step overview of a full-line replacement process
Begin by evaluating the scope: a full-line replacement entails isolating the service, verifying property boundaries and permits, locating existing utilities, selecting an appropriate replacement material and method (trenchless or open-trench), and scheduling equipment and qualified crew.
Next, shut water, excavate access, remove old line, install new pipe with proper slope and fittings, pressure-test, disinfect, restore backfill and surfaces, reconnect and inspect.
Working with Professionals: Hiring, Permits, and Costs
Selecting the right plumber or contractor begins with verifying licenses, insurance, references, and examples of past main-line work.
Questions should cover timeline, materials, trenching vs. trenchless methods, warranty, and a written estimate that itemizes labor, parts, permits, and contingency.
The homeowner should confirm required permits and inspections, understand local code implications, and review typical cost ranges and factors—soil type, line length, access, and method—before signing a contract.
How to find and vet qualified plumbers and contractors
Where should a homeowner start when a main water line repair exceeds DIY skills?
Begin with licensed plumbers and contractors listed by local licensing boards and trade associations.
Check insurance, bonding, and recent references; verify experience with mains and trenching.
Review online ratings and complaint histories, request proof of permits and inspections, and prefer firms offering written warranties and clear timelines.
Questions to ask contractors and what estimates should include
How should homeowners probe a contractor’s qualifications and proposal to guarantee a main water line repair is done correctly and without hidden costs?
A concise checklist and clear estimate prevent surprises: request license and insurance proof, itemized labor and material costs, timeline and payment schedule, warranty details and change-order terms.
Compare multiple bids and demand written contracts.
- License and insurance verification
- Itemized estimate
- Timeline and payment terms
- Warranty and change-order policy
Permits, inspections, and local code considerations
After verifying licenses, insurance, and obtaining detailed bids, homeowners must address permits, inspections, and local code requirements before work begins.
Contractors should pull necessary permits, schedule required inspections, and follow local utility notification rules. Compliance guarantees safety, avoids fines, and preserves warranties.
Homeowners should request permit copies, inspection reports, and documentation showing work meets municipal standards prior to final payment.
Typical cost ranges and factors that affect price
Cost is the primary practical concern for most homeowners considering a main water line replacement, and it typically ranges widely depending on project specifics. Typical costs depend on pipe length, material, access difficulty, permit fees, and labor. Below is a concise cost-factor breakdown.
| Factor | Typical Impact |
|---|---|
| Pipe material | Moderate–High |
| Excavation depth | High |
| Labor rates | Moderate |
| Permits/inspections | Low–Moderate |
| Access/landscape repair | High |
Preventing Future Main Line Failures
Preventing future main line failures begins with routine maintenance such as regular inspections, pressure monitoring, and winterization to catch issues early.
Thoughtful landscaping—using root barriers and appropriate tree placement—reduces root intrusion risk, while soil management and corrosion controls like protective coatings or cathodic protection extend pipe life.
Upgrading to corrosion-resistant materials and installing pressure-regulating devices further lowers the chance of recurrence.
Routine maintenance actions (inspections, pressure monitoring, winterization)
Regularly inspecting the main water line, monitoring system pressure, and taking seasonal precautions like winterizing exposed pipes form the core of routine maintenance that reduces the risk of catastrophic failures.
Homeowners should schedule checks, log pressure readings, and address minor leaks promptly to prevent escalation.
- Visual inspections for corrosion and leaks
- Install and read pressure gauges regularly
- Insulate and heat vulnerable sections
- Maintain clear access to shutoff valves
Landscaping best practices (root barriers, tree placement)
When planning plantings near a main water line, homeowners and landscapers should prioritize species selection, placement, and physical barriers to keep roots from contacting pipes.
Choose shallow-rooted, noninvasive plants; locate trees and large shrubs at least 25–35 feet from mains depending on species; install root barriers or compacted gravel trenches between vegetation and pipe.
Maintain regular inspections and prune roots when detected.
Soil and corrosion prevention (protective coatings, cathodic protection)
Addressing soil chemistry and electrochemical attack is critical to extending the service life of buried mains.
Owners should specify durable protective coatings (epoxy, polyethylene) and guarantee continuous coverage at joints.
Impressed current or sacrificial anode cathodic protection systems mitigate corrosion where coatings are compromised.
Periodic soil testing, drainage control, and inspection maintain effectiveness, reducing leaks and prolonging pipe life without altering system pressure or fittings.
Upgrading materials and pressure-regulating devices
Having controlled soil chemistry and electrochemical attack, attention should turn to the materials and pressure-control hardware that determine a main’s long-term resilience.
Replace aging cast iron or galvanized lines with polyethylene, PVC, or ductile iron with appropriate linings.
Install a pressure-reducing valve, surge arrestor, and a backflow preventer sized to local codes.
Regularly inspect and calibrate regulators to prevent stress-induced failures.
Troubleshooting Common Repair Problems and Mistakes to Avoid
Temporary patches often fail because they do not address underlying corrosion, pressure issues, or improper material compatibility.
So long-term solutions require correct diagnosis and durable materials.
Common installation errors—poor joint preparation, incorrect pipe sizing, and inadequate support—are preventable with proper planning and adherence to codes.
If unexpected soil conditions, recurring leaks, or complex fittings appear, the project may exceed DIY scope and a licensed plumber should be contacted.
Why temporary fixes fail and how to make reliable repairs
Quick fixes often fail because they treat symptoms instead of causes: a patched crack, wrapped joint, or clamp may stop visible leakage briefly but leaves underlying issues—corrosion, ground movement, tree roots, or pressure anomalies—unresolved.
Reliable repairs diagnose and address root causes, use proper materials and fittings, restore correct pipe alignment and bedding, and test for pressure stability and leaks before backfilling to prevent recurrence.
Common installation errors and how to prevent them
Many installation mistakes stem from poor planning, improper materials, or shortcuts during trenching and jointing; recognizing these common errors—incorrect pipe sizing, inadequate bedding, mismatched fittings, insufficient corrosion protection, and improper pressure testing—prevents repeated failures.
Proper prevention includes verifying pipe type and diameter, compacting stable bedding, using approved compatible fittings and seals, applying corrosion barriers, and conducting systematic pressure and leak tests before backfilling.
When DIY turns into a costly project red flags to stop and call a pro
Recognize when a home plumbing repair exceeds amateur skill: persistent low pressure after multiple fixes, repeated leaks at the same joint, sudden soil movement or sinkholes near the line, discovery of corroded or crumbling pipe material, and inability to isolate the main without shutting off water to the entire property are clear red flags.
In such cases, stop, secure water, document conditions, and contact a licensed plumber for assessment and safe repair.
Cost-Saving Strategies and Financing Options
When considering repairs to a main water line, the homeowner should weigh the upfront and long-term costs of DIY work, partial fixes, and full replacement to determine the most economical course.
They should also review insurance policies, warranty terms, and possible reimbursement routes to see what expenses might be covered.
If out-of-pocket costs are prohibitive, available financing options and payment plans can spread the burden for major repairs.
Comparing DIY, partial repair, and full replacement economics
Although upfront costs vary widely, evaluating whether to attempt a DIY repair, opt for a partial fix, or invest in full replacement hinges on accurate assessment of pipe condition, long-term risk, and available financing.
DIY saves labor but risks missed damage; partial repairs balance cost and longevity; full replacement maximizes reliability and resale value.
Compare lifetime costs, downtime, and contractor warranties before deciding.
Insurance coverage, warranties, and reimbursement tips
After weighing DIY versus partial or full replacement, homeowners should next examine how insurance, warranties, and reimbursement options can offset costs and reduce financial risk.
Review policy specifics for subterranean pipe coverage, claim limits, and deductibles. Check manufacturer and contractor warranties for transferable terms and duration.
Document damage thoroughly, obtain itemized receipts, and pursue reimbursements promptly to maximize recovery and avoid denial.
Financing choices and payment plans for major repairs
Several financing routes exist to cover major main-line repairs, each with distinct costs, timelines, and eligibility criteria.
Homeowners may use emergency savings, personal loans, home equity lines of credit (HELOCs), credit cards, contractor payment plans, or municipal assistance programs.
Compare interest rates, fees, repayment terms, and tax implications.
Prioritize low-cost, fixed-rate options and read contracts closely to avoid hidden charges.
Examples and Case Studies
The section presents concise real-world examples to illustrate repair options and outcomes.
One case describes fixing a localized crack with a targeted patch.
Another outlines a trenchless full replacement procedure step by step.
A third documents a long-term maintenance program that prevented repeat failures.
Readers are shown practical results, timelines, and lessons applicable to similar situations.
Short repair example: fixing a localized crack
A homeowner noticed a slow but steady drip from a visible hairline crack in a PVC main line near the foundation and called a licensed plumber to perform a quick, localized repair.
The plumber shut off water, cleaned and dried the area, applied a repair coupling with appropriate size and solvent, pressure-tested the joint, restored service, and recommended monitoring plus scheduled inspection to guarantee no further deterioration.
Full replacement example: trenchless installation walkthrough
Many homeowners opt for trenchless main-line replacement when localized fixes no longer suffice or when aging infrastructure requires full renewal. This walkthrough traces a typical project from initial assessment and permitting through locating utilities, drilling and pipe bursting or slip-lining, to pressure testing, backfill, and final inspections, highlighting decision points, timelines, and common contractor practices.
The example covers site prep, equipment staging, disruption minimization, warranty terms, and cost breakdowns.
Long-term maintenance success story
Longevity often hinges on consistent attention: a suburban municipality documented fifteen years of reduced main-line failures after instituting a scheduled inspection-and-flushing program, targeted cathodic protection on sections with metallic joints, and a homeowner education campaign about tree-root management.
Data showed fewer emergency repairs, lower repair costs, and extended pipe life.
Replicable metrics and clear responsibilities facilitated adoption by neighboring districts.
Quick Reference Checklists
The article presents three concise checklists to guide response and repair of a main water line: an emergency shutoff and safety checklist, a pre-repair diagnostic checklist, and a post-repair inspection and testing checklist.
Each checklist is organized for quick reference so responders can act methodically under pressure. Together they guarantee safety, accurate diagnosis, and verification of a successful repair.
Emergency shutoff and safety checklist
Several clear steps confirm a swift, safe response when a main water line fails: locate the main shutoff valve, cut power to affected areas if flooding is present, and isolate appliances and fixtures to prevent backflow.
A concise emergency checklist confirms safety, minimizes damage, and readies the scene for repairs.
- Turn off main water valve
- Cut electrical power if water reaches outlets
- Move valuables and furniture
- Shut off appliance supply lines
Pre-repair diagnostic checklist
Before any repair begins, a brief diagnostic checklist guides assessment of the main water line to determine scope and required tools.
The technician notes visible leaks, water pressure anomalies, soil disturbance, and material type to plan intervention and safety measures.
- Confirm shutoff valve function and isolation points
- Inspect visible piping and fittings for corrosion
- Note water meter readings and pressure
- Photograph damage and site conditions
Post-repair inspection and testing checklist
Once repairs are complete and isolation valves are returned to service, a concise post-repair inspection and testing checklist verifies integrity, function, and compliance with site documentation.
The checklist verifies pressure stability, leak absence, water quality, and system routing. Record findings, restore landscaping, and confirm permit closure where required.
- Check for visible leaks and seepage
- Verify stabilized system pressure
- Test water clarity, odor, and flow
- Confirm as-built documentation and permits
Conclusion
The home’s water line, once a hidden artery, becomes a cracked river whose repair restores more than flow. Like gardeners tending roots, homeowners who diagnose, patch, or replace the main line rescue the house’s pulse and prevent future droughts. Each tightened joint, replaced section, and learned precaution acts as a stitch mending fabric worn by time. In the end, careful maintenance transforms fragile plumbing into a quietly resilient backbone, sustaining everyday life.