How to Make a Soaker Hose: DIY Step-by-Step Guide for Even Garden Watering
Creating a DIY soaker hose is a simple and effective way to water your garden evenly while minimizing evaporation and runoff. To make one, start by selecting a base—such as an old garden hose, porous tubing, or a fabric line. Next, plan your layout and measure the lengths needed for your garden beds. Drill or punch evenly spaced holes in the hose, smooth the edges, and cap the ends. If necessary, connect it to a pressure regulator and filter. Finally, install your soaker hose under 2–3 inches of mulch or on the surface, test the water flow, and adjust the pressure as needed. Follow the detailed steps below for additional tips and guidance.
How a Soaker Hose Works and Why It’s Useful for Gardens
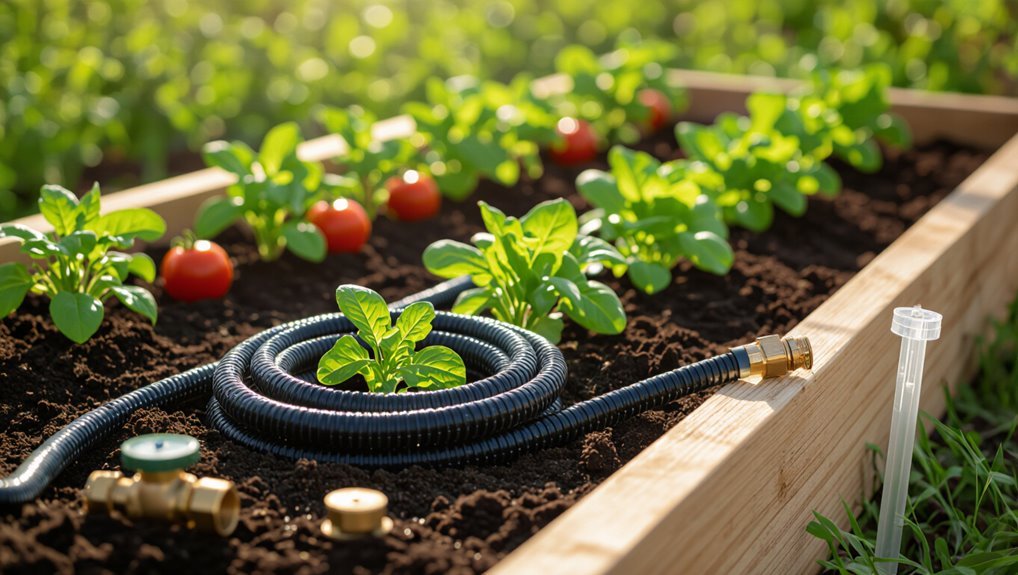
Soaker hoses deliver water through porous tubing that seeps moisture directly into the root zone, minimizing surface runoff and evaporation.
Compared with drip lines, sprinklers, and hand watering, they provide simpler, uniform wetting for larger beds while using less water and labor.
They are especially suited to vegetable rows, perennial borders, and closely planted beds where low-pressure, even irrigation is preferred.
Basic principles of seepage irrigation
Many garden irrigation needs are met by seepage systems that deliver water slowly and directly to the root zone, minimizing evaporation and runoff.
Seepage relies on capillary action and gravity to distribute moisture evenly along porous tubing or buried lines.
The guide explains how to make a soaker hose that controls flow rate, spacing, soil contact and pressure to encourage deep, efficient root uptake.
Benefits compared with drip systems, sprinklers, and hand watering
Having outlined how seepage irrigation gently delivers water to roots, the discussion now compares that method to other common watering approaches. Soaker hoses offer uniform deep watering, lower evaporation, and simplicity versus drip, sprinklers, and hand watering; trade-offs include flexibility and precision.
| Method | Efficiency | Ease |
|---|---|---|
| Soaker hose | High | Easy |
| Drip system | Very high | Moderate |
| Sprinkler/hand | Low–medium | Variable |
Ideal garden types and plant situations for soaker hoses
When planted in beds that benefit from slow, consistent soil moisture—such as vegetable rows, perennial borders, and densely mulched flower beds—a porous hose delivers water directly to root zones with minimal runoff.
It suits clay or sandy soils when adjusted for percolation, supports row crops, raised beds, shrubs, and newly planted trees, and reduces foliar wetting, making it ideal for moisture-sensitive species and water-wise landscapes.
Materials and Tools Needed to Make a Soaker Hose
For a DIY soaker hose, common hose bases include repurposed garden hose, vinyl tubing, or commercially available porous fabric tubing.
Essential tools are a drill or awl for making holes, sandpaper, tape, a hose connector, and scissors.
Optional accessories to improve performance and control include a pressure regulator, filter, hose timer, and inline valve.
Hose base options (old garden hose, vinyl tubing, porous fabric tubing)
Selecting the hose base is the first practical decision in building a soaker hose, as it determines durability, water flow, and placement options.
Options include repurposed rubber garden hoses for strength, flexible vinyl tubing for budget and easy layout, or porous fabric tubing for even seepage and gentle root watering.
Choice depends on longevity, soil contact, and desired seepage rate.
Required tools (drill, awl, sandpaper, tape, hose connector, scissors)
Prepare a small kit of basic tools before assembling the soaker hose: a drill with assorted bits to make uniform holes, an awl or heated nail for fine punctures, medium-grit sandpaper to deburr edges, waterproof tape for sealing connections, a compatible hose connector to join to the water supply, and sharp scissors to trim tubing cleanly.
Keep tools organized, inspect for wear, and choose sizes matching tubing.
Optional accessories (pressure regulator, filter, hose timer, inline valve)
A few simple accessories can improve a DIY soaker hose’s performance and longevity.
A pressure regulator guarantees steady low flow, preventing bursts and uneven seepage.
A mesh filter prevents particulate clogging.
A programmable hose timer automates watering schedules and conserves water.
An inline valve allows section control for targeted irrigation.
Select durable fittings rated for outdoor use to maximize reliability.
Planning Your Soaker Hose Layout
Careful measurement of beds and calculation of required hose length establishes the foundation for an effective layout.
Spacing and run patterns are then mapped to guarantee even coverage while accounting for water source location, pressure, and flow rate.
Finally, soil preparation and strategic plant placement are planned to maximize irrigation efficiency.
Measuring garden beds and calculating hose length
Measuring garden beds accurately is the foundation of an efficient soaker-hose layout: record each bed’s length and width, note plant spacing and rows, and sketch any irregular shapes or obstacles so total hose length and required fittings can be calculated precisely.
After measuring, sum linear distances for mainlines and laterals, add allowances for connectors and turns, and round up to account for adjustments.
Determining spacing and run patterns for even coverage
Even spacing of soaker-hose runs guarantees uniform moisture delivery across beds while preventing overwatering near emitters and dry patches between lines.
Plan parallel runs 12–18 inches apart for vegetables, 18–36 inches for shrubs, and skirt plant bases.
Use serpentine layouts for irregular beds and staggered offsets on slopes.
Account for row length, access paths, and planting density to ascertain consistent wetting.
Considering water source, pressure, and flow rate
Because water delivery determines both coverage and run length, evaluating the source, pressure, and flow rate is the first practical step in laying out a soaker-hose system.
The installer measures available psi and gallons per minute, checks for leaks or shared fixtures, and compares hose flow specifications.
Matching run length and emitter density to supply prevents weak zones; pressure regulators or splitters may be required.
Preparing soil and plant placement for efficient irrigation
A clear layout begins with soil prepared to accept slow, deep watering and plants positioned to match moisture patterns; loosened, weed-free beds and amended soil improve infiltration, while grouping species by water needs concentrates soaker lines where they are most effective.
Assess root zones, map lines to avoid drips on walkways, stagger emitters near crowns, and mulch to reduce evaporation and maintain even moisture.
Step-by-Step: Convert an Existing Hose into a Soaker Hose
The process begins with preparing and cleaning the hose to guarantee clear water flow.
Next, measured marks guide evenly spaced holes which are then drilled or punctured with care, followed by smoothing edges and testing for leaks.
Finally, the modified hose is connected to the faucet and the pressure adjusted to achieve the desired seep rate.
Preparing and cleaning the hose
Begin by inspecting the hose for cracks, blockages, or buildup that could impede water flow; clear any visible debris and note areas needing repair.
Flush the hose with running water, reversing flow if possible, until water runs clear.
Use a flexible brush or pipe cleaner for interior deposits.
Dry the exterior, trim damaged ends, and replace washers to guarantee tight, leak-free connections before proceeding.
Marking drip hole spacing and pattern
Measure and mark the hose to establish drip spacing and pattern before any puncturing occurs.
The planner selects spacing based on plant needs and water pressure — typical intervals range from 2 to 12 inches.
Use a tape measure and waterproof marker to note each spot, include end stops and straight versus staggered rows, and double-check alignment along the entire hose length.
Drilling or puncturing holes safely and consistently
Prepare a clean, level workspace and gather protective gear and tools before puncturing the hose.
The operator secures the hose with clamps or a jig, aligns a drill bit or heated probe at each mark, and uses steady, perpendicular pressure to create uniform openings.
Speed, consistent bit size, and periodic inspection prevent irregular holes.
Debris is cleared from the work area after completion.
Smoothing edges and testing for leaks
After puncturing, the operator smooths each hole to remove burrs and thin projections that can catch soil or tear under pressure. A small file or deburring tool rounds edges, preventing snags.
Next, a short low-pressure water test identifies leaks and weak spots; any failing areas are resealed with flexible waterproof tape or trimmed and reworked until the hose emits only the expected seepage pattern.
Connecting to faucet and adjusting pressure
With the hose confirmed free of burrs and patched leaks, attention turns to attaching it to the water source and setting flow.
The soaker hose is fitted to a faucet with a threaded connector and optional pressure regulator.
Gradually open the faucet, monitor seepage along the hose, and adjust regulator until a steady, even drip emerges.
Secure fittings and retest for consistent output.
Step-by-Step: Build a Soaker Line from Porous Tubing
The procedure begins with measuring, cutting, and laying porous tubing along the planting beds to guarantee even coverage.
Sections are joined and capped as needed, while manifolds and branch lines are installed to route water where required.
Filters and pressure regulators are integrated to protect the system and control flow.
Cutting and laying porous tubing
Measure and mark the porous tubing to match the garden layout, then cut each section squarely so fittings seat properly and water flows evenly.
Lay tubing along plant rows, following contours and keeping it close to root zones. Space parallel lines uniformly for even coverage, avoid kinks, and secure tubing with stakes.
Test alignment before finalizing placement and trim excess for neatness.
Joining sections and creating end caps
Several simple fittings and a good seal are all that’s required to join porous tubing and close its ends reliably.
Straight barbed couplers link cut lengths; push tubing fully onto barbs and secure with stainless clamps or crimp rings.
For corners, use 90° barbed elbows.
Create end caps by inserting a male plug or tightly crimping with a designed rubber stopper and clamp.
Installing manifolds and branch lines
Begin by laying out the manifold where water will be distributed, ensuring equal access to each branch and clear routing to planting zones.
Position manifold near main supply, fix securely, then measure and cut branch lines to reach rows or beds.
Use compatible fittings and clamps for leak-free joints.
Slope branches minimally for drainage and tag lines for maintenance access and zone control.
Integrating filters and regulators
Install a filter and pressure regulator at the manifold inlet to protect porous tubing from sediment and prevent overpressure damage.
The filter traps particulates; choose one rated for garden debris and clean or replace regularly.
The regulator reduces household pressure to the soaker’s ideal 10–25 psi.
Mount components on a stable tee, include shutoff valves for maintenance, and test flow before burying tubing.
Installation Best Practices for Even Garden Watering
The section compares burying versus surface-laying soaker tubing, noting trade-offs in water delivery, maintenance, and root access.
It also covers mulch strategies to cut evaporation and shield lines, zoning and scheduling to match plant water needs, and timing adjustments for seasonal growth cycles.
Practical tips for winterizing and adapting run times are provided to maintain even watering year-round.
Burying vs. surface-laying: pros and cons
How should gardeners choose between burying a soaker hose and laying it on the surface?
Burying reduces evaporation, protects tubing, and provides deeper root watering but complicates inspection and repositioning.
Surface-laying offers easy access, quick repairs, and visible leak detection though it risks sun damage and greater evaporation.
Choice depends on crop needs, maintenance willingness, soil type, and aesthetic preference.
Mulch use to reduce evaporation and protect tubing
Mulch serves two practical roles around soaker hoses: it cuts surface evaporation and shields tubing from sunlight and physical wear.
Applying a 2–3 inch layer of organic mulch (wood chips, straw, or compost) maintains soil moisture, moderates temperature, and prevents UV degradation.
Keep mulch clear of direct emitters to avoid clogging, replenish annually, and inspect tubing beneath for damage or pests.
Zone watering and scheduling for different plant groups
Effective zone watering groups plants by shared water needs so each area receives tailored run times and frequencies.
Separate beds—vegetables, annuals, shrubs, lawns—into distinct soaker loops and set timers accordingly.
Deep-rooted shrubs need longer, less frequent cycles; shallow-rooted annuals require shorter, more frequent watering.
Test soil moisture, adjust run times for microclimates, and label zones for easy management.
Seasonal adjustments and winterizing
After grouping and scheduling zones by plant water needs, seasonal adjustments and winterizing confirm those schedules remain appropriate as temperatures and daylight change.
Adjust run times monthly, reduce frequency during cooler seasons, and increase after heat spells.
Flush and drain hoses, disconnect and store above freezing, cap irrigation lines, and inspect emitters for clogs or damage to prevent winter freeze harm and guarantee spring readiness.
Troubleshooting Common Problems
Common soaker hose problems include uneven wetting, low flow from clogged pores, excessive pressure that causes bursts, and physical damage from rodents or sun exposure.
Clear, stepwise diagnostics—checking layout, pressure, and individual holes—quickly identify the cause.
Practical fixes range from flushing and localized cleaning to pressure regulation and patching or replacing sections with UV- and rodent-resistant materials.
Uneven wetting or dry spots and how to fix them
When a soaker hose delivers uneven wetting or leaves dry patches, the problem usually stems from inconsistent water pressure, clogged emitters, or improper hose layout; identifying which factor is at work is the first step toward an efficient fix.
Check for kinked or elevated sections, balance pressure with zone valves or reduced length, reposition hoses to follow plant roots, and add mulch to retain moisture and even distribution.
Low flow or clogged holes: diagnosis and cleaning steps
Low flow or clogged holes in a soaker hose usually result from mineral buildup, sediment, or plant debris restricting the tiny pores; diagnosing the issue starts with a systematic inspection and simple tests.
Examine hose lengthwise, flush with clean water, and run short high-pressure bursts from a hose-end sprayer.
Isolate blocked sections, soak in vinegar for mineral deposits, rinse thoroughly, and replace irreparable segments.
High pressure causing bursts: prevention and repair
Inspect the system for pressure issues before claiming a hose failure: soaker hoses are designed for low, steady flow and will burst if subjected to excessive upstream pressure from pumps, improper valves, or open faucet flow.
Reduce pressure with a regulator, add a pressure-relief valve, or install a simple irrigation timer.
For small splits, patch with hose-approved tape or a rubber splice; replace severely damaged sections.
Rodent or sun damage and durable repair options
Many soaker hoses show wear from rodents chewing or UV degradation causing cracks and brittle sections; both problems create slow leaks that reduce soak efficiency and can worsen quickly.
Inspect regularly, replace ruined segments, and apply UV-resistant tape or self-fusing silicone wrap for temporary fixes.
For lasting repair, splice with a barbed connector and hose clamps or install a short replacement length of thicker, UV-stable tubing.
Cost, Time, and Maintenance Expectations
Typical material costs are outlined alongside a brief comparison of DIY assembly versus purchasing a pre-made soaker hose to help readers weigh upfront savings and time investment.
A concise routine maintenance checklist—flushing, inspecting for clogs or leaks, winterizing—is provided with suggested frequencies.
Expected lifespans and clear signs for replacement, such as persistent clogging, brittle cracking, or uneven seepage, are summarized to set realistic expectations.
Typical material costs and DIY vs. store-bought comparison
When evaluating a DIY soaker-hose project versus purchasing a pre-made system, cost, time, and upkeep weigh differently:
| Item | DIY | Store-bought |
|---|---|---|
| Materials | Low–moderate | Included |
| Time | Moderate–high | Low |
| Cost | $10–$40 | $20–$100 |
| Customization | High | Limited |
DIY saves money and allows tailoring; prefabricated units trade convenience for higher price.
Routine maintenance checklist and frequency
Although a DIY soaker hose requires minimal daily attention, a few scheduled checks keep it functioning efficiently and extend its lifespan:
- Inspect for clogs, kinks, and leaks weekly; flush lines monthly.
- Adjust emitter spacing and flow at seasonal planting changes; check fittings each season.
- Store and drain before freezing temperatures; inspect for sun damage annually and replace degraded sections promptly.
Lifespan estimates and signs to replace the hose
Routine checks help extend a DIY soaker hose’s serviceable life, but owners should still plan for eventual replacement based on material, usage, and climate.
Expected lifespan varies: rubber blends 5–10 years, porous recycled hoses 2–6 years.
Replace when leaks multiply, flow weakens, fabric degrades, or mildew and cracking appear.
Budget modestly for periodic replacement and seasonal storage to maximize longevity.
Water-Saving Tips and Best Practices for Healthy Plants
Effective water use pairs appropriate run times with soil texture and each plant’s needs to prevent over- or under-watering.
Timers, moisture sensors, and smart controllers can automate schedules for consistency and conservation.
Integrating soaker hoses with rainwater collection and a layer of mulch further reduces runoff and evaporation while supporting plant health.
Matching watering duration to soil type and plant needs
Because soil texture and plant type determine how quickly water moves and is retained, matching soak duration to those factors prevents both runoff and stress.
Sandy soils need shorter, more frequent soaks; clay benefits from slower, longer applications to allow infiltration.
Deep-rooted perennials require less frequent, longer sessions than shallow annuals.
Monitor moisture and adjust durations seasonally for efficient, healthy irrigation.
Using timers, sensors, and smart controllers
Matching soak times to soil and plants sets the stage for automated controls that fine-tune watering with minimal waste.
Timers schedule consistent cycles; moisture sensors prevent overwatering by pausing irrigation when thresholds are met.
Smart controllers integrate weather forecasts and remote adjustments, optimizing runtime.
Selection should prioritize reliability, battery life, and compatibility with low-pressure soaker systems to guarantee healthy, efficient watering.
Combining soaker hoses with rainwater harvesting and mulching
Several simple measures—capturing rainwater, laying mulch, and routing soaker hoses—can greatly reduce water use while keeping soil moisture consistent.
Collect rain in barrels, filter debris, and connect gravity-fed lines to soaker systems.
Apply 2–4 inches of organic mulch to suppress evaporation and stabilize temperature.
Combine timed irrigation with stored water prioritization during dry spells to maximize efficiency and plant health.
Project Variations and Upgrades
The guide briefly presents options for adapting the basic soaker hose to different needs, including portable setups for containers and temporary beds.
It also suggests combining soaker lines with drip emitters to target individual plants more precisely.
Simple decorative and concealed installations are described to improve aesthetics while preserving function.
Portable soaker hose setups for containers and temporary beds
Portability transforms soaker hose systems into flexible watering solutions for containers and temporary beds, allowing gardeners to quickly rearrange, seasonally repurpose, or remove lines as needed.
Lightweight, kink-resistant tubing with quick-connect fittings facilitates rapid layout changes. Use short lengths, stakes, and manifold tees to isolate zones.
Rollable storage and modular shutoffs simplify maintenance and wintering without permanent installation.
Integrating drip emitters for individual plants
After setting up portable soaker lines, gardeners can add drip emitters to target individual plants that need precise watering. Emitters attach via barbed tees or micro tubing to the main soaker line, delivering measured flow rates.
Use adjustable or pressure-compensating emitters for seedlings, shrubs, or potted plants. Position emitters at root zones, secure tubing, and test for even distribution before final placement.
DIY decorative or concealed irrigation ideas
When gardeners want irrigation to blend with landscaping or hide tubing from view, decorative and concealed soaker solutions offer functional elegance. Routing lines under mulch, inside faux rocks, or beneath paver seams keeps water delivery discreet while preserving aesthetics.
Install shallow trenches, secure tubing with landscape staples, camouflage emitters with gravel, and use decorative covers.
Regularly inspect for clogs, roots, and wear to maintain performance.
Quick Materials Checklist and Simple Installation Guide
A concise checklist and a brief installation roadmap help gardeners prepare and act quickly on a soaker hose project.
- One-page shopping list: hose, connectors, timer, stakes, and optional mulch.
- Concise 10-step installation summary: layout, cut, connect, test, cover, and adjust.
One-page shopping list for a basic soaker hose project
One concise page lists every item needed for a basic soaker hose installation, including hose, connectors, a pressure regulator, timer (optional), stakes, a backflow preventer, hose cutter, and Teflon tape, accompanied by estimated quantities and common sizes to simplify shopping.
The sheet notes quantities, preferred diameters, and simple notes for compatibility.
- Hose, 1/2″–5/8″, length
- Connectors, 3–5 assorted
- Pressure regulator, 1 (25–30 PSI)
Concise 10-step installation summary
With the shopping list complete, the installer moves to a concise 10-step sequence that pairs a short materials checklist with straightforward actions to lay out, connect, and test the soaker hose system.
Materials: hose, connectors, timer, stakes, mulch.
Steps summarize measuring, uncoiling, routing, connecting, pressure check, securing, zoning, adjusting, mulching, and final test.
- Measure and plan
- Connect and seal
- Test and adjust
Conclusion
The guide closes by reaffirming that crafting a soaker hose delivers steady, efficient irrigation, saving water while nurturing plants. With basic tools and modest time investment, gardeners can reap long-term benefits, turning an ordinary hose into a reliable watering system. When properly planned and maintained, the setup runs like clockwork, minimizing stress on vegetation and schedules. Thoughtful tweaks and routine checks guarantee the system pays dividends season after season.