How to Find Water Pipes Underground: 7 Proven Methods for Homeowners and Contractors
To effectively locate underground water pipes, homeowners and contractors can use a combination of methods, including mapping, visual tracing, and noninvasive detection techniques. Homeowners can utilize tools like metal detectors and probes for shallow metallic lines, while professionals may employ advanced equipment such as pipe locators, ground-penetrating radar, and acoustic correlators for deeper or nonmetallic pipes. For confirmation, hand potholing or soft-dig vacuuming can safely verify targets. Always consult utility maps and contact 811 before digging to ensure safety. Continue reading for detailed methods, associated costs, and essential safety tips.
How to Locate Underground Water Pipes Quickly and Safely
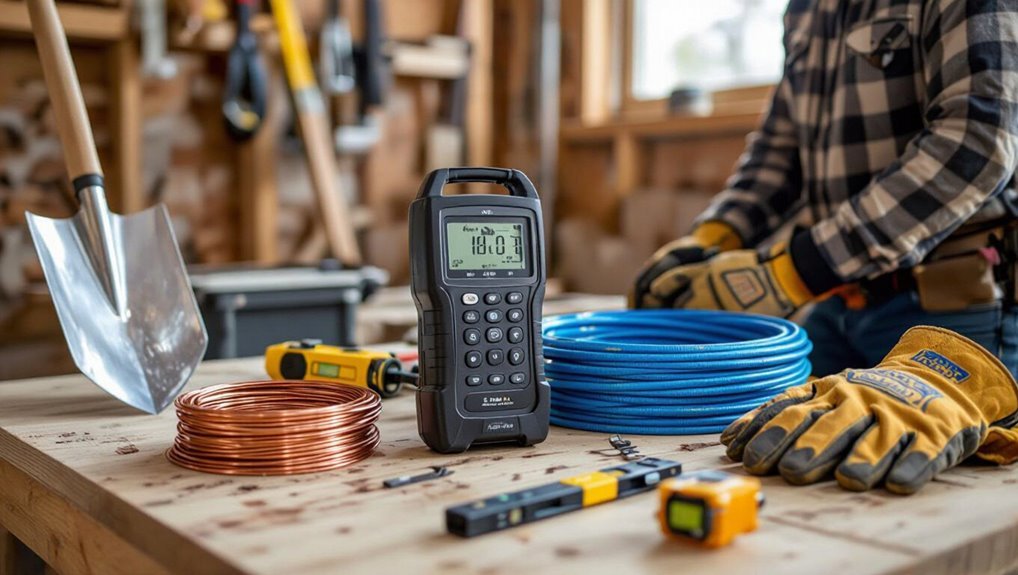
Homeowners and contractors often need to locate underground water pipes for repairs, landscaping, additions, or to avoid utility damage during excavation.
Before beginning any locating work, they must confirm property plans, call utility‑location services, and obtain required permits.
Observing safety protocols and local regulations reduces the risk of injury, service disruption, and legal penalties.
Common reasons homeowners and contractors need to find water pipes
Many repair projects, landscaping changes, and construction jobs require knowing the exact location of underground water pipes to prevent costly damage, guarantee compliance with local codes, and maintain uninterrupted service.
Homeowners and contractors seek pipe locations for repairs, additions, irrigation installations, and remodeling.
Emergency leak response, utility coordination, and accurate planning drive the need to learn how to find water pipe underground promptly and reliably.
Legal and safety precautions before you start locating pipes
Before any digging or detection begins, clear legal and safety checks must be completed: verify property utility maps or as-built plans, call local 811 or utility-locating services where required, obtain any necessary permits, and confirm right-of-way and easement boundaries.
Additionally, guarantee personal protective equipment, adhere to confined-space and trenching rules, notify neighbors if work affects shared services, and document all clearances before starting.
Quick methods to detect underground water pipes (overview)
A brief comparison outlines when a homeowner can use DIY detection and when a licensed professional should be called for safety or accuracy.
The overview summarizes fast detection methods and pairs each with a concise tools-and-equipment checklist.
Readers are prepared to weigh risks, costs, and required gear before choosing a method.
When to call a professional vs. DIY detection
How should one decide between hiring a professional locator and trying quick DIY methods? The choice depends on project scale, risk, and confidence.
Simple yard checks suit homeowners for minor tasks; complex sites, deep or uncertain utility maps, and excavation require professionals.
Call experts when safety, legal compliance, accuracy, or potential service disruption matter; opt DIY only for low-risk, verified scenarios.
Tools and equipment checklist for each method
Several straightforward toolkits match the quick detection methods commonly used by homeowners and DIYers.
Each toolkit pairs tools with a detection approach and safety items. Recommended basics include:
- Metal detector, soil probe, tape measure, spray paint.
- Acoustic stethoscope, ground microphone, headphones, marker flags.
- Handheld pipe locator or magnetic locator, batteries, gloves, charged phone for photos and notes.
Electronic and electromagnetic detection methods
Electronic and electromagnetic detection methods include step-by-step use of pipe locators with transmitters, deployment of ground-penetrating radar (GPR) where soil conditions and depth warrant it, and the application of metal detectors or magnetic locators for conductive lines.
Each technique has specific limitations and ideal use cases—GPR excels in non-metallic contexts but is costlier, pipe locators balance accuracy and ease of use, and magnetic tools are cheaper but limited to ferrous or tracer-equipped pipes.
A direct comparison of depth capability, positional accuracy, and expense helps select the appropriate method for a given site.
Using a pipe locator and transmitter step-by-step
Begin by preparing the locator and transmitter according to the manufacturer’s instructions: inspect batteries, verify connections, and select the appropriate frequency or mode for the pipe material.
Apply the transmitter clamp or direct connect, energize the line, then sweep with the receiver at consistent height and speed.
Mark strongest signals, triangulate position, confirm depth readings, and recheck along route to avoid false positives.
Ground-penetrating radar (GPR) when and how to use it
Use ground-penetrating radar (GPR) to locate buried pipes when subsurface conditions or the utility’s material limit conventional locators—GPR detects contrasts in soil dielectric properties to image pipes regardless of conductivity.
Operators survey systematic grid lines, adjust antenna frequency for depth/resolution tradeoffs, and interpret radargrams for reflections indicating pipe signatures.
Soil moisture, clutter, and depth limits affect success; professional calibration and safety checks are recommended.
Metal detectors and magnetic locators limitations and use cases
Metal detectors and magnetic locators detect subsurface metallic objects by sensing disturbances in the local magnetic field or eddy currents induced by alternating fields, making them effective for ferrous and certain nonferrous pipes near the surface.
They work best for shallow, metal-containing utilities, struggle with deep, nonmetallic lines, and are affected by soil mineralization, nearby infrastructure, and weak signal-to-noise ratios.
Comparison of electronic methods: depth, accuracy, cost
Although electronic and electromagnetic detectors share the goal of locating buried utilities, they differ markedly in depth capability, positional accuracy, and cost. Electronic locators excel with conductive tracing but vary by model; electromagnetic methods offer deeper reach with less pinpoint precision. Choice depends on budget, required depth, and acceptable error.
| Method | Depth | Cost |
|---|---|---|
| Passive EM | Low | Low |
| Active EM | Medium | Medium |
| Ground-penetrating radar | High | High |
Acoustic and flow-based detection techniques
Acoustic and flow-based detection uses listening devices and leak noise correlators to pinpoint pipe locations and leaks by measuring sound arrival times.
Pressure testing combined with valve isolation helps infer pipe routes and identify sections with flow or loss.
Acoustic methods are most effective on pressurized leaks in buried metallic or plastic pipes, while electronic methods better suit non-audible targets or complex underground infrastructure.
Listening devices and leak noise correlators procedure
Operators employ listening devices and leak noise correlators to detect and pinpoint underground pipe leaks by capturing and analyzing sound and flow-related signals transmitted through soil and pipe material.
Technicians position ground microphones or contact sensors, record noise signatures, and use correlator algorithms to calculate leak location from time-delay differences between sensors.
Calibration, noise filtering, and controlled flow adjustments improve accuracy before excavation or repair.
Using pressure testing and valve isolation to infer pipe routes
Combine controlled pressure tests with strategic valve isolation to map underground pipe routes by observing pressure changes and flow responses across a network.
Technicians close valves sequentially, apply measured pressure or induce flow, and record transient drops and stabilized readings.
Differential patterns reveal branch locations, connections, and probable depths.
Results guide targeted excavations or further acoustic/electronic investigation, reducing trial-and-error digging.
Best scenarios for acoustic methods vs. electronic methods
Having mapped probable pipe routes through pressure testing and valve isolation, technicians can decide whether sound-based detection or electronic locating will be more effective for further verification.
Acoustic methods excel on pressurized leaks, shallow pipes, and soft soils where flow noise transmits.
Electronic techniques suit metallic or tracer-equipped lines, deeper installations, and complex networks requiring precise position and depth data, often combined for confirmation.
Visual and manual inspection techniques
The inspector begins by tracing lines from visible fixtures and the meter to establish likely pipe directions.
Property easements, service lines and utility maps are consulted to refine those routes.
When uncertainty remains, controlled trial excavation or potholing is used with safe digging practices to verify locations.
Tracing from visible fixtures and meter locations
Several straightforward visual and manual inspection steps can quickly reveal the likely route of buried water pipes by following visible fixtures and the meter.
Inspect visible supply lines, shutoff valves, hose bibs and meter connections, noting alignment and depth clues. Measure distances, observe building penetrations and landscaping cuts, and probe gently with a soil knife along inferred lines to confirm continuity before using electronic locating tools.
Following easements, service lines, and utility maps
When property plans, easement lines, and utility maps are reviewed together, they provide a clear framework for predicting where buried service lines will run.
Visual inspection then confirms these predictions by matching mapped routes to visible markers such as boundary stakes, valve boxes, curb cuts, and alignment of neighboring properties’ utilities.
Inspectors note deviations, record offsets, photograph markers, and cross-reference as-built drawings to refine probable pipe locations before marking.
Trial excavation and potholing safe digging practices
Begin careful trial excavation and potholing only after all mapping, visual inspections, and locates are complete.
Crews expose utilities using soft dig methods: hand digging, vacuum excavation, or air excavation to minimize damage. They uncover pipe bedding, confirm depth and material, and document findings.
Operators use protective shoring, traffic control, and personal protective equipment, halting work immediately upon unexpected utility discovery for reassessment.
Non-invasive thermal and chemical methods
Non-invasive approaches such as infrared thermal imaging can reveal wet zones and trace probable pipe routes by highlighting temperature differences in soil and surfaces.
Chemical techniques like controlled dye testing and smoke testing can confirm leaks or conveyance paths when performed with proper containment and safety precautions.
These methods offer advantages in speed and surface coverage but have limitations versus electromagnetic detection, including sensitivity to soil conditions and difficulty locating deep or non-leaking metallic pipes.
Infrared/thermal imaging to detect wet zones and pipe routes
Using infrared or thermal imaging, technicians can locate subsurface moisture and infer buried pipe paths by detecting temperature differentials at the surface caused by leaking or flowing water.
Portable thermal cameras map anomalies quickly, guiding further investigation. Results depend on soil conditions, depth, time of day, and recent weather.
Thermal surveys are noninvasive, best combined with ground-penetrating radar or acoustic methods for confirmation.
Dye testing and smoke testing how to perform safely
Thermal imaging can indicate likely leak locations, but confirmatory tests often require marking flow paths more directly; dye testing and smoke testing provide low-impact ways to trace sewer and stormwater connections or pinpoint leaks without excavation.
Practitioners use nonstaining fluorescent dye for water tracing and theatrical or specialized smoke for air-path detection, ensuring ventilation, PPE, permits, and downstream containment to protect health and environment.
Pros and cons compared to electromagnetic detection
While chemical and infrared methods reveal surface signs of buried water by highlighting temperature or tracer movement, electromagnetic detection directly senses metallic pipes or conductive water columns beneath the ground.
Non-invasive thermal and chemical techniques map leaks where heat or tracer appears but struggle with depth, soil masking, and nonconductive plastics.
Electromagnetic methods offer depth and material specificity but miss plastic lines and require calibration and interference management.
Interpreting results and mapping detected pipes
After detection, findings should be translated into accurate as-built maps and clear documentation that record pipe locations, depths, and attributes.
Field markings and GPS tagging provide spatial reference for on-site crews and enable integration into GIS.
Final utility plans should be shared with stakeholders to support maintenance, future excavation, and regulatory compliance.
Creating accurate as-built maps and documentation
Create clear, reliable as-built maps by translating detection data into standardized, georeferenced drawings that document pipe location, depth, material, and condition.
Record survey methods, equipment settings, confidence levels and anomaly notes. Use consistent symbols, scales and legend entries.
Include cross-sections where necessary and attach photographic or video evidence.
Store files in common formats with version control and a brief explanatory metadata sheet.
Marking, GPS tagging, and sharing utility plans with stakeholders
Having produced standardized, georeferenced as-built maps, the next step is to convert those records into field-ready markings and geotagged assets that stakeholders can use for planning and excavation.
Durable paint, flags, and permanent markers denote routes and critical features. GPS-tagged points, photos, and metadata feed shared GIS layers and PDF plans.
Controlled access and versioning guarantee accuracy and liability management.
Common problems, pitfalls, and how to avoid them
Detectors can produce false positives or pick up interference from buried utilities, electrical wiring, or surface metal, so readings should be verified with multiple methods.
Accidental strikes to water pipes or nearby services pose safety and repair risks, which are minimized by hand-excavation, utility confirmation, and using safe distances and markers.
Many DIYers rely on guessing or singular tools; following systematic procedures and opting for professional locators when uncertain reduces mistakes.
False positives and interference causes
False positives from underground pipe searches often stem from electromagnetic noise, buried non-metallic utilities with conductive fittings, and nearby metallic objects that mimic pipe signatures; recognizing these sources is essential to avoid costly mistakes.
Technicians should verify with multiple detection modes, compare utility maps, perform ground-truth excavations at low-risk spots, and recalibrate equipment to reduce interference and misidentification.
Risks of accidental strikes and how to mitigate them
After confirming and cross-checking detection results to reduce misidentification, attention shifts to the very real consequences of striking an underground pipe.
Injuries, flooding, service interruption, repair costs, and regulatory fines can follow.
Mitigation includes clear marking, hand excavation within safety zones, notifying utilities, using soft-dig techniques, maintaining updated plans, and enforcing competent supervision and emergency response plans to limit damage and liability.
Common mistakes DIYers make and safer alternatives
Start by recognizing that many DIYers underestimate the hidden complexity of locating and working near underground water pipes. This leads to common mistakes such as relying solely on a single detection pass, neglecting utility notifications, excavating mechanically within safety zones, or failing to verify pipe depth and material before cutting.
Safer alternatives include multi-method locating, contacting utilities, hand-excavation in marked areas, and professional consultation when uncertain.
Cost, time, and decision guide for choosing a detection method
Typical price ranges and time estimates for each detection method are summarized to help compare equipment rental, contractor fees, and expected on-site duration.
A concise decision flowchart is presented to match site conditions and budget with the most appropriate technique.
The reader is guided toward a recommended option and next steps based on cost, time, and constraints.
Typical price ranges and time estimates for each method
Budget and time considerations shape the choice of underground pipe detection methods: hobbyist tools and basic metal detectors cost under $200 and can yield results in minutes to an hour for small areas, while professional locating services, CCTV inspections, and ground-penetrating radar (GPR) range from a few hundred to several thousand dollars and typically require a few hours to a full day depending on site complexity.
| Method | Typical cost | Typical time |
|---|---|---|
| DIY metal detector | <$200 | Minutes–1 hour |
| Professional locator | $200–$800 | 1–4 hours |
| GPR/CCTV | $500–$5000+ | Several hours–1 day |
Decision flowchart: selecting the right method by site condition and budget
Having compared costs and timeframes for each detection option, a simple decision flowchart helps determine the most appropriate method based on site conditions, urgency, and available funds.
Assess surface accessibility, pipe depth, material, and interference. If urgent and accessible, choose visual inspection or tracer; for depth or complexity, select GPR or acoustic correlator; when budget is constrained, opt for radio locator or professional consultation.
When to hire a professional locator and what to expect
When uncertainty, complex site conditions, or legal stakes are present, hiring a professional locator is recommended.
The homeowner should ask about prior experience, request certifications (such as NULCA or ASNT), confirm insurance and review the locator’s equipment and detection methods.
A clear scope of work and an itemized cost estimate—showing mobilization, survey time, marking, and reporting—sets expectations and reduces disputes.
Questions to ask a locating contractor
How should a homeowner decide if it’s time to call a professional locator?
Ask about availability, turnaround time, and service area.
Inquire whether prior utility maps or plans are reviewed and what onsite diagnostics will be performed.
Request a written estimate, scope of work, and expected markings.
Clarify access needs, safety protocols, and whether follow-up documentation or locate reports are provided.
Certifications, equipment, and insurance to look for
Several key credentials and resources separate competent locators from amateurs: valid certifications, up-to-date equipment, and appropriate insurance.
Professionals should hold industry certifications (e.g., NULCA, state licensure), use calibrated electronic locators, ground-penetrating radar, and tracer systems, and carry general liability plus professional indemnity.
Proof of worker’s compensation and vehicle insurance is expected.
Clear contracts and documented safety protocols indicate reliability.
Sample scope of work and cost estimate items
A clear scope of work and a detailed cost estimate outline what a professional locator will do, why each task is necessary, and how much it will cost.
The document specifies site survey, locating methods, marking, report, and liability limits.
Typical cost items include mobilization, equipment use, labor hours, and report fees.
Example inclusions:
- Site survey and utility research
- Electromagnetic and ground-penetrating services
- Marking, documentation, and travel fees
Preventive measures to avoid future locating problems
Preventive steps reduce the risk of future locating errors and disruptions.
Clear marking and permanent records for new installations, along with tracer wires and accessible shutoffs, make later detection straightforward.
Regular updates and routine maintenance of utility records keep location information accurate over time.
Best practices for marking and recording new installations
Implement clear marking and thorough recordkeeping immediately upon installation to reduce future locating errors.
Use durable, standardized markers, color codes, and depth annotations at intervals and junctions.
Record GPS coordinates, as-built drawings, pipe materials, installation dates, and contractor details in both paper and digital formats.
Store records with property files and notify utility registries when required to guarantee accurate future locating and maintenance.
Using tracer wires and accessible shutoffs for future locating
Install tracer wire and provide accessible shutoffs to guarantee reliable future locating and rapid service isolation.
Tracer wire attached to metallic pipes or tracer tape for plastic lines enables electronic detection.
Accessible shutoffs, clearly labeled and positioned above frost line, allow quick isolation during repairs.
Record locations and tie-ins on as-built plans.
These preventive measures minimize excavation, reduce damage risk, and speed emergency response.
Maintenance tips to preserve accurate utility records
Keeping tracer wires, accessible shutoffs, and as-built plans up to date is the foundation for preventing future locating errors.
Regular inspections, corrosion checks, and immediate repair of damaged tracer wires preserve signal integrity.
Update records after any modification, label valves clearly, and store digital as-builts with version control.
Train staff on notification protocols and coordinate with utility locators to guarantee shared, accurate maps.
Conclusion
Locating underground water pipes requires balancing speed, cost, and accuracy while avoiding damage and delays. Homeowners and contractors can choose from electronic, acoustic, visual, or manual methods depending on site conditions and budget; when uncertainty or risk rises, professionals offer expertise and responsibility. Which approach best prevents costly mistakes and guarantees safe results? By selecting appropriate tools, following preventive practices, and knowing when to call a locator, users minimize surprises and protect infrastructure.