
How to Remove Calcium Buildup in Water Pipes: 7 Proven Methods to Restore Flow
Calcium buildup in water pipes can significantly restrict flow and damage appliances. To effectively remove this buildup, homeowners should first assess the hardness of their water and check for visible scale. Here are seven proven methods to restore flow: mechanical descaling, hydro-jetting, acid or citric descalers, electronic or magnetic conditioners, ion-exchange water softeners, template-assisted crystallization, or, if damage is severe, pipe replacement. Ensure to follow safety protocols, isolate the system, and flush pipes thoroughly after treatment. Finally, measure flow and hardness to confirm results. For detailed guidance, including comparisons and costs, continue reading.
What causes calcium buildup in water pipes and why it matters
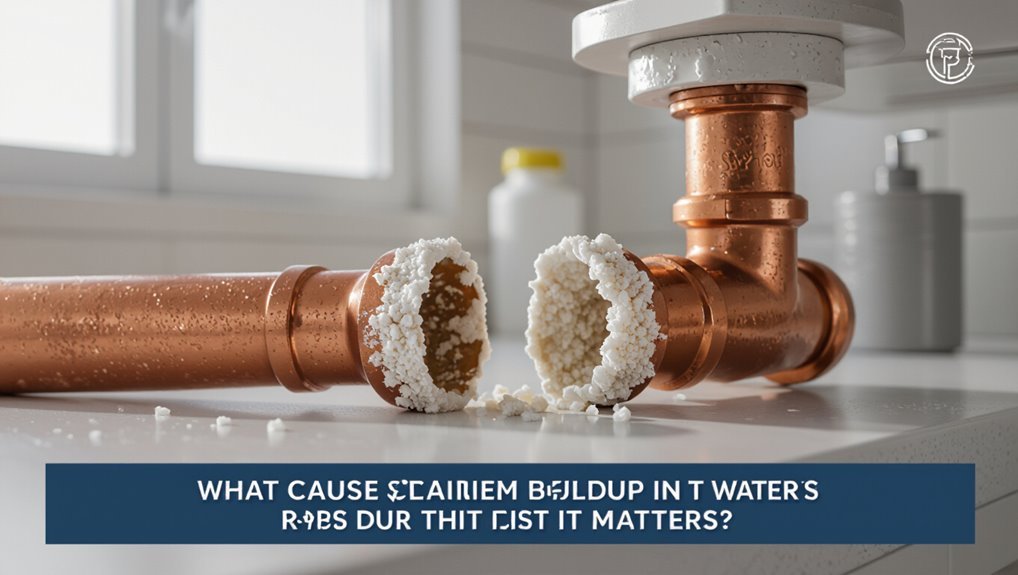
Hard water rich in calcium and magnesium promotes limescale formation inside pipes and on fixtures.
Visible signs include white crusty deposits, reduced water flow, and uneven heating or noisy appliances.
If left untreated, scale narrows pipes, shortens appliance life, and raises energy and maintenance costs.
How hard water leads to limescale formation
Because dissolved minerals precipitate when water chemistry or temperature changes, calcium and magnesium ions tend to deposit inside pipes as scale.
Hard water, rich in bicarbonate, increases precipitation when heated or when CO2 degasses.
Over time crystalline limescale narrows flow, reduces efficiency, and complicates how to remove calcium buildup in water pipes, requiring mechanical or chemical treatment to restore performance.
Common signs of calcium buildup in plumbing systems
After describing how mineral precipitation forms limescale inside pipes, attention turns to the observable effects this buildup produces.
Homeowners and technicians notice reduced water pressure, uneven flow from faucets, and noisy plumbing.
White, crusty deposits appear on fixtures and aerators. Appliances with water connections show mineral residues.
Frequent clogging and recurrent need to descale fixtures indicate progressive calcium accumulation requiring remedial action.
Risks of untreated scale for flow, fixtures, and appliances
Scale accumulation in pipes progressively narrows passages, raising flow resistance and decreasing system efficiency. Left unchecked, this leads to higher energy costs, frequent blockages, and premature wear on fixtures and appliances.
Mineral scale also impairs valves, reduces heater efficiency, fosters corrosion beneath deposits, and raises replacement and repair frequency.
Reduced flow pressures impair appliances’ performance and can contaminate water quality if biofilms develop.
Quick assessment: How to inspect pipes and determine scale severity
A brief inspection begins with visual checks of exposed pipes, fittings, and fixtures for white, crusty deposits or narrowed openings that indicate scale.
Home water hardness testing kits can quantify mineral levels and, when interpreted against regional standards, help gauge whether buildup is likely to form rapidly.
If visible scale is extensive, tests show high hardness, or there are flow and pressure problems, a professional plumber should be consulted.
Visual checks for exposed pipes, fittings, and fixtures
Begin by visually tracing all accessible sections of exposed pipes, fittings, and fixtures, noting discoloration, rough crusts, or white-gray deposits that indicate calcium buildup.
Record location, extent, and texture of deposits.
Check joints, valves, aerators, and showerheads for narrowing or flaking.
Compare multiple areas to gauge spread.
Photograph findings for reference and to plan targeted cleaning or professional assessment.
Testing water hardness at home and interpreting results
While inspecting visible deposits provides clues, testing water hardness at home gives objective data to judge scale severity and prioritize actions.
Home test kits or test strips measure calcium and magnesium as grains per gallon or ppm. Collect samples from cold taps, follow kit instructions, and compare results to standard ranges (soft, moderately hard, hard, very hard).
Higher readings indicate greater scaling risk.
When to call a professional plumber
After confirming hard-water levels with home tests, a quick visual and tactile inspection helps determine whether professional help is warranted.
Look for heavy white crust, reduced flow at multiple fixtures, discolored water, persistent clogs, or audible pipe strain.
If scale covers pipe interiors, if DIY descaling fails, or if galvanized/old plumbing is involved, engage a licensed plumber for assessment and safe descaling.
Seven proven methods to remove calcium buildup in water pipes
The following methods cover mechanical, chemical, and system-level approaches to removing calcium scale from pipes. Each option suits different severities and pipe materials, and some are best used together for long-term control.
Professional assessment is recommended before choosing an approach.
- Mechanical descaling (brushing, scraping) and hydro-jetting/high-pressure flushing
- Chemical descalers and acid-based flushes
- Electrochemical/electronic descaling devices and whole-house ion-exchange water softeners
Method 1 Mechanical descaling (pipe brushing and scraping)
Mechanical descaling begins with selecting the right tools—wire brushes, rotary brushes, scrapers and flexible rods—matched to the pipe material to prevent damage to copper, PVC or galvanized steel.
A clear step-by-step procedure covers isolating the section, loosening deposits from upstream to downstream, flushing debris, and inspecting for remaining buildup.
Safety considerations include wearing eye and hand protection, avoiding excessive force that can puncture pipes, and ensuring water and power are shut off before work begins.
Tools required and suitability by pipe material
Several handheld and powered tools are effective for mechanical descaling, but their selection depends on pipe material, diameter, and access.
Brass or stainless steel brushes suit metal pipes; nylon or soft-bristle brushes protect PVC and PEX.
Flexible shaft drills, drill-mounted brushes, and long-reach cable scrapers fit larger diameters.
Choose nonabrasive options for thin-walled or coated pipes to prevent damage.
Step-by-step procedure and safety considerations
Begin by isolating the affected section of pipe and draining or shutting off water to prevent flow during brushing or scraping.
Wear gloves, eye protection, and a mask.
Secure access, support the pipe, and choose the correct brush size.
Work from access points outward, apply steady pressure, avoid gouging, and clear debris frequently.
Rinse, inspect for damage, and restore flow slowly while checking for leaks.
Method 2 Chemical descalers and acid flushes
Chemical descalers range from household acids like vinegar and citric acid to stronger commercial formulations, each requiring specific dilution and contact times to effectively dissolve calcium deposits.
Compatibility with pipe materials and fixtures must be checked before application to prevent corrosion or damage.
Used solutions and rinse water should be neutralized if necessary and disposed of according to local regulations to protect plumbing and the environment.
Types of chemicals (vinegar, citric acid, commercial descalers)
Different acids and descaling agents dissolve and loosen calcium deposits at varying rates and strengths, so choosing the right one depends on pipe material, deposit severity, and safety constraints.
Common options include household white vinegar (mild acetic acid), food-grade citric acid (effective and less corrosive), and formulated commercial descalers (stronger, fast-acting, often buffered).
Each offers trade-offs in effectiveness, corrosion risk, and handling requirements.
Dilution, contact time, compatibility, and disposal precautions
Some precautions and parameters must be controlled when using descalers or acid flushes to guarantee effectiveness without damaging plumbing or the environment.
Proper dilution per manufacturer or household ratios prevents corrosion. Maintain recommended contact time for measurable scale softening.
Verify material compatibility (metals, seals, coatings). Neutralize and dilute residues before disposal, follow local regulations, and use PPE to protect handlers and drains.
Method 3 Hydro-jetting and high-pressure flushing
Hydro-jetting uses a high-pressure water stream to mechanically scour calcium deposits from the interior of pipes and is typically recommended for severe or widespread scaling in commercial or municipal systems.
Its advantages include rapid, thorough removal and minimal chemical use, while drawbacks include cost, need for professional equipment, and the potential to dislodge large fragments that can clog downstream fixtures.
Because the pressure can stress or fracture older, corroded, or thin-walled pipes, inspection and assessment of plumbing condition are advised before proceeding.
How hydro-jetting works and when it’s recommended
Blast-cleaning with high-pressure water breaks up and flushes out calcium deposits, mineral scale, and accumulated debris from the interior of pipes.
Technicians insert a specialized nozzle and propel water at controlled pressures to scour pipe walls, then flush loosened material downstream.
Recommended for severe or widespread scaling and blocked lines where mechanical scraping or chemical treatment is insufficient, and when access allows safe, contained flushing.
Pros, cons, and damage risk to older plumbing
After outlining how high-pressure water dislodges and flushes scale, it is important to weigh the advantages and drawbacks of hydro-jetting for older systems.
Benefits include thorough cleaning, reduced chemical use, and restored flow.
Risks involve pipe weakening, joint failure, or dislodging debris that exposes leaks in corroded or brittle cast iron, galvanized, or aged plastic; inspection and professional assessment mitigate damage.
Method 4 Electrochemical and electronic descaling devices
Electrochemical and electronic descaling devices work by altering how calcium and other minerals crystallize, promoting softer, non-adherent formations rather than hard scale.
Their effectiveness varies with water chemistry and flow conditions, and results typically appear over weeks rather than immediately.
Installation is usually noninvasive with minimal maintenance, though periodic checks and manufacturer guidance guarantee peak performance.
How electronic descalers alter crystal formation
Several manufacturers claim that electronic descalers reduce scale by changing how calcium carbonate crystals form and adhere inside pipes.
These devices emit electromagnetic or high‑frequency signals that allegedly promote formation of smaller, less adhesive crystalline particulates or amorphous precipitates.
Altered crystal morphology is said to favor suspension and transport rather than hard attachment, reducing deposit buildup without chemical addition.
Effectiveness, installation, and maintenance notes
Evaluating electrochemical and electronic descaling devices requires clear distinction between laboratory results, field studies, and manufacturer claims.
Evidence shows variable effectiveness: some systems reduce scale adhesion and improve flow in softer water, while hard-water performance is inconsistent.
Installation is noninvasive but requires correct placement and grounding.
Maintenance is minimal—periodic inspections and firmware checks—but routine monitoring of water quality and flow is recommended.
Method 5 Whole-house water softeners (ion exchange)
Whole-house ion-exchange softeners replace calcium and magnesium ions with sodium or potassium, preventing scale formation and gradually removing existing deposits as softened water flows through piping.
Proper system sizing is critical to match household water hardness and flow rates, and influences how often the resin requires regeneration.
Homeowners should also consider ongoing salt or potassium chloride needs and the upfront and maintenance costs when evaluating this option.
How ion-exchange softeners prevent and reverse scale
Ion-exchange softeners protect plumbing by replacing hardness ions—primarily calcium and magnesium—with sodium or potassium ions as water passes through a resin bed.
This exchange prevents new scale formation by keeping calcium soluble and suspended. Existing thin scale gradually softens and detaches as softened water and normal flow erode deposits.
Regular regeneration maintains resin capacity and continuous scale control throughout the system.
System sizing, salt requirements, and costs
When selecting a system, homeowners should match softener capacity to household water use and hardness level to guarantee effective scale prevention without excessive regeneration.
Proper sizing determines resin volume and regeneration frequency.
Salt consumption typically ranges 6–20 pounds monthly, depending on use and efficiency.
Installed costs vary $800–$3,500; higher-end models and installation complexity raise prices.
Operating costs: salt plus occasional maintenance.
Method 6 Magnetic and template-assisted crystallization systems
Magnetic and template-assisted crystallization systems alter calcium carbonate formation by promoting the growth of microscopic, non-adherent crystals instead of hard scale.
Studies show mixed but promising efficacy—performance often depends on water chemistry, flow rates, and system design.
These systems are most suitable where salt-free treatment is preferred and where partial scale control, low maintenance, and minimal plumbing changes are priorities.
Mechanism, evidence of efficacy, and ideal applications
Although not chemically removing hardness ions, magnetic and template-assisted crystallization systems alter calcium carbonate formation by promoting the growth of stable microcrystals that remain suspended rather than adhering to pipe walls.
These devices either apply magnetic or electric fields or provide nucleation surfaces (templates) that favor particulate precipitation over scale deposition.
Studies show mixed but promising reductions in scaling under specific flow, temperature, and water chemistry conditions; ideal for retrofit, low-maintenance applications.
Method 7 Replacing damaged pipe sections and targeted repairs
When calcium buildup has caused irreparable damage or persistent flow restriction, replacing affected pipe sections can be the most effective remedy.
The choice of replacement material should prioritize long-term resistance to scaling, with cross-linked polyethylene (PEX) often outperforming older materials in limiting deposits, while copper remains durable but may require more frequent monitoring for mineral buildup.
Targeted repairs paired with appropriate material selection minimize recurrence and extend system life.
When replacement is the best option
If deposits have caused severe narrowing, repeated failures, or structural damage that cannot be resolved with cleaning or chemical treatments, replacement of affected sections becomes the most practical and reliable solution.
Replacement is recommended when flow cannot be restored, leak risk persists, or corrosion undermines pipe integrity.
Targeted removal limits disruption, guarantees long-term reliability, and is cost-effective versus continual repairs.
Materials that resist future scaling (PEX, copper considerations)
After replacing damaged sections, choosing pipe materials that resist future scaling helps prevent recurrence and protects the investment.
PEX offers smooth, flexible, scale-resistant surfaces and resists corrosion, reducing buildup risk.
Copper’s durability and thermal properties can limit deposits but may require water chemistry control to avoid corrosion.
Material choice should reflect local water hardness, system temperature, and long-term maintenance priorities.
Step-by-step plan to remove scale from a residential plumbing line
The text outlines gathering tools and safety gear, plus shutting off the water supply before any work begins.
It then explains selecting a removal method suited to the severity of scaling and the pipe material, followed by stepwise DIY actions, neutralization, and thorough post-treatment flushing.
Finally, clear stop points are provided to indicate when complications require a licensed plumber.
Preparing tools, safety gear, and shutting off water
Gather the necessary tools and safety gear, then locate and shut off the main water supply before beginning work on a scaled residential line.
Inspect pipe access points, assemble wrenches, brushes, descaling solutions, bucket, and hose.
Wear gloves, eye protection, and a mask.
Relieve system pressure by opening faucets, drain affected sections, and verify no water flow before disconnecting fittings or applying mechanical or chemical treatments.
Choosing the right method based on severity and pipe type
With tools staged and the supply shut off, the homeowner should assess scale severity and pipe material to select an appropriate removal approach.
Light, localized deposits on copper or PVC suit mild acid wipes or mechanical scraping; heavy, long runs in galvanized or cast iron often require professional descaling or replacement.
Consider corrosion risk, access, cost, and long-term prevention before choosing a method.
Sequential actions for DIY removal and post-treatment flushing
Begin by isolating the affected section: shut off main and local valves, relieve pressure by opening nearby taps, and drain the line to expose the scaled area.
Confirm power is off to any connected pumps or heaters before proceeding.
Mechanically remove loose scale with brushes or picks, apply appropriate descaler, allow dwell time, flush thoroughly with clean water, reinstall fittings, and test for leaks and restored flow.
When to stop and hire a professional
After attempting mechanical removal and chemical descaling, the homeowner should assess whether to continue or call a professional based on specific signs:
- persistent obstruction after multiple flushes,
- brittle or heavily pitted pipe walls,
- visible corrosion,
- leaks that worsen when pressure is restored,
- inaccessible sections (behind walls or under slabs),
- or any uncertainty about electrical or gas-connected equipment.
A pro evaluates structural integrity, isolates affected runs, performs camera inspections, and executes repairs or replacement safely.
Comparing methods: effectiveness, cost, time, and risk
A concise comparison helps readers weigh effectiveness, cost, time, and risk when choosing a descaling method. Below is a quick reference table summarizing these criteria for common approaches:
| Criterion | Notes |
|---|---|
| Effectiveness | How well the method removes scale and prevents recurrence |
| Cost & Time | Upfront expense and expected duration |
A balanced choice matches household needs and tolerable risk.
Short explanation of comparison criteria
When comparing methods for removing calcium buildup, four practical criteria guide selection: effectiveness, cost, time, and risk.
Effectiveness measures scale removal and prevention durability. Cost covers materials, labor, and long-term maintenance.
Time assesses duration and disruption. Risk evaluates pipe damage, chemical hazards, and environmental impact.
Balancing these criteria helps determine the most appropriate, practical approach for a given plumbing situation.
Preventing future calcium buildup
Preventing future calcium buildup requires a combination of routine maintenance and ongoing monitoring to catch early deposits before they escalate.
Long-term water treatment options, such as water softeners or chemical conditioning, can reduce hardness at the source.
Simple household measures—point-of-use filters, periodic vinegar rinses, and scheduled inspections—help slow scale between professional services.
Routine maintenance tasks and monitoring schedule
Establishing a regular maintenance routine and monitoring schedule keeps calcium buildup from reoccurring and preserves pipe performance.
Inspectors should schedule quarterly visual inspections, biannual descaling where needed, and annual flow-rate and pressure checks.
Record mineral deposits, cleaning actions, and any repairs in a log.
Promptly address anomalies and tighten inspection intervals after repeated buildup to prevent progressive clogging and corrosion.
Water treatment options to reduce hardness long-term
Although mechanical cleaning removes existing deposits, long-term control of calcium buildup requires addressing water hardness at the source.
Effective options include ion-exchange water softeners, magnetic or electronic descalers where appropriate, and template-assisted crystallization systems.
Municipal treatment upgrades, lime softening, or reverse osmosis can serve whole-house or point-of-use needs.
Professional water testing guides selection, sizing, and maintenance for sustained scale prevention.
Simple household practices to slow scale (filters, vinegar rinses)
After addressing hardness at the source with treatment systems, homeowners can also adopt low-effort household practices that slow new calcium deposits and extend appliance life.
Install sediment and carbon pre-filters to catch particulates and reduce scale nucleation.
Perform monthly vinegar rinses on faucets, showerheads and removable parts to dissolve fresh buildup.
Flush water heaters annually and use vinegar-soaked cloths for stubborn spots.
Common mistakes to avoid when removing pipe scale
Common errors when removing pipe scale include using incompatible chemicals or incorrect concentrations that can corrode fittings or leave residues.
Applying excessive pressure or abrasive techniques risks damaging pipe walls and joints.
Waiting to treat early deposits or ignoring warning signs often turns a fixable problem into a costly repair.
Using incompatible chemicals or concentrations
When mixing or applying descaling agents, selecting incompatible chemicals or incorrect concentrations can sharply increase risks to plumbing, fixtures, and health.
Improper combinations can produce toxic gases, corrosion, or sealant failure. Excessively strong solutions etch metal and degrade polymers; overly weak mixes waste time and allow deposits to persist.
Always consult product labels, manufacturer guidance, and dilute precisely.
Overpressurizing or abrasive methods that damage pipes
Apply pressure or scour pipe interiors only with methods and force rated for the material; excessive hydraulic pressure, power flushing at too-high velocities, or aggressive mechanical abrasion can crack joints, shear soft linings, and thin metal walls, turning a localized scale problem into a leaking or failed system.
Operators should match cleaning intensity to pipe specifications, use calibrated equipment, and prefer gentler chemical or low-pressure mechanical options to avoid structural damage.
Delaying treatment and ignoring early warning signs
After stressing the importance of matching cleaning intensity to pipe specifications, it is equally important to recognize how delaying treatment and ignoring early warning signs can turn manageable scale into widespread damage.
Minor flow reduction, noise, or localized deposits often precede major blockages.
Prompt inspection and targeted descaling prevent costly repairs, microbial growth, and systemic corrosion; procrastination escalates scope, expense, and risk.
Signs removal worked and how to verify restored flow
Verification begins by measuring flow rate and water pressure and noting improvements in appliance performance.
Simple tests—timing faucet output, reading a pressure gauge, and observing faster hot water recovery—provide objective evidence.
A final step is post-treatment water quality testing to confirm no residual treatment chemicals or dislodged particulates remain.
Measuring flow rate, pressure, and appliance performance
Measure flow rate, pressure, and appliance performance to confirm calcium removal and restored plumbing function.
Technicians record baseline and post-treatment flow (gallons per minute) and static/working pressure with gauges.
Verify fixtures: faster fill times, steady spray patterns, and normalized hot-water recovery.
Check appliances for improved efficiency and reduced cycling.
Document measurements and compare to expected values to validate successful descaling.
Post-treatment water quality checks
With flow rates, pressures, and appliance performance documented, attention turns to post-treatment water quality checks that confirm mineral removal and restored flow.
Inspect water clarity, taste, and odor; measure hardness with test strips or lab analysis; compare conductivity and pH to baseline.
Monitor aerator and fixture discharge for reduced scale.
Repeat tests after one and three months to guarantee lasting improvement.
Cost estimates and decision guide for homeowners
Typical price ranges for DIY descaling (chemical kits or vinegar flushes) are contrasted with professional options like hydro-jetting or pipe replacement, which carry higher upfront costs.
Homeowners are advised to weigh immediate expenses against long-term savings from preventive maintenance and upgraded materials.
A clear cost-benefit comparison helps determine the most cost-effective solution for each household’s needs.
Typical price ranges for DIY vs professional services
When homeowners weigh removal options for calcium buildup, cost differences between DIY methods and hiring a professional are a primary consideration.
DIY supplies—vinegar, descalers, brushes, rental tools—typically total $20–$150 per job.
Professional services range from $150 for simple flushes to $500–$1,200 for pipe descaling or localized replacement.
Estimates vary by severity, access, and regional labor rates.
How to choose the most cost-effective long-term solution
Although upfront cost matters, the most cost-effective long-term solution weighs initial expenses against recurring maintenance, lifespan, and the likelihood of future repairs.
Homeowners should compare methods (descaling, pipe replacement, water softeners) using 5–10 year total cost projections, factoring installer quality, warranty, and local water hardness.
Prioritize options minimizing downtime and repeat interventions while fitting budget and property resale considerations.
Resources and tools checklist for DIY descaling
The checklist outlines essential products, tools, and protective gear for safe DIY descaling, and it notes clear signs that warrant calling a professional. Homeowners are encouraged to match task complexity to their skill level and to prepare appropriate equipment before starting.
The list below groups recommended items and thresholds for when to contact certified plumbers or water treatment specialists.
- Recommended descaling products (vinegar, commercial descalers), basic tools (pipe wrench, tubing brush), and PPE (gloves, goggles).
- Advanced equipment for tougher jobs (wet/dry vacuum, chemical-resistant hoses) and inspection aids (flashlight, inspection camera).
- When to call a professional: persistent blockages, corroded pipes, large-scale systems, or any uncertainty about safety or code compliance.
Recommended products, tools, and protective gear
A concise checklist of recommended products, essential tools, and appropriate protective gear helps guarantee safe, effective DIY descaling of water pipes.
Recommended products:
- white vinegar
- diluted muriatic or phosphoric-based descalers
- pipe-safe descaling tablets.
Essential tools:
- adjustable wrench
- pipe brush set
- bucket
- tubing
- spray bottle.
Protective gear:
- chemical-resistant gloves
- safety goggles
- respirator (if using strong acids)
- durable workwear.
When to contact certified plumbers or water treatment specialists
When DIY attempts encounter persistent low flow, recurrent clogging, brittle or corroded piping, foul odors, or signs of leaks and water damage, professional help should be contacted promptly.
Certified plumbers or water treatment specialists can diagnose underlying causes, test water chemistry, and recommend safe, code-compliant remedies that DIY methods cannot provide.
They also manage complex descaling, system replacements, warranty-covered equipment, and municipal code compliance, ensuring safety.
Conclusion
Calcium buildup in pipes reduces flow, increases energy use and risks costly repairs; prompt, appropriate descaling restores performance and extends system life. For example, a homeowner in Phoenix used a targeted combination of mechanical scrubbing and citric acid flushing after inspection revealed moderate scale; flow returned to near-original levels within days, avoiding pipe replacement. Regular monitoring and choosing the right method for severity help guarantee lasting results and sensible costs.
