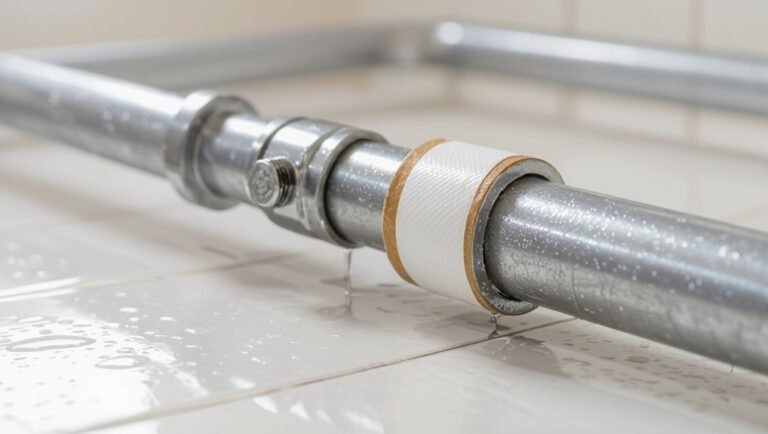
How to Winterize Water Pipes: A Step-by-Step Guide to Prevent Freezing and Burst Pipes
Winterizing water pipes is essential to prevent freezing and bursting, which can lead to costly water damage. To effectively winterize your pipes, follow these key steps:
- Drain outdoor hoses and irrigation systems.
- Open under-sink cabinets to allow warm air circulation.
- Let vulnerable faucets drip to prevent freezing.
- Insulate exposed pipes and use heat tape in unheated areas.
- Flush shut-off valves and appliance lines, using non-toxic antifreeze only when necessary.
Regular follow-up checks and seasonal maintenance further reduce risks. For a comprehensive guide, refer to the detailed steps and tools needed.
Why Winterizing Water Pipes Matters
Frozen pipes can block water flow and expand until they rupture, causing costly water damage and service interruptions.
Homeowners are advised to begin winterizing when prolonged subfreezing temperatures are forecast or when local climate history shows frequent freezes.
Early warning signs include poorly insulated or exposed piping, unusually low indoor temperatures near plumbing, and fluctuating water pressure.
Common consequences of frozen and burst pipes
When water inside a pipe freezes and expands, it can crack the pipe and lead to leaks or full bursts that flood homes and damage structures.
Immediate consequences include water damage, mold growth, ruined insulation, and compromised electrical systems. Repair costs and insurance claims rise.
Understanding how to winterize water pipes prevents disruption, preserves property value, and reduces emergency repair expenses.
When to start winterizing based on climate and forecast
The risk and cost of burst pipes make timely preventive action important, and the timing for winterizing depends on local climate patterns and short-term forecasts.
Homeowners in colder zones should prepare well before sustained subfreezing temperatures; milder regions can delay until consistent freezes appear in forecasts.
Monitor long-range predictions, sudden cold snaps, and overnight lows to schedule insulation, draining, and protective measures promptly.
Signs your plumbing is at risk
How can a homeowner tell if their plumbing is vulnerable to winter damage?
Look for slow drains, reduced water pressure, visible pipe condensation, or frost on exposed lines.
Inspect outdoor faucets, hose bibs, and uninsulated crawlspaces.
Check for drafts near plumbing, previous freeze marks or patched sections, and older pipes prone to corrosion.
Early detection enables targeted winterizing and prevents bursts.
Quick Action Checklist to Prevent Freezing (Direct Steps)
A concise checklist gives homeowners immediate, low-effort actions to reduce pipe-freeze risk, such as opening cabinet doors, letting faucets drip, and adding temporary insulation.
It also outlines emergency steps to take when temperatures fall suddenly, like shutting off the main valve and safely applying heat to vulnerable sections.
The following items prioritize speed and effectiveness to protect plumbing until permanent measures can be implemented.
Immediate low-effort measures homeowners can do today
Act quickly to reduce the risk of frozen pipes with a few simple, immediate steps homeowners can perform today:
- Open cabinet doors under sinks and around plumbing to allow warmer air circulation.
- Let a slow drip from faucets served by vulnerable pipes to keep water moving.
- Apply temporary insulation—wrap exposed pipes with towels, foam sleeves, or heat tape where available.
Emergency steps if temperatures suddenly drop
When temperatures plunge unexpectedly, homeowners should move immediately through a short checklist of direct actions to protect vulnerable plumbing:
open cabinet doors,
run a slow trickle of cold and hot water,
disconnect and drain outdoor hoses,
insulate exposed pipes with towels or foam,
shut off and drain exterior valves,
apply space heaters safely near susceptible areas,
and monitor for freezing until temperatures rise.
Tools and Materials You’ll Need
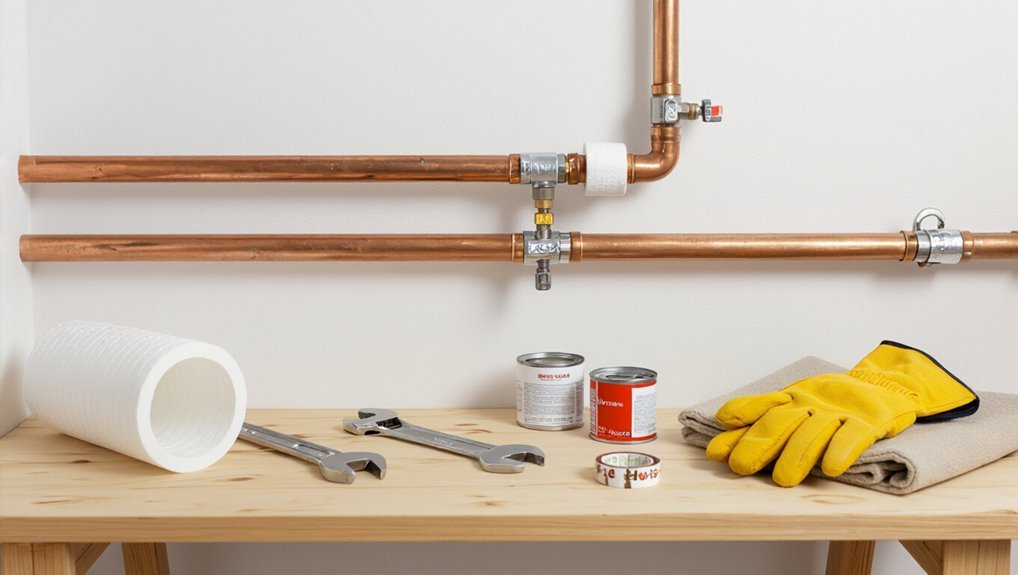
This section outlines the basic supplies homeowners can gather for a DIY winterization, such as pipe insulation, heat tape, wrenches, and sealants.
It also notes optional professional-grade equipment—thermal cameras, industrial pipe heaters, and commercial-grade antifreeze—and explains when their use is appropriate.
Readers are guided to match tools to the job’s scale and complexity to guarantee effective, safe winterization.
List of basic supplies for DIY winterization
A compact set of tools and materials covers the essentials for DIY pipe winterization:
basic hand tools (adjustable wrench, pliers, screwdriver), pipe insulation (foam sleeves or wrap), heat tape or thermostatic cable for vulnerable runs, plumber’s tape (thread sealant), pipe clamps or straps, a reliable shop vacuum or compressed air source for blowing lines, and a moisture barrier or caulk for sealing gaps around penetrations.
- Insulation, tape, caulk
- Hand tools, clamps
- Vacuum/air source, heat cable
Optional professional-grade equipment and when to use it
Consider investing in professional-grade gear for complex or high-risk winterization jobs: commercial hot-air guns, industrial-grade heat tape with built-in thermostats, motorized pipe threaders and cutters, pneumatic blowers or wet/dry vacuums with higher CFM, and infrared thermometers for accurate cold-spot detection.
- Use when DIY tools fail for large systems.
- Rent for occasional jobs; buy for frequent professional work.
- Prioritize safety training and certification.
Step-by-Step Guide to Winterize Indoor Pipes
The following steps guide a homeowner through protecting indoor plumbing from freezing.
They cover locating vulnerable pipes and shut-off valves, draining and flushing interior lines, and insulating pipes in basements, crawlspaces, and attics.
Practical instructions on installing heat tape safely and on maintaining indoor heat and thermostat settings complete the procedure.
Locate vulnerable indoor plumbing and shut-off valves
Identify all indoor plumbing runs and their associated shut-off valves before beginning winterization.
Inspect basements, crawlspaces, attics, exterior walls and utility closets for exposed piping.
Note valves for fixtures, appliances and irrigation backflow devices.
Label each shut-off, record location and type, and verify accessibility.
Prioritize uninsulated or poorly heated areas for insulation or temporary heating measures prior to draining.
Drain and flush interior water lines
With vulnerable runs and shut-offs mapped and prioritized, attention shifts to removing water from the interior network to prevent freeze damage.
Open all faucets, drain hose bibs and the water heater per manufacturer instructions, then open lowest and highest house valves to aid flow.
Flush toilets, run tub and sink drains until clear.
Close drain valves, leave faucets slightly open.
Insulate pipes in unheated areas (basement, crawlspace, attic)
Several essential steps protect pipes in unheated areas from freezing: inspect exposed runs in basements, crawlspaces, and attics for proximity to cold drafts, measure pipe diameters and lengths, and select appropriate insulation materials such as foam sleeves, fiberglass wrap, or heat tape.
Install snug-fitting insulation, seal gaps at joints and wall penetrations with caulk or foam, and maintain attic ventilation while minimizing direct cold exposure to pipe runs.
Use heat tape and cable: installation and safety tips
When insulation alone cannot guarantee protection—particularly for very cold or exposed runs—electric heat tape and self-regulating heating cable provide active freeze prevention.
Install per manufacturer instructions: secure tape along pipe length, avoid overlap, use listed GFCI protection, and seal connections and joints with weatherproof tape or approved mastic.
Inspect annually for damage, replace degraded sections, and never use household extension cords.
Maintain indoor heat and thermostat settings to protect pipes
Maintain a consistent indoor temperature to reduce the risk of frozen pipes by ensuring heat reaches all areas where plumbing runs.
Set thermostats no lower than 55°F (13°C) during cold spells, and use programmable schedules to avoid large overnight drops.
Open cabinet doors under sinks, keep interior doors ajar, and circulate warm air with ceiling fans on low to help maintain steady warmth around vulnerable pipes.
Winterizing appliances: water heaters, boilers, and HVAC connections
After ensuring indoor temperatures stay steady to protect exposed pipes, attention turns to the appliances that supply and heat the home’s water and air.
Inspect and insulate exposed appliance pipes and valves, drain and flush water heaters if recommended, set boilers to safeguard against freeze, and seal HVAC condensate lines.
Verify vents and clear debris to prevent cold-air intrusion and system damage.
Step-by-Step Guide to Winterize Outdoor and Exposed Pipes
The guide outlines the essential actions for protecting outdoor and exposed pipes before freezing weather arrives.
It covers shutting off and draining exterior faucets and irrigation systems, removing and storing hoses, and fitting spigots with insulated covers.
Additional steps include safeguarding sump pumps and outdoor valves and specific measures for seasonal or vacant properties.
Shut off and drain exterior faucets and irrigation systems
Before temperatures drop below freezing, homeowners should shut off and drain all exterior faucets and irrigation systems to prevent pipe bursts and costly water damage.
Locate and close the shutoff valves inside the home, open exterior faucets and inline valves to drain residual water, operate automatic system drain or manual bleeder, and verify meters and low points are empty before sealing access points for winter.
Remove and store hoses; protect spigots with insulated covers
Disconnect and coil garden hoses, then store them indoors to prevent freezing, cracking, and sediment buildup.
Afterward, detach any remaining fittings and drain residual water.
Fit insulated foam or hard-shell spigot covers over exterior faucets, securing with tape or zip ties if needed.
These measures reduce heat loss, block drafts, and minimize freeze-related damage to exposed spigots throughout winter months.
Protect sump pump and outdoor valves
Inspect and secure sump pumps and outdoor valves to prevent freeze damage and maintain winter reliability.
Check pump operation, clean debris, and test float switches.
Insulate exposed discharge pipes and cover external valve bodies with foam or commercial covers.
Confirm discharge lines slope away from foundation and are clear of ice.
Drain and shut off isolated outdoor valves to avoid trapped water and bursting.
Steps for seasonal homes and vacant properties
Prepare a concise, methodical plan for winterizing seasonal or vacant properties to prevent frozen, burst, or damaged outdoor and exposed pipes.
Inspect and shut off exterior water supply; drain hoses, faucets, and irrigation lines.
Blow out underground sprinkler systems, insulate exposed piping, and install frost-proof covers.
Maintain minimal indoor heat, monitor remotely, and schedule regular checks or winterization before extended vacancy.
Special Situations and Advanced Techniques
The guide next addresses special situations and advanced techniques that require tailored approaches, including winterizing mobile homes and RV plumbing.
It covers strategies for protecting pipes in basements, crawlspaces, and garages, safe use of plumbing antifreeze, and criteria for rerouting or replacing vulnerable sections.
Practical considerations and warning points are highlighted to help readers choose the appropriate method for their setting.
Winterizing mobile homes and RV plumbing
Many mobile homes and RVs require different winterizing steps than site-built houses because confined plumbing, exterior-mounted components, and lightweight materials raise the risk of freeze damage.
Techniques include draining water systems, blowing out lines with compressed air, adding RV-grade antifreeze to traps and tanks, insulating exposed pipes, sealing vents and skirting gaps, and protecting external fixtures.
Regular inspections before cold spells are essential.
Protecting pipes in basements, crawlspaces, and garages
When basements, crawlspaces, and garages house supply lines or fixture connections, their typically colder, damper conditions demand targeted protection to prevent freezing and moisture damage.
Insulate exposed pipes with foam sleeves or wrap, seal gaps where cold air enters, install heat tape where needed, elevate lines above concrete floors, guarantee adequate ventilation and drainage, and monitor for condensation and leaks throughout winter.
Using antifreeze safely in plumbing systems
After insulating and sealing exposed lines in basements, crawlspaces, and garages, attention may shift to situations where passive measures are insufficient and antifreeze becomes a practical option.
Use only non-toxic, propylene-glycol antifreeze labeled for plumbing; never pour automotive ethylene-glycol into potable systems.
Flush lines, add measured amounts per manufacturer instructions, and document locations.
Winter inspections guarantee no leaks or cross-contamination occur.
When to consider rerouting or replacing vulnerable pipe sections
Consider rerouting or replacing pipe sections if insulation, heat tracing, and localized repairs fail to mitigate freezing risk or recurring leaks.
Prioritize rerouting when pipes run through unheated or exposed cavities; replace corroded, repeatedly frozen, or undersized materials.
Evaluate cost, access, and future maintenance.
Engage a licensed plumber for permanent relocations, material upgrades (copper, PEX), and code compliance to guarantee long-term protection.
How to Test and Verify Pipes Are Protected
Simple leak checks and flow tests can reveal vulnerable joints and partially frozen sections before they cause damage.
Regular monitoring during extended cold spells—including visual inspections, temperature checks, and listening for unusual sounds—helps catch problems early.
If tests indicate persistent leaks, recurrent freezing, or uncertain results, a professional plumber should be contacted.
Simple tests to check for leaks and frozen sections
Inspecting and testing winterized plumbing guarantees protective measures actually prevent leaks and freeze damage.
A systematic check includes visual inspection for frost or condensation, feeling pipes for cold spots, opening faucets to confirm flow, and running pressure tests or monitoring meters for drops.
Use infrared thermometers to locate cold sections.
Document findings, isolate and repair any leaks, then retest to verify integrity.
Monitoring strategies during prolonged cold spells
When temperatures remain below freezing for days, a proactive monitoring routine guarantees winterized pipes stay protected:
Inspect visible lines daily for frost, condensation, or bulging.
Maintain thermostats and attic/ crawlspace insulation at recommended levels.
Check meter and pressure for unexplained drops.
Use smart sensors or temperature probes on vulnerable runs, and log readings to detect gradual thermal loss before damage occurs.
When to call a professional plumber
How can a homeowner be certain winterized pipes are truly secure before temperatures plunge further?
A professional plumber should be called if observable signs persist: recurring low flow, visible sweating or frost on exposed pipes, unexplained pressure drops, or unreliable insulation coverage.
For complex systems, aging plumbing, or inaccessible runs, a licensed plumber can perform pressure tests, thermal imaging, and targeted repairs to guarantee protection.
Common Mistakes and How to Avoid Them
Common errors include overlooking small exposed pipe sections and fittings, which can become freeze points if not insulated.
Unsafe reliance on open flames or improper use of heat sources and poorly selected insulation increases risk of fire or inadequate protection.
Misusing antifreeze and other chemicals—either by using the wrong type or incorrect concentrations—can damage plumbing and contaminate water.
Overlooking small exposed sections and fittings
Many homeowners focus on main lines but neglect small exposed pipe sections and fittings, which are frequent failure points during freezes.
These areas—valve stems, unions, hose bibs and short runs in unheated spaces—require targeted insulation and sealing.
Inspect thoroughly, use foam sleeves or tape, and secure weatherproof covers.
Small oversights lead to localized freezing and costly repairs.
Unsafe use of heat sources and improper insulation
Using makeshift heaters or over-relying on temporary heat sources around pipes can create fire hazards and still fail to prevent freezing if insulation is inadequate.
Properly rated thermostatically controlled heat tape and ceramic or oil-filled space heaters used at safe distances reduce risk.
Combine them with continuous foam, pipe sleeves, or spray insulation, sealing gaps and monitoring temperatures to guarantee consistent protection without creating new hazards.
Misusing antifreeze and chemicals
Mistaking automotive or RV antifreeze for products safe in potable-water systems, overdiluting chemical inhibitors, or applying concentrated solutions without flushing protocols can contaminate drinking water and damage plumbing components.
Professionals recommend only EPA- or NSF-approved antifreeze for potable systems, follow manufacturer dosages, isolate treated sections, label treated lines, and perform thorough post-winter flushing and testing to guarantee safety and prevent corrosion.
Cost Estimates and Time Expectations
Typical DIY winterization projects often cost between $20 and $200 and can take from 30 minutes for a single outdoor faucet to several hours for an entire basement.
Professional service fees vary by region and complexity, with hourly rates, emergency call-outs, and materials driving final prices.
The following section compares these typical DIY estimates with common professional cost factors to help readers set realistic time and budget expectations.
Typical DIY costs and time per project area
When homeowners prepare to winterize water pipes, cost and time vary by task and home layout: insulating exposed pipes and sealing gaps are low-cost, quick jobs (often $10–$50 in materials and 1–2 hours), while installing heat tape, relocating outdoor spigots, or insulating crawlspaces can run $50–$300 and take several hours to a day.
| Area | Typical Cost | Typical Time |
|---|---|---|
| Pipes | $10–$100 | 1–4 hrs |
| Spigots | $20–$150 | 1–6 hrs |
| Crawlspace | $50–$300 | 2–8 hrs |
Cost factors for hiring a professional
Cost depends on scope, skill level, materials, and regional labor rates: simple services like insulating exposed pipes or winterizing an outdoor spigot are billed as short flat-rate jobs, while more complex work—re-routing lines, insulating a crawlspace, or installing electric heat tape—incurs higher hourly or project-based charges.
Estimates often include inspection, permits, materials, travel, and warranty; expect variation by season and urgency.
Maintenance Checklist for Winter-Ready Plumbing
The maintenance checklist separates tasks into pre-winter annual preparations, mid-winter checks and necessary adjustments, and post-winter inspection and restoration steps.
Each phase lists specific actions—insulating exposed pipes, testing shutoff valves, monitoring for slow leaks or freezing, and then repairing or re-insulating as needed once temperatures rise.
This organized approach helps guarantee plumbing remains protected throughout the season and is quickly returned to full service afterward.
Pre-winter annual tasks
Prepare a concise annual checklist that targets critical plumbing elements before freezing weather arrives.
Inspect exposed pipes, insulate vulnerable runs, and thaw any residual frost.
Test outdoor faucets and shutoff valves for leaks.
Drain irrigation lines and remove hoses.
Verify attic and crawlspace insulation levels.
- Inspect and insulate
- Shutoff and drain
- Repair leaks and gaps
Mid-winter checks and adjustments
Mid-winter checks focus on verifying that pre-winter measures remain effective and addressing any emerging issues before they escalate.
- Inspect visible pipes, insulation, and heat tape for damage or loosening; repair promptly.
- Confirm indoor temperatures and cabinet access near plumbing meet minimums; adjust thermostats or open doors slightly.
- Test exterior faucets and drains for slow flow or frost buildup; clear and protect vulnerable points.
Post-winter inspection and restoration steps
Begin inspections by walking the property to identify post-thaw damage, focusing on leaks, warped pipes, compromised insulation, and any exterior fixtures that show signs of cracking or persistent moisture.
Assess, document, and prioritize repairs. Restore insulation and protective covers, test system pressure and drains, and schedule professional servicing for any suspected hidden damage.
- Repair leaks promptly
- Replace damaged insulation
- Test and verify systems
Resources and Emergency Contacts
A list of qualified plumbers and 24-hour emergency services is provided to assist homeowners facing pipe failures or freezes.
Manufacturer manuals for pipes, valves, and insulation, along with local utility guidelines, offer specific instructions and safety requirements.
Readers are encouraged to keep contact numbers and relevant documentation accessible before cold weather arrives.
How to find qualified plumbers and emergency services
When a pipe freezes or bursts, knowing where to find licensed plumbers and 24/7 emergency services can prevent extensive damage and costly repairs. Homeowners should compile vetted contacts before severe weather arrives.
Seek licensed plumbers with insurance, local references, and online reviews. Verify emergency response times, flat-rate policies, and written estimates.
Maintain a prioritized contact list including after-hours hotlines, license numbers, and service guarantees.
Helpful manufacturer manuals and local utility guidelines
After compiling qualified plumbers and emergency contacts, homeowners should collect appliance and system manuals plus local utility guidance to streamline winter pipe protection and post-incident recovery.
Manuals provide model-specific shutoff, maintenance, and warranty details; utilities outline outage, freeze warnings, and thaw assistance.
Maintain printed and digital copies, and store emergency contact links.
- Manufacturer manuals
- Local utility guidelines
- Emergency procedures
Conclusion
Winterizing water pipes greatly reduces home damage risk: frozen pipes cause an estimated $5,000 average repair bill when they burst. Following clear, preventative steps—insulating exposed lines, draining outdoor faucets, and maintaining steady indoor temperatures—lowers that likelihood and saves both money and hassle. Consistent inspection and prompt repairs keep systems resilient through cold months. By treating winterization as routine maintenance, homeowners protect property value and avoid costly, disruptive emergencies.