
How to Remove an Aerator From a Pull-Down Faucet: Quick Step-By-Step Fix
To remove an aerator from a pull-down faucet, follow these quick steps: First, shut off the water supply and clear the sink area. Check the spray head for a threaded or snap-in aerator. If it’s threaded, twist it counterclockwise by hand; if it’s stuck, use a cloth-wrapped wrench, strap wrench, or pliers for better grip. For particularly stubborn aerators, apply penetrating oil, soak, or gently tap before attempting again. Keep all parts organized for easy reassembly, and remember to test for leaks after reinstalling. Further troubleshooting steps are available below.
Tools and Materials Needed
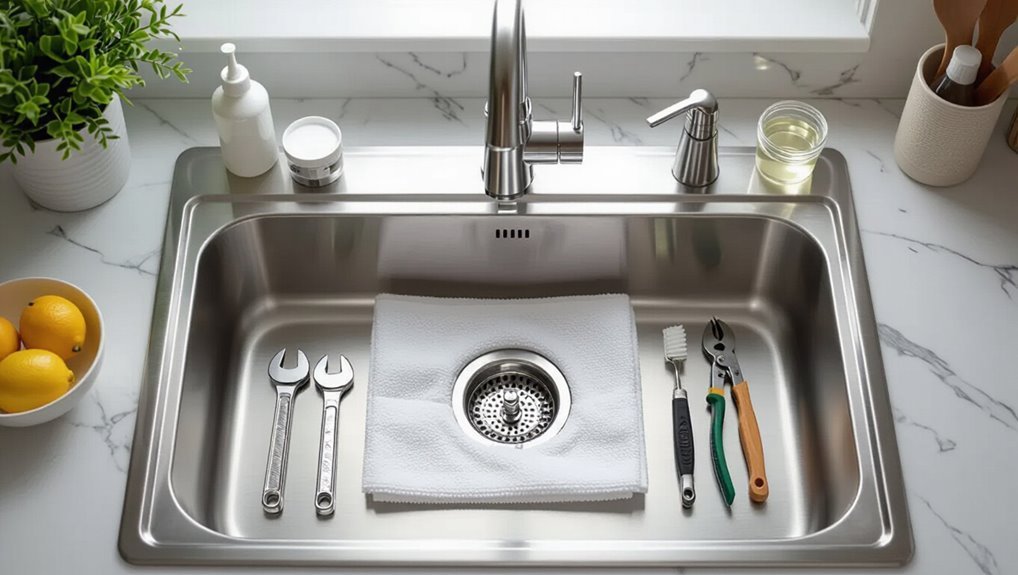
A basic set of household tools—adjustable wrench, pliers, and a cloth—should be ready before attempting aerator removal.
For stubborn or corroded aerators, optional items like needle-nose pliers, strap wrenches, or penetrating oil may be useful.
Protective gear such as gloves and eye protection is recommended to prevent injury and protect finishes.
Common household tools to have on hand
Necessary tools for removing a faucet aerator are typically basic and likely already in a household toolbox.
For those learning how to remove aerator from pull down faucet, gather simple items to prevent damage and speed the task.
- Adjustable wrench or pliers (with cloth)
- Flathead screwdriver or pick
- Bucket or towel to catch parts and water
Optional tools for stubborn aerators
When basic tools like an adjustable wrench, pliers with a cloth, and a flathead screwdriver fail to loosen a seized aerator, a few specialized items can help free stubborn fittings without damaging the faucet.
Recommended optional tools include:
- Penetrating oil for loosening mineral deposits.
- Strap or jawed silicone-covered wrench to prevent scratching.
- Aerator key set sized for various fittings.
Safety precautions and protective gear
Before any work begins, confirm that the water supply is shut off and the area is well-lit and ventilated; this reduces the risk of accidental sprays, slips, and inhalation of fumes from penetrating oils.
Wear safety glasses, nitrile gloves, and non-slip shoes. Use a towel to protect finishes and a small container for parts.
Keep tools organized and a flashlight handy for visibility.
Quick Answer: How to Remove an Aerator from a Pull-Down Faucet
A pull-down faucet aerator can usually be removed in 5–15 minutes with moderate difficulty using basic tools or by hand.
If the aerator is corroded, sealed with mineral buildup, or set deep in the pull-down head, professional service is recommended to prevent damage.
Calling a plumber is also advised when attempts to remove it risk voiding the faucet warranty or when the user lacks confidence in handling tight fittings.
One-sentence summary with expected time and difficulty
Quickly remove the pull-down faucet’s aerator in about 5–10 minutes using basic tools; difficulty is easy for someone comfortable with simple hand tasks.
The process typically involves extending the spray head, securing it, unscrewing the aerator (by hand or with pliers and a cloth), cleaning or replacing the screen and washer, then reassembling and testing for leaks.
When to call a professional
If someone encounters stubborn corrosion, stripped threads, a broken spray-head hose, or persistent leaks after attempting removal, it’s time to call a professional.
A licensed plumber can prevent further damage, assess hidden valve or cartridge issues, and replace parts safely.
Seek help when tools fail, access is restricted, or warranty concerns exist.
Emergency service is warranted for major leaks or water damage.
Understanding Pull-Down Faucet Aerators
An aerator is a small mesh-and-screen assembly fitted at a faucet’s outlet that regulates flow, reduces splash, and traps debris.
Pull-down faucet aerators often sit inside a retractable spray head or use a quick-connect insert, so their shape and access differ from the exposed threaded aerators on standard faucets.
Common varieties include standard male or female threaded aerators, snap-in inserts, and proprietary cartridges with varying thread sizes and flow ratings.
What an aerator is and why it matters
A faucet aerator is a small screened device threaded onto the spout that mixes air into the water stream to reduce splashing, conserve flow, and improve perceived pressure.
In pull-down faucets, it also protects the spray head and can trap debris or mineral buildup that affects performance.
Regular inspection and cleaning preserve spray quality, prevent clogging, and extend faucet longevity while saving water and energy.
How aerators differ on pull-down vs. standard faucets
Having discussed why aerators matter, the focus shifts to how pull-down faucet aerators differ from those on standard fixed spouts.
Pull-down aerators are often recessed, smaller, or integrated into the spray head to accommodate the hose and swivel mechanism.
Accessibility, sealing methods, and exposure to hose movement increase variation, affecting removal approach and requiring attention to hidden fasteners and flexible connections.
Common aerator types and threads
Different designs and thread standards define how pull-down faucet aerators fit and function, so recognizing the common types—standard male or female threaded inserts, cartridge-style screens, and integrated spray heads—is essential for removal and replacement. Identification guides tool choice and replacement parts; thread size, pitch, and housing visibility determine whether unscrewing, prying, or cartridge extraction is required.
| Type | Typical thread |
|---|---|
| Male threaded | 15/16″-27 |
| Female threaded | 55/64″-27 |
| Cartridge-style | No external thread |
| Integrated spray | Manufacturer-specific |
Step-by-Step Removal Process
The following steps outline the practical procedure for removing a pull-down faucet aerator, beginning with preparing the faucet and workspace.
The guide covers identifying the aerator type and correct rotation, attempting hand removal, and using pliers or a strap wrench while protecting the finish.
It concludes with proven techniques for dealing with stuck or corroded aerators.
Step 1 Prepare the faucet and workspace
Before touching the aerator, clear the surrounding area and shut off the water supply to prevent drips and accidental flow; place a towel or small basin beneath the spout to catch any loose parts.
Inspect available tools—adjustable wrench, rubber jaw pliers, or aerator key—and protect finishes with tape.
Guarantee good lighting, steady footing, and a clean surface to organize removed components.
Step 2 Identify the aerator type and direction to turn
With the area secured and tools at hand, attention turns to identifying the aerator style and which way it must be turned.
The technician inspects for external threading, internal threading, or snap-in designs. Note arrow indicators or flat sides for a wrench.
Determine clockwise-to-tighten versus counterclockwise-to-loosen based on visible threads and manufacturer marks before attempting removal.
Step 3 Removing by hand
Begin by positioning a finger and thumb around the aerator housing to establish a firm grip.
Then gently turn counterclockwise if threads are visible (or follow the direction identified previously for nonstandard fittings).
If resistance eases, continue steady turns until the aerator unscrews.
Inspect threads and inner components as it is removed, catching any loose seals or screens to prevent loss.
Step 4 Using pliers or strap wrench without damaging finish
If the aerator will not loosen by hand, a protected gripping tool should be used to prevent scratching the finish.
The technician wraps a thin cloth or uses rubber jaws around pliers, or selects a strap wrench sized to the aerator.
Apply steady, even pressure counterclockwise, avoiding sudden twists.
Once loosened, finish removal by hand to prevent overtightening or damage.
Step 5 Techniques for stuck or corroded aerators
When an aerator is seized by mineral deposits or corrosion, apply incremental force and specialized methods rather than brute strength; the technician soaks the aerator joint with vinegar or a descaler, allows dwell time, then tries gentle turning with a strap wrench.
If immobile, tap the housing lightly to break mineral bonds, reapply penetrating oil sparingly, and repeat extraction attempts until loosened.
Step 6 Cleaning or replacing the aerator components
After loosening and removing the aerator housing as described previously, the technician inspects its components—screen, flow restrictor, rubber washer, and housing—for mineral buildup, corrosion, or damage.
Mineral deposits are soaked in vinegar, gently brushed with an old toothbrush, and rinsed. Damaged or excessively corroded parts are replaced with matching components; elastic washers are swapped for secure sealing.
Step 7 Reinstalling or testing the aerator
Reinstall the cleaned or replaced components into the aerator housing in the correct order—screen, flow restrictor, and rubber washer.
Then thread the housing back onto the faucet by hand to guarantee proper alignment.
Tighten gently with pliers using a cloth to avoid scratching.
Run water to check flow and spray pattern.
Inspect for leaks; if present, reseat washer or tighten slightly and retest.
Troubleshooting Common Problems
If the aerator refuses to budge despite applied force, gentle penetrating oil and heat may free seized threads, but care is needed to avoid damage.
Stripped threads or a damaged aerator housing often require replacement of the aerator or adapter, while mineral buildup inside a pull-down spray head usually responds to soaking in vinegar or a descaling solution.
After reassembly, any leaks should be isolated to the aerator, washer, or seat and corrected by reseating, replacing seals, or tightening to the specified torque.
Aerator won’t budge after applying force
When an aerator refuses to move despite firm twisting and prying, the issue is usually corrosion, mineral buildup, or a seized thread that locks the pieces together; identifying which is responsible guides the next steps, such as applying penetrating oil, using heat, or switching to specialized tools to prevent damage to the faucet finish.
If penetrating oil and gentle heat fail, use strap or rubber-jaw pliers and protect surfaces; work incrementally.
Damaged threads or stripped aerator housing
Assess the threads and housing for visible wear: rounded, cross-threaded, or flattened grooves and cracked metal or plastic indicate damage that can prevent a secure seal and proper removal.
If threads are stripped, replacement of the aerator or male/female adapter is required. Use a compatible replacement, and if the faucet outlet is damaged, consider a repair kit or professional service to restore proper threading and sealing.
Mineral buildup inside spray head of pull-down hose
Damaged threads that prevent proper removal of an aerator can also signal long-term exposure to hard water, which frequently causes mineral buildup inside the spray head of a pull-down hose.
Mineral deposits restrict spray patterns and reduce water flow.
Disassemble the spray head per manufacturer instructions, soak components in vinegar solution, gently scrub with a brush, rinse thoroughly, and reassemble, checking function.
Leaks after reassembly
Check connections and seals immediately after reassembly to identify the source of any leaks.
Inspect the aerator, O-rings, and hose connection for misalignment, damaged threads, or crushed seals.
Tighten fittings snugly but avoid overtightening.
Replace worn O-rings or thread tape as needed.
Test with low water pressure, then full pressure, observing for persistent drips and correcting the specific faulty component.
Replacing and Upgrading Aerators
When selecting a replacement aerator, the user should match size, thread type, flow rate, and preferred material to the existing faucet and local regulations.
They should weigh low‑flow options for water savings against high‑flow aerators for stronger performance.
If flow problems persist or the spray pattern remains uneven, replacing the entire spray head or cartridge may be the better solution.
How to choose the right replacement aerator (size, flow rate, material)
Selecting the correct replacement aerator requires matching three key attributes—size, flow rate, and material—to the faucet and household needs.
Measure thread type (male/female) and diameter; verify flow rating compatible with fixtures; choose corrosion-resistant material (brass, stainless, or plastic) for longevity.
Consider finish matching for appearance.
- Size
- Flow rate
- Material
Low-flow vs. high-flow aerators and water-saving considerations
Although a faucet aerator may seem trivial, choosing between low-flow and high-flow models considerably affects water use, comfort, and utility costs. Low-flow saves water and reduces bills; high-flow improves rinsing and user satisfaction. Selection balances conservation and performance; consider fixtures, household habits, and local regulations.
| Feature | Impact |
|---|---|
| Flow rate | Usage |
| Comfort | Satisfaction |
| Savings | Bills |
| Performance | Rinsing |
| Regulations | Compliance |
When to replace the entire spray head or cartridge
Inspect the spray head and cartridge for persistent leaks, reduced spray quality, or mechanical failure to determine if a full replacement is warranted.
Signs include internal corrosion, stuck diverter valves, frequent clogging after cleaning, or worn seals causing dripping.
If performance issues persist or warranty covers replacement, swap the entire spray head or cartridge for compatibility, improved function, and long-term reliability.
Maintenance Tips to Prevent Future Problems
A simple maintenance routine prevents most aerator issues before they start.
Recommendations include a regular cleaning schedule with gentle methods, using appropriate descaling solutions or mild cleaners, and performing quick checks after periods of seasonal inactivity.
These steps keep flow consistent and reduce the need for frequent removal or replacement.
Regular cleaning schedule and methods
Establishing a simple, regular cleaning schedule keeps aerators flowing freely and prevents mineral buildup that can restrict water flow or cause uneven sprays.
Inspect aerators monthly for debris, run water to check spray pattern, and remove screens quarterly for quick rinses.
Wipe housings and O-rings during reassembly, replace damaged components promptly, and log maintenance dates to maintain consistent performance.
Descaling solutions and safe cleaning products
Remove mineral deposits promptly using descaling solutions formulated for faucets—these break down limescale without damaging finishes or internal parts.
Use pH-neutral cleaners, non-abrasive pads, and manufacturer-approved sprays to protect seals and coatings. Rinse thoroughly after treatment.
Recommended practices:
- Apply dilute vinegar or commercial descaler briefly.
- Soak removable parts in solution.
- Wipe, rinse, and reassemble securely.
Quick checks to perform after seasonal inactivity
Inspect fixtures and supply lines for visible damage or leaks before restoring water flow after seasonal inactivity.
Check aerator screens for mineral buildup and corrosion; remove and clean or replace if clogged.
Run water briefly to purge air and sediment, inspect hose connections and spray head operation, and verify shutoff valves function.
Note any persistent drips or irregular flow for prompt repair.
Common Mistakes and How to Avoid Them
Common errors include using the wrong tools or applying excessive force, which can damage the aerator or faucet.
Small components are easily lost during removal if not collected carefully.
Reinstalling the aerator with incorrect orientation can cause leaks or poor flow.
Using the wrong tools or excessive force
Gripping the aerator with pliers or forcing it with brute strength often damages the finish, strips the threading, or bends internal parts, turning a simple task into a costly repair.
A gentle, tool-appropriate approach prevents harm: use a rubber jar opener, strap wrench, or cloth-wrapped adjustable wrench and apply steady, controlled turns.
Stop if resistance feels abnormal and reassess before proceeding.
Losing small parts during removal
Work carefully to prevent small components—like screens, O-rings, and retaining clips—from slipping into drains or vanishing from the work area.
Place a towel or shallow tray beneath the faucet, use magnetic or labeled small-part containers, and work over a well-lit surface.
Inspect removed pieces immediately, photograph their order if unsure, and keep children and pets away until reassembly is complete.
Reinstalling with incorrect orientation
Reinstalling an aerator with incorrect orientation can cause leaks, reduced flow, or damaged threads; consequently, each part must be aligned exactly as it came off.
The technician should note the order and direction of screens, seals, and housings, test fit by hand, and avoid cross-threading.
If unsure, photograph the assembly before removal and consult manufacturer diagrams to verify correct reinsertion and peak performance.
Visual Aid Suggestions
The article should recommend clear, step-by-step photos that show each stage of aerator removal, from tool placement to final disassembly.
It should also include labeled diagrams illustrating aerator components and common thread types to help readers identify their specific model.
Combining photos with schematic views will reduce confusion and speed correct removal.
Photos to include step-by-step
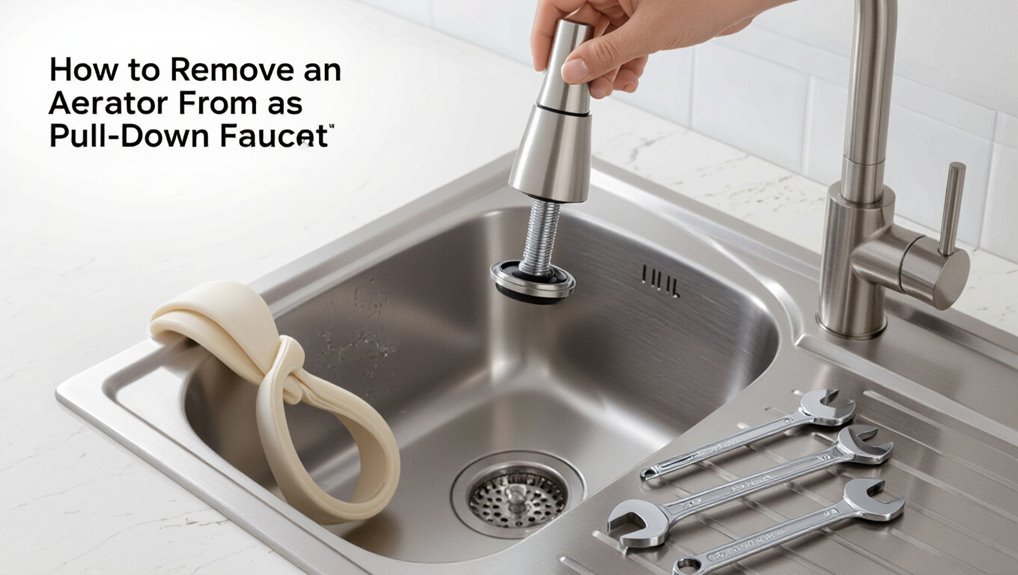
Typically, include clear, sequential photos that match each step of the aerator-removal process, showing tools, hand positions, and the aerator before and after removal.
Capture close-ups of tool engagement, wrist alignment when turning, protective cloth placement, and aerator threads exposed.
Include a shot of removed parts laid out on a towel and a final image demonstrating successful reassembly or faucet condition post-removal.
Diagrams showing aerator components and common thread types
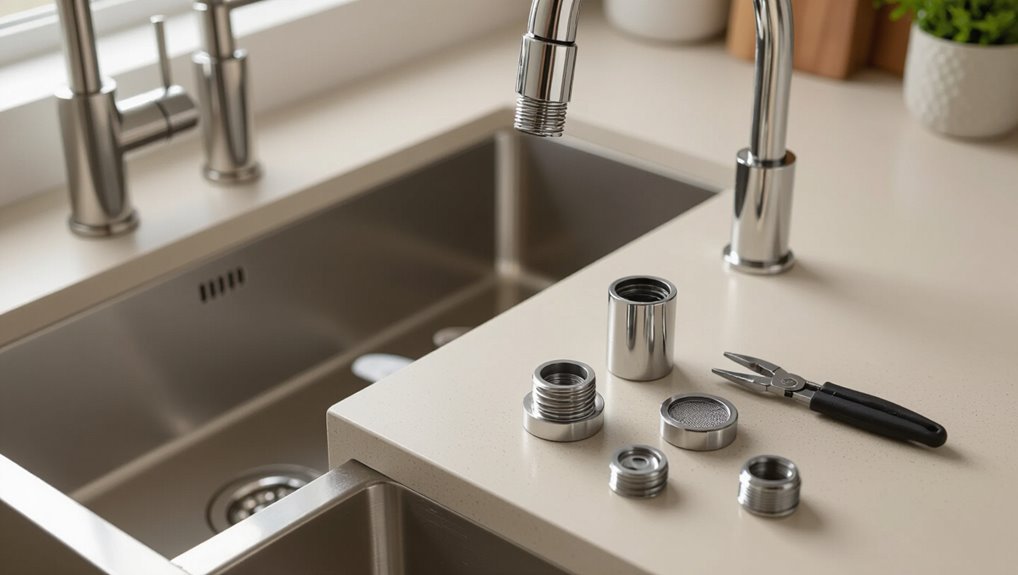
Several clear diagrams help users identify each aerator component and recognize common thread types at a glance.
Illustrations label housing, screen, flow restrictor, O-ring, and retainer.
Include side-view cross-sections showing male versus female threads, pitch differences, and metric versus imperial markings.
Simple callouts for removal tools, common sizes (e.g., 15/16″, 55/64″, M22), and orientation reduce confusion.
Conclusion
To summarize, the homeowner learned to identify the aerator, to protect the finish, to apply steady pressure, and to use the right tool; the homeowner practiced patience, inspected for debris, tested water flow, and replaced worn parts; the homeowner kept spare seals, scheduled brief cleanings, monitored spray patterns, and avoided overtightening. By repeating these simple actions, the pull-down faucet remained reliable, efficient, and trouble-free, saving time, effort, and expense.
