How to Fix a Cracked Cast Iron Sewer Pipe: Step-by-Step Repairs, Costs & When to Call a Pro
If you have a cracked cast iron sewer pipe, you can often stabilize it using epoxy putty, rubber sleeves, or stainless steel repair couplings for small, accessible leaks. However, larger fractures, severe corrosion, buried sections, or root intrusion usually necessitate sectional replacement or trenchless relining by a licensed plumber. Costs can vary widely—from budget-friendly DIY kits to several thousand dollars for professional repairs. This guide will help you determine which repair method is suitable, the associated costs, and when it’s best to call a professional.
What to Do First When You Discover a Cracked Cast Iron Sewer Pipe
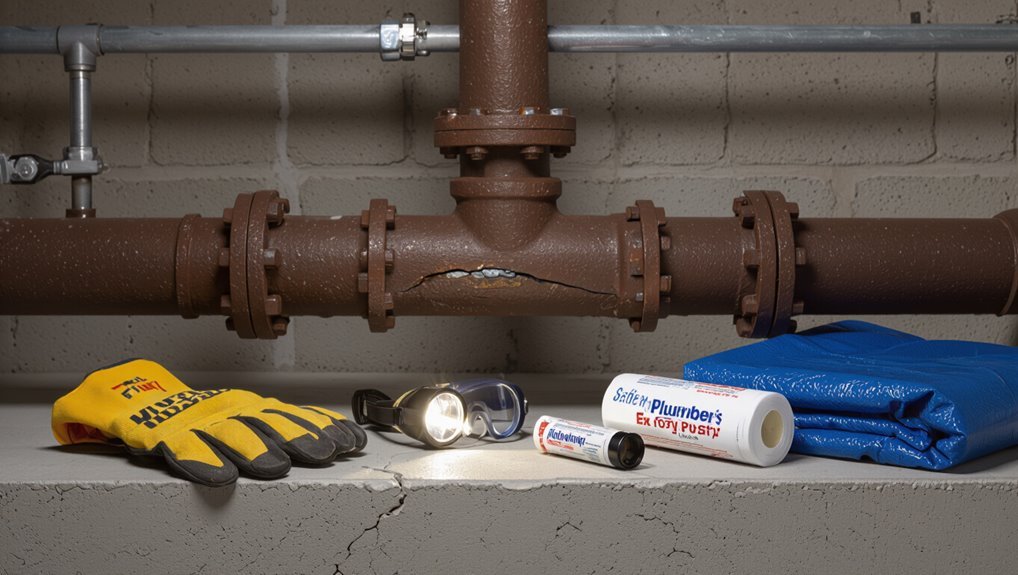
Upon discovering a cracked cast iron sewer pipe, the first actions are to secure the area, limit exposure to sewage, and address immediate sanitation and safety hazards.
Next, a quick visual assessment should distinguish obvious, visible damage from potential hidden leaks or structural issues that may require cameras or professional inspection. The homeowner should consider shutting off water and isolating the septic system if leakage is significant.
Finally, photograph and document all visible damage and conditions for insurance claims or contractor estimates before any major cleanup or repairs begin.
Immediate safety and sanitation steps
When a cast iron sewer pipe is found cracked, the immediate priority is to protect people and prevent further contamination: isolate the affected area, stop water use to limit flow into the damaged line, and ventilate the space to disperse odors and gases.
Wear gloves, masks, and eye protection; block off HVAC vents; place absorbent materials for leaks; document conditions for repair decisions and how to fix a cracked cast iron sewer pipe.
How to assess visible vs. hidden damage
How should one distinguish between visible and hidden damage to a cracked cast iron sewer pipe?
Inspect exposed sections for rust, spalling, hairline cracks, and active leaks; note surrounding stains, soft soil, or sinkholes indicating subsurface issues.
Use a flashlight and mirror for joints.
For hidden concerns, recommend camera inspection, probe adjacent soil, and monitor odors or slow drains to infer concealed deterioration requiring professional evaluation.
When to shut off water and septic systems
At the first sign of a cracked cast iron sewer pipe, the homeowner should immediately consider shutting off the water and isolating the septic system to prevent further contamination, backups, and structural damage.
Shut main water if leaks risk flooding; stop indoor water use. Close septic inlet valves or divert flow if possible.
Notify professionals before restoring service to avoid worsening damage.
Documentation and photos for insurance or contractor estimates
Document the damage immediately with photos, notes, and timestamps to create a clear record for insurance claims and contractor estimates.
Capture wide shots showing location, close-ups of cracks, surrounding rot, and any displaced fittings.
Note date, time, odors, and symptoms.
Keep original receipts, repair bids, and communication logs.
Store copies digitally and physically to streamline claims and contractor assessments.
Quick Answer: Can You Repair a Cracked Cast Iron Sewer Pipe Yourself?
A homeowner can handle minor, accessible hairline cracks or shallow corrosion with the right tools and materials.
Extensive damage, multiple joins affected, sewer odors, persistent leaks, or buried/structurally compromised sections typically require a licensed plumber.
The choice hinges on pipe condition, access, and the risk of further collapse or contamination.
Situations where DIY repair is feasible
When is a DIY repair reasonable for a cracked cast iron sewer pipe?
DIY is feasible for small, accessible hairline cracks, surface corrosion without structural loss, or when using patch kits, epoxy, or coupling repairs on short sections.
Homeowner must have plumbing experience, proper tools, permits, clear access, and ability to test for leaks.
Complex fractures, multiple joints, offset pipes, or root intrusion mandate professional intervention.
Situations that require a professional
Why should a professional be called for a cracked cast iron sewer pipe?
Complex damage, extensive corrosion, collapsed sections, sewer gas leaks, or recurring blockages typically require professional diagnosis and repair.
Trained plumbers use cameras, cutting and relining tools, and proper seals; they guarantee code compliance, prevent contamination, and assess structural risk.
DIY efforts risk worsening damage, costly replacements, and health hazards.
Basics of Cast Iron Sewer Pipes
Cast iron sewer pipes are typically installed in segments joined by leaded or rubber couplings and can fail where joints settle, crack under load, or corrode from prolonged exposure to moisture and acidic wastes.
Common causes of cracking and corrosion include ground movement, tree root intrusion, chemical attack, and internal corrosion from hydrogen sulfide.
Typical lifespans range from 50 to over 100 years, but widespread rusting, multiple cracks, persistent backups, or foul odors indicate systemic failure requiring thorough repair or replacement.
How cast iron pipes are installed and how they fail
Installers typically join iron sewer pipes using bell-and-spigot fittings sealed with oakum and molten lead or, in later systems, rubber or mechanical couplings; the method chosen affects both alignment and long-term performance.
Pipes rest on bedding, are supported at intervals, and connect with cast branches or adapters.
Failure manifests as joint separation, cracking from stress, or loss of support leading to misalignment and leakage.
Common causes of cracking and corrosion
Cracking and corrosion in cast iron sewer pipes arise from a mix of mechanical stresses, environmental chemistry, and aging materials.
Ground movement, traffic loads, and vibration create fatigue and fractures.
Electrochemical corrosion from soil minerals, acidic runoff, and stray electrical currents thins walls.
Chemical attack from sewer gases and acidic effluent accelerates pitting.
Poor installation, improper bedding, and incompatible repairs exacerbate deterioration.
Typical lifespan and signs of systemic failure
While many factors influence longevity, typical service lives for cast iron sewer pipes generally range from 50 to 100 years under favorable conditions.
Systemic failure signs include widespread pinhole leaks, persistent odors, recurring backups, sagging runs, and multiple joint separations.
Accelerated deterioration occurs with soil acidity, heavy traffic loads, or electrochemical corrosion.
When several symptoms appear, thorough inspection and section replacement are advised.
Tools, Materials, and Preparations Needed for Repairs
Before starting any repair, the practitioner should guarantee appropriate safety gear and site protection are in place and confirm permit and local code requirements.
A concise tools list for inspection, cutting, and joining—such as inspection cameras, grinders or reciprocating saws, pipe cutters, and torque wrenches—will be needed.
Required materials typically include repair couplings or sleeves, epoxy or pipe wrap, and compatible replacement pipe sections.
Safety gear and site protection
A repairer’s personal protective equipment and careful site containment are essential for safely addressing a cracked cast iron sewer pipe; at minimum this includes chemical-resistant gloves, eye protection, a respirator rated for organic vapors and particulates, knee pads, and waterproof boot covers, plus impermeable drop cloths, plastic sheeting to seal off the area, and absorbent pads for spills.
Additional measures: adequate ventilation, caution signage, and proper disposal containers.
Tools list for inspection, cutting, and joining
Gather the necessary tools and materials so the inspection, cutting, and joining stages proceed efficiently and safely.
Required items include a flashlight or inspection camera, tape measure, marker, pipe wrenches, adjustable wrench, reciprocating saw with carbide or diamond blade, grinder with cutting wheel, deburring tool, pipe clamps, torque wrench, plumber’s tape, shop vacuum, drain plugs, and disposable gloves.
Materials: couplings, sleeves, epoxy, replacement pipe types
With the inspection and cutting tools staged, attention turns to selecting materials that will restore integrity and seal the line.
Common options include stainless steel repair couplings, banded sleeves for short cracks, and epoxy putties or injection systems for pinhole leaks.
Full replacements use cast iron, PVC, or ABS pipe sections with appropriate junction fittings and corrosion-resistant fasteners selected for sewer applications.
Permits and local code considerations
Permits and local code requirements determine what repairs are permitted, which materials and methods meet standards, and whether inspections or licensed contractors are required before work begins.
Homeowners should verify municipal plumbing codes, obtain necessary permits, and follow inspection schedules.
Some jurisdictions mandate certified installers for sewer replacement or trenchless relining.
Failure to comply risks fines, insurance denial, and costly rework.
Step-by-Step Repair Options for Cracked Cast Iron Sewer Pipes
The section outlines practical repair options for cracked cast iron sewer pipes, starting with immediate temporary fixes to stop leaks.
It then compares common methods—rubber repair sleeves with stainless clamps, epoxy putty and patching, sectional replacement using no-dig couplings, and trenchless cured-in-place pipe (CIPP) lining—while noting typical steps and when each is appropriate.
Each approach is presented with concise, actionable steps and considerations for durability, cost, and required access.
Temporary fixes to stop leaks immediately
Act quickly: when a cast iron sewer pipe shows an active crack or leak, immediate temporary measures can limit water damage and odors until a permanent repair is made.
Apply quick temporary actions to contain flow, protect surrounding areas, and reduce health risks while arranging professional repair.
- Clamp or brace to slow seepage, feeling anxious but hopeful
- Patch with plumber’s putty, relieved temporarily
- Redirect drainage, urgency to protect belongings
- Use buckets and dehumidifiers, tense vigilance
Repair method A: Using rubber repair sleeves and stainless clamps
Once immediate containment is in place, a common and reliable interim-to-long-term repair is to install a rubber repair sleeve secured with stainless steel clamps.
The procedure: clean and dry the pipe, center the sleeve over the crack, tighten multiple corrosion-resistant clamps evenly, torque to manufacturer specs, and verify a watertight seal.
This method accommodates slight irregularities and resists corrosion for extended service life.
Repair method B: Epoxy putty and pipe patching
Apply epoxy putty and a matching patch to seal localized cracks quickly and durably, making this method suitable for small fractures and non-structural leaks in cast iron sewer pipes.
Surface preparation, including cleaning and drying, guarantees adhesion.
Mix and apply putty, press patch over cured material, then secure until fully set.
Inspect for leaks and monitor periodically to confirm long-term integrity.
Repair method C: Sectional replacement with no-dig couplings
For cracks too extensive for epoxy patches or located where structural integrity must be restored, sectional replacement using no-dig couplings offers a minimally invasive option.
Technicians cut out the damaged section, measure and fit a replacement pipe, then secure rubber-sleeved stainless clamps to existing cast iron ends. This restores alignment and flow with limited excavation, suitable for short runs and spot repairs.
Repair method D: Trenchless pipe lining (CIPP) overview and steps
Trenchless pipe lining, commonly called CIPP (cured-in-place pipe), rehabilitates cracked cast iron sewer lines by creating a continuous, jointless resin-saturated liner inside the existing pipe without full excavation.
Technicians inspect and clean the pipe, measure and prepare a resin-impregnated sleeve, invert or pull the sleeve into place, cure it with steam or UV to harden, then trim and reconnect fittings for immediate service.
Repair method E: Full pipe replacement (open trench) steps
Begin by excavating the pipe run to expose the damaged sections.
Then proceed with a systematic removal and replacement of the cast iron line using an open-trench method.
Shore the trench, cut and remove old sections, install new pipe segments with proper pitch and bedding, reconnect fixtures, pressure-test for leaks, backfill in layers, compact, and restore surface finishes to code and site standards.
How to Choose the Right Repair Method
Choosing the appropriate repair method depends on objective factors such as crack size and location, overall pipe condition, surrounding soil and surface load, and the homeowner’s cost versus longevity priorities.
Smaller, accessible cracks or sound pipe sections may suit trenchless lining, while extensive damage, unstable soil, or heavy loads often require open replacement.
The selection balances immediate expense against expected service life and site constraints.
Decision factors: crack size, location, pipe condition, soil and load
Repair decisions hinge on several objective factors: the crack’s width and length, its position along the run or at joints, the overall condition and remaining wall thickness of the cast iron, and external influences such as soil type and surface loads.
Practitioners assess whether cracks are hairline, segmented, or through-wall; accessibility; corrosion extent; groundwater and frost risk; and traffic or structure loads to select lining, clamp, splice, or replacement.
Cost vs. longevity tradeoffs
Cost considerations and expected service life often determine which repair path is selected after evaluating crack characteristics and external conditions.
Short-term fixes like epoxy patches and band clamps are cheaper but may require rework sooner.
Full section replacements and high-quality relines cost more upfront yet offer decades-long durability.
Owners should weigh immediate budget limits against projected lifespan and maintenance frequency.
When trenchless vs. open replacement is better
When site access is limited or disruption must be minimized, trenchless techniques often provide a faster, less invasive alternative to open replacement; conversely, extensive structural damage, multiple lateral failures, or mismatched pipe gradients typically necessitate open excavation to guarantee a reliable, long-term fix.
Decision factors include pipe length, soil conditions, tree roots, local permits, budget, and expected lifespan; professionals assess camera inspections and structural reports.
Cost Estimates and Budgeting
Estimated costs for DIY repairs (patching, sealants, section replacement) and for professional services are summarized to help compare price points by method.
Typical professional repair and full replacement ranges are provided alongside average timeframes and factors that drive price variation.
The overview also flags hidden expenses—landscaping restoration, permit fees, and emergency call-out charges—that should be included in a realistic budget.
Typical DIY repair costs by method
Breaking down expected expenses helps homeowners choose the most appropriate DIY repair method for a cracked cast iron sewer pipe. Typical options, materials, and approximate costs follow—patch kits and epoxy, pipe sleeve, slip coupling, clamp repair, and replacement sections vary by complexity and tool needs.
| Method | Estimated DIY Cost |
|---|---|
| Patch kit / epoxy | $20–$80 |
| Pipe sleeve | $50–$150 |
| Slip coupling | $30–$120 |
| Clamp repair | $25–$100 |
| Replacement section | $80–$300 |
Typical professional repair and replacement cost ranges
Although repair costs vary with damage severity and access difficulty, homeowners should expect professional work on cracked cast iron sewer pipes to run considerably higher than DIY options. Typical ranges: inspections $150–$400, spot repairs $500–$1,500, relining $1,000–$6,000, and full replacement $3,000–$10,000.
| Service | Low | High |
|---|---|---|
| Inspection | $150 | $400 |
| Spot repair | $500 | $1,500 |
| Pipe relining | $1,000 | $6,000 |
| Full replacement | $3,000 | $10,000 |
Hidden costs to consider (landscaping, permits, emergency service)
Often overlooked, hidden costs can add substantially to the invoice for repairing or replacing a cracked cast iron sewer pipe.
Landscaping restoration, tree root mitigation, and driveway or patio repairs increase expenses.
Permit fees and inspection charges vary by jurisdiction.
Emergency service calls, expedited parts, or after-hours labor carry premium rates.
Contingency budgeting of 10–20% helps absorb these unpredictable add-ons.
How to Hire a Professional Plumber or Contractor
When hiring a plumber or contractor for a cracked cast iron sewer pipe, the homeowner should verify licenses, relevant experience with cast iron repairs, and professional references.
During on-site estimates, key questions include the proposed repair method, timeline, permits required, and responsibility for unforeseen damage.
Compare written estimates for scope, itemized costs, timelines, and warranty terms before making a selection.
What qualifications and experience to look for
Before hiring anyone to repair a cracked cast iron sewer pipe, homeowners should verify specific credentials and track records to guarantee competence and compliance.
Preferred professionals hold state plumbing licenses, insurance (liability and workers’ comp), and bonding.
Seek specialists with documented cast iron or sewer-replacement experience, references, warranty policies, and familiarity with local codes and permits.
Relevant trade certifications and years on similar jobs add credibility.
Questions to ask during estimates
What should be clarified during an on-site estimate? The homeowner should confirm scope, materials, timeline, and contingency plans.
Ask about permits, access needs, and disruption. Verify insurance, payment schedule, and disposal.
- Will this restore safety and stop recurring damage?
- Can this be completed without major disruption?
- Is the price fair and transparent?
- Who is responsible if something goes wrong?
Comparing written estimates and warranties
How should a homeowner weigh written estimates and warranties to choose the best contractor?
A homeowner compares line-item estimates, verifying scope, materials, labor, permits, and timeline.
Evaluate warranty length, coverage (parts, labor, workmanship), transferability, and exclusions.
Confirm written guarantees and contractor licensing/insurance.
Favor transparent, detailed bids and longer, broader warranties; document agreements before work begins to avoid disputes.
Common Problems and How to Avoid Them
Common problems with cracked cast iron sewer pipes include DIY mistakes such as improper sealing or incorrect pipe alignment, which can be prevented by following manufacturer instructions and using the right tools.
Failed repairs often show persistent odors, recurrent backups, or new leaks, and should prompt immediate reevaluation by a qualified plumber.
Delaying proper repair can lead to corrosion spread, structural damage, and higher replacement costs over time.
Mistakes during DIY repairs and how to prevent them
Attempting a DIY repair on a cracked cast iron sewer pipe can lead to costly errors when homeowners underestimate the pipe’s condition, use improper materials, or skip necessary safety and diagnostic steps.
Common mistakes include inadequate patching, ignoring corrosion, poor joint sealing, and unsafe confined-space work.
Preventive measures: proper inspection, right materials, correct techniques, and safety gear.
- Panic at leaks
- Regret costly redo
- Anxiety over odors
- Frustration with delays
Signs a repair has failed and next steps
After a DIY patch or professional repair, signs that the fix has failed are often obvious and should prompt immediate action: recurring leaks, persistent sewer gas odors, wet spots or mold growth near joints, and slow or gurgling drains.
Document symptoms, shut off affected fixtures if needed, contain water damage, and contact the original contractor for warranty coverage; otherwise arrange a licensed plumber for inspection and permanent repair.
Long-term issues from delayed repair
When repairs to a cracked cast iron sewer pipe are postponed, small problems can escalate into costly structural, health, and environmental hazards. Untreated leaks weaken surrounding soil and foundations, promote mold growth, and allow sewage to corrode nearby materials.
Over time, pipe collapse, sinkholes, pervasive odors, pest infestations, and groundwater contamination can occur. Prompt inspection, targeted repairs, and routine maintenance prevent escalation and larger remediation costs.
Preventive Maintenance and Extending the Life of Sewer Pipes
A regular inspection schedule using camera surveys and periodic smoke or dye tests helps detect early corrosion, joint leaks, and blockages before they lead to cracks.
Managing soil compaction, controlling tree root intrusion, and limiting surface loads over sewer runs reduce external stresses that accelerate failure.
When replacement is required, selecting corrosion-resistant materials and modern lining or trenchless upgrade methods can substantially extend service life.
Recommended inspection schedule and techniques
Several targeted inspections per year provide the best balance between cost and early problem detection for cast iron sewer systems.
Recommend biannual visual checks and interior camera inspections every 2–4 years, increasing frequency for older pipes or recurring issues.
Include smoke testing and dye tracing when leaks or cross-connections are suspected.
Maintain clear records, photograph defects, and schedule professional assessments after any significant change.
Soil, tree root, and load management strategies
Control soil conditions, roots, and surface loads to minimize external stresses that cause cast iron sewer pipes to crack or misalign.
Maintain proper drainage and compact backfill to prevent settling.
Install root barriers and remove invasive trees at safe distances.
Limit heavy vehicle traffic and redistribute loads with reinforced surface structures.
Monitor for signs of movement and address issues promptly to prolong pipe life.
Upgrades and materials for long-term reliability
When planning upgrades for long-term reliability, engineers prioritize materials and methods that resist corrosion, root intrusion, and mechanical stress while minimizing disruption during installation.
Options include PVC and HDPE relining, epoxy or cured-in-place pipe (CIPP) liners, stainless or ductile iron replacements, and mechanical seals.
Regular inspection, root barriers, and targeted trenchless repairs extend service life while reducing excavation and future failures.
Real-World Repair Scenarios and Case Examples
The section presents three real-world scenarios: a small crack repaired with a sleeve including typical timeline and cost, a comparison of trenchless lining versus open replacement outcomes, and lessons learned from an emergency full replacement after a collapse.
Each case highlights decision criteria, expected performance, and financial trade-offs.
Readers are guided to practical takeaways for choosing the most appropriate repair strategy.
Small crack repaired with sleeve timeline and cost
Several homeowners have documented repairs where a small longitudinal crack in a cast iron sewer pipe was stabilized using a stainless-steel sleeve and epoxy sealant; typical on-site work takes 2–4 hours for access, fitting, and curing, with total disruption limited to a small excavation or crawlspace operation.
Average materials and labor range $300–$900, warranties often 1–5 years, and follow-up inspection is recommended within six months.
Trenchless lining vs. open replacement comparative outcomes
How do outcomes compare between trenchless lining and open replacement in real-world cast iron sewer repairs?
Case studies show trenchless lining minimizes excavation, reduces disruption and restores flow quickly with lower short-term cost, but may not address severe corrosion or collapsed sections.
Open replacement yields thorough removal of degraded pipe, higher durability and predictable lifespan but involves greater expense, longer disruption and landscaping restoration.
Emergency full replacement after collapse lessons learned
Following the comparison between trenchless lining and open replacement, emergency full replacement scenarios highlight failures where immediate, thorough action was unavoidable.
Case examples reveal collapsed cast iron sections, widespread root intrusion, and unstable soil requiring excavation.
Lessons learned emphasize rapid assessment, shoring, coordinated permits, temporary service restoration, and selecting durable materials.
Timely full replacement minimized recurring backups and long-term costs.
Aftercare: Testing and Confirming a Successful Repair
After repairs, the team performs pressure testing and visual or camera inspection of the patched section to verify watertight integrity and proper alignment.
A schedule for follow-up inspections is recommended—typically a short-term check after a few weeks of normal use and periodic reviews aligned with local codes or known risk factors.
Detailed documentation of tests, inspection reports, and repair photos should be retained for homeowner records, insurance claims, or future property transactions.
How to pressure-test and inspect repaired sections
Begin by isolating the repaired section and preparing for a controlled pressure test to verify watertightness and structural integrity.
Plug both ends, pressurize to manufacturer-recommended psi, and monitor for pressure loss.
Inspect joints, seals, and surrounding soil for seepage.
Use a smoke or dye test for small leaks and a camera inspection to confirm internal integrity before restoring flow and backfill.
When to schedule follow-up inspections
A practical schedule for follow-up inspections balances early verification with longer-term monitoring to guarantee the repaired cast iron sewer pipe remains watertight and structurally sound.
Inspectors recommend checks at 1 week, 1 month and 6 months post-repair, then annually for several years.
Additional inspections follow heavy storms, nearby excavation, or recurring drainage issues.
Prioritize camera exams and leak tests to confirm integrity.
Documentation for home sale or insurance
Following the scheduled inspections and any necessary rechecks, homeowners should compile a clear set of documents demonstrating the repair’s scope and performance for prospective buyers or insurers.
Include invoices, contractor certifications, CCTV inspection videos/stills with timestamps, pressure or smoke test results, warranty details, permit closures, and photos before/during/after repair.
Store originals and create digital copies for easy sharing during sale or claims.
Quick Reference: Repair Method Pros, Cons, and Best Use Cases
When selecting a repair method for a cracked cast iron sewer pipe, homeowners and professionals should weigh the trade-offs among durability, cost, disruption, and suitability for the specific defect; the following quick-reference summary distills each option’s primary pros, cons, and best-use scenarios to guide a practical decision.
| Method | Pro | Con |
|---|---|---|
| Patch/Clamp | Low cost | Short-term |
| CIPP Liner | Long-lasting | Higher cost |
| Replace Section | Permanent | Most disruptive |
Conclusion
When a cracked cast iron sewer pipe is found, assess the damage, choose an appropriate repair, and act promptly to prevent further harm. DIY fixes can save money on small defects, while relining or replacement suits extensive deterioration. Seal joints, restore flow, and monitor performance to confirm success. Maintain surfaces, schedule inspections, and address corrosion early to extend service life. Balance cost, complexity, and longevity when deciding whether to hire a professional.