How to Remove a Sink Stopper to Clean the Drain: Step-by-Step Fix for Every Type
To remove a sink stopper for cleaning, first identify the type of stopper—pop-up, lift-and-turn, push-pull, toe-touch, or grid. Gather basic tools and follow these steps: For pop-ups, detach the pivot rod under the sink; for lift-and-turn or push-pull stoppers, unscrew or release the retaining clip; and for grid or lift-out stoppers, simply pull straight up. Position a bucket under the P-trap, wear gloves, and clean the parts gently before reassembling. Additional steps are available for specific disassembly and troubleshooting.
What to expect when removing a sink stopper
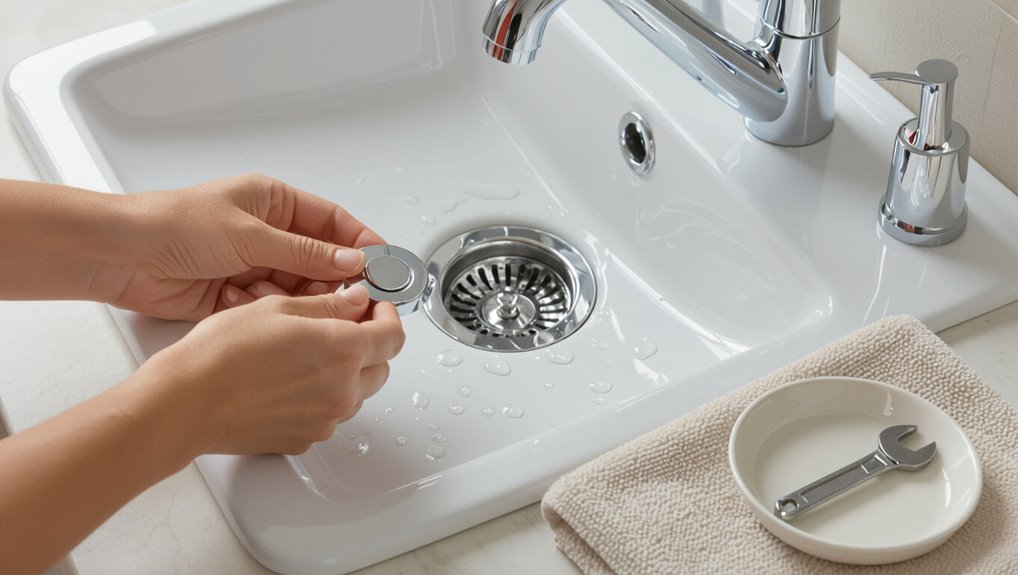
The section outlines common stopper types—lift-and-turn, pop-up, and push-button—and how their mechanisms affect removal.
It lists typical tools and materials such as pliers, screwdrivers, plumber’s grease, and towels.
It also notes basic safety steps and signs that a plumber should be called for more complex or risky repairs.
Common types of sink stoppers and how they differ
Different sink stoppers—pop-up, lift-and-turn, push-button, and grid—have distinct mechanisms and attachment methods, so removal steps and common problems vary accordingly.
Pop-up stoppers connect via pivot rods; lift-and-turn unscrew; push-button often release with a spring clip; grid stoppers simply lift out.
Knowing each type clarifies how to remove sink stopper to clean drain and anticipate stuck parts or corroded fittings.
Tools and materials you’ll likely need
Gather basic tools and a few common materials before attempting to remove a sink stopper to streamline the task and reduce surprises.
A small adjustable wrench, channel-lock pliers, Phillips and flathead screwdrivers, needle-nose pliers, and a hex or Allen key are useful.
Add plumber’s grease, a bucket, rags, a flashlight, and a tube of plumber’s putty or silicone sealant for reassembly.
Safety precautions and when to call a professional
Usually, a homeowner should follow basic precautions—turn off water supply if applicable, place a bucket under the P-trap, wear eye protection and gloves, and guarantee good lighting—because working under a sink can expose hands to sharp edges, chemical residue, and unexpected leaks.
If corrosion, seized fittings, persistent odors, or complex pop-up mechanisms appear, advise contacting a licensed plumber to prevent damage or injury.
Quick answer: How to remove any sink stopper in under 10 minutes
A brief, step-by-step rundown shows how to remove common stopper types quickly.
For pop-up and lift-and-turn units, disconnect the pivot rod beneath the sink;
push-pull and toe-touch models usually unscrew or pull straight up;
grid and lift-out stoppers lift out after loosening any retaining screws or clips.
With basic tools and the drain assembly exposed, most stoppers come free in under ten minutes.
Fast overview steps for pop-up, lift-and-turn, push-pull, toe-touch, grid, and lift-out stoppers
Start by identifying the stopper type—pop-up, lift-and-turn, push-pull, toe-touch, grid, or lift-out—so the correct quick method can be chosen.
For pop-up: release pivot rod under sink.
Lift-and-turn: unscrew knob, pull stopper.
Push-pull: pull up and twist or release clip.
Toe-touch: depress and lift after removing spring.
Grid: pull straight out.
Lift-out: lift and wiggle free.
Identify your stopper type (step-by-step diagnosis)
First, inspect visible parts: a horizontal pivot rod under the basin and a vertical lift rod behind the faucet usually indicate a pop-up (pivot rod) stopper.
Next, note top-mounted mechanisms—lift-and-turn has a rotating cap, push-pull has a pull-up cap, toe-touch responds to a foot tap, and push-button clicks down and springs up.
Finally, look for a perforated grid or a removable lift-out strainer in the drain opening to identify grid or lift-out designs.
Visual cues for pop-up (pivot rod) stoppers
How can one quickly recognize a pop-up (pivot rod) stopper?
Look under the sink for a horizontal pivot rod entering the tailpiece and a vertical lift rod above the faucet.
The stopper moves by tilting on a pivot, not by unscrewing.
The visible linkage, a clevis strap with a spring clip or cotter pin, confirms a pop-up/pivot assembly.
Signs of lift-and-turn and push-pull stoppers
What clues indicate a lift-and-turn or push-pull stopper? A lift-and-turn has a visible knob or seam on top; it rotates slightly before lifting and usually stays angled when open. A push-pull is smooth on top, operates by pressing down to lock and pressing again to release. Both lack an external pivot rod and sit centered in the drain opening.
How to recognize toe-touch and push-button designs
Curious which mechanism sits beneath the drain? The text describes toe-touch and push-button stoppers.
Toe-touch units operate by pressing the visible cap with a toe or finger; they toggle open/closed and often have a springy feel.
Push-button types require a firm press and click, returning by internal spring.
Visual cues: smooth cap with no external lever; listen for a click or feel the toggle.
Grid and lift-out strainer indicators
After checking for toe-touch and push-button characteristics, attention should turn to grid and lift-out strainers, which have distinct visual and handling cues.
Grid strainers show a perforated metal or plastic cap flush with the sink; lift-out strainers are a basket or cup with a visible rim and sometimes a central post or notch.
Test removal by grasping and lifting straight up.
Removing a pop-up (pivot rod) stopper detailed steps
First, prepare the area and gather basic tools such as pliers, a screwdriver, and a bucket to catch water.
Next, access the pivot rod under the sink, disconnect it to remove the stopper, and clean both the stopper and the drain seat.
Finally, reinstall the stopper, reconnect the pivot rod, and test the mechanism for smooth operation.
Prepare the area and gather tools
Clear the area under the sink and lay down a towel or shallow pan to catch water or small parts before removing a pop-up (pivot rod) stopper.
Gather slip-joint pliers, a screwdriver, an adjustable wrench, needle-nose pliers, and a bucket.
Wear gloves and safety glasses.
Guarantee good lighting and a small container for nuts and clips to prevent loss.
Accessing the pivot rod under the sink
With the work area readied and tools at hand, the technician slides under the sink to locate the pivot rod assembly that connects the pop-up stopper to the lift rod.
They clear space, shine a light, and identify the horizontal pivot rod inserted through the tailpiece.
Observing retaining nut and clip positions, the technician notes orientations and takes a photo for reference before proceeding.
Disconnecting the pivot rod and removing the stopper
The technician loosens the retaining nut on the pivot rod by hand or with pliers until the rod can be pulled free from the tailpiece.
Then, the technician rotates and withdraws the rod enough to release the stopper. If a retaining clip is present, it is pried off or slid back first.
Any buildup on the rod or nut is wiped away so the stopper can be lifted out through the drain opening.
Once freed, the stopper is lifted vertically, clearing pivot post engagement and guide slots.
It is then inspected visually for obstructions before proceeding.
Cleaning the stopper and the drain seat
After the pivot rod is withdrawn and the stopper lifted free, attention turns to removing debris and buildup from both the stopper and the drain seat.
The stopper is scrubbed with an old toothbrush and mild detergent, focusing on grooves and the flange.
The drain seat is inspected, scraped gently with a plastic pick, rinsed thoroughly, and cleared of hair, soap scum, and mineral deposits.
Reinstalling the stopper and testing operation
Reinsert the stopper assembly by aligning the pivot rod’s hole with the stopper’s post, sliding the stopper into the drain while guiding the pivot rod back through the tailpiece opening until it seats in the post.
Reattach the retaining clip and tighten the pivot nut finger‑tight plus a quarter turn.
Operate the lift rod to confirm smooth travel and watertight closure; adjust linkage if alignment is off.
Troubleshooting common issues with pop-up stoppers
Begin by loosening the pivot nut beneath the sink to free the pivot rod that secures the pop-up stopper; this allows the stopper to be withdrawn for inspection or cleaning.
Check for obstructions, mineral buildup, or a bent rod.
Realign or replace a damaged rod, clear debris, lubricate moving parts, and retighten the pivot nut.
Test operation and adjust linkage for smooth travel.
Removing a lift-and-turn or push-pull stopper detailed steps
To remove a lift-and-turn or push-pull stopper, first identify and loosen the retaining screw or nut beneath the knob.
Then lift off the top and pull the stopper straight out of the drain.
The exposed parts should be cleaned and inspected for wear or damage before reassembly.
After replacing the knob and securing the retaining fastener, test the stopper’s movement and address common issues such as stuck mechanisms, stripped screws, or damaged seals.
Locate the retaining screw or retaining nut
Locate the retaining screw or nut by first inspecting the visible parts of the lift-and-turn or push-pull stopper: lift-and-turn stoppers typically have a small screw on top of the cap, while push-pull models often conceal a retaining nut beneath the sink.
Note any corrosion or mineral buildup, determine the appropriate screwdriver or wrench size, and make sure the assembly is stabilized before attempting to loosen fasteners.
Removing the knob/top and pulling out the stopper
With the retaining screw or nut identified and any corrosion addressed, the next step is removing the knob or top to access the stopper body.
For lift-and-turn, unscrew counterclockwise while holding the stopper; for push-pull, depress and twist or pry the cap off.
Once loosened, pull the stopper straight up, feeling for linkage; disconnect any ball-and-clevis or pivot rod before fully removing.
Cleaning and inspecting for damage
After removing the stopper, inspect its surfaces and the surrounding drain for mineral buildup, hair, and grime.
Remove debris with gloves and a soft brush.
Soak metal parts in vinegar or a mild descaler to dissolve deposits.
Check rubber seals and O-rings for cracks or flattening.
Replace any damaged components.
Rinse all pieces thoroughly and dry before further work.
Reassembly and function check
Once cleaned and checked for wear, the stopper can be reassembled and tested to confirm smooth operation.
For lift‑and‑turn, align the cam and post, lower the stopper into the tailpiece, and secure the set screw.
For push‑pull, seat the shaft and spring, press down and pull up to verify travel.
Run water, operate several cycles, and check for proper sealing and drainage.
Troubleshooting common problems
Begin by identifying which stopper type is installed—lift‑and‑turn or push‑pull—so the correct removal sequence and tools are used.
If resistance occurs, inspect for set screws, retaining clips, or corroded threads. Use penetrating lubricant, correct screwdriver or pliers, and gentle wiggling.
For stubborn corrosion, apply heat cautiously or replace the stopper assembly.
Test operation before final reassembly.
Removing a toe-touch or push-button stopper detailed steps
The guide first identifies whether the toe-touch or push-button stopper is threaded or snap-fit so the correct removal method is chosen.
It then explains how to release and unscrew or unclip the stopper, and when the entire drain flange must be removed for access.
Finally, it covers cleaning the parts, reinstalling the stopper, and testing for proper operation.
Determine if the stopper is threaded or snap-fit
How can one tell whether a sink stopper is threaded or snap-fit?
Inspect the visible stopper base and rim: a threaded stopper shows a seam or exposed threads where it screws into the drain.
A snap-fit stopper fits flush, with no thread gap and often has a spring‑loaded mechanism or retaining clip beneath.
Gently wiggle the stopper; rotational resistance suggests threading, while simple vertical give implies snap-fit.
Unlocking and unscrewing the stopper
To remove a toe‑touch or push‑button stopper, first guarantee the sink is dry and the drain area is visible so the mechanism can be accessed safely.
Depress the stopper fully, then locate the retaining ring under the cap or at the flange. Rotate counterclockwise to release; lift the stopper straight up while checking for a spring or clip.
Clean and inspect before reassembly.
When to remove the entire drain flange
If replacing the stopper or addressing persistent leaks and corrosion cannot be resolved by removing only the internal mechanism, it becomes necessary to remove the entire drain flange.
This step is indicated when the flange wobbles, shows visible rust or mineral buildup at its base, or sealing compounds have failed, since those conditions compromise the watertight seal and can prevent proper reassembly.
In toe-touch or push-button models, removal is warranted when actuation binds, flange alignment is off, or underlying threads are stripped.
Cleaning, reinstallation, and testing
Begin by thoroughly cleaning all stopper components and the drain flange to guarantee a reliable seal and smooth operation.
Inspect for wear or mineral buildup, replacing damaged parts.
Reassemble the toe-touch or push-button mechanism per manufacturer orientation, aligning springs and posts.
Test function by operating several cycles, checking for proper seating and no leaks.
Adjust linkage or retighten as needed for consistent performance.
Removing a lift-out or grid-style stopper detailed steps
For lift-out or grid-style stoppers, the first step is to lift out the strainer basket or remove the stopper assembly for inspection.
Any trapped debris or mineral buildup should be cleared and damaged gaskets or seals replaced as needed.
Reassemble the parts carefully, checking that gaskets seat correctly and the stopper fits snugly to prevent leaks.
Lifting out the strainer basket or stopper assembly
Lift the stopper assembly straight up while holding the strainer basket steady, then inspect for retaining clips or a threaded collar that may need loosening before complete removal.
If clips are present, depress or slide them outward; if a collar threads, rotate counterclockwise with pliers or by hand.
Remove the assembly vertically, noting orientation for reassembly and setting small parts aside safely.
Clearing debris and buildup
Remove the lift-out or grid-style stopper from the sink and set it on a clean workspace so the technician can see trapped debris, hair, and mineral buildup clearly.
Using gloves, inspect crevices, rubber flanges, and the basket. Remove hair and gunk with tweezers or a brush.
Flush with warm soapy water, and use vinegar or a mild descaler for mineral deposits. Allow to dry.
Replacing gaskets or seals if necessary
After cleaning and inspecting the stopper components, the technician should check the condition of gaskets and seals for cracks, flattening, or hardened areas that could allow leaks.
Worn seals must be removed and matched to size and material—rubber or silicone—then replaced.
Lubricate new seals lightly with plumber’s grease for proper seating.
Confirm alignment before proceeding to the next step.
Reassembly tips to ensure proper fit
Begin reassembly by orienting the stopper components in the order they will sit in the drain, ensuring the tailpiece, flange, and any retaining clips match the original configuration; this prevents misalignment that can cause binding or leaks.
Align the lift-out or grid stopper central shaft, seat the flange evenly, tighten any set screws or nuts snugly, and cycle the stopper to verify smooth operation and watertight seal.
Cleaning the drain and stopper components
After removing the stopper, the next step is to clean both the drain and the stopper components using appropriate methods.
Recommend effective cleaners and noncaustic alternatives, and use mechanical tools—brushes, picks, and plungers—to clear hair and mineral buildup.
Inspect parts for corrosion or damage and advise replacement when cleaning no longer restores function.
Best cleaners and safe chemical alternatives
Several effective options balance cleaning power with safety when tackling sink stoppers and drains.
Mild biodegradable enzyme cleaners break down organic buildup without corrosive fumes. A diluted vinegar and baking soda rinse dissolves grime and neutralizes odors.
Oxygen bleach (sodium percarbonate) brightens and sanitizes safely. For persistent residue, use manufacturer-recommended noncaustic cleaners to protect metal and rubber components.
Mechanical cleaning: brushes, picks, and plungers
Manual tools tackle debris that chemical cleaners cannot reach, using targeted scraping, bristling, and suction to restore flow.
A narrow drain brush clears grime from walls; a flexible pick teases out trapped fragments around the stopper; a small plunger or mini-suction cup dislodges loose blockages.
Steel wool is avoided on plated parts; rinse components and test operation after reassembly.
Removing hair clogs and mineral deposits
Having cleared loose debris with brushes, picks, and plungers, attention shifts to hair clogs and mineral buildup that lodge deeper in the drain and on stopper parts.
Use needle-nose pliers or a hair hook to extract embedded hair.
Apply a vinegar and baking soda soak for mineral deposits, scrubbing with a nylon brush.
Rinse thoroughly and reassemble, testing for smooth operation.
When to replace parts instead of cleaning
When does cleaning cross the line into replacement? Corroded, cracked, or warped stoppers, split gaskets, persistent leaks after cleaning, and ruined pivot rods indicate replacement.
Frequent clogs despite clear passages, stripped threads, or irreparable mineral buildup also justify new parts.
Replacing damaged components restores seal integrity and function faster than repeated cleaning, preventing recurring failures and water damage.
Preventing future clogs and stopper problems
Routine daily and weekly habits, such as rinsing with hot water and removing hair after use, help minimize buildup before it becomes a problem.
The use of simple products and accessories—mesh strainers, enzymatic cleaners, and sink guards—can further reduce debris accumulation.
Periodic lubrication of pivot rods and seals with a plumber-approved silicone grease keeps moving parts operating smoothly and prevents sticky stoppers.
Daily and weekly maintenance habits
A few simple daily and weekly habits greatly reduce the chance of sink clogs and stopper malfunctions.
Wiping rims and visible debris daily prevents grime buildup. Running hot water briefly after use flushes residues.
Weekly, remove and inspect stoppers for hair and soap, clear trapped material, and test lift mechanisms for smooth motion.
Promptly address slow drainage to avoid larger blockages.
Products and accessories to reduce buildup
Install and use targeted products and accessories to minimize buildup and keep stoppers functioning smoothly.
Select items that prevent hair, soap scum, and debris accumulation without damaging finishes or seals.
- Mesh or silicone sink strainers to catch solids.
- Biodegradable enzyme drain cleaners for organic residue.
- Brush-and-pick kits for periodic debris removal around the stopper.
How to properly lubricate moving parts
Lubricating the stopper’s moving parts reduces friction, prevents corrosion, and helps maintain a reliable seal that keeps clogs from forming.
Apply a small amount of silicone-based plumber’s grease to pivot joints, lift rods, and O-rings after cleaning and drying. Avoid petroleum-based lubricants that damage rubber.
Reassemble, operate several times to distribute grease, and wipe excess to prevent debris attraction.
Common mistakes and how to avoid them
Common failures are identified quickly—corroded pivot rods, stripped threads, and brittle rubber seals account for most breakages and stem from age or chemical damage.
Overtightening fasteners or reassembling parts out of alignment commonly causes leaks and impaired stopper function.
Attempting complex repairs without the right tools or experience can worsen damage, so professional help is advised when parts are inaccessible or the mounting hardware is corroded.
What breaks most often and why
Most sink stopper failures stem from wear and improper handling: corroded pivot rods, stripped threads on lift assemblies, torn rubber seals, and mineral-clogged pivot holes are the usual culprits.
Metal fatigue and rust weaken linkages, while abrasive cleaning or forcing parts causes threads and clips to fail.
Rubber degrades from cleaners and heat, and hard-water deposits jam moving components, preventing proper operation.
How to avoid overtightening and misalignment
Prevent overtightening and misalignment by using steady, moderate force and aligning parts before applying final torque; this preserves threads, seals, and linkages while ensuring smooth operation.
Inspect threads and mating surfaces, hand-start fasteners, and use appropriate tools with torque control.
Tighten incrementally, check alignment visually and functionally, then secure.
Replace damaged seals or stripped threads before reassembly to avoid recurrent leaks and binding.
When DIY can cause more harm than good
After careful alignment and controlled tightening, homeowners may still encounter situations where a DIY approach risks worsening the problem.
Common mistakes include forcing stuck parts, using incorrect tools, and neglecting seals or threads. These actions can crack porcelain, strip fittings, or cause persistent leaks.
When complications exceed basic adjustments, consulting a plumber prevents costly repairs and preserves fixture integrity.
When to replace the stopper or call a plumber
If the stopper is cracked, corroded, or repeatedly fails to seal or move smoothly, replacement is likely needed rather than a simple adjustment.
Persistent leaks, recurring clogs after cleaning, or visible damage to linkage and seals are signs a professional assessment may be warranted.
Homeowners should weigh repair time and parts cost for a DIY fix (typically low) against labor charges and faster resolution from a plumber for more complex or leak-prone problems.
Signs a stopper or drain needs replacement
Visible signs and performance issues can indicate when a sink stopper or the drain assembly needs replacement rather than a simple cleaning or adjustment.
Corrosion, cracked or warped stopper components, persistent leaks, chronic clogs despite clearing, loose or missing linkage, and visible sewer odors suggest failure.
Repeated mechanical malfunction or damaged seals that recur after repair warrant replacement or professional inspection.
Cost and time estimates for DIY vs professional repair
Estimating whether to tackle a sink stopper problem as a DIY project or hire a plumber depends largely on the complexity of the issue, the cost of parts, and the homeowner’s skill level; simple pop-up or lift-and-turn stoppers with accessible linkages and intact seals often take 15–60 minutes and under $20–$40 in parts, while corroded assemblies, damaged drain fittings, or leaks requiring pipe work can take a professional 1–2 hours and cost $100–$300 or more.
| Scenario | Time | Cost |
|---|---|---|
| Simple DIY | 15–60 min | $20–$40 |
| Moderate | 60–120 min | $40–$100 |
| Pro required | 1–2 hrs | $100–$300+ |
Quick troubleshooting checklist
A brief checklist helps identify common issues when removing a sink stopper.
It should note whether the stopper won’t come out, whether it becomes stuck after cleaning, and whether leaks appear after reassembly.
Each item can guide the reader to the appropriate troubleshooting step or recommend professional help if needed.
Stopper won’t come out
When a sink stopper refuses to come free, follow a short troubleshooting checklist to identify the cause and choose the least invasive fix.
Check for visible retaining screws under the stopper or beneath the sink.
Inspect the lift rod linkage for disconnection or misalignment.
Look for mineral buildup around the stopper top.
Try gentle rocking motion, avoid excessive force.
If inaccessible, consider removing the tailpiece.
Stopper stuck after cleaning
Try a gentle wiggle to determine whether debris or residual mineral deposits are binding the stopper after cleaning.
If movement is limited, apply a mild penetrating solution and wait several minutes, then retry.
Inspect pivot rods and linkage for misalignment or trapped hair.
For pop-up stoppers, check the lift rod clip position.
If still stuck, carefully remove retaining components to free and re-seat the stopper.
Leaks after reassembly
Inspect the assembly systematically to identify common causes of leaks after reinstallation.
Check for loose slip-nuts, misaligned washers, and damaged or missing O-rings.
Confirm plumber’s putty or silicone seals sit evenly and that tailpiece threads engage fully.
Tighten connections incrementally and test with a paper towel to locate seepage.
Replace compromised seals or fittings and retest until dry.
Tools and replacement parts reference
A concise list of essential tools—such as pliers, adjustable wrench, screwdriver set, and basin wrench—helps prepare for most stopper removals.
Common replacement parts (stoppers, lift rods, pivot nuts, and gaskets) are noted with basic compatibility tips for pop-up, lift-and-turn, and push-pull systems.
Guidance on reliable retailers and how to match part numbers or measure dimensions completes the reference.
Essential tools list
Essential tools and common replacement parts are listed here to prepare anyone tackling a sink stopper job: adjustable wrench, channel-lock pliers, screwdrivers (flat and Phillips), needle-nose pliers, plumber’s putty or silicone, replacement stopper or pop-up assembly, pivot rod and clevis strap, plumber’s tape, and a small flashlight.
Tools enable safe removal, inspection, and reinstalling; parts allow quick fixes.
- Basic hand tools
- Sealants and tape
- Replacement assemblies
Common replacement parts and compatibility notes
Several common replacement parts are stocked for sink stoppers, each with specific compatibility considerations to guarantee proper fit and function.
Compatibility depends on stopper type, tailpiece diameter, and linkage style.
Recommended spares include:
- Rubber gaskets and O-rings sized to stopper shaft.
- Pop-up assemblies matched to sink thickness and overflow.
- Lift rods and clevises compatible with existing linkage.
Where to buy parts and how to match models
Where can replacement parts be found and how can models be matched precisely? Local hardware stores, plumbing supply shops, and online retailers stock stoppers, seals, and linkage kits.
Match by brand, part number, sink type, and measurements. Photos of the assembly help.
- Compare part numbers and photos.
- Measure shaft, flange, and seal diameters.
- Ask suppliers for model compatibility.
Conclusion
Removing a stuck sink stopper is usually straightforward: identify type, disconnect linkage, lift out, clean, and reassemble. A persistent theory claims hair and mineral buildup alone cause most clogs; inspection often shows that misaligned pivot rods, broken seals, or trapped small objects play equal roles. Knowing the exact failure speeds repairs and prevents repeat visits. If parts are corroded or linkage bent, replace the stopper or call a plumber to restore reliable drainage.