How to Size Pressure Tank: Step-by-Step Guide for Home and Well Systems
To properly size a pressure tank for home and well systems, consider factors such as pump flow rate (GPM), cut-in and cut-out pressures, and desired cycling frequency. A correctly sized tank reduces pump cycling and maintains consistent water pressure. Typically, homes require 20–40 gallon tanks; aim for a usable drawdown that matches 1–2 times the pump’s GPM. Additionally, factor in well yield and peak demand to ensure optimal performance. The following sections will guide you through detailed calculations, examples, and upgrade options.
What a Pressure Tank Does in Home and Well Water Systems
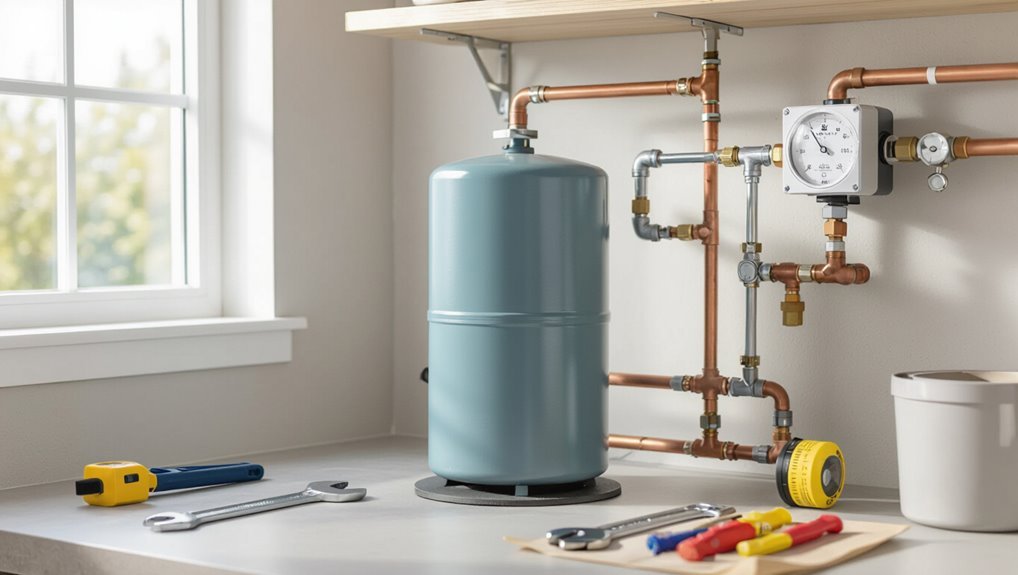
A pressure tank stores water under air pressure to smooth delivery and reduce the frequency of pump starts and stops.
Common designs include bladder or diaphragm tanks, which separate air from water, and plain steel (non-bladder) tanks that rely on an air cushion.
Key terms for sizing and operation are tank capacity in gallons, usable drawdown, and the pump’s cut-in and cut-out pressures.
Role of the pressure tank in water delivery and pump cycling
The pressure tank cushions the water system by storing pressurized water and reducing the frequency of pump starts. This delivers steady flow during short demands and prevents rapid cycling that shortens pump life.
It maintains pressure between cut-in and cut-out settings, smooths pressure spikes, and reduces wear.
Consider demand patterns and recovery needs when determining how to size the pressure tank for efficient delivery and pump longevity.
Types of pressure tanks (bladder/diaphragm vs. plain steel)
Pressure tanks come in two primary designs—bladder/diaphragm and plain steel—each managing the air–water interface differently to control system pressure and protect the pump.
Bladder/diaphragm tanks isolate water from the air with a flexible barrier, reducing air absorption and maintenance.
Plain steel (non-bladder) tanks rely on an air cushion and require periodic recharging and more corrosion monitoring.
Key components and terminology (gallons, drawdown, cut-in/cut-out pressure)
After comparing bladder/diaphragm and plain steel designs, attention shifts to the terms and components that define how those tanks actually perform in a home or well system.
A tank’s gallon capacity and usable drawdown (water released between cut-in and cut-out) determine cycling frequency.
Cut-in/cut-out pressures set pump operation points.
Air charge, bladder presence, and tank volume together control system stability and runtime.
Quick Answer: How to Size a Pressure Tank for Typical Home and Well Setups
A simple rule of thumb is presented: most single-family homes with a standard well pump and typical water use perform well with a 20–40 gallon pressure tank.
A larger tank is recommended when the pump cycles excessively, the household has high simultaneous demand, or the well yields slowly.
The following text explains how to apply the guideline and when upsizing is warranted.
One-sentence sizing guideline for common household systems
For most single-family homes with a typical well pump, choose a tank whose drawdown equals about one to two times the pump’s flow rate in gallons per minute (GPM) to minimize cycling while matching household demand.
For example, with a 10 GPM pump aim for 10–20 gallons drawdown; smaller pumps (5 GPM) need 5–10 gallons, larger pumps scale likewise.
When to use a larger tank than the guideline recommends
Several situations justify selecting a pressure tank larger than the one implied by the one- to two-times GPM drawdown rule: long pump run cycles, frequent high-flow fixtures, systems with significant pressure drop, variable-speed or constant-pressure pumps needing buffer, homes with large storage appliances, or aiming to reduce pump starts for longevity.
Choosing a larger tank smooths cycling, stabilizes pressure, and prolongs pump life.
Step-by-Step Method to Calculate Required Pressure Tank Size
The procedure begins by recording the pump’s cut-in and cut-out pressures and evaluating household water use and peak flow rates.
Next, the drawdown percentage specific to the tank type is used to convert required usable gallons into total tank capacity.
Finally, pump cycle limits and the preferred number of cycles per hour are checked to confirm the chosen tank meets longevity and performance goals.
Step 1 Determine pump cut-in and cut-out pressures
Begin by identifying the pump’s cut-in and cut-out pressures, which are the pressures at which the pump starts and stops to maintain system pressure.
Record these values from the pressure switch label or gauge. Accurate cut-in/cut-out numbers are essential for calculating usable tank drawdown and sizing.
Note any factory settings or adjustments required for system compatibility and safety.
Step 2 Measure or estimate daily water demand and peak flow rates
One or two representative days’ water use should be tallied to establish typical daily demand and any peak flow events.
The writer recommends listing fixtures, appliance cycles, and irrigation periods with estimated flow rates and durations.
Sum total volume and identify highest simultaneous flow.
Use these figures to determine required storage and the maximum pump delivery rate to prevent short-cycling and supply deficits.
Step 3 Calculate drawdown percentage for your tank type
Calculate the drawdown percentage specific to the tank type to determine usable water between pump cut-in and cut-out pressures.
The guide instructs identifying manufacturer drawdown curves or standard values: bladder tanks often provide 20–30% drawdown, diaphragm or air-over-water tanks vary.
Use the tank’s rated drawdown at the designated pressure range.
Record the percentage for subsequent usable-gallon calculations.
Step 4 Compute required usable gallons and tank capacity
With the drawdown percentage determined, the next step is to translate that percentage and the system’s flow and run-time requirements into usable gallons and total tank capacity.
Multiply required usable gallons (based on peak flow × desired run time) by 100 ÷ drawdown percentage to get tank volume.
Round up to nearest standard tank size and verify pressure settings match the pump and system demands.
Step 5 Account for pump cycle limits and desired cycles per hour
After sizing the tank for usable gallons, the next consideration is pump cycling limits and the target number of on/off cycles per hour.
The installer calculates required drawdown so the pump runs no more than its rated cycles, often 6–20 per hour for longevity.
Adjust tank size upward if necessary to reduce cycles, balancing cost and pump life without exceeding system pressure constraints.
Step 6 Select first available standard tank size and verify compatibility
Select the nearest larger standard tank capacity that meets or slightly exceeds the required usable gallons, then confirm its precharge, pressure ratings, and physical connections match the system.
The installer checks material, bladder type, dimensions for site fit, and inlet size.
Verify maximum working pressure, relief and drain provisions, and warranty terms.
Confirm supplier lead time and installation instructions before purchase.
Practical Examples and Worked Calculations
The following section applies the step-by-step method to three representative scenarios: a single-family home with a shallow well and 1.5 gpm demand, a residence with simultaneous uses (showers, washer, irrigation), and a high-demand property served by a pressure-boosting system.
For each example, worked calculations will be shown and summarized in clear tables to illustrate sizing decisions and assumptions.
Readers can compare results to determine how pressure, drawdown, and peak flow affect recommended tank capacity.
Example A Single-family home with shallow well and 1.5 gpm demand
This example examines a single-family home served by a shallow well where peak demand is 1.5 gallons per minute (gpm).
It shows how to determine an appropriate pressure tank size using the household flow rate, pump cycle limits, and practical drawdown needs.
Using a 30–50 psi cut-in/cut-out, minimal run-time targets, and desired cycles per hour, calculations yield a modest tank (often 20–30 gallons) to limit cycling and maintain steady supply.
Example B Home with multiple simultaneous uses (showers, washer, irrigation)
Consider a household where simultaneous uses—two showers running, a washing machine, and a sprinkler zone—raise peak demand to about 6–8 gpm.
Sizing the pressure tank for such conditions requires balancing pump cycle limits, desired minimum runtime, and sufficient drawdown to prevent pressure sag during brief high-flow events.
A larger bladder tank (e.g., 40–80 gallons usable) reduces cycles, supports flow spikes, and permits modest pump sizing.
Example C High-demand property with pressure-boosting system
Moving from a typical household scenario with intermittent high flows, the next example examines a high-demand property served by a pressure-boosting system where sustained flows and multiple simultaneous zones drive peak demand well above residential levels.
The calculation identifies peak flow, required booster capacity, acceptable drawdown, and recommended tank volume to reduce cycling, stabilize pressure, and protect pump life under continuous multi-zone operation.
H4: Calculation tables for each example
When presenting practical examples and worked calculations, concise tables can translate the narrative steps into directly usable numbers and formulas, allowing engineers and installers to compare peak flow, drawdown, booster capacity, and recommended tank volume across scenarios. Below is a compact summary for each example.
| Parameter | Value |
|---|---|
| Peak flow | 15 GPM |
| Drawdown | 6 gal |
| Booster | 1.5 HP |
| Tank | 80 gal |
Sizing Tables and Quick Reference Charts
The article presents sizing tables that match recommended tank capacities to household size and pump horsepower for quick selection.
Accompanying charts summarize typical drawdown percentages for common tank types at various pressure settings.
These references allow rapid comparison and help confirm choices derived from the worked examples.
Recommended tank sizes by household size and pump horsepower
A concise table that matches household size and pump horsepower to recommended pressure-tank capacity helps homeowners and technicians choose an appropriately sized tank without complex calculations. Recommended sizes balance run cycles and water needs; select larger tanks for larger homes or lower horsepower to reduce short-cycling.
| Household | Pump HP | Tank (gallons) |
|---|---|---|
| 1–2 persons | 1/2 | 20–30 |
| 3–4 persons | 3/4 | 30–44 |
| 5+ persons | 1–1.5 | 44–80 |
Drawdown percentages by tank type and pressure setting
Different tank constructions and pressure settings yield predictable drawdown percentages that guide selection and adjustment for specific applications. Typical diaphragms, bladders, and steel tanks at common cut-in/cut-out pressures show consistent usable volumes. Reference table:
| Tank Type | Pressure (psi) | Drawdown % |
|---|---|---|
| Diaphragm | 30/50 | 20% |
| Bladder | 40/60 | 30% |
| Steel | 20/40 | 12% |
Installation and Start-Up Considerations That Affect Sizing
Installation and startup factors can change required tank capacity and must be checked before final sizing.
Correct pre-charge pressure relative to pump cut-in pressure, along with accurate setting of control switches, determines usable drawdown.
Long pipe runs, valve placement, and the associated pressure losses should be accounted for because they affect pump selection and effective system pressure.
Pre-charge pressure settings and how to set them
How should the tank’s pre-charge be set to secure correct system performance? The pre-charge should equal system cut-in pressure minus pump off differential divided by two?
No — set bladder tanks to pump cut-in pressure (typically 20–40 psi) with tank empty of water.
Verify with a pressure gauge, adjust via the Schrader valve, then retest after cycling to secure stable cut-in/cut-out operation.
Pipe length, valve placement, and pressure loss impacts
Because friction and fittings add measurable pressure drop between the pump and the tank, pipe length, valve placement, and component choices directly influence effective tank sizing and system performance.
Longer runs, small-diameter piping, and multiple elbows increase pressure loss, reducing usable drawdown.
Strategic valve placement near the tank, minimizing fittings, and selecting appropriately sized pipe preserve pressure, allowing the tank to meet expected cycle rates and delivery volumes.
Pump type compatibility and control switch settings
Pump type compatibility and control switch settings directly determine how a pressure tank performs within a water system: centrifugal, jet, and submersible pumps each produce different flow-pressure characteristics and cycling behaviors that must align with the tank’s volume and precharge.
Meanwhile, pressure switch cut-in and cut-out settings set the usable drawdown and cycling frequency. Proper matching minimizes short-cycling, preserves pump life, and guarantees adequate delivery during peak demand.
Common Problems Related to Incorrect Tank Sizing and How to Diagnose Them
Incorrect tank sizing often leads to short cycling, which is caused by insufficient drawdown volume and is indicated by rapid on/off pump cycles that require corrective upsizing or a different cut-in/cut-out setting.
Undersized tanks can also produce low water pressure or inadequate reserve during peak use, evident when multiple fixtures run and pressure drops quickly.
Frequent pump starts from either issue accelerate equipment wear and raise energy use, so counting starts per hour and monitoring pressure curves are useful diagnostic steps.
Short cycling: causes, symptoms, and corrective sizing actions
Short cycling occurs when a pressure tank and its control system start and stop the pump in rapid succession, reducing equipment life and causing unstable pressure at fixtures.
Causes include undersized tank, incorrect precharge, leaking bladder, or misadjusted pressure switch.
Symptoms: frequent short pump runs, audible cycling, and premature pump failure.
Corrective sizing actions: increase tank volume, verify/set precharge 2 psi below cut-in, or replace faulty bladder.
Low water pressure or inadequate reserve during peak use
While rapid cycling often signals a tank or control mismatch, another common consequence of improper tank sizing is low water pressure or insufficient reserve during peak demand.
Symptoms include noticeable pressure drops when multiple fixtures run, delayed recovery, and frequent pump cycling under load.
Diagnosis compares draw-off volumes and required flow rates to tank drawdown capacity; corrective sizing increases usable reserve to meet peak flow needs.
Frequent pump starts damaging equipment and energy implications
Repeated pump starts markedly shorten pump life and raise operating costs by increasing wear on electrical components and motor bearings; they also cause higher energy consumption because starting draws considerably more power than steady-state running.
Frequent cycling indicates an undersized or waterlogged tank, faulty air charge, or incorrect cut-in/out settings.
Diagnosis uses cycle counting, pressure gauge checks, and tank volume testing; remedy: correct sizing, recharge, or adjust controls.
Maintenance, Testing, and When to Replace the Tank
The section explains how to test bladder pre-charge and measure tank drawdown to verify operating volume and pressure settings.
It also outlines symptoms that distinguish bladder failure from corrosion in plain tanks and advises on inspection indicators that warrant replacement.
Finally, it provides a recommended maintenance schedule and realistic lifespan expectations to help plan proactive tank service or replacement.
How to test bladder pre-charge and tank drawdown
Before performing any measurements, verify the pump is off and system pressure has stabilized so the tank and gauge readings reflect true pre-charge and drawdown conditions.
Record static pressure, drain water to cut‑in pressure, then measure remaining pressure with a tire gauge at the air valve.
Subtract to get drawdown.
Compare air charge to manufacturer spec, adjust with a pump of dry air if needed.
Signs of bladder failure versus corrosion in plain tanks
Distinguish bladder failure from corrosion by focusing on symptom patterns and simple tests: a failed bladder typically produces rapid pressure loss, spongy or waterlogged tank behavior, and fluctuating drawdown without visible external rust.
In contrast, corrosion in a plain steel tank shows slow leaks, audible seepage or weeping at seams, visible rust, and brittle fittings.
Probe with a pressure gauge, tap test, and inspect seams to confirm cause.
Recommended maintenance schedule and lifespan expectations
Although exact intervals vary with usage and water quality, a routine maintenance schedule keeps pressure tanks reliable and extends service life.
Inspect air charge annually, check for leaks and corrosion biannually, and test switch cut-in/cut-out pressures yearly.
Replace bladders every 5–10 years depending on wear; expect 10–20 years for well-maintained tanks.
Retire tanks showing persistent pressure loss, rust perforation, or repeated bladder failures.
Cost, Energy, and ROI Considerations
Typical retail prices for common pressure tanks vary by size and construction, from small residential bladder tanks to larger steel or composite models.
Reduced pump cycling with appropriately sized tanks can lower energy use and extend pump life, producing measurable savings over time.
Comparing upfront cost against anticipated energy and maintenance savings helps determine when upgrading to a larger tank is financially justified versus when the extra capacity is unnecessary.
Price ranges for common tank sizes and types
Many homeowners and contractors compare upfront costs, operating expenses, and expected payback when evaluating pressure tank options.
Typical prices:
- small (20–40 gallon) diaphragm tanks $150–350,
- medium (60–80 gallon) steel or bladder tanks $300–700,
- large (100+ gallon) commercial vessels $700–2,000+.
Specialty stainless or ASME-certified tanks command premiums.
Installation, local taxes, and warranty levels also affect final cost and comparative ROI.
Energy savings from reduced pump cycling
Reduced pump cycling can yield measurable energy savings by decreasing the number and duration of motor starts, which are the most energy-intensive moments in well-pump operation. Each avoided start reduces inrush current and shortens run-time, lowering electricity use and wear.
Fewer starts translate to lower utility bills and reduced maintenance costs over time, improving ROI for properly sized tanks through sustained efficiency gains.
When a larger tank pays off vs. when it’s unnecessary
When the incremental cost of a larger pressure tank is weighed against the expected reductions in pump starts and energy use, the decision hinges on site-specific factors such as daily water demand patterns, pump horsepower, utility rates, and maintenance costs.
A larger tank pays off when frequent short draws, high electricity costs, or significant pump wear exist; it’s unnecessary for low, steady demand or where space and upfront cost outweigh modest savings.
Tips for Choosing the Right Tank Brand, Warranty, and Installer
When selecting a pressure tank, attention should be paid to build materials, a clear warranty (including coverage for a replaceable bladder), and proven brand reliability.
Homeowners are advised to prepare a concise list of questions for installers—such as experience with well systems, warranty handling, and typical installation issues like air charging and placement—and to watch for common pitfalls like improper mounting or incorrect tank sizing.
A licensed plumber or well contractor should be consulted for complex systems, uncertain diagnoses, or when local codes and warranty conditions could affect installation.
Features to look for (materials, warranty, replaceable bladder)
While a correctly sized pressure tank guarantees system performance, the choice of materials, warranty terms, and whether the bladder is replaceable determine durability and long‑term value.
Buyers should prioritize corrosion‑resistant construction (e.g., stainless steel or epoxy‑lined carbon steel), clear warranty coverage that outlines duration and what’s covered, and a serviceable bladder to avoid full‑tank replacement.
Inspect fittings, pressure switch compatibility, and manufacturer reputation before purchasing.
Questions to ask installers and common installation pitfalls
How should a homeowner vet installers and brands to avoid costly mistakes?
Ask for license, insurance, references, and written estimates.
Confirm brand compatibility, warranty terms, and who handles claims.
Request installation scope, pressure settings, and post-install testing.
Beware of undersized tanks, improper precharge, poor piping support, and omitted check valves.
Prefer installers with documented well-system experience and clear service policies.
When to consult a plumber or well contractor
After verifying credentials, references, and installation details, homeowners should consider at what point a specialist is needed to select or install a pressure tank.
Consult a plumber or licensed well contractor when system complexity, variable pump cycles, atypical well depth, or water quality affect sizing.
Also hire a pro for warranty-eligible installations, code compliance, pump-tank integration, or if diagnostic testing and pressure curve analysis are required.
Alternative Solutions and Upgrades
Beyond selecting a single pressure tank, alternative solutions such as pressure-boosting systems and variable frequency drives (VFDs) can improve steady pressure and efficiency.
Secondary or buffer tanks are often added for irrigation or periods of high demand to reduce pump cycling.
Integrating cisterns or other water storage with the pressure system provides greater reserves and flexibility for backup or large-volume use.
Pressure-boosting systems and variable frequency drives (VFDs)
Consider pressure-boosting systems paired with variable frequency drives (VFDs) when steady supply pressure or improved pump efficiency is required. These systems regulate pump speed to maintain target pressure, reduce cycling, and shrink required tank volume compared with fixed-speed setups.
VFDs adapt to varying demand, improving energy efficiency and extending pump life. Installation requires proper controls, pressure transducers, and safeguards to prevent short-cycling and overpressure.
Using secondary tanks or buffer tanks for irrigation and high demand
Many irrigation systems and other high-demand applications benefit from adding a secondary or buffer tank to absorb peak flows and reduce pump cycling.
These tanks deliver short-term storage at system pressure, smoothing demand spikes, minimizing VFD or pump wear, and allowing smaller primary tanks.
Proper sizing considers peak flow rate, allowable drawdown, refill time and placement to maintain pressure stability and prevent cavitation.
Integrating water storage (cisterns) with pressure systems
When integrated with a pressurized system, cisterns act as a long-term source that reduces pump runtime and provides emergency reserve. Proper integration requires attention to pump selection, control logic, and the interaction between atmospheric storage and pressurized buffer tanks.
Engineers recommend pump staging, float and level controls, check valves, and pressure-switch coordination so the cistern supplies bulk volume while the pressure tank smooths short cycles and maintains delivery pressure.
Additional Resources and Calculation Tools
The article points readers to practical tools such as online calculators and downloadable sizing worksheets to simplify pressure tank selection.
It also lists recommended references for standards, pump curves, and installation guidelines. These resources support accurate calculations and informed decisions.
Online calculators, downloadable sizing worksheets, and recommended references
Although precise calculations can be performed by hand, online calculators and downloadable worksheets streamline the process and reduce errors by automating repetitive steps.
Useful tools and references include:
- Manufacturer sizing calculators (Tanks & pressure switches)
- Excel/CSV sizing worksheets for pump cycles
- University extension guides on well hydraulics
- Standards (ASME, ANSI) summaries
- Community forums and verified how‑to articles for troubleshooting
Conclusion
Sizing a pressure tank seems straightforward—until the pump cycles faster than expected. The right tank balances demand, run time, and efficiency; the wrong one wastes energy and shortens equipment life. Having followed the step-by-step methods, examples, and tips, readers now stand on the edge of a decision: choose carefully, or face recurring problems. The next choice will reveal whether the system hums quietly for years—or forces costly fixes soon after installation.