How to Test Toilet for Leaks: Simple Steps to Find and Fix Silent Water Waste
To test your toilet for leaks, simply add food coloring or a dye tablet to the tank. Wait 10–20 minutes, then check the bowl for any colored water. Listen for constant running sounds, monitor your water meter for unexplained usage, and look for moisture around the base of the toilet. Common leak culprits include worn flappers, faulty fill valves, and cracked seals. Addressing small leaks is crucial, as they can waste hundreds to thousands of gallons of water each year. Follow the steps provided for effective diagnosis and repair.
How to Quickly Confirm a Toilet Is Leaking
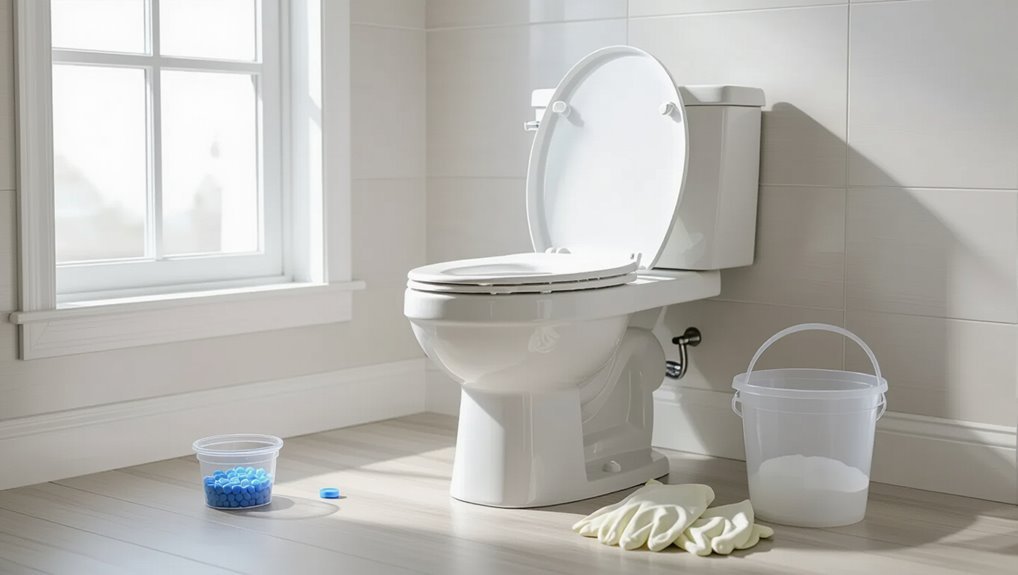
A quick check for a leaking toilet begins with a one-minute visual and sound inspection to catch obvious drips or running water.
If results are inconclusive, a dye test using food coloring or a commercial dye tablet can reveal silent leaks from the tank to the bowl.
For leaks not visible in the bowl, observing the water meter for unexplained movement provides a reliable indicator of invisible leaks.
One-minute visual and sound check
Start by observing the toilet for one minute while standing a few feet away: watch the water level in the bowl and listen for any continuous hissing or trickling sounds after the tank has finished refilling.
A steady drop or soft refill noise indicates potential internal loss. This quick inspection is a practical first step in how to test toilet for leaks before performing diagnostic tests.
Dye test using food coloring or a commercial dye tablet
If the brief visual and sound check suggests internal loss, the dye test is the next quick way to confirm whether water is leaking from the tank into the bowl.
Add several drops of food coloring or drop a commercial dye tablet into the tank, wait 10–15 minutes without flushing, then inspect the bowl.
Colored water in the bowl indicates a leak past the flapper or flush valve.
Detecting invisible leaks with water meter observation
Check the water meter to catch leaks that leave no visible trace by noting its reading, avoiding any water use for a short interval, then rechecking for movement.
An advancing dial or changing digital display while fixtures are idle indicates a continuous leak such as a slow toilet flapper leak.
Record baseline and retest after isolating fixtures; persistent flow points to hidden leaks, prompting targeted inspection or professional repair.
Why Silent Toilet Leaks Matter for Water Bills and Home Health
Silent toilet leaks often stem from worn flappers, faulty fill valves, or cracked seals that allow continuous water loss without noticeable symptoms.
Even small drips can add up to hundreds of gallons per month—examples include a slow flapper leak wasting 200–600 gallons monthly and more serious faults exceeding 1,000 gallons—translating into tangible increases on water bills.
Beyond cost, persistent moisture and mineral buildup from leaks can harm fixtures and contribute to mold or structural issues if left unaddressed.
Typical causes of silent leaks and how they waste water
A slow, unnoticed leak from a toilet can steadily waste dozens to hundreds of gallons of water each day, driving up utility bills and masking broader plumbing problems.
Common causes include a deteriorating flapper, a misaligned or worn fill valve, corroded flush-valve seals, or cracked overflow tubes that allow continuous water flow from tank to bowl.
Mineral buildup, loose fittings, or hairline tank cracks perpetuate seepage and inefficiency.
Average water loss examples and cost estimates
Those unnoticed leaks can add up quickly: a slow trickle of one drop per second wastes about 5,000 gallons per year, while a modest continuous leak of one gallon per hour uses roughly 8,760 gallons annually. Estimated costs vary by region; small leaks add hundreds, larger leaks add thousands to yearly bills. Emotional reality: water wasted equals money lost.
| Leak size | Annual gallons |
|---|---|
| Drop/sec | 5,000 |
| 1 gal/hr | 8,760 |
| Small crack | 20,000 |
| Major leak | 100,000 |
Tools and Materials You Need Before Testing
Before beginning leak checks, the article lists a few simple household items—food coloring, a cup, and paper towels—that can confirm obvious leaks quickly.
It then outlines recommended tools for a more accurate diagnosis, such as a toilet tank dye tablet, adjustable wrench, and a leak detection kit.
This prepares the reader to choose either a quick spot-check or a more precise inspection.
Simple household items for quick tests
Several common household items suffice for quick toilet leak checks: food coloring, a clear cup, paper towels, and basic gloves if desired.
- Food coloring for dye tests
- Clear cup to hold and pour dye
- Paper towels to catch drips and note stains
- Basic gloves for cleanliness
These simple items enable a fast, nontechnical check for silent tank-to-bowl leaks without specialized equipment.
Recommended tools for accurate diagnosis
Gather precise tools to guarantee an accurate diagnosis of toilet leaks: a clear food coloring or dye tablet for tank-to-bowl tests, a small flashlight to inspect hidden areas, an inexpensive leak-detection dye or dye tablets for longer checks, a bucket and sponge for controlled flushing and water removal, adjustable pliers and a screwdriver for minor adjustments, a hose or fill-valve wrench for valve work, and a notebook or phone to record observations and measurements.
- Dye tablets or food coloring
- Flashlight and inspection mirror
- Pliers, screwdriver, fill-valve wrench
- Bucket, sponge, notebook
Step-by-Step Leak Detection Guide
The guide begins by preparing the toilet for testing, including shutting off the water and clearing the tank and bowl.
It then outlines step-by-step procedures for the dye test and the water meter method, followed by instructions for visually and manually inspecting tank components.
Finally, it addresses checking the bowl-to-floor base for concealed leaks and interpreting findings.
Preparing the toilet for testing
Begin by turning off the toilet’s water supply at the shutoff valve and flushing to empty the tank, leaving the bowl as the primary water source; this prevents refilling during testing and isolates potential leak paths.
Next, remove decorative tank lid, dry interior surfaces, and inspect flapper, fill valve, overflow tube, and tank-to-bowl gasket for obvious damage.
Clear surrounding floor and note water level.
Performing the dye test step-by-step
Place a few drops of dye or a dye tablet into the toilet tank, then wait and observe the bowl for color transfer; this simple visual check reveals whether water is seeping past the flapper or other seals.
Allow at least 15–30 minutes without flushing. If dye appears, inspect the flapper, chain, and seat for deterioration, replace or adjust parts, then retest until no color shows.
Using the water meter method step-by-step
After confirming the tank seals with a dye test, proceed to the water meter method to measure hidden or slow leaks more precisely.
Shut off all water fixtures, note the meter reading, wait 15–30 minutes without using water, then recheck. An increased reading indicates a leak.
If readings remain steady, the toilet likely isn’t leaking; if not, trace plumbing or call a pro.
Inspecting tank components visually and by touch
When the dye and meter tests suggest a possible leak, inspect the tank components visually and by touch to identify worn or misaligned parts.
Lift the lid and examine the flapper, fill valve, overflow tube, and chain for cracks, mineral buildup, loose connections, or sagging.
Gently feel each component to detect soft spots, corrosion, or improper seating that may not be apparent to the eye.
Replace or tighten faulty parts promptly.
Checking the bowl-to-floor base for concealed leaks
One clear way to find a concealed leak at the bowl-to-floor joint is to perform a focused, step-by-step inspection that isolates the base from other water sources.
Check for stains, softened flooring, or warping.
Run a dye test in the tank, then dry the area and observe for fresh moisture.
Gently rock the bowl to detect loose bolts and inspect the wax ring seal for deterioration.
How to Identify the Type and Source of the Leak
The technician first inspects common internal components for flapper-related leaks by looking for slow water loss, testing flapper seating, and listening for continuous running.
Next, attention turns to the fill valve and overflow tube for signs of improper shutoff or high water level, while the tank and bowl are examined for hairline cracks or compromised tank-to-bowl seals.
Finally, the base is checked for moisture, staining, or movement indicative of a failing wax ring or flange.
Flapper-related leaks: signs and verification
If a toilet is losing water into the bowl between flushes, a faulty flapper is among the most likely causes and should be inspected first.
Check for warped, brittle, or mineral-coated rubber, confirm proper seating, and observe whether the flapper closes fully after flushing.
Dye testing with food coloring reveals slow seepage.
Replace if deformation, poor seal, or chain misadjustment prevents full closure.
Fill valve and overflow tube issues: how to spot them
After ruling out flapper faults, attention moves to the fill valve and overflow tube, common sources when the tank continuously refills or water runs into the bowl.
Inspect fill valve for slow leaks, misalignment, or worn seals; listen for trickling.
Verify water level sits below the overflow tube; adjust float or replace valve if water constantly spills into the tube, indicating valve failure.
Cracks in the porcelain or tank-to-bowl connections
When water appears on the floor despite a quiet tank, cracks in the porcelain or a failing tank-to-bowl gasket should be considered first.
Visual inspection and targeted testing reveal whether the leak is a hairline fracture, a loose bolt seal, or seepage at the joint.
Dye in tank, drying surfaces, and feeling bolts for moisture locate the source.
Replace cracked parts or tighten/replace the gasket and bolts.
Wax ring and flange failures at the base
Several common leaks originate at the toilet base where the wax ring and flange connect the fixture to the drain; diagnosing these requires inspecting for specific signs rather than guessing.
Water pooling, soft or rotten subfloor, wobble at the bowl, and staining around the base indicate seal or flange failure.
Confirm by drying, testing with dye or paper, and checking flange height and bolt integrity before replacing the wax ring.
Simple Fixes You Can Do Yourself
Simple, low-cost repairs can often stop common toilet leaks, including replacing or adjusting the flapper, cleaning or swapping the fill valve, and correcting float height or overflow tube level.
Re-seating or replacing the flapper chain and handle frequently restores proper flushing action.
For hairline tank or bowl cracks, temporary seals may hold briefly, but larger cracks or persistent leaks warrant a professional inspection.
Replacing or adjusting the flapper
Inspect the flapper and its chain for wear or misalignment before assuming a larger problem.
If the flapper is warped, cracked, or fails to seal, replace it with a compatible model; guarantee the chain has slight slack so the flapper seats fully but not so long it traps under the flapper.
Test several flushes to confirm a watertight seal and adjust chain length as needed.
Cleaning or replacing the fill valve
If adjusting or replacing the flapper did not stop intermittent refilling or slow leaks, attention should turn to the fill valve, which controls water flow into the tank.
Inspect for mineral buildup, clean debris from the inlet and valve seat, and test operation.
If cleaning fails or the valve leaks or runs continuously, replace it with a compatible, low-maintenance unit following manufacturer instructions and shutoff precautions.
Adjusting float height and overflow tube level
Adjusting the float height and aligning the overflow tube are quick, effective steps to stop a toilet from running or constantly refilling.
Inspect the float mechanism and set it so water stops about one inch below the overflow rim.
Confirm the overflow tube is vertical and not cracked; if water spills into it prematurely, lower the fill level or reposition the float until refilling ceases at the correct height.
Re-seating or replacing the flapper chain and handle
Check the flapper chain and handle for proper seating and connection before moving to more complex repairs.
Verify the chain has slight slack—too tight prevents seal, too loose traps under flapper. Re-seat the chain on the flapper peg or replace it if corroded.
Tighten or replace the handle and lift arm if bent.
Test several flushes to confirm a watertight seal.
Temporary fixes for cracks and when to call a pro
Address small tank or bowl cracks promptly with temporary measures that stop leaks until a permanent repair or replacement can be arranged.
Clean and dry the area, apply waterproof epoxy or silicone patch kits rated for potable water, and monitor for seepage. Use a bucket for safety if needed.
For large cracks, persistent leaks, or structural concerns, recommend contacting a licensed plumber to assess and replace components.
When to Hire a Plumber and What to Expect
If tests reveal persistent running, water on the floor, or multiple failed repairs, a professional plumber should be contacted.
Typical visits address valve or flapper replacement, seal or flange repair, and supply-line issues, often resolved in under two hours though more extensive work can take longer.
Homeowners should ask about diagnosis fees, estimated labor and parts costs, warranties, and expected time on site before authorizing work.
Signs a professional is needed
Call a professional when a toilet exhibits persistent or worsening symptoms that basic troubleshooting cannot resolve.
Indicators include continuous running, repeated clogs despite clear drains, water level instability, loud or unusual noises, visible cracks, or signs of moisture and mold near the base.
A plumber will diagnose underlying causes, advise on safety or water shutoff, and provide scope and cost expectations before work begins.
Typical plumber repairs and time estimates
When a plumber is summoned for persistent toilet problems, the most common repairs tend to be straightforward and relatively quick to complete.
- Replace flapper or flush valve (15–30 minutes)
- Adjust or replace fill valve (20–40 minutes)
- Tighten or replace tank bolts and seals (20–45 minutes)
- Diagnose and fix phantom leaks or supply line issues (30–60 minutes)
Repairs typically involve standard parts and brief service calls.
Questions to ask your plumber and cost considerations
How much expertise is required and what will it cost are the two core concerns homeowners should address before hiring a plumber.
Ask about licensing, insurance, and experience with toilet leaks. Request a written estimate, labor and parts breakdown, warranty, and timeline.
Inquire about diagnostic fees and whether repair or replacement is recommended.
Compare quotes and check references before approving work.
Preventive Maintenance to Avoid Future Leaks
A concise preventive maintenance plan begins with a routine inspection checklist that targets flappers, fill valves, seals, and visible supply connections.
It should note recommended replacement intervals for common parts—such as flappers every 3–5 years and fill valves every 5–7 years—to prevent failures before they occur.
Where appropriate, water-saving upgrades like dual-flush mechanisms or pressure-assisted tanks can both conserve water and reduce leak risk.
Routine inspection checklist
Why inspect regularly? Routine checks catch small faults before wasting water. A concise checklist guides efficient preventive maintenance.
- Check tank and bowl for visible cracks or mineral buildup.
- Inspect flapper seal and chain alignment for wear or gaps.
- Observe fill valve operation and float level during refill.
- Test for silent leaks using dye, noting flow changes and timestamps.
Recommended replacement intervals for common parts
Regular replacement of key toilet components prevents gradual wear from becoming leaks and reduces sudden failures.
Flush valve flappers typically require replacement every 3–5 years; fill valves last 5–7 years.
Supply lines and shutoff valves are recommended every 7–10 years or when corrosion appears.
Tank-to-bowl gaskets and bolts warrant inspection and replacement every 5–10 years to maintain reliable seals.
Water-saving upgrades that also reduce leak risk
Although often pursued for lower bills, water-saving upgrades can also decrease the chance of leaks by modernizing components and reducing stress on seals and fittings.
Installing dual-flush or low-flow toilets, high-efficiency fill valves, and pressure-compensating fittings reduces flow and mechanical wear.
These upgrades lower constant pressure on gaskets, simplify maintenance, and often include warranties, collectively minimizing silent leaks and long-term repair needs.
Troubleshooting Uncommon or Persistent Leak Problems
When a toilet continues to leak intermittently after repairs, a careful reinspection of seals, valves, and tank hardware can reveal overlooked issues.
Hard water or mineral buildup and improper installation are common hidden causes that require targeted cleaning or component replacement.
Persistent problems accompanied by sewage odors or slow drains should prompt checks of the trap, venting, and connections to the sewer line.
Intermittent leaks after repairs
Troubleshooting intermittent leaks after repairs requires a methodical approach, since symptoms that appear and disappear can indicate issues distinct from constant leaks.
Inspect seals, flapper seating, and refill valve timing for wear or misalignment.
Monitor tank and bowl over several cycles, test with food coloring, and recreate conditions (temperature, usage patterns).
Document findings and recheck previously replaced parts before replacing new components.
Leaks caused by hard water, mineral buildup, or poor installation
Addressing leaks caused by hard water, mineral buildup, or poor installation requires focusing on the specific mechanisms by which these factors compromise seals and fittings: mineral deposits can deform or obstruct valve seats and flapper surfaces.
Meanwhile, improper alignment, uneven flange seating, or inadequate sealant create stress points that allow water to escape.
Descaling, replacing distorted parts, realigning connections, and resealing with proper gaskets or wax rings typically resolves persistent leaks.
Diagnosing sewage smells or slow drains related to leaks
After treating mineral buildup and correcting misaligned seals, persistent odors or sluggish drains may indicate leaks that bypass visible water paths and affect the sewer connection or venting.
Inspect wax ring, closet flange, and flange bolts for gaps or deterioration.
Check vent stacks for blockages and listen for gurgling during flushing.
If uncertain, engage a plumber for dye tests, camera inspection, or smoke testing.
Quick Reference: Common Symptoms, Causes, and Fixes
A concise list of common symptoms—such as a constantly running toilet, slow tank refill, hissing sounds, phantom flushing, or water pooling around the base—helps quickly diagnose likely causes and appropriate fixes. Common issues, causes, and remedies are summarized below for fast action and simple repairs.
| Symptom | Likely Cause | Quick Fix |
|---|---|---|
| Running | Flapper leak | Replace flapper |
| Slow refill | Fill valve | Adjust/replace |
| Hissing | Valve seal | Clean/replace |
| Phantom flush | Leak to bowl | Dye test/repair |
Conclusion
Silent toilet leaks can waste up to 200 gallons of water daily, a startling statistic that underscores the importance of prompt detection and repair. Following simple tests and basic maintenance lets homeowners identify common sources—flapper wear, fill-valve issues, or cracked seals—and often remedy them without professional help. When problems persist or involve structural damage, hiring a licensed plumber is advisable to prevent higher bills, mold growth, and long-term plumbing failures.