How to Clear a Clogged Floor Drain Fast: Step-by-Step Fixes That Work
To quickly clear a clogged floor drain, follow these effective steps using basic tools. First, stop any water flow and remove the drain grate to access the blockage. Wear gloves to clear away visible debris. Use a cup plunger for a few vigorous plunges, then pour hot (not boiling) water to help dissolve any grease. If the clog persists, insert a hand auger to break up or retrieve the obstruction. For thick water accumulation, a wet/dry vacuum can be useful, followed by an enzyme cleaner to maintain drain health. If these methods don’t resolve the issue, consider deeper troubleshooting or professional help.
How to Quickly Unclog a Floor Drain: Immediate Steps to Try Right Now
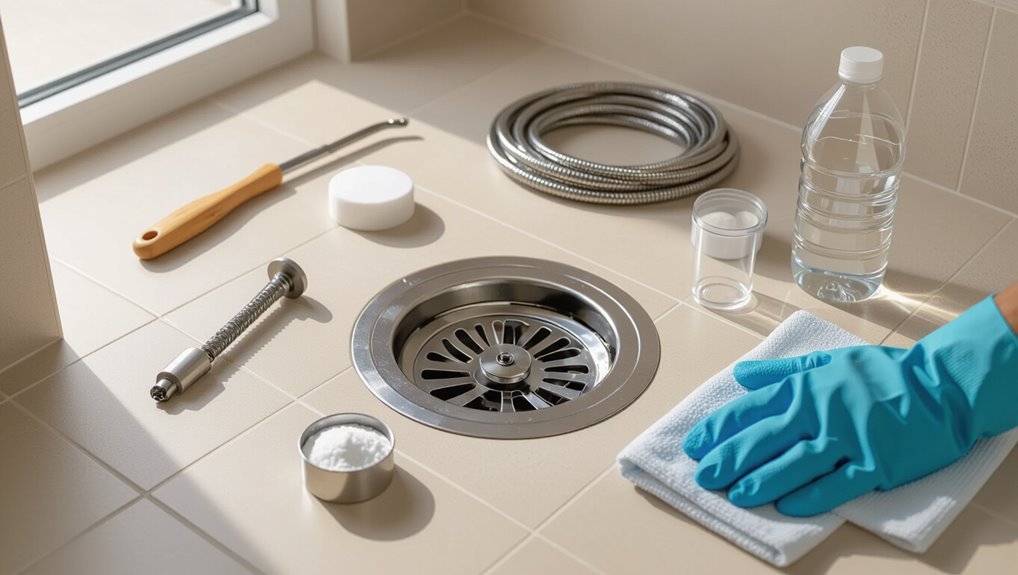
Before attempting anything, one should put on gloves, eye protection, and non-slip footwear and limit exposure to contaminated water.
A quick assessment follows: observe nearby fixtures and water behavior to determine whether the blockage is local to the drain or indicates a main-line issue.
If the clog appears local, try fast, low-effort fixes such as removing the grate, clearing visible debris, plunging briefly, or flushing with hot water for 5–10 minutes.
Safety first what to wear and precautions to take
Always wear appropriate personal protective equipment when addressing a clogged floor drain: chemical-resistant gloves, splash goggles, and closed-toe shoes with non-slip soles.
The operator should also use a mask if fumes are present, avoid direct skin contact with cleaners, ventilate the area, and turn off nearby electrical sources.
Keep bystanders, especially children and pets, well away while attempting how to clear a clogged floor drain.
Quick assessment how to tell if the clog is local or in the main line
How can one quickly distinguish a local blockage from a main-line clog?
One checks nearby fixtures: if only the floor drain backs up, the clog is likely local.
If multiple fixtures (sinks, toilets) gurgle or drain slowly, suspect a main-line issue.
Also observe water return: isolated slow flow points to local, widespread backup indicates main sewer obstruction requiring professional attention.
Fast, low-effort fixes you can do immediately (5 to 10 minutes)
Try a few quick, low-effort steps that often clear simple blockages in minutes: remove the grate, pull out visible debris with gloved hands or a grabber, pour a kettle of hot (not boiling) water down the drain to dissolve grease, and use a rubber plunger to dislodge material with several firm pumps.
- Check for standing water level
- Smell for sewage odors
- Inspect trap for hair buildup
- Repeat hot-water and plunging cycle
Tools and Supplies You’ll Need for Fast and Thorough Clearing
The article lists basic household items—plunger, bucket, gloves and a drain snake—that handle most minor blockages.
It then outlines professional-grade options such as an auger, wet/dry vacuum and enzyme cleaners for stubborn clogs.
Finally, it explains when chemical drain cleaners are appropriate and summarizes key safety precautions.
Common household items that work (plunger, bucket, gloves, drain snake)
Gathering a few common household tools can quickly turn a stubborn floor drain into a clear, functioning outlet: a plunger to dislodge surface blockages, a bucket for removing standing water, gloves to protect hands, and a drain snake for reaching deeper clogs.
These items enable safe, immediate action—plunge vigorously, scoop water, wear gloves, and feed the snake to break and extract debris for restoration.
Recommended professional tools for tougher clogs (auger, wet/dry vacuum, enzyme cleaner)
Reach for professional-grade tools when basic methods fail: an auger to cut and pull dense blockages, a wet/dry vacuum to extract thick standing water and loosened debris, and enzyme cleaners to break down organic matter safely over time.
Select an auger sized for the drain, use a wet/dry vacuum with proper fittings and seals, and choose enzyme treatments labeled for drains and continuous use.
When to use chemical drain cleaners and safety considerations
Consider chemical drain cleaners only when mechanical methods and enzyme treatments have failed or are impractical, and the clog is clearly caused by organic buildup, hair, or grease rather than structural damage or foreign objects.
Use products per label, wear goggles, gloves, and respiratory protection, ventilate the area, avoid mixing chemistries, remove standing water when instructed, and call a professional for persistent or suspicious clogs.
Step-by-Step Methods to Clear a Clogged Floor Drain
The section outlines five practical approaches to clear a clogged floor drain, progressing from simple to more involved techniques.
It covers manual removal of hair and debris, effective plunging, using a hand auger for deep blockages, employing a wet/dry vacuum for stubborn clogs, and applying eco-friendly enzyme or biological cleaners.
Each method is presented with clear steps, typical use cases, and basic safety or equipment notes.
Method 1 Manual removal and hair/debris extraction
The procedure begins with safely removing the floor drain grate using the correct screwdriver or pry tool to avoid damage.
Once exposed, a flashlight is used to inspect the pipe while a long-handled grabber or needle-nose pliers extract hair and debris.
Careful, methodical removal reduces the need for chemicals or professional assistance.
How to remove the grate safely
Before attempting any work, verify the area is dry and well-lit, and that rubber gloves and eye protection are worn to prevent contact with debris or contaminated water.
Inspect the grate for screws or clips. Use the correct screwdriver or a flat pry tool, applying steady pressure to lift evenly.
Set removed hardware aside, avoid forcing corroded parts, and note orientation for reassembly.
Using a flashlight and grabber tool to pull out debris
Shine a focused flashlight into the drain to locate visible obstructions.
A long, flexible grabber tool with rubberized claws is inserted slowly; the operator pinches the trigger, maneuvers around the trap, and captures hair, lint, and small debris.
Withdraw gently, inspect, and repeat until clear.
Sanitize the tool and run water to confirm flow restoration.
Method 2 Plunging the floor drain effectively
The next method covers using a plunger to clear a floor drain, beginning with selecting a plunger that matches the drain opening and forming a tight seal.
It then explains the proper push-pull plunging motion, maintaining steady force rather than abrupt jerks.
Guidance is provided on trial duration and when to stop and try a different approach.
Choosing the right plunger and creating a seal
Selecting an appropriate plunger and ensuring a tight seal are critical for successful plunging of a floor drain; a cup-style plunger works for flat surfaces while a flange or sink plunger suits recessed drains.
Inspect rubber for flexibility, choose a handle offering good grip, and trim hair or debris from the flange.
Use a damp cloth or wet the rubber edge to improve sealing before plunging.
Correct plunging motions and how long to try
After a good seal is confirmed, attention turns to the plunging motion and timing. The person uses steady, forceful strokes—five to ten brisk pushes then pulls—maintaining the seal.
Pause, check for drainage, repeat up to three cycles. If no improvement after about 10–15 minutes total, stop and try alternate methods.
Excessive force is avoided to prevent pipe damage.
Method 3 Using a hand auger (snake) for deeper blockages
A hand auger is fed slowly into the drain while the operator turns the handle clockwise to push the coil forward without forcing it against the pipe walls.
Gentle, steady rotation and occasional back-and-forth motion help break or hook the obstruction while minimizing risk of scratching or kinking the line.
Progress is indicated when resistance eases, water begins to flow freely, or debris is retrieved on the auger tip.
How to feed and rotate the auger without damaging the pipe
Begin feeding the auger slowly, keeping steady tension on the cable while rotating the handle clockwise to prevent kinking and to guide the head through bends.
Advance in short increments, easing resistance; back off slightly if binding occurs. Keep the cable centered in the pipe, avoid forcing sharp angles, and use steady, controlled rotations.
Retract periodically to clear debris and inspect for damage.
Signs the auger reached and cleared the clog
Once the auger has been fed and rotated through bends with steady tension, telltale signs indicate it has reached and cleared the obstruction.
Resistance will suddenly ease, water drains faster, and debris may return to the drain mouth.
Retracting the cable reveals trapped material on the tip.
Audible loosening sounds or smoother rotation confirm passage.
A final flush verifies free flow.
Method 4 Wet/dry vacuum technique for stubborn clogs
The wet/dry vacuum offers strong suction for extracting debris and pooled water from a clogged floor drain when mechanical tools fail.
Proper setup—using a tight seal around the hose with a rubber adapter or duct tape—maximizes suction, while low suction settings and filters protect the unit.
Attention to captured liquids, filter disposal, and sanitizing the vacuum and drain prevents contamination and simplifies cleanup.
Wet-vac setup and tips for creating suction
Set up the wet/dry vacuum on a dry setting with the appropriate floor nozzle or adapter securely attached, ensuring all filters and collection bags are removed or configured per the manufacturer’s instructions for wet pickup.
Position the hose over the drain, seal gaps with a damp rag or towel, start on low power, increase suction if needed, and use short bursts to dislodge debris while monitoring hose temperature and motor strain.
Dealing with liquids and cleanup
After creating suction with the wet/dry vacuum and dislodging debris, attention turns to handling the liquid and cleaning the area to prevent odors and contamination.
The operator empties the vacuum into a suitable drain or container, rinses the hose, and disinfects surfaces with a bleach solution.
Damp materials are removed and laundered; disposable items are bagged and sealed.
Ventilate until fully dry.
Method 5 Eco-friendly enzyme or biological cleaners
Enzyme and biological cleaners work best on organic clogs like hair and grease and typically require several hours to overnight to break materials down, so results are not immediate.
For persistent blockages, combining enzyme treatments with mechanical methods—such as brushing, snaking, or a brief wet/dry vacuum—can loosen debris and speed clearing.
Users should follow product instructions for dwell time and avoid mixing enzymes with harsh chemicals.
When enzyme treatments are effective and how long to wait
When are biological cleaners the right choice and how long should one wait for results? They suit organic, slow-forming clogs (hair, soap, grease) in drains with standing water removed.
Apply per label, maintain warm conditions, avoid harsh chemicals.
Initial softening appears in 12–24 hours; significant clearing often requires 3–7 days with repeated applications.
Complete resolution can take up to two weeks.
Combining enzyme cleaners with mechanical methods
Combine biological cleaners with mechanical techniques to accelerate breakdown and removal of organic blockages while minimizing chemical use.
Technicians apply enzyme solutions, allow dwell time per product instructions, then agitate with a drain snake or brush to loosen softened debris.
Flush thoroughly with hot water. Repeat if necessary.
This paired approach reduces harsh chemicals, speeds clearance, and helps restore flow effectively.
Troubleshooting When Initial Fixes Don’t Work
If simple plunging and snaking fail, attention should turn to signs that the obstruction lies beyond the local drain and possibly in the building’s main sewer line.
Indicators of a deeper problem include simultaneous slow drainage in multiple fixtures and persistent sewage odors.
While waiting for professional repair, temporary measures such as shutting off water to affected areas and placing buckets or temporary barriers can help prevent overflow.
How to identify if the clog is in the building’s main sewer line
How can one tell whether a stubborn drain problem stems from the building’s main sewer line rather than a local trap or branch?
Check multiple fixtures: simultaneous backups or gurgling in toilets, sinks, and other floor drains suggest a main-line issue.
Inspect cleanouts—high water or sewage at the main cleanout indicates blockage downstream.
If local plunging and snaking fail, consult building maintenance or a plumber for camera inspection.
Indicators of a deeper problem (slow drains throughout home, sewage smell)
When slow drainage and persistent sewage odors appear across multiple fixtures, they often signal a deeper plumbing failure beyond a single trap or fixture.
Such signs include simultaneous backups in sinks, tubs, and floor drains; gurgling noises from drains; and sewage smell from vents or drains.
These symptoms suggest main sewer line blockage, collapsed piping, or venting failure, warranting professional inspection and repair.
Temporary measures to prevent overflow while waiting for repairs
Shut off water sources feeding affected fixtures and divert flows to prevent backing up while awaiting professional repairs.
The property owner should act swiftly to limit damage: contain spills, monitor backups, and document conditions for technicians and insurance.
- Place barriers and towels to block seepage
- Use buckets to catch drips
- Reroute appliance drains if possible
- Record photos and times for claims
When to Call a Professional Plumber
If basic methods fail or signs like sewage backup, persistent odors, or repeat clogs appear, a licensed plumber should be contacted.
The professional will typically inspect the line, use camera diagnostics or augers, and provide a clear estimate before work begins.
Homeowners should describe symptoms, locations, odor or overflow details, and any recent work to speed diagnosis and reduce costs.
Red flags that require expert intervention
Recognize warning signs early to prevent minor clogs from becoming costly emergencies: persistent backups after multiple attempts, foul sewage odors, gurgling toilets or multiple fixtures affected, slow drainage throughout the system, water rising from floor drains, or visible damage to drain components.
If DIY tools fail or there’s risk of contamination, seek a licensed plumber promptly to avoid structural damage and health hazards.
What to expect from a professional service visit
Call a licensed plumber when basic remedies fail or when signs indicate a more serious problem; during a service visit, the technician will assess the situation, diagnose the cause, explain needed repairs, and provide an estimate before beginning work.
The plumber may perform camera inspection, hydro-jetting, snaking, or repair/replace trap components, test drainage, and offer prevention advice and warranty details.
How to describe the problem to get faster, cheaper service
After the technician outlines findings and recommended repairs, homeowners can speed resolution and reduce costs by describing the problem clearly and providing relevant details.
Include symptoms (slow drainage, backups, odors), duration, frequency, recent changes or DIY attempts, exact drain location, and water level.
Mention access constraints and pets. Concise, factual information helps the plumber arrive with suitable tools, parts, and time estimates.
Preventing Future Floor Drain Clogs
Preventing future floor drain clogs begins with simple daily habits, such as keeping debris and grease away from drain openings and following clear do’s and don’ts for disposal.
Installing screens or low-profile fittings can block hair and solids while still allowing normal flow.
A regular maintenance schedule—periodic flushing, occasional enzyme treatment, and routine inspections—helps catch buildup before it becomes a blockage.
Daily habits and do’s/don’ts to keep drains clear
Maintaining clear floor drains depends largely on simple daily habits that minimize debris and grease entering the system.
Regular rinses with hot water, prompt removal of visible solids, and avoiding pouring fats down drains prevent buildup. Periodic enzyme treatments keep organic residue low. Train occupants on proper disposal and monitor drain flow.
- Rinse with hot water weekly
- Scoop solids immediately
- Don’t pour grease
- Use enzyme treatments
Simple fittings and screens that reduce debris entry
When fitted correctly, basic strainers, grates, and trap covers block hair, food particles, and large debris before they enter the piping, reducing the frequency of clogs and easing maintenance.
Durable stainless or plastic screens, magnetic or snap-in inserts, and adjustable grate heights suit varied drains. Choosing tight mesh, corrosion-resistant materials, and easy-removal designs minimizes blockages and speeds cleaning without altering drain flow.
Recommended maintenance schedule (flushing, enzyme treatments, inspections)
A straightforward, regular maintenance schedule—combining periodic flushing, targeted enzyme treatments, and routine inspections—keeps floor drains clear and reduces emergency blockages.
Monthly flushing with hot water or a mild detergent removes buildup.
Apply enzymatic cleaners quarterly in organic-prone drains.
Inspect grates and trap seals every three months, and log results.
Increase frequency in high-use or greasy environments to prevent recurrence.
Common Mistakes That Make Clogs Worse
Many homeowners resort to quick fixes that can aggravate a floor drain problem.
Harsh chemical cleaners can corrode pipe materials, repeated plunging or aggressive snaking can bend or crack lines, and ignoring a persistently slow drain allows buildup to harden and spread.
Recognizing these mistakes early reduces the risk of more extensive, costly repairs.
Harmful chemicals and why they can damage pipes
Often homeowners reach for strong chemical drain cleaners without realizing the long-term harm they cause to pipes and plumbing systems.
Corrosive formulations can eat away at metal, weaken joints, and damage plastic over time. Residue may harden, worsening blockages and complicating repairs.
Chemical exposure also risks fittings, seals, and nearby fixtures, increasing leak likelihood and necessitating costly replacements rather than simple mechanical clearing.
Overuse of plunging or snaking and potential pipe damage
While corrosive cleaners pose chemical risks to pipes, mechanical methods can also cause harm when misused. Excessive plunging can loosen seals, dislodge trap connections, or force debris deeper.
Overzealous snaking may abrade pipe walls, enlarge joints, or puncture older materials. Proper technique, appropriate tools, and knowing when to stop prevent escalation and avoid costly repairs beyond the original clog.
Ignoring slow drains and long-term consequences
Ignoring a drain that only trickles invites larger problems over time.
Water pooling, unpleasant odors, and bacterial growth escalate. Gradual buildup hardens, making removal harder and increasing the risk of full blockage or pipe corrosion.
Structural damage and costly repairs can follow.
Prompt cleaning, routine maintenance, and addressing slow flow early prevent emergency interventions and preserve plumbing integrity.
Quick Reference: Best Method by Clog Type and Severity
An emergency checklist helps decide the fastest, safest response for any clogged floor drain and sets priorities before attempting repairs.
| Priority | Action | Why it matters |
|---|---|---|
| 1 | Stop water source | Prevents overflow and damage |
| 2 | Clear surface debris | Reduces risk of worsening the clog |
| 3 | Call professional if hazardous | Protects health and property |
Follow the checklist first, then select the method matched to clog type and severity.
Emergency checklist to follow for any clogged floor drain
If a floor drain clogs, follow a concise emergency checklist to assess risk, stop further water flow, and choose the safest, most effective clearing method based on clog type and severity.
Quickly inspect, shut off nearby water, and protect surroundings. Prioritize safety, document conditions, and call professionals if needed.
- Assess hazard level and water source
- Isolate flow and power nearby
- Contain and protect belongings
- Decide DIY vs. pro based on severity
Conclusion
The drain conqueror needn’t be a hero; a few swift tools and sensible steps will banish most blockages before they stage a plumbing apocalypse. When plungers, snakes, and safe cleaners fail, a pro arrives like a calm, competent storm-tamer. Regular maintenance and smarter habits keep future clogs from rebelling. In short, decisive action plus prevention turns frantic drips into quiet, confidently flowing drains—almost suspiciously peaceful for something that once gurgled like doom.