
How to Repair a Water Leak Under a Slab: Step-by-Step Fixes and When to Call a Pro
A slab leak requires prompt action and a structured repair approach. First, immediately shut off the main water supply, cut power if there’s flooding, and document any damage. To locate the leak, look for warm spots on the floor, monitor your water bill for spikes, check the water meter for movement, and be alert for moldy odors. If the leak is small and accessible, you can patch it or use a slip coupling after excavating the area. For more extensive damage, consider trenchless rerouting or full slab excavation. After repairs, conduct a pressure test to ensure the fix is effective, then properly restore the concrete. For detailed step-by-step methods, costs, and guidance on when to hire a professional, continue reading.
What to Do First When You Discover a Water Leak Under a Slab
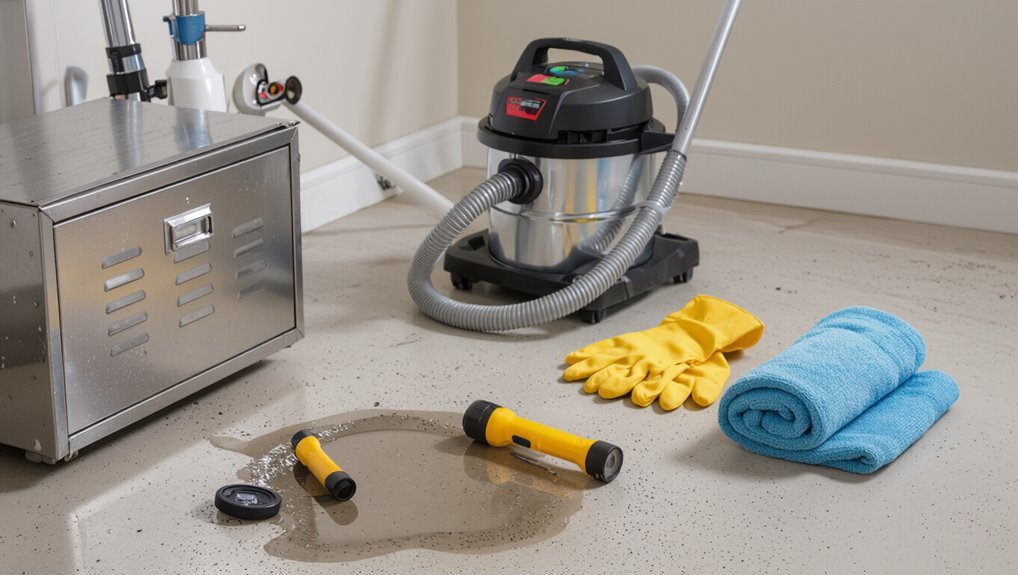
Upon discovering a suspected slab leak, the first step is to confirm signs such as unexplained wet spots, warm floor areas, high water bills, or the sound of running water beneath the slab.
Next, take immediate safety and damage-control actions—mop or contain standing water, move valuables out of affected areas, and ventilate the space to reduce humidity.
If flooding is significant or electrical outlets/fittings are wet, shut off the main water and, if water reaches electrical components, cut power at the breaker before contacting a plumber.
Signs that confirm a slab leak (visible and hidden indicators)
Recognizing a slab leak quickly depends on spotting both obvious and subtle signs that water is escaping beneath the foundation.
Visible indicators include pooled water, wet spots, warped flooring, and unusually high water bills.
Hidden clues are warm floor areas, mold odors, reduced water pressure, and continuous meter movement.
These signs prompt investigation into how to repair water leak under slab and assess extent.
Immediate safety and damage-control steps to take
Shut off the water supply immediately to limit further flooding and structural damage.
Then turn off electricity to affected areas if standing water or wet floors are present to eliminate electrocution risk.
Evacuate occupants from damp zones, document visible damage with photos, move valuables upward, mop or pump standing water, ventilate to reduce mold risk, and contact the insurer and a qualified plumber for assessment.
When to shut off main water and electricity
Safety takes priority: when a leak under a slab is discovered, the main water should be turned off immediately to stop ongoing flooding, and the electricity to affected areas cut if there is any standing water or persistent dampness that could contact wiring or appliances.
After shutting supplies, ventilate the space, avoid using electrical devices, document conditions for insurers, and call a licensed plumber and electrician for assessment.
Quick Assessment: Determine Severity and Location
A brief assessment helps distinguish a slab leak from plumbing or appliance leaks by noting persistent wet spots, unexplained rises in the water bill, and sounds of running water beneath the floor.
Simple checks include shutting off fixtures one at a time, inspecting visible pipes and appliances, and feeling for warm or damp areas on the slab.
If signs point to the slab or the source is unclear, a licensed leak-detection professional should be contacted promptly.
How to differentiate between a slab leak and other leaks
How can a homeowner tell whether moisture under a concrete floor comes from a slab leak or from another source?
A concise differentiation relies on symptom patterns: persistent moisture despite dry fixtures, higher water bills, localized warm spots, and sounds of running water suggest slab leaks.
Surface stains, clogged drains, or appliance leaks often show temporal correlation and visible paths.
Confirm with professional diagnostics.
Simple in-home checks you can perform right away
Start with a quick visual sweep of the area: inspect the slab for wet spots, discoloration, efflorescence, or soft flooring, and note any unusual warm areas by touch.
Check the main water meter for continuous flow with fixtures off, listen for running water in walls, and monitor damp odors.
Document findings, take photos, and mark suspect locations for further testing.
When to call a leak-detection professional
If basic checks suggest ongoing moisture, unexplained water loss, or signs concentrated beneath the slab, professional leak-detection should be considered promptly.
A technician assesses leak size, maps pipe locations with acoustic, thermal, or tracer methods, and evaluates structural risk.
Call a pro when leaks persist after shutoff tests, water bills rise without explanation, visible slab heave or sinkage appears, or DIY methods fail.
Tools and Materials Needed for DIY Slab Leak Repair
Before beginning repairs, the homeowner should assemble diagnostic tools, repair materials, and safety gear to guarantee the job proceeds efficiently and safely.
Diagnostic tools typically include a leak detection device, pressure gauge, moisture meter, and pipe locator; repair materials may include pipe patches, couplings, epoxy, replacement piping, and concrete patching supplies.
A safety checklist should cover personal protective equipment, shutoff procedures, ventilation, and any required permits or utility locates.
Essential diagnostic tools (list)
While slab leak repair requires specialized skills, a compact set of diagnostic tools lets a homeowner identify likely leak locations and assess urgency. These tools focus on locating sound, detecting moisture, measuring pressure, and tracing pipes.
A concise diagnostic kit speeds decisions, limits invasive probing, and clarifies whether professional intervention is needed.
- Acoustic leak detector
- Moisture meter/thermal camera
- Pressure gauge and pipe tracer
Repair materials and equipment for common fixes (list)
After confirming likely leak areas with acoustic, moisture, and pressure tools, attention shifts to the repair materials and equipment a homeowner might use for common slab fixes.
Common supplies cover patch compounds, pipe repair kits, and basic trenching tools. Choose durable, plumbing-grade items matched to pipe material and soil conditions.
- Epoxy putty or hydraulic cement
- Slip-on pipe repair clamps/kits
- Shovels, pry bar, hand saw
Safety gear and preparation checklist
Safety starts the job: a homeowner preparing to access a slab leak should assemble personal protective equipment and site-control items tailored to concrete work and potential water exposure.
The checklist includes PPE, containment and dewatering tools, and safe excavation gear. Verify shutoffs, utility locates, ventilation, and stable footing before work begins.
- Gloves, goggles, respirator
- Pump, wet vacuum, tarps
- Shovels, knee pads, bracing
Step-by-Step DIY Methods to Repair a Water Leak Under a Slab
The section outlines three practical approaches for addressing a slab leak based on location, access, and resources.
Method 1 covers targeted repairs to the exposed pipe without cutting the slab.
Method 2 explains trenchless directional drilling and rerouting.
Method 3 describes the traditional slab opening and full pipe replacement.
Each method is presented with concise step-by-step actions, required tools, and typical pros and cons.
Method 1 Localized pipe repair without breaking slab
Localized pipe repair without breaking the slab is appropriate when the leak is accessible via a small access point, the pipe material is compatible with patching or internal lining, and the surrounding slab is structurally sound.
The procedure typically involves locating the leak, excavating a minimal access hole or using sewer inspection equipment, and applying a targeted repair such as a saddle clamp, epoxy injection, or cured-in-place lining.
Expected lifespan varies by method and pipe condition—temporary clamps may last months to a few years, while properly applied internal linings can last a decade or more, though limitations include incomplete sealing of severely corroded or fractured pipes.
When this method is appropriate
When a visible damp spot, sagging flooring, or steadily increasing water bills point to a confined leak in the slab area, this method is appropriate for repairs that can be accessed without breaking concrete.
It suits isolated pipe failures near reachable junctions, short damaged sections, or line connections under thin slabs.
Not suitable for widespread leaks, multiple breaks, or severe slab erosion requiring professional assessment.
Step-by-step procedure
If the leak appears confined and accessible as described above, the following step-by-step procedure outlines how to locate, expose, and repair a short damaged section of pipe beneath a slab without breaking concrete.
Shut water, verify location via sounding/pressure tests, excavate minimal access trench, expose pipe, cut out damaged section, install slip couplings or repair sleeve, pressure-test, backfill and compact, restore surface.
Expected lifespan and limitations
Although a targeted under-slab repair can restore function quickly and at lower cost than full slab replacement, its service life typically depends on pipe material, soil conditions, repair method, and workmanship.
Typical longevity ranges from a few years to two decades; epoxy or saddle repairs often last less than full repipes.
Limitations include concealed damage, recurring leaks, and compromised structural issues that may necessitate eventual slab excavation.
Method 2 Directional drilling and pipe reroute (trenchless)
Directional drilling and pipe reroute (trenchless) is presented as an alternative when slab access is impractical or widespread pipe replacement is needed.
The section will outline the step-by-step process, summarize typical costs, and weigh advantages and drawbacks.
Readers are encouraged to compare feasibility and budget against localized repair options before choosing this method.
When to consider trenchless repair
When is trenchless repair the right choice?
Trenchless suits situations with accessible entry/exit points, localized leaks in otherwise intact mains, limited surface disturbance tolerance, and soil or landscaping that makes open excavation impractical or costly.
It’s appropriate when pipe material and layout permit directional drilling, when homeowners prioritize faster restoration, and when budget allows slightly higher upfront equipment or contractor fees.
Step-by-step overview of the process
If trenchless repair fits the situation, the directional drilling and pipe reroute method proceeds through a defined sequence of steps that convert planning into a new, accessible service line.
The sequence: inspect and locate leak, map utilities, design bore path, set entry and exit pits, drill pilot hole, ream to size while pulling new pipe, connect to existing system, test and backfill.
Pros, cons, and typical costs
Although trenchless drilling requires specialized equipment and planning, it often offers a less disruptive alternative to full slab demolition by creating a new service line beneath the foundation. Benefits include minimal landscaping damage and faster completion; drawbacks are equipment cost and access limits. Typical costs range $2,000–$8,000.
| Pros | Cons |
|---|---|
| Minimal disruption | High equipment cost |
| Faster completion | Not always feasible |
| Preserves landscaping | Specialized crew |
Method 3 Traditional slab opening and pipe replacement
When excavation is required, the traditional slab-opening method outlines a clear step-by-step workflow for locating the leak, cutting and removing concrete, exposing and replacing the damaged pipe, and backfilling the trench.
After plumbing repairs, attention turns to proper compaction, pouring and curing concrete, and restoring finished flooring to prevent future settling or damage.
Safety precautions, permit considerations, and recommended materials for durable restoration are highlighted throughout the procedure.
When excavation is necessary
Excavation becomes necessary when noninvasive methods fail to locate or stop a leak beneath a concrete slab, requiring direct access to the damaged pipe for repair or replacement.
Excavation is warranted if leaks continue despite pressure tests, spot repairs, or epoxy relining, if soil conditions worsen, or if pipe damage is extensive.
It is a last-resort option due to cost, disruption, and structural considerations.
Step-by-step excavation and replacement workflow
Begin by confirming the exact leak location and marking the cutting area on the slab.
Shut off water, remove flooring, and cut the slab to marked lines.
Excavate soil to expose the pipe, support adjacent slab edges, and isolate utilities.
Cut out the damaged pipe section, install replacement piping with appropriate couplings and bedding, pressure-test the repair, then backfill around the pipe.
Post-repair concrete and floor restoration tips
After verifying the repair passed pressure testing and the trench is properly compacted around the new pipe, attention turns to restoring the slab and finished floor. Careful planning at this stage prevents cracking, uneven surfaces, or future leaks.
The slab should be poured in controlled lifts, cured per manufacturer instructions, and saw-cut joints added where needed. Match floor heights, reinstall underlayment, and protect finishes during final curing.
How to Confirm the Repair Worked
After the repair, pressure-testing and electronic leak-detection should be performed to verify there is no remaining seepage.
The site should be monitored over time for delayed signs of failure such as new damp spots, settling, or unexplained utility usage.
Finally, all findings, test results, and any warranty details should be documented and retained for future reference.
Pressure-testing and leak-detection verification steps
Several practical tests verify that a slab leak repair holds: pressurizing the affected line, monitoring for pressure loss over a set interval, and performing a targeted leak-detection sweep with acoustic or tracer methods to confirm no residual flow.
Technicians isolate zones, apply manufacturer-recommended pressure, log readings at intervals, and repeat acoustic scans.
Successful verification shows stable pressure and absence of acoustic or tracer signals.
Monitoring for delayed signs of failure
Although initial pressure tests and acoustic sweeps indicate a successful repair, confirming long-term integrity requires monitored observation over days to weeks.
Inspect for gradual pressure loss, new damp spots, fresh odors, or temperature changes near slab junctions.
Record readings, photos, and meter logs daily then weekly.
Recheck visible plumbing, exterior grading, and indoor humidity.
Any progressive signs prompt immediate re-evaluation or professional reassessment.
Documentation and warranty considerations
When confirming a slab leak repair, thorough documentation and clear warranty terms provide the primary evidence of success and protect both owner and contractor. This includes dated test results, pre- and post-repair photographs, material and part numbers, and a written description of methods used.
Records should note inspection dates, pressure test outcomes, responsible technicians, warranty duration, exclusions, and contact procedures for claim initiation.
Cost Estimates and Factors That Affect Price
Cost differences between DIY fixes and professional repairs can range from a few hundred dollars for simple epoxy patches to several thousand for full slab repairs.
Factors such as difficult access, the type of pipe, and the extent of damage commonly increase total cost.
Homeowners are advised to obtain multiple written estimates, compare scope and warranties, and verify licenses before selecting a contractor.
Typical cost ranges for DIY vs. professional repairs
Repairing a water leak under a slab can range from a modest weekend DIY job to a multi-thousand-dollar professional intervention, depending on scope and method. DIY patching, pipe sleeves, or rerouting often costs $100–$1,000 in materials and rental tools. Professional slab repairs and trenching typically run $1,500–$10,000+. Below is a quick comparison:
| Option | Typical range |
|---|---|
| DIY materials | $100–$1,000 |
| Minor professional repair | $1,500–$4,000 |
| Major professional repair | $4,000–$10,000 |
Variables that drive up costs (access, pipe material, extent of damage)
Several key variables can considerably increase the price of fixing a slab leak, each affecting labor, time, and materials in different ways.
Restricted access (landscaping, driveways, finished floors) raises excavation and restoration costs.
Corroded or obsolete pipe materials demand replacement rather than repair.
Extensive damage or multiple leaks prolong work, require more materials, and may uncover structural or mold remediation expenses that escalate total charges.
How to get and compare contractor estimates
After outlining variables that drive up prices, homeowners should learn how to obtain and compare contractor estimates to avoid surprises.
They should solicit at least three written bids, confirm license and insurance, request itemized breakdowns (labor, materials, permits, contingency), verify warranties, and ask about subcontractors.
Compare scope, timeline, and exclusions rather than lowest price alone to assess true value and risk.
When to Hire a Professional and How to Choose One
Recognizing clear indicators that a slab leak requires a licensed plumber—such as rapid water meter movement, significant foundation dampness, or repeated repairs—is the first step.
When interviewing contractors, the homeowner should ask about experience with slab leaks, preferred repair methods, timelines, and references.
Before hiring, the homeowner must verify current licenses, confirm liability and workers’ compensation insurance, and obtain written warranties for work and materials.
Clear indicators you should call a licensed plumber
When persistent wet spots, sudden drops in water pressure, unexplained spikes in the water bill, visible foundation cracks, or the sound of running water with no fixtures in use appear, a licensed plumber should be contacted promptly.
These signs commonly indicate a slab leak that requires professional diagnosis and repair to prevent structural damage and mold growth.
Immediate action is warranted for basement flooding, softened floors, recurring damp odors, and failed DIY fixes.
Questions to ask potential contractors
Those warning signs warrant prompt professional involvement, and choosing the right contractor begins with targeted questions that reveal competence, experience, and reliability.
Ask about past slab leak projects, timelines, and specific repair methods. Request references and examples. Clarify project scope, costs, and cleanup responsibilities before signing.
- Experience with slab leaks
- Expected timeline and milestones
- Detailed written estimate and scope
How to verify licenses, insurance, and warranties
Verify credentials carefully before hiring for slab-leak repairs: contractors should provide a current state or local license number, proof of general liability and workers’ compensation insurance, and clear warranty terms covering both labor and materials.
Confirm license validity with the issuing agency, request insurer contact for verification, get written warranty details with duration and exclusions, and retain all documents before work begins.
Common Mistakes and How to Avoid Them
Many homeowners attempt slab leak repairs themselves and sometimes create recurring problems by using improper materials or incomplete fixes.
Misidentifying the leak source can lead to repairs that do not address the underlying issue, resulting in wasted time and expense.
Clear diagnostic steps, correct materials, and adherence to proven techniques help guarantee a durable, long-term solution.
DIY pitfalls that cause recurring leaks
Avoiding common DIY mistakes is essential because quick fixes or incomplete repairs under a slab often lead to recurring leaks, higher costs, and structural damage.
Typical pitfalls include using improper sealants, inadequate pipe support, neglecting corroded fittings, and skipping pressure testing.
Proper permitting, following manufacturer instructions, and verifying material compatibility reduce repeat failures; when unsure, consult a licensed plumber to guarantee a lasting repair.
Errors in detection leading to improper repairs
Numerous detection errors—misreading moisture maps, misplacing acoustic sensors, or mistaking slab efflorescence for active seepage—frequently send repairs in the wrong direction.
Technicians then patch wrong zones, overlook hidden joints, or replace unaffected piping. Consequences include wasted materials, persistent leaks, and structural damage.
Accurate diagnosis requires systematic testing, cross-verification of methods, and documented findings to prevent misdirected interventions.
Best practices to ensure a durable fix
Building on the pitfalls of faulty detection, guaranteeing a durable repair requires addressing both diagnostic and execution errors with a clear protocol.
Inspect thoroughly, verify leak source with pressure testing, and document findings.
Use proper materials, follow manufacturer cure times, and guarantee subsurface drying.
Avoid temporary patches, improper compaction, and skipped permits.
Schedule post-repair monitoring and professional review when doubts persist.
Preventive Measures to Reduce Future Slab Leaks
Preventive measures focus on regular maintenance checks, managing water pressure, and promptly addressing minor issues before they escalate.
Long-term risk is reduced by upgrading to more durable piping materials and reconsidering routing to minimize stress points beneath the slab.
Proper landscaping and improved surface drainage further protect the foundation by directing water away from vulnerable areas.
Routine maintenance checks and water-pressure management
Inspecting fixtures, monitoring pressure, and scheduling regular checks form the core of routine maintenance for minimizing slab leaks.
Homeowners should inspect visible pipes, fittings, and appliance connections for drips and corrosion.
Installing a pressure gauge and keeping supply pressure within recommended limits reduces stress on joints.
Promptly addressing minor issues and maintaining documentation of inspections helps detect trends before they become major slab failures.
Upgrading plumbing materials and routing options
After routine maintenance and pressure management have reduced immediate risk, homeowners can further protect foundations by upgrading piping materials and adjusting routing to minimize exposure and stress.
Replace aging galvanized or copper lines with PEX or CPVC for flexibility and corrosion resistance.
Reroute critical supply lines away from slab edges, avoid tight bends, add accessible manifolds, and install isolation valves to simplify future repairs and limit slab penetrations.
Landscaping and drainage practices to protect the slab
When proper grading and controlled water flow are maintained around a structure, landscaping becomes a frontline defense against slab leaks by directing surface and roof runoff away from the foundation.
Strategic swales, French drains, and downspout extensions reduce saturation near the slab.
Select drought-tolerant plants, avoid high-water trees near footings, and maintain gutters and irrigation to prevent soil movement and hydrostatic pressure against the slab.
Typical Materials, Lifespans, and Replacement Guidelines
Common pipe materials found beneath slabs—such as copper, galvanized steel, polybutylene, and PVC—exhibit distinct failure modes like corrosion, galvanic reaction, plastic degradation, and joint failure.
Typical lifespans vary by material and soil conditions, often ranging from 20–70 years. Recurring leaks, widespread corrosion, or inaccessible repairs are common indicators that full re-piping should be considered.
Practical replacement guidelines prioritize visible deterioration, frequency of repairs, and cost-effectiveness compared with continued spot fixes.
Common pipe materials under slabs and their failure modes
A variety of pipe materials are used beneath concrete slabs—each with distinct construction, expected service life, and typical failure modes that influence repair or replacement decisions. Common types: cast iron (corrosion, joint failure), copper (pinholes, corrosion), PVC/CPVC (cracking, joint separation), PEX (ribbed abrasion, UV issues).
| Material | Typical failure mode |
|---|---|
| Cast iron | Corrosion/joints |
| Copper | Pinholes/corrosion |
Recommended replacement timelines and indicators for full re-piping
Several factors guide the decision to fully re-pipe a slab-on-grade home: pipe material, age, documented leaks, water quality, and the frequency and cost of spot repairs.
Copper and CPVC often reach 50–70 years; galvanized steel fails around 40–60 years; PEX and PVC expect 30–50 years.
Immediate re-piping is advised with recurrent leaks, widespread corrosion, low water pressure, or escalating repair costs exceeding replacement estimates.
Appendix: Emergency Contacts, Resources, and Further Reading
The appendix lists practical steps for documenting damage to support insurance claims, including photos, timestamps, and organized inventories.
It also points to relevant industry standards and building codes that guide repair scope and compliance.
Finally, it provides links to professional associations and certified leak-detection services for qualified referrals.
How to document damage for insurance claims
Documenting damage for insurance claims requires prompt, systematic, and verifiable records to maximize recovery and avoid disputes.
The homeowner should photograph damage, timestamp files, note locations, and preserve samples.
Maintain a written inventory, record contractor estimates, and save receipts.
Communicate in writing with insurers and avoid unauthorized repairs until advised.
- Photos and videos with timestamps
- Itemized inventory and receipts
- Written contractor estimates and correspondence
Useful industry standards and codes to reference
After compiling photographic evidence, inventories, and estimates, homeowners and contractors should consult authoritative industry standards and local codes to guide repairs and support claims.
Relevant references include plumbing and building codes (IPC, UPC, local amendments), ASTM testing and materials standards, NFPA for safety, and EPA guidance on contamination.
Adherence documents permit requirements, approved repair methods, and inspection protocols to guarantee compliance and liability protection.
Links to professional associations and certified leak-detection services
When seeking qualified assistance, homeowners and contractors should prioritize contacts from established professional associations and certified leak-detection services to guarantee reliable diagnostics, verifiable credentials, and insurance-compliant reports.
A concise appendix lists reputable organizations, national certification bodies, and vetted local providers offering searchable directories, membership verification, and complaint histories for informed selection and emergency response coordination.
- National plumbing and leak-detection associations
- Certification bodies with searchable registries
- Vetted local specialists and emergency services
Conclusion
Like a quiet leak that once whispered beneath the house, solving a slab leak turns uncertainty into steady ground. With prompt assessment, the right tools, and careful technique, small failures become patched memories; when problems loom too large, professional hands restore confidence. Regular inspections and sensible preventive steps keep foundations dry and futures secure. In repair and vigilance alike, homeowners trade worry for resilience, letting the house breathe easier beneath its steady slab.
