How to Install a Water Heater Expansion Tank: Step-by-Step Guide for Beginners
To install a water heater expansion tank, follow these essential steps: First, shut off the water supply and power to the heater. Next, depressurize the cold-water line, then install a tee with an isolation valve. Mount the expansion tank vertically, ensuring to seal the threads and hand-tighten before using a wrench for added security. After slowly repressurizing the system, adjust the tank’s precharge to match the system pressure. Finally, inspect for leaks and test the relief valves to ensure proper functionality. For more detailed guidance on sizing and troubleshooting, continue reading.
What an expansion tank does and why it’s needed for water heaters
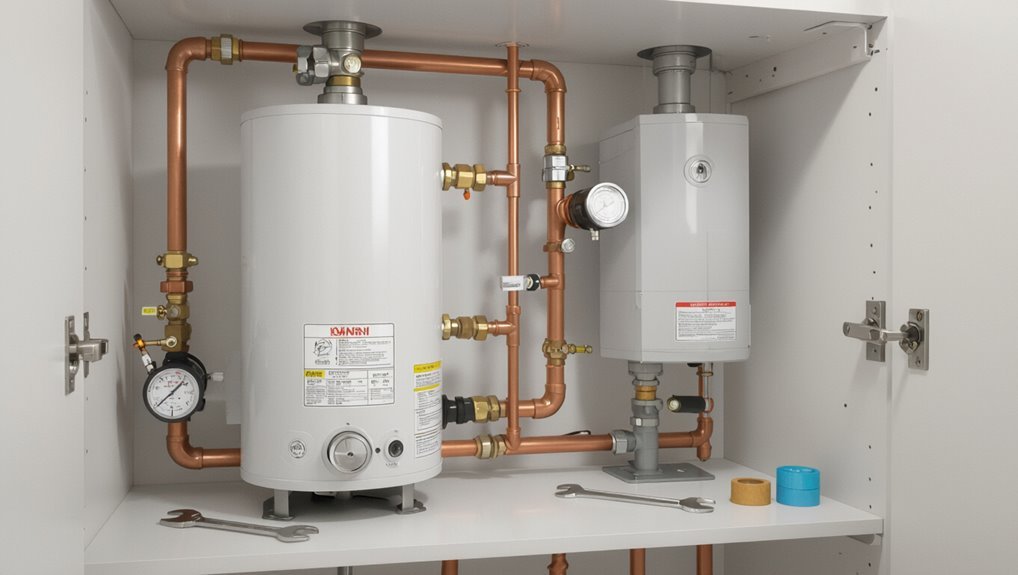
Thermal expansion raises water pressure in closed plumbing systems as heated water increases in volume.
An expansion tank absorbs that extra volume to prevent pressure spikes, protect the water heater and pipes, and help meet plumbing codes.
Homeowners may need an expansion tank if the pressure relief valve discharges, pipes knock, or meter/gauge readings show unusually high pressure.
How thermal expansion affects closed plumbing systems
When water is heated in a closed plumbing system, it expands and raises internal pressure. An expansion tank provides a controlled space to absorb that extra volume and prevent stress on pipes, fixtures, and the water heater itself.
Thermal expansion cycles increase pressure spikes, accelerating wear and leakage. Guidance on how to install an expansion tank on a water heater outlines location, isolation valve, and proper precharge to mitigate these effects.
Benefits of installing an expansion tank (pressure control, longevity, code compliance)
Having established how heating water in a closed system raises pressure and stresses components, it becomes clear why an expansion tank is used: it cushions pressure spikes by providing a compressible space for excess water volume.
This reduces stress on valves, fittings, and the heater, extends system lifespan, minimizes maintenance, and helps meet plumbing codes requiring thermal expansion control in many jurisdictions, improving safety and reliability.
Signs you need an expansion tank (pressure relief valve trips, banging pipes, high pressure readings)
Because water expands as it heats, a homeowner may notice clear signs that an expansion tank is needed: frequent trips of the temperature-and-pressure relief valve, loud banging or knocking in pipes (water hammer), and consistently high static or dynamic pressure readings at fixtures.
These symptoms indicate thermal expansion and pressure cycling that can damage valves, joints, appliances, and shorten water heater lifespan without corrective expansion capacity.
Tools, materials, and safety preparations before you start
Before beginning the installation, a clear list of required tools—wrenches, pipe dope or Teflon tape, a leak detector, and adjustable pliers—should be prepared.
Necessary materials and replacement parts, such as the correctly sized expansion tank, mounting bracket, fittings, and pressure-relief components, must be confirmed on hand.
Safety precautions, including shutting off power and water, relieving system pressure, wearing protective gear, and calling a licensed plumber for unfamiliar or high-pressure systems, should be observed.
Required tools list
A compact checklist helps guarantee the installation proceeds safely and efficiently: a pipe wrench, adjustable wrench, Teflon tape, plumber’s tape or joint compound, pipe cutter or hacksaw, appropriate fittings and a shutoff valve, a mounting bracket or straps, and the correct-size expansion tank.
Proper tools prevent leaks and simplify work.
- Pipe wrench and adjustable wrench
- Teflon and plumber’s tape
- Pipe cutter or hacksaw
- Mounting bracket or straps
- Shutoff valve and fittings
Required materials and replacement parts
Essential materials and replacement parts include a correctly sized expansion tank rated for the system pressure, a pressure-reducing valve or adapter if the existing connections are incompatible, threaded fittings or unions matching the plumbing (brass or stainless steel recommended), pipe dope or Teflon tape for sealing threads, isolation valve(s) to shut off and drain the line, appropriate pipe sections or flex connectors, mounting hardware rated for the tank weight, and replacement pressure-relief valve components if corrosion or wear is evident.
- Expansion tank (correct size)
- Threaded fittings/unions
- Pipe dope or Teflon tape
- Isolation valves and connectors
- Mounting brackets and hardware
Safety precautions and when to call a professional
Turn off the water supply and power to the heater, then verify the system is depressurized before any work begins.
Wear safety glasses, gloves, and use proper tools.
Check for leaks, corrosion, or gas lines; if unsure about plumbing, gas connections, electrical wiring, or local code compliance, contact a licensed plumber or electrician.
Stop and call a professional for complex or unsafe conditions.
Choosing the right expansion tank for your water heater
Selecting the correct expansion tank requires matching its capacity to the water heater size, expected thermal expansion volume, and system pressure.
The choice also involves tank type and mounting orientation—vertical or horizontal, pre-charged or bladder-style—based on available space and installation preferences.
Finally, compatibility with the specific heater—conventional tank, tankless, or indirect-fired system—must be confirmed to guarantee proper operation and warranty compliance.
Sizing an expansion tank (gallons, heater capacity, system pressure)
Sizing an expansion tank requires matching the tank’s usable volume to the water heater’s recovery capacity and the system’s static and thermal pressures.
Calculate expected thermal expansion (gallons) from heater capacity and temperature rise, then compare to tank’s air-charged volume at system static pressure.
Choose a tank with usable volume exceeding expansion and compatible pressure rating; verify local code or manufacturer tables for final selection.
Types and connection orientations (vertical vs horizontal, pre-charged vs bladder)
Different expansion-tank types—diaphragm/bladder and air-charged (simple steel) models—and their permitted orientations, vertical or horizontal, determine installation flexibility and performance.
Bladder/pre-charged tanks isolate water from the air cushion, tolerate any orientation per manufacturer, and require correct precharge.
Steel air-charged tanks rely on absorbed air, may need periodic recharging, and are typically mounted vertically for reliable operation and drainage.
Compatibility with different water heater types (tank, tankless, indirect)
When matching an expansion tank to a water-heating system, the tank type and capacity must align with the heater’s operating pressure, thermal expansion volume, and plumbing configuration.
Conventional storage heaters need larger tanks sized to tank volume and temperature rise.
Tankless units often require smaller or no tank depending on flow and check valves.
Indirect systems demand compatible pressure ratings and placement to protect boiler and piping.
Step-by-step installation process
The installation process begins with basic safety steps: power and water are shut off and a portion of the tank is drained to lower pressure.
Next, the cold-water supply line is inspected to choose a suitable mounting point. A tee fitting and shutoff valve are installed, then the expansion tank is attached with proper fittings and thread sealant.
Step 1 Turn off power and water supply
Shut off both the water supply and the power before beginning any work on the water heater: close the cold-water shutoff valve feeding the tank and either switch off the breaker at the electrical panel for electric heaters or turn the gas control to the pilot position for gas units.
Verify power is off with a tester and confirm the inlet valve is fully closed before proceeding.
Step 2 Drain a portion of the water heater to reduce pressure
Begin by relieving pressure in the tank to make connections safe and manageable: attach a garden hose to the water heater’s drain valve at the tank base and route the hose to a suitable drain or outside area.
Open a hot water faucet upstairs to vent air, then carefully open the drain valve until several gallons flow out.
Close the valve when pressure is sufficiently reduced.
Step 3 Locate the cold-water supply line and the best mounting point
With pressure reduced, attention shifts to the cold-water supply line and selecting a mounting point for the expansion tank.
The installer visually traces the incoming pipe near the water heater, identifying accessible, level sections with sufficient clearance. A stud or solid wall anchor is preferred for bracket attachment.
The chosen spot must allow vertical tank orientation, easy access for future service, and minimal piping strain.
Step 4 Install a tee fitting and ball valve or shutdown valve
Before cutting into the cold-water line, the installer confirms the main supply remains depressurized and measures to mark the tee location where the expansion tank will connect.
The tee should sit on a straight, accessible section of pipe between the shutoff and the water heater, allowing the branch for the tank to run vertically.
The installer cuts, deburrs, fits the tee, then installs a ball or shutoff valve on the branch for isolation.
Step 5 Attach the expansion tank using appropriate fittings and thread sealant
After verifying the ball or shutoff valve on the tee is closed and the branch is ready, the installer prepares to attach the expansion tank by inspecting the tank’s threaded inlet and the tee’s branch fitting for cleanliness and proper fit.
They apply plumber’s tape or compatible thread sealant to male threads, hand-start the tank, then tighten with a wrench to a snug, leak-free fit without over-torquing.
Step 6 Mount and secure the tank to the wall or support
Position the expansion tank bracket at the chosen mounting location, ensuring it is level and aligned with the tank inlet so the tank will hang straight and the plumbing will not be stressed.
Mark holes, drill appropriate anchors for the wall type, and fasten the bracket securely.
Hang the tank, verify clearances, and tighten supporting hardware to manufacturer torque specifications to prevent movement or vibration.
Step 7 Re-pressurize the system and check pre-charge on the tank
Begin re-pressurization by slowly opening the water supply to the heater and system, allowing lines to fill while watching for leaks.
As pressure rises, check the expansion tank’s pre-charge with a tire-style gauge at the tank’s Schrader valve and compare it to the water system’s normal static pressure so the tank’s air charge matches manufacturer recommendations.
Adjust air pressure as needed, then isolate valve and secure fittings.
Step 8 Check for leaks and verify system pressure and relief valve operation
Inspect the system carefully for any signs of leakage and confirm that the water pressure and temperature/pressure relief (T&P) valve operate correctly.
This includes visually checking all fittings and joints, feeling for dampness around connections, monitoring the pressure gauge for stable readings within the expected static range, and actuating the T&P valve briefly to verify it discharges and reseats without dripping.
Then tighten any weeps, retest, and note final readings.
Step 9 Restore power and final testing
Re-energize the water heater only after confirming all plumbing and fittings are secure and dry, the isolation valves are properly set, and the T&P and expansion tank components have passed leak and pressure checks.
Restore electrical or gas supply per manufacturer instructions, relight pilot if required, then monitor for proper heating.
Recheck for leaks, verify stable pressure, and document settings and observations before concluding the job.
How to test and maintain an installed expansion tank
The next section covers routine testing and upkeep of the expansion tank, beginning with checking the air charge using a tire gauge and adjusting the pre-charge to match the system pressure.
It also outlines a simple inspection schedule—what to look for, such as leaks, corrosion, or a waterlogged tank—and how often to perform checks.
Finally, it explains the steps for replacing a failed expansion tank safely and restoring the system to proper operation.
Checking air charge with a tire gauge and adjusting pre-charge
Begin by confirming the expansion tank is isolated from system pressure and cooled.
Use a tire gauge on the Schrader valve to read pre-charge; target pressure equals household static water pressure (typically 40–60 psi).
If low, use a pump to add air; if high, release air.
Recheck after adjustment.
Record the value and guarantee valve cap is tightened before returning the tank to service.
Routine inspection schedule and what to look for
Routine inspections for an installed expansion tank should occur at least annually, with a simple visual and functional checklist performed to catch leaks, corrosion, pressure loss, or mounting issues before they cause system problems.
- Check for visible leaks or corrosion at connections
- Verify tank mounting and brackets
- Measure air charge with a tire gauge
- Confirm no waterlogged feel or temperature anomalies
- Note unusual noises or pressure fluctuations
How to replace a failed expansion tank
When an expansion tank fails, a prompt replacement prevents pressure-related damage to the water heater and plumbing system.
The technician isolates water and power, relieves pressure, drains the line, disconnects the old tank, and installs a matching-size replacement with proper fittings and Teflon tape.
After refilling, restoring power, and checking for leaks, testing system pressure guarantees correct operation and safety.
Common mistakes to avoid during installation
Common mistakes during expansion tank installation often stem from incorrect sizing or improper orientation, which can compromise system performance.
Skipping shutoff or depressurization steps increases the risk of water damage and personal injury.
Using incorrect fittings or poor sealing practices leads to leaks and premature failure.
Incorrect sizing or orientation errors
Although often underestimated, incorrect sizing and improper orientation of an expansion tank can compromise system performance and void warranties.
Selecting a tank with wrong capacity or incompatible precharge pressure leads to chronic pressure spikes or premature failure.
Mounting upside-down or without recommended clearance impedes air cushion function and inspection.
Verify manufacturer specifications and local codes to guarantee correct size, orientation, and warranty compliance.
Skipping shutoff or depressurization steps
Failing to shut off water supply and release system pressure before installing an expansion tank risks sudden water discharge, injury, and damage to fittings.
Technicians who skip these steps may force water into the work area, compromise seals, and create hazardous conditions.
Properly isolating the heater, draining a small volume, and relieving pressure guarantees safe, controlled installation and prevents avoidable leaks or accidents.
Using wrong fittings or poor sealing practices
Select appropriate fittings and guarantee proper sealing to prevent leaks and pressure loss when installing an expansion tank.
Installers should match pipe size, thread type, and material compatibility. Use thread sealant or plumber’s tape correctly, avoid over-tightening, and inspect joints for cross-threading.
Faulty fittings or poor seals can cause water damage, system inefficiency, and premature component failure, so verify connections before restoring pressure.
Troubleshooting post-installation problems
After installation, the homeowner may still encounter issues such as persistent high system pressure or repeated discharge from the relief valve.
Noisy pipes can emerge when trapped air or improper support alters flow dynamics.
Leaks at fittings or the tank connection should be inspected promptly to identify loose joints, damaged seals, or incorrect plumbing materials.
Persistent high pressure or relief valve discharge
Persistent high pressure or repeated discharge from the temperature-and-pressure (T&P) relief valve after installing an expansion tank indicates an unresolved system imbalance or component fault rather than normal operation.
The installer should verify expansion tank precharge matches system static pressure, confirm tank isolation valve is open, inspect thermal bypasses and check valves for failure, and test the relief valve.
Replace defective components and retest system pressure.
Noisy pipes after installation
Addressing noisy pipes begins with identifying the sound and its source: ticking or pinging often signals thermal expansion of metal, hammering indicates water hammer from sudden valve closure, and a high-pitched whine can point to restricted flow or a partially closed valve.
Solutions include securing loose pipes, installing water hammer arrestors, checking and fully opening valves, and flushing debris from lines to restore normal flow.
Leaks at fittings or tank connection
Inspect the fittings and tank connection promptly when leaks appear, because small drips can indicate loose connections, damaged seals, or improper installation that will worsen over time.
The technician should isolate the water, tighten unions or compression nuts, replace deteriorated washers or threaded sealant, and recheck pressure.
If leakage persists, recommend shutting off supply and consulting a licensed plumber to prevent water damage and system failure.
Cost, code considerations, and when a permit or professional is required
Typical costs include the expansion tank, fittings, and isolation valve plus labor if a plumber is hired, with prices varying by tank size and regional rates.
Compliance with local plumbing codes and permit requirements can affect placement, sizing, and installation methods.
Situations such as modifying the water heater system, tying into gas lines, or lack of homeowner confidence generally require a licensed plumber and possibly a permit.
Typical cost breakdown (parts, labor)
Budgeting for an expansion tank involves two main expense categories: parts and labor. Typical parts include the tank, mounting bracket, fittings, and pressure relief components; labor varies by complexity and local rates. Permits or pros may be needed for safety or warranty.
| Item | Typical cost | Notes |
|---|---|---|
| Tank | $40–$150 | Size-dependent |
| Fittings/bracket | $10–$40 | |
| Labor | $100–$300 | Per hour/flat |
| Permit/pro inspection | $0–$150 | If required |
Relevant plumbing codes and local permit issues
Alongside parts and labor costs, local plumbing codes and permit requirements can affect total expense and the timeline for installing an expansion tank.
Code dictates tank sizing, pressure relief placement, mounting, and connection materials. Some jurisdictions require permits and inspections; fees vary.
Homeowner-install allowances differ by locality. Confirm municipal requirements before starting to avoid fines, rework, or failed inspections.
Scenarios that require a licensed plumber
When local codes are strict, water heater expansions intersecting with closed systems, high-pressure conditions, or complex piping layouts typically require a licensed plumber to guarantee compliance and safety.
Licensed pros are needed when permits are mandated, manufacturers’ warranties demand certified installation, or insurance requires documented work.
They assess pressure regulation, install isolation valves or backflow prevention, and provide inspection-ready documentation and liability protection.
Quick-reference installation checklist
A concise checklist helps confirm readiness before beginning an expansion tank installation and guides each on-site task.
It should include a pre-install checklist for tools, materials, shutoff verification, and code compliance.
A separate step-by-step on-site checklist covers mounting location, connection sequence, leak checks, and pressure testing.
Pre-install checklist
Before starting the installation, verify that all required parts, tools, and safety gear are present and that the work area is clear and accessible.
The installer confirms measurements, pressure ratings, and compatibility before proceeding.
Use this concise checklist:
- Expansion tank sized for system pressure
- Compatible fittings and adapters
- Pipe wrench, thread sealant, Teflon tape
- Pressure gauge and air valve tool
- Personal protective equipment (gloves, eye protection)
Step-by-step on-site checklist
One clear checklist guides the on-site sequence: verify shutoff and drain procedures, confirm tank and fitting orientation, install the expansion tank to the cold-water line with proper sealant and supports, pressurize and check for leaks, then record system pressure and label the tank.
- Confirm water and power are off
- Drain required volume
- Fit and seal connections
- Support and secure tank
- Test pressure, log results
Conclusion
In short, installing an expansion tank protects a water heater from pressure spikes and prolongs system life. One plumber likened an expansion tank to a car’s shock absorber: when a city study found thermal expansion caused 30% of residential relief-valve failures, the tank absorbed the forces that would otherwise jolt pipes. With correct sizing, proper shutoffs and periodic checks, homeowners gain quieter, safer plumbing and avoid costly leaks and premature appliance replacement.