
How to Clean a Well Pump: Step-by-Step Guide to Safe Maintenance and Improved Water Quality
Cleaning a well pump is essential for maintaining optimal flow, pressure, and water quality by eliminating sediment, biofilm, and mineral buildup. To ensure a successful cleaning process, prioritize safety by wearing personal protective equipment (PPE), turning off the power, isolating plumbing, and relieving pressure. Begin by inspecting the wellhead, then remove and clean any screens or filters. Use approved descaling products, followed by a measured chlorine shock for disinfection, and flush the system thoroughly. After reassembling, restore power and test for bacteria and nitrates. Establish a regular maintenance schedule to prevent future issues. For detailed steps and additional safety tips, continue reading.
What Cleaning a Well Pump Means and Why It Matters for Water Quality
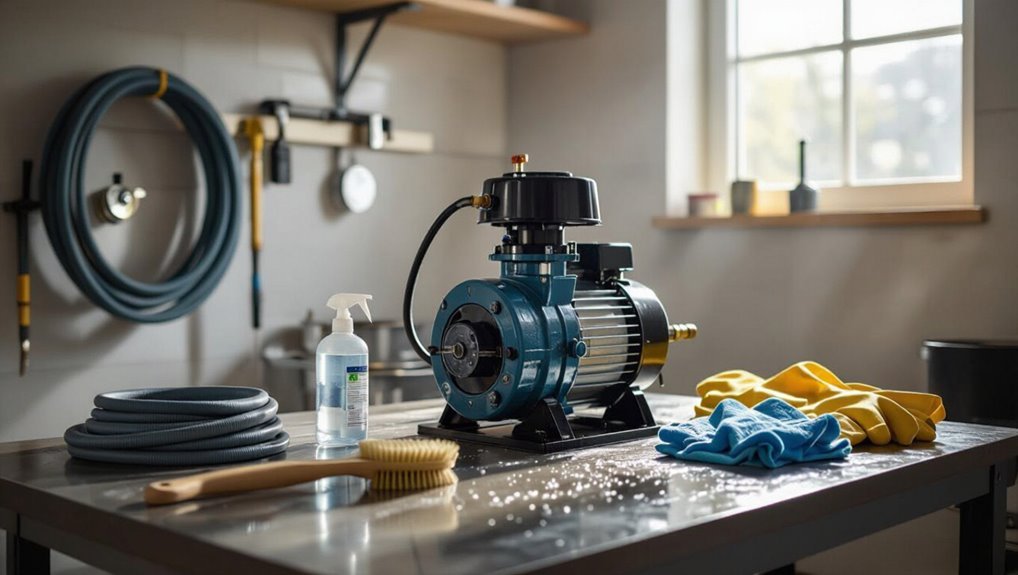
Cleaning a well pump involves removing sediment, biofilm, and mineral buildup that can reduce flow, damage components, and introduce contaminants into the water supply.
Signs that cleaning is needed include reduced water flow, unusual noises, discoloration, and pressure swings.
Homeowners can perform routine maintenance like flushing and basic inspections, but persistent problems or tasks that require disassembly and disinfecting should prompt a professional service.
How sediment, biofilm, and mineral buildup affect pump performance and water safety
Several common contaminants—sediment, biofilm, and mineral deposits—gradually impair a well pump’s mechanics and compromise water quality.
Sediment abrades seals and clogs screens; biofilm shelters bacteria and reduces disinfectant efficacy; mineral scaling restricts flow and damages components.
Routine maintenance, including knowing how to clean a well pump, prevents contamination, prolongs equipment life, and maintains potable water safety for users.
Signs your well pump needs cleaning (reduced flow, odd noises, discoloration, pressure swings)
Noticeable changes in a well’s behavior—reduced flow, erratic pressure, unusual noises, or discoloration—often indicate the pump or its intake needs cleaning.
Persistent low output, sputtering faucets, grinding or humming beyond normal startup, brown or metallic-tinted water, and frequent pressure cycling point to sediment, biofilm, or mineral obstruction.
Prompt identification preserves pump efficiency, prevents contamination, and reduces wear that can shorten equipment lifespan.
When to call a professional vs. when homeowner maintenance is appropriate
After recognizing signs like reduced flow or discoloration, homeowners must decide whether the issue can be addressed with basic maintenance or requires a professional.
Routine tasks—filter changes, visible debris removal, simple pressure adjustments—are appropriate for confident owners.
Complex problems—pump replacement, deep-well disassembly, electrical faults, contamination concerns—need licensed technicians to guarantee safety, compliance, and restored water quality.
Safety Preparations Before You Start
Before beginning work on a well pump, the preparer should assemble appropriate personal protective equipment and follow strict hygiene practices to prevent contamination and injury.
They must shut down electrical and mechanical systems, isolate the well from the household plumbing, and verify lockout/tagout procedures are in place.
Finally, a concise checklist of required tools, approved cleaners, and testing supplies should be prepared and confirmed before any service starts.
Required personal protective equipment and hygiene precautions
Because cleaning a well pump involves contact with water, debris, and potentially contaminated components, appropriate personal protective equipment (PPE) and strict hygiene practices are essential to reduce injury and infection risk.
Wear chemical-resistant gloves, safety goggles, a NIOSH-approved respirator if aerosols or strong cleaners are used, and slip-resistant boots.
Wash hands thoroughly after work; launder contaminated clothing separately.
Electrical and mechanical shutdown procedures
Shut down all power and relieve mechanical pressure to create a safe work environment: isolate the pump circuit at the main breaker or a dedicated disconnect, lock out and tag out the breaker per local procedures, and verify de-energization with a calibrated voltage tester.
Drain lines, vent pressure via test ports or faucets, secure moving parts against startup, and confirm mechanical isolation before beginning any disassembly or cleaning.
How to isolate the well from the household water system
Isolate the well by closing the well’s dedicated shutoff valve and any upstream isolation valves.
Then open a nearby faucet to relieve trapped water and confirm the household system is decoupled.
Verify isolation by checking that pressure gauges on the pressure tank and supply lines read zero and that no flow occurs at other fixtures when the well pump circuit is re-energized briefly for test purposes only.
After confirmation, lock or tag valves to prevent accidental reopening.
Checklist of tools, cleaners, and testing supplies
Tools, cleaners, and testing supplies should be gathered and inspected before any work begins to verify safety and efficiency.
Essentials include adjustable wrenches, screwdrivers, pliers, flashlights, insulated gloves, and eye protection.
Cleaning agents: bleach, nonaromatic pump-safe detergent, and brushes.
Testing supplies: chlorine test strips, pH kit, TDS meter, and replacement seals.
Confirm labels, expiration dates, and containment for spills.
Step-by-Step Well Pump Cleaning Process
The procedure begins with a systematic inspection of the wellhead, cap, and visible components to identify damage or contaminants.
Next, power is shut off, system pressure relieved, and electrical connections disconnected before the pump is removed and its type (submersible or jet) noted for specific handling.
Exterior surfaces, screens, and intake filters are cleaned, and mineral buildup is descaled with cleaners safe for the pump and water supply.
Step 1 Inspect the wellhead, cap, and above-ground components
Begin by visually and physically examining the wellhead, cap, and any above-ground fittings for signs of damage, corrosion, loose connections, or contamination.
Note cracks, gaps, rust, animal entry, or standing water.
Verify seals, vent screens, and mounting bolts are intact and secure.
Photograph issues, record measurements, and flag components needing repair or replacement before proceeding with cleaning.
Step 2 Turn off power, relieve pressure, and disconnect electrical connections
Shut off the pump’s power at the main breaker or dedicated disconnect to eliminate electrical hazards before any work begins.
Then relieve system pressure by opening a faucet and the tank’s pressure relief valve.
Verify zero pressure on the gauge.
Disconnect electrical cables at the service box, labeling wires for reassembly.
Use insulated tools and confirm lockout/tagout procedures are in place.
Step 3 Remove and inspect the pump (submersible vs. jet pump differences)
Remove the pump carefully and perform a focused inspection, noting that submersible and jet pumps require different disassembly steps and diagnostic checks.
For submersibles, inspect cable seals, motor housing, and impellers for corrosion or debris.
For jet pumps, check the pump housing, impeller, and external foot valve.
Note worn seals, scoring, or loose fittings; document findings for repair or replacement.
Step 4 Clean exterior surfaces, screens, and intake filters
Using a soft brush, cloth, and appropriate cleaning solution, the technician clears grime and mineral buildup from the pump exterior, screens, and intake filters to restore flow and prevent contamination.
The process is systematic, cautious, and documented:
- Wipe casing, junction box, and visible fittings
- Gently brush screens to dislodge debris
- Rinse filters with clean water, avoiding high pressure
- Inspect and replace damaged or corroded parts
Step 5 Descale and remove mineral buildup using safe cleaners
Descale buildup by applying a manufacturer-approved acidic cleaner in controlled sections, allowing it to dissolve mineral deposits without harming seals or coatings.
Rinse thoroughly between applications, protecting electrical components and rubber parts.
Use soft brushes or nonabrasive pads to remove loosened scale.
Neutralize residual acid per product instructions, capture and dispose of wastewater responsibly, and inspect fittings and impellers for remaining deposits before reassembly and testing.
Step 6 Disinfect the pump and well casing with chlorine shock treatment
Prepare to disinfect the pump and well casing with a calculated chlorine shock treatment to eliminate bacteria and organic contaminants remaining after mechanical cleaning.
A measured bleach solution is introduced to the casing, circulated through the pump, and allowed sufficient contact time per guidelines.
After disinfection, water testing confirms microbial removal.
Safety precautions and proper dilution prevent corrosion and health hazards during treatment.
Step 7 Rinse, reassemble, and restore electrical connections
Flush the system thoroughly to remove residual chlorine and loosened debris before reassembling components.
After confirming clear, odor-free water, dry and inspect all fittings, seals, and o-rings.
Reinstall pump housing, piping, and access panels per manufacturer torque specs.
Reconnect electrical wiring with power locked out, verify correct connections and secure ground.
Restore power only after final visual safety checks are completed.
Step 8 Restart procedure and pressure adjustments
With the system reassembled and power restored only after final safety checks, the operator begins the restart sequence by confirming all valves are correctly positioned and the pressure tank is isolated per the manufacturer’s startup procedure.
The pump is energized briefly to purge air, pressure settings are observed, cut-in/cut-out adjusted if needed, and slow cycling monitored.
Any leaks or abnormal noises prompt immediate shutdown and inspection.
Step 9 Post-cleaning water testing and monitoring schedule
Why test now? Post-cleaning testing confirms disinfection effectiveness and detects contaminants dislodged during service.
Collect samples for bacteria, nitrates, and turbidity within 24–48 hours.
Repeat bacteriological tests at one month and quarterly for a year, or after repairs or unusual taste/odor.
Maintain a log of results, actions taken, and next scheduled tests to guarantee ongoing water safety.
Specific Procedures by Pump Type
The following section outlines tailored cleaning checklists and safety cautions for common pump types, beginning with submersible units and jet pumps.
It highlights specific steps, recommended tools, and hazards to watch for with each configuration.
Differences in procedure for shallow versus deep well systems are noted where they affect access, disinfection, and pressure testing.
Submersible pump cleaning checklist and cautions
Different submersible designs demand distinct cleaning steps and safety precautions, so the checklist below separates procedures by common pump types (single-stage, multistage, stainless-steel, and plastic-bodied units) and highlights universal cautions—lockout/tagout, electrical isolation, and proper handling to prevent seal or impeller damage.
- Inspect and document condition, corrosion, wear, and debris.
- Remove and clean screens, diffusers, and impellers per material.
- Replace seals, O-rings, and sacrificial anodes as needed.
- Test insulation, continuity, and run dry prevention before reinstallation.
Jet pump cleaning checklist and cautions
Begin by isolating power and depressurizing the system, then document pump model, mounting (above-ground or jet/pressure tank configuration), and visible wear before any disassembly;
jet pumps and shallow-well ejector assemblies require distinct steps for suction-line inspection, check-valve removal, and gland/packing or mechanical-seal access, while deep-well jet assemblies and booster jets need attention to jet/nozzle clearances and lateral pipe fittings.
- Inspect suction line and fittings
- Remove and check check-valves
- Access and assess packing/seal condition
- Clean/measure jet and nozzle clearances
Shallow well vs. deep well cleaning differences
After completing the jet pump checklist and addressing suction-line, check-valve, and jet/nozzle issues, attention shifts to procedures that vary by well depth and pump design.
Shallow wells require accessible aboveground disinfection, sediment removal, and pump cavitation checks.
Deep wells demand submersible-specific flushing, pressure-tank isolation, and careful chlorination contact times.
Safety, pressure testing, and water sampling protocols differ accordingly.
Recommended Cleaning Agents and Equipment
Recommended cleaning agents and their safe concentrations for disinfecting well systems are outlined alongside compatible descalers and corrosion risks to guarantee material compatibility.
Attention is given to which descaling chemicals are effective yet non-damaging to pump seals, housings, and piping.
Common tools and replacement parts used during cleaning—such as brushes, fittings, seals, and pressure gauges—are listed to prepare for routine maintenance.
Safe disinfectants and concentrations for well systems
Select disinfectants that are effective against bacteria and safe for well components, with free chlorine (household bleach) being the standard choice for most residential wells. Use 50–200 ppm free chlorine for shock chlorination, contact 6–24 hours, then flush until chlorine is undetectable. Alternate agents (peracetic acid, iodine) exist but require specialist guidance.
| Agent | Typical Concentration | Notes |
|---|---|---|
| Household bleach | 50–200 ppm | Standard, accessible |
| Peracetic acid | Manufacturer | Professional use |
| Iodine | Consult pro | Limited use |
Descalers and corrosion considerations
Balance is critical when addressing scale and corrosion in well pumps: descaling agents must remove mineral deposits without attacking metal, seals, or plastics.
Mild acid cleaners (citric or dilute muriatic alternatives) and commercially formulated descalers are preferred when compatible with pump materials. Corrosion inhibitors and short contact times reduce risk.
Always consult pump manufacturer specifications and neutralize residues before returning the system to service.
Tools and parts commonly replaced during cleaning
Several essential tools and consumable parts are typically replaced or used during well pump cleaning to guarantee safe, effective maintenance.
Recommended items include replacement seals, O-rings, gaskets, check valves, and sacrificial anodes.
Necessary tools comprise adjustable wrenches, pipe wrenches, nipple extractors, silicone lubricants, chemical-resistant gloves, safety goggles, and a flowmeter.
Spare wiring connectors and filtration cartridges are also advised.
Troubleshooting Common Problems Found During Cleaning
When cleaning reveals issues, the next step is to identify whether staining or turbidity persists and why.
The guide then covers causes of continued low pressure or erratic cycling, criteria for replacing corroded or damaged parts, and signs that contamination originates from surface runoff or nearby septic systems.
Clear diagnostic actions and appropriate remedies follow.
Persistent turbidity or discoloration after cleaning
Investigate persistent turbidity or discoloration promptly, as it signals underlying issues that cleaning alone may not resolve.
The technician should sample water, inspect well casing and screen for damage, and assess iron, manganese, or bacterial contamination.
Flushing and shock chlorination may be necessary, but recurring color demands professional water testing and possible treatment system upgrades or well rehabilitation to restore safe, clear water.
Ongoing low pressure or erratic pump cycling
Persistent turbidity or discoloration can coincide with mechanical problems, and technicians should also be alert for symptoms of ongoing low pressure or erratic pump cycling during and after cleaning.
Technicians should verify pressure tank integrity, check pressure switch settings and contacts, inspect for air leaks in piping, confirm correct pump priming, and observe cycle frequency.
Document findings and repeat tests after adjustments.
Corroded or damaged components and when to replace them
Inspecting for corroded or mechanically damaged components is critical because degraded parts can compromise pump performance and introduce contaminants during cleaning.
Corroded fittings, pitted impellers, cracked seals, and frayed wiring require prompt replacement. Replace parts showing structural failure, significant metal loss, or electrical insulation breakdown.
Use manufacturer-approved components and document replacements to maintain reliability and water quality.
Detecting and addressing contamination sources (surface runoff, septic issues)
Many contamination issues stem from nearby surface runoff or failing septic systems, and recognizing their signs during pump cleaning helps prevent recurrent water quality problems.
Inspect wellhead seals, casing integrity, and grading to guarantee surface water diverts away. Test for coliforms, nitrates, and turbidity after disturbances.
If contamination is confirmed, disinfect, repair seals, correct drainage, and consult a septic professional or local health authority for remediation.
Routine Maintenance Schedule to Prevent Future Issues
A clear maintenance schedule helps prevent common well pump problems by matching inspection and cleaning frequency to water quality and household usage.
Routine tasks are grouped into monthly checks, annual service items, and multi-year overhauls to guarantee nothing is overlooked.
After each maintenance event, concise records should note date, observed issues, actions taken, parts replaced, and next scheduled service.
Recommended inspection and cleaning frequency based on water quality and usage
Because well water quality and household demand vary widely, inspection and cleaning intervals should be tailored to both the water chemistry and usage patterns.
High-mineral, turbid, or iron-rich sources and heavy household or irrigation use warrant inspections every 3–6 months and cleaning as needed.
Low-risk, seasonal, or low-use systems may shift to semiannual or annual checks, with records guiding adjustments.
Monthly, annual, and multi-year tasks
Regularly scheduled checks split into monthly, annual, and multi-year tasks create a predictable framework that prevents minor issues from becoming costly failures.
Monthly inspections catch leaks, pressure swings, and filter clogs.
Annual service includes pressure tank checks, electrical inspections, and disinfection.
Multi-year tasks replace aging components and inspect well casing integrity.
- Check pressure and flow
- Clean or replace filters
- Test electrical components
- Inspect casing and seals
Recordkeeping: what to log after each maintenance event
When maintenance is completed, the technician should create a concise entry that documents date, time, and specific tasks performed.
Include equipment serial numbers, parts replaced, measurements (pressure, flow, voltage), chemical treatments and concentrations, observed anomalies, corrective actions, and next recommended service date.
Note technician name, contact, and client signature.
Store records digitally and in a physical log for compliance and trend analysis.
Costs, When to Hire a Professional, and Regulatory Considerations
Estimated out-of-pocket costs for cleaning a well pump range from modest DIY supplies (chemicals, hoses, basic tools) to several hundred dollars or more for a licensed contractor.
Homeowners should consider hiring a licensed well contractor when work involves electrical systems, deep disinfection, complicated repairs, or loss of pressure that suggests a pump or pressure tank issue.
Local regulations may require permits and dictate how chlorinated rinse water is handled and disposed, so checking municipal and health-department rules is essential before beginning work.
Typical costs for DIY supplies vs. professional services
A few basic cleaning jobs can be completed for under $50 in supplies—vinegar, brushes, replacement seals, and a mild disinfectant—while more thorough DIY efforts that require specialty chemicals, replacement impellers, or a pressure tank adapter commonly run $100–$300.
Professional pump cleaning and inspection typically cost $200–$800 or more, depending on depth, travel, and repairs; permits or testing add fees.
Criteria for hiring a licensed well contractor
After weighing the cost differences between DIY cleaning and hiring a pro, readers should assess specific criteria that justify contracting a licensed well professional.
Consider severity of contamination, complex pump or pressure system issues, and lack of proper tools or training.
Verify licensing, insurance, references, and transparent estimates.
Hire professionals for safety risks, recurrent problems, or when warranties and code compliance must be preserved.
Local regulations, permits, and safe disposal of chlorinated rinse water
Many jurisdictions require permits or specific procedures before disinfecting or disposing of chlorinated well rinse water. Homeowners should confirm local rules and possible fees with health departments or water authorities. Failure to comply can lead to fines, environmental harm, or invalidated warranties.
Professionals understand discharge limits, neutralization, and documentation. Hire licensed contractors when regulations, system complexity, or liability risks exceed homeowner capability.
Practical Tips to Improve Long-Term Water Quality
After cleaning the pump, homeowners should consider point-of-entry filters for whole-house issues and point-of-use systems for drinking water to address residual contaminants.
Regular preventative steps—such as installing sediment traps, maintaining well caps, and scheduling periodic disinfection—can reduce sediment buildup and biofouling.
Seasonal planning, including insulating or draining exposed components before freezing and securing surface drainage before heavy rains, helps protect water quality year-round.
Point-of-entry and point-of-use treatment options after cleaning
Once the pump and well have been cleaned, homeowners should evaluate point-of-entry (POE) and point-of-use (POU) treatment options to maintain water quality, targeting contaminants identified during testing and preventing future buildup.
POE systems—filters, softeners, chlorinators, UV reactors—treat whole-house supply.
POU devices—carbon filters, reverse osmosis, under-sink UV—address drinking and cooking water.
Selection depends on tested contaminants, flow rates, maintenance needs, and budget.
Preventive measures to reduce sediment and biofouling
Implement routine practices that minimize sediment entry and limit biofilm growth to protect water quality and extend pump life.
Install and maintain sediment traps and fine pre-filters, guarantee proper well casing and screened intake, and keep the surrounding area clean and graded to reduce surface runoff.
Periodically disinfect and flush lines, monitor turbidity, and schedule inspections to catch early fouling.
Seasonal considerations and preparing for freezing or heavy rain
Seasonal weather shifts demand specific preparations to protect well pumps from freeze-related damage and storm-driven contamination.
Insulate exposed pipes, install heat tape, and maintain adequate groundwater levels before winter.
For heavy rain, inspect caps, seals, and drainage to prevent surface runoff entry.
Schedule cleaning and disinfection after major storms and verify pressure tank and electrical protections to guarantee continued safe operation.
Quick Reference: Do-It-Now Checklist for a Safe Well Pump Cleaning
Begin by confirming power is shut off at the breaker and the pump is isolated from the water supply; this prevents electrical shock and unintended flow while work begins.
Then follow a concise checklist to guarantee safety and efficiency:
- Wear gloves, eye protection, and nonconductive footwear.
- Drain and depressurize the system before opening fittings.
- Inspect seals, wiring, and visible corrosion.
- Sanitize tools and surfaces; document completed steps.
Conclusion
Regular well pump cleaning preserves water quality and system longevity. Studies show improperly maintained wells contribute to 40% of private-water contamination incidents, underscoring routine care’s public-health importance. Following safety steps, correct cleaning agents, and pump-specific procedures reduces bacterial growth and sediment buildup. Homeowners who adopt a maintenance schedule or hire professionals when needed protect their supply and avoid costly repairs. Consistent attention to the pump and surroundings yields safer, clearer water over time.
