How to Clear an Airlock in Water Pipes Quickly: Simple Steps to Restore Flow
To quickly clear an airlock in water pipes, follow these simple steps: First, check your mains supply and shutoffs, wear gloves, and have towels ready. Isolate the fixture and open the highest and lowest taps, then briefly restore the mains to push the air out. Alternatively, connect a hose between the hot and cold taps to force the air through. Open bleed points from top to bottom and listen for hissing until a steady flow returns. For more detailed follow-up steps and prevention tips, refer to the information provided later.
What an airlock in water pipes is and why it stops flow
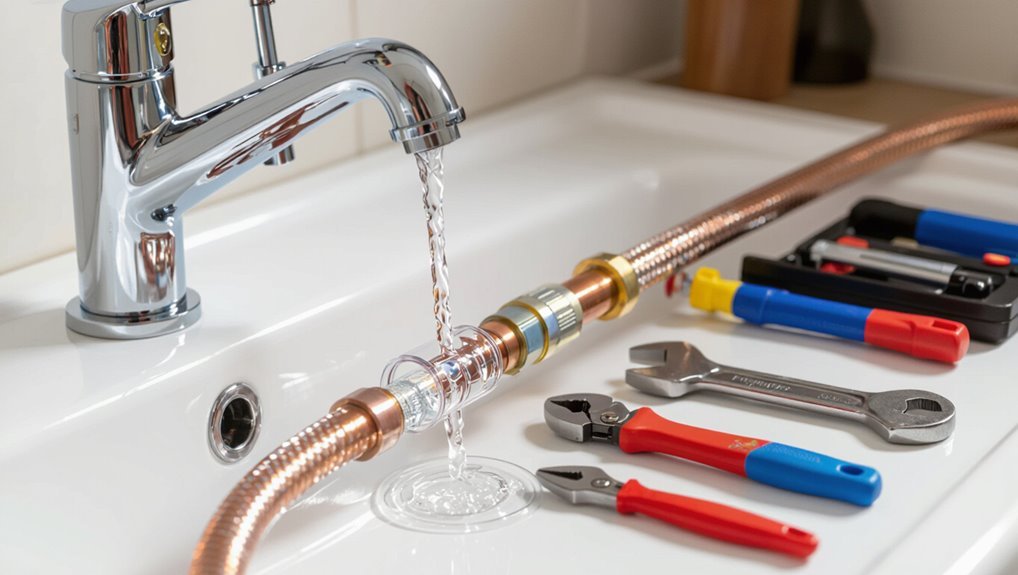
An airlock in household plumbing occurs when trapped air gathers at a high point in a pipe, preventing normal water movement.
Typical causes include incomplete refilling after repairs, a drained system, or leaks that admit air.
Common symptoms are sputtering taps, weak flow, or noisy pipes.
Fixtures and horizontal runs with high points—such as upstairs bathrooms, long cold-water lines, and shower feeds—are most prone to trapping air.
How an airlock forms in household plumbing
Sometimes a small pocket of trapped air in household plumbing can block water flow by creating a sealed gas barrier that prevents pressurized water from passing through.
Airlocks form when pipes are drained, filled unevenly, or vented poorly; rising air collects at high points or bends.
Understanding formation helps homeowners learn how to clear airlock in water pipes and prevent recurrence.
Common symptoms that indicate an airlock
How can one tell if an airlock is present in household plumbing?
Indicators include weak or no water flow from taps despite mains supply, sputtering or pulsing from outlets, loud banging or gurgling noises when faucets run, and inconsistent hot and cold delivery.
Pressure may return after running multiple taps briefly.
These signs point to trapped air obstructing normal pipe flow.
Pipes and fixtures most prone to airlocks
Airlocks occur when pockets of trapped air block water movement in a closed piping system, preventing normal flow to outlets.
Narrow, upward-running pipes, long horizontal runs with slight gradients, and dead-leg branches are especially susceptible.
Appliances with isolated inlet valves—washing machines, dishwashers, and showers with low-flow fittings—often exhibit airlock symptoms.
Older valves and poorly bled radiators increase likelihood.
Quick safety checks before attempting to clear an airlock
Before attempting to clear an airlock, the reader should verify whether the water supply and nearby electrical circuits need to be shut off to prevent damage or shock.
They should also gather basic tools and materials—such as adjustable wrenches, hoses, cloths, and a clean bucket—so the job can be done safely and efficiently.
If the issue involves complex plumbing, high pressure, or uncertainty about electrical risks, a qualified professional should be contacted instead of proceeding with DIY.
When to shut off water and electricity
Turn off the main water supply and isolate electrical circuits serving nearby appliances before attempting to clear an airlock.
The individual should cut power to affected zones to prevent motorized pump or heater activation and avoid shock when working near wet fittings.
Confirm valves are fully closed, tag or note status, and wait briefly for pressure equalization before proceeding with airlock clearing steps.
Tools and materials to have on hand
A small kit of essential tools and safety items should be assembled and checked before attempting to clear an airlock to guarantee the task can be completed quickly and safely.
Include adjustable wrench, screwdriver, hose and adaptor, bucket, towels, pliers, and a hand pump or shop-vac with non-damaging settings.
Add safety gloves, eye protection, and a flashlight; confirm functioning torch and accessible shutoff locations.
When to call a professional instead of DIY
With the kit assembled and basic tools at hand, users should run a few quick safety checks to decide whether the job is suitable for DIY or requires a professional.
If pipes are frozen, corroded, inaccessible, or leaking heavily, or if gas appliances are nearby, call a licensed plumber.
Lack of confidence, inadequate tools, or complex building plumbing also warrant professional help.
Fast methods to clear an airlock
The article outlines several fast, practical ways to clear an airlock, each suited to different plumbing layouts and tool availability.
It summarizes four primary techniques and notes when a professional pump or vacuum tool may be needed for stubborn cases.
The following list highlights the methods to be described next:
- Using the mains water pressure (single-supply technique)
- Using a hose to force water through (hose-bleed technique)
- Manual bleeding with taps and valves (localized bleed)
- Using a pump or vacuum tool (for stubborn airlocks)
- Choose method based on access, pipe type, and safety considerations
Method 1 Using the mains water pressure (single-supply technique)
The technician first isolates the affected fixture and closes any relevant valves to control flow.
They then open the highest and lowest taps in the system and briefly restore mains pressure to force the trapped air through.
Finally, flow is checked at the taps to confirm the airlock has cleared.
Step 1: Prepare fixtures and close valves
Begin by isolating the affected water outlets and shutting nearby valves to create a controlled section of pipe for pressure work.
The operator removes aerators or hose fittings, secures service isolations, and confirms the mains supply to be used.
All adjacent taps remain closed to prevent pressure loss.
Check visible joints for leaks before proceeding to apply controlled mains pressure.
Step 2: Open the highest and lowest taps
Open the highest tap fully and then the lowest tap on the same circuit to create a clear flow path; this lets mains pressure push trapped air upward while water displaces it toward the outlet.
The operative taps should remain fully open to maintain continuous flow.
Observe the lowest outlet for sputtering or steady stream; audible air release and steady water indicate partial or full clearance.
Step 3: Turn mains on briefly to push air out
Turn the mains on briefly to let higher pressure force trapped air through the open highest and lowest taps; a short burst of full pressure dislodges pockets of air and pushes them toward the outlet without over-stressing the system.
The operator should apply mains for a few seconds, then shut off, repeat as necessary, and listen for steady water flow before moving to the next step.
Step 4: Confirm restored flow
After brief mains pulses have been applied and a steady flow was heard at the open taps, the operator should verify that the affected outlet is delivering continuous, full-pressure water.
They inspect each nozzle, check for sputtering or air pockets, and feel for consistent pressure.
If flow is stable, close taps in sequence, monitor for leaks, and document the time and results before considering the job complete.
Method 2 Using a hose to force water through (hose-bleed technique)
The hose-bleed technique uses a temporary hose connection to force water through the obstructed section, typically between hot and cold lines or between two fixtures.
The procedure requires creating a sealed path, opening the appropriate taps, and running water to push the trapped air out before disconnecting the hoses.
Finally, valves and taps are tested and reset to guarantee normal operation.
Step 1: Connect hoses between hot and cold or between two fixtures
Begin by connecting a garden hose between the cold and hot taps of the affected fixture, or between two nearby fixtures if direct hot-to-cold access isn’t possible.
Confirm fittings are snug to prevent leaks. Use a hose rated for potable water if concerned.
Position hose to avoid kinks. Verify valves are accessible for subsequent steps and that the hose won’t create trip hazards.
Step 2: Create a temporary sealed path and open taps
Create a sealed path by attaching the hose securely to both taps or fixtures, guaranteeing all fittings are tight and any nearby valves are open to allow flow;
then open the downstream tap fully while keeping the upstream tap slightly ajar to let pressured water push the trapped air through the hose.
The person monitors for leaks, confirms fittings remain seated, and verifies no cross-connections or backflow risks exist.
Step 3: Run water to push air out and disconnect safely
Open the downstream tap fully and then quickly open the upstream tap to allow a steady stream of water to flow through the hose, forcing the trapped air toward the open outlet; maintain pressure until sputtering stops and a continuous, solid flow is observed.
Then close the upstream tap first, keeping downstream open briefly to clear residual water; disconnect the hose carefully to avoid spills.
Step 4: Test and reset valves
After flushing the line with the hose, inspect and operate each valve in the affected circuit to confirm normal function and seating. Test by cycling valves between open and closed positions, listening for flow changes and checking for leaks. Reset any partially closed valves fully open. Verify downstream fixtures restore steady flow and document findings.
| Valve ID | Status |
|---|---|
| Main | Open |
| Isolation 1 | Open |
| Isolation 2 | Open |
| Service | Open |
| Drain | Closed |
Method 3 Manual bleeding with taps and valves (localized bleed)
The technician first identifies service isolation valves and bleed screws to establish access points.
Next, bleed points are opened in a controlled sequence to allow trapped air to escape.
Finally, each point is closed and the system inspected for leaks before restoring normal operation.
Step 1: Locate service isolation valves and bleed screws
Before attempting to bleed an airlock, the technician locates the service isolation valves and any inline bleed screws that control the affected circuit; these are typically near the water meter, boiler, or at branch junctions and are sometimes behind access panels or on manifolds.
They note valve types, orientation, and accessibility, confirm shutoff capability, and identify suitable bleed points for safe, controlled venting without disrupting other circuits.
Step 2: Open bleed points in sequence to release air
Begin by opening the identified bleed points in a controlled sequence, starting at the highest and nearest valves to the trapped air and progressing toward the supply source to encourage a steady path for air to escape.
Open each point slightly, listen for hissing, then fully open once water flows.
Work methodically, allowing trapped air to vent before advancing to the next bleed point.
Step 3: Close and check for leaks
Close each bleed point sequentially once a steady, air-free water flow is observed, taking care not to overtighten valves or taps.
After closing, inspect nearby fittings, joints and appliance connections for drips.
Run fixtures briefly to confirm pressure stabilizes and no gurgling returns.
If leaks appear, reopen the suspect point slightly, reseat or tighten fittings, then retest until the system remains dry and stable.
Method 4 Using a pump or vacuum tool (for stubborn airlocks)
The technician selects a pump and fittings suited to the pipe size and access points.
The device is attached and suction or pressure is applied according to the tool’s instructions to dislodge trapped air.
If the airlock persists, flow is briefly reversed and the system is checked for restored normal flow.
Step 1: Choose appropriate pump and accessories
Select a pump and the right accessories based on pipe size, access points, and the severity of the airlock.
Recommend a hand or electric pump, wet/dry shop vacuum, or bladder/balloon pump as appropriate.
Include reinforced hoses, correct-diameter couplings, pressure gauges, and non‑return valves.
Verify material compatibility and available power or manual effort before proceeding to attachment and operation.
Step 2: Attach and create suction/pressure as directed
Attach the pump or vacuum securely to the access point using the correct-diameter coupling and a reinforced hose, ensuring all fittings are tight and any inline non‑return valves are removed or bypassed; then create pressure or suction gradually while monitoring a pressure gauge to prevent overpressurizing the system.
Operate in short pulses, increase slowly until flow begins, listen for hissing, and stop immediately if leaks or abnormal pressure spikes occur.
Step 3: Reverse flow if needed and verify success
If flow does not resume after initial pumping, reverse the flow direction to dislodge any trapped air by switching the pump or vacuum to the opposite mode or by swapping hose connections so suction and discharge are exchanged.
Make this change gradually while watching the gauge and listening for movement.
After reversal, run water briefly, inspect fixtures for steady flow, and recheck fittings for leaks.
How to verify the airlock is fully cleared
Verification begins by noting restored normal flow and steady pressure at affected outlets.
A careful check for remaining trapped air pockets involves listening for sputters and observing inconsistent streams while briefly opening and closing taps.
Finally, testing multiple fixtures and appliances confirms the issue is fully resolved rather than isolated to a single point.
Signs of restored normal flow and pressure
Once the trapped air has been released, normal flow and steady pressure return should be evident through several clear, observable changes. Water runs smoothly without sputtering, faucets hold consistent pressure, and appliances operate normally. Visual checks and flow tests confirm stability.
| Indicator | Observation | Action |
|---|---|---|
| Flow sound | Steady | No intervention |
| Faucet stream | Continuous | Monitor |
| Appliance function | Normal | Resume use |
How to check for remaining trapped air pockets
How can one confirm that no air pockets remain after bleeding an airlock? The person inspects steady, consistent flow from the affected outlet, listening for sputtering or gurgling.
Valve positions are rechecked for full opening. Pressure gauges, where fitted, should show stable pressure without fluctuations.
Finally, brief observation over several minutes guarantees no return of irregular flow, indicating successful purging.
Testing multiple fixtures and appliances
After confirming steady flow and stable pressure at the originally affected outlet, attention shifts to other fixtures and connected appliances to guarantee the airlock has not migrated or left isolated pockets.
Systematically open taps, showers, and appliance valves one at a time, observe flow and pressure, and run washing machines or dishwashers briefly.
Note any sputtering or weak flow and re-bleed affected lines.
Preventing future airlocks in water pipes
To minimize recurrence, attention should turn to proper valve management during any plumbing work to prevent air entry.
Regular maintenance of looped and long-run systems, including periodic bleeding and inspection, reduces trapped pockets.
Where appropriate, installing anti-airlock devices or expansion tanks provides a mechanical safeguard against future airlocks.
Proper valve management during plumbing work
Maintain strict valve discipline during any plumbing intervention to minimize air entry and guarantee predictable flow when systems are recharged.
Technicians should isolate sections sequentially, bleed trapped air via dedicated vents or slow valve openings, and document valve positions.
Reopen supply valves gradually, verifying downstream flow and pressure.
Lock or tag valves after service to prevent accidental changes that could introduce new airlocks.
Routine maintenance tips for looped and high-run systems
With valve positions documented and supply lines recharged methodically, attention shifts to routine upkeep for looped and long-run systems to prevent recurrence of airlocks.
Regularly purge high points, inspect and bleed accessible vents, and verify flow at distal outlets.
Schedule periodic pressure checks, remove sediment, and guarantee proper gradient and insulation.
Keep clear records of maintenance and any adjustments.
Installing anti-airlock devices and expansion tanks
Install anti-airlock devices and correctly sized expansion tanks to reduce trapped air and pressure fluctuations that promote airlocks.
Professionals recommend automatic air vents at high points, line-mounted air separators, and bladder or diaphragm expansion tanks sized to system volume and pressure.
Proper installation, isolation valves, and periodic inspection prevent recurrence.
Correct component selection minimizes cycling, water hammer, and repeated venting interventions.
Troubleshooting when quick fixes fail
If quick fixes do not restore full flow, the next step is to distinguish a true airlock from other issues such as blockages, leaks, or pump failure.
Where flow is only partially restored, targeted diagnostics—isolating sections, checking valves, and monitoring pressure—can pinpoint the problem.
If professional help is needed, record symptoms, recent work, affected fixtures, and any pressure readings to provide the plumber.
Distinguishing airlocks from other flow problems (blockages, leaks, pump failure)
How can one tell an airlock apart from a blocked pipe, a leak, or a failing pump?
An airlock yields sudden loss or sputtering flow after system servicing, restored by venting or pressure changes.
Blockages produce localized no-flow and backpressure; leaks show visible loss, dampness, or pressure drop; pump failure causes no flow with electrical or mechanical fault signs.
When partial flow persists: targeted diagnostics
When partial flow continues after basic venting and pressure adjustments, proceed with focused diagnostics to isolate the cause:
Inspect accessible fixtures sequentially to map weak spots, check pressure at inlet and distal taps, listen for trapped air in risers, verify non-return and isolation valves seating, examine visible joints for flow restriction, and test pump operation under load.
Document findings for repair or escalation.
Information to provide when contacting a plumber
After targeted diagnostics fail to restore full flow, the homeowner should gather clear, concise information to relay to a plumber. Include location, symptoms, steps tried, timing, noise, and any visible damage. Provide access details and preferred contact.
| Item | Example |
|---|---|
| Location | Kitchen cold tap |
| Symptoms | Intermittent sputtering, low pressure |
| Tried | Bled system, checked valves |
Common mistakes to avoid when clearing an airlock
When addressing airlocks, technicians should avoid shortcuts that risk damaging pipes or fixtures and be mindful not to overpressurize the system.
Simple mistakes—like forcing fittings open or using excessive water pressure—can cause leaks, burst pipes, or ruined valves. Clear, controlled methods and pressure relief steps prevent most common failures.
- Forcing stuck fittings instead of loosening them gradually
- Using high-pressure hoses or pumps without pressure control
- Ignoring manufacturer pressure limits on fixtures
- Skipping shutoffs or isolation steps before working on a section
- Failing to vent slowly rather than opening a valve all at once
Risky actions that can damage pipes or fixtures
Avoiding common mistakes is essential because improper attempts to clear an airlock can cause leaks, burst pipes, or damaged fixtures.
Risky actions include using excessive force on valves or fittings, applying makeshift tools that strip threads, rapid temperature shocks, and disconnecting pressurized sections without isolation.
Only use correct tools, isolate supply lines first, and follow manufacturer guidance to prevent irreversible damage.
Overpressurizing systems and how to prevent it
Mistakes like forcing fittings or disconnecting pressurized sections can create pathways for sudden pressure spikes, so attention must shift to the specific hazard of overpressurizing the system. The guide recommends slow valve adjustments, pressure relief, and using gauges. Professional help is advised for unknown systems; never exceed recommended PSI limits.
| Hazard | Prevention | Note |
|---|---|---|
| Spike | Slow valve use | Monitor gauge |
| Burst | Relief valve | Replace weak parts |
| Misread | Calibrate gauge | Test before use |
Estimated time, difficulty, and cost for DIY airlock clearing
Typical clearance times vary by method, from a few minutes for tap-bleeding to one to two hours for system flushing or pump-assisted techniques.
Each technique carries a different skill level—basic tasks suit most homeowners while radiator or sealed-system work may require intermediate plumbing knowledge or professional training.
Costs range from low (free to $20 for simple tools) to moderate ($50–$200 for parts and rental tools), with professional service recommended when risks or complexity exceed the DIYer’s comfort.
Typical time ranges by method
Most DIY airlock-clearing methods fall into three practical categories—quick fixes, moderate efforts, and time-intensive solutions—each with predictable ranges for duration, difficulty, and expense.
Quick fixes: 5–20 minutes, low difficulty, negligible cost.
Moderate efforts: 30–90 minutes, moderate difficulty, small material expense.
Time-intensive: 2–6 hours, higher difficulty, moderate to significant cost if parts or tools are needed.
Skill level required for each technique
Five common DIY airlock-clearing techniques map to distinct skill tiers:
basic (handy homeowner, minimal tools),
intermediate (familiar with plumbing fixtures and simple tools),
advanced (comfortable disassembling valves or fittings),
professional-level (requires licensed plumber or specialized equipment),
and hybrid (skill varies by specific method).
Each technique includes estimated time and difficulty:
basic tasks take minutes,
intermediate 15–45 minutes,
advanced up to hours,
and professional cases demand expert intervention.
Cost breakdown: tools, parts, and when to hire help
After outlining the skill tiers and time ranges for each airlock-clearing method, attention shifts to the costs involved: tools, replacement parts, and when professional help becomes the more economical choice.
Basic DIY requires inexpensive items—plunger, hose, wrench—typically $10–$50. Replacement valves or fittings raise costs to $20–$150.
Call a plumber when diagnostics or access exceed two hours or when quoted labor surpasses DIY estimates.
Conclusion
Like a trapped sigh finally finding its way out, the settled air yields and water remembers its run. With steady hands and simple checks, flow returns — a bellows released, a small victory against stubborn silence. Quick fixes often do the trick, yet care and patience steer success. Learning the cues, avoiding hasty mistakes, and keeping pipes primed prevents future hushes, so the household’s pulse keeps moving, clear and steady.